Table of Contents
Advertisement
Quick Links
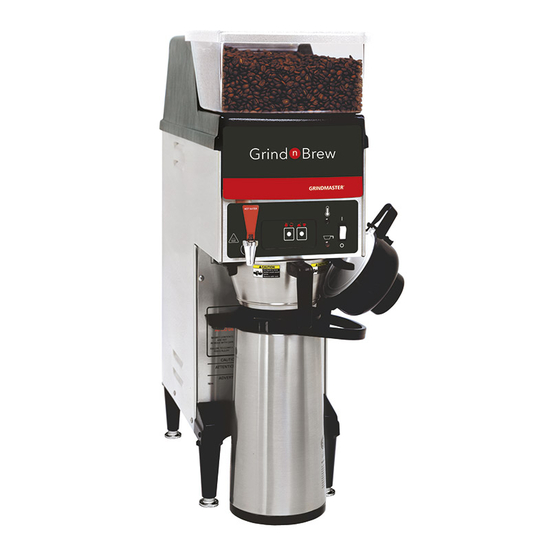
Grind'n Brew Coffee Systems
Operation and Instruction Manual
11, -21, -10, -20 including H, HQ versions
Models:
-
T
ABLE OF
Warning Labels . . . . . . . . . . . . . . . . . . . . . . . . . . . .3
Technical Data . . . . . . . . . . . . . . . . . . . . . . . . . . . . .4
Unit Installation . . . . . . . . . . . . . . . . . . . . . . . . . . . .5
Water Hook-up . . . . . . . . . . . . . . . . . . . . . . . . . . . . .5
Electrical Hook-up & Start-up Procedure . . . . . . . . .6
Operating the Touchpad . . . . . . . . . . . . . . . . . . . . .6
Brewing . . . . . . . . . . . . . . . . . . . . . . . . . . . . . . . . . .7
User Lockout . . . . . . . . . . . . . . . . . . . . . . . . . . . . . .7
Bean Counter . . . . . . . . . . . . . . . . . . . . . . . . . . . . .8
User Settings . . . . . . . . . . . . . . . . . . . . . . . . . . . . . .8
Pulse Brew Cycle . . . . . . . . . . . . . . . . . . . . . . . . . .8
User Menu . . . . . . . . . . . . . . . . . . . . . . . . . . . . . . . .9
Brew Volume Setting . . . . . . . . . . . . . . . . . . . . . . .10
System Restore Feature . . . . . . . . . . . . . . . . . . . .10
Factory/Field Test Menu . . . . . . . . . . . . . . . . . . . .11
Water System Errors . . . . . . . . . . . . . . . . . . . . . . .12
Timer Settings . . . . . . . . . . . . . . . . . . . . . . . . . . . .12
Setting the Grind . . . . . . . . . . . . . . . . . . . . . . . . . .12
Maintenance . . . . . . . . . . . . . . . . . . . . . . . . . . . . .13
Shear Plate Replacement . . . . . . . . . . . . . . . . . . .14
Troubleshooting Guide . . . . . . . . . . . . . . . . . . . . .15
Exploded Views . . . . . . . . . . . . . . . . . . . . . . . . . . .17
Wiring Diagrams . . . . . . . . . . . . . . . . . . . . . . . . . .22
PRINTED IN USA
C
ONTENTS
for
Model Grind'n Brew-10H
Model Grind'n Brew-20H
Grindmaster Corporation
4003 Collins Lane
Louisville, KY 40245 USA
(502) 425-4776
(800) 568-5715 (Technical Service Only)
FAX (502) 425-4664
www.grindmaster.com
®
Model Grind'n Brew-11H
Model Grind'n Brew-21H
(800) 695-4500
Patents Pending
0307 Form # BW-350-13
Part #70661
Advertisement
Table of Contents

Related Manuals for Grindmaster 11


Summary of Contents for Grindmaster 11
-
Page 1: Table Of Contents
System Restore Feature ....10 Factory/Field Test Menu ....11 Water System Errors . -
Page 3: Warning Labels
Warning Labels USE ONLY ON A CIRCUIT THAT IS PROPERLY PROTECTED AND CAPABLE OF THE RATED LOAD. ELECTRONICALLY GROUND THE CHASSIS. DO NOT DEFORM PLUG OR CORD. FOLLOW NATIONAL AND LOCAL ELECTRICAL CODES. WATER CONNECTIONS SHALL COMPLY WITH THE PLUMBING CODE OF BOCA & THE FOOD SERVICE SANITATION MANUAL OF THE FDA DO NOT USE NEAR COMBUSTIBLES. -
Page 4: Technical Data
Technical Data - Single Bean Domestic Models 1710 Technical Data - Dual Bean Domestic Models 1710 Page 4 208/240 208/240 1710 2674 3560 1810 208/240 208/240 1710 2674 3560 1810 1810 208/240 208/240 1810 2749 3660 208/240 208/240 1810 2749 3660 1810 3660... -
Page 5: Unit Installation
Unit Installation IMPORTANT:This brewer should be installed by a knowledgeable and experienced commercial equipment installer. Brewer Contents Your brewer package should include the following: 1 Grinderbrewer (either single or dual bean) 1 Operation and Instruction Manual (this manual) 1 Hose to 1/4" flare fitting (part # 61237) Tools Required for Installation #2 Phillips screwdriver 9/16"... -
Page 6: Electrical Hook-Up & Start-Up Procedure
Electrical Hook-up and Start-up Procedure IMPORTANT: Do not plug the unit in yet. IMPORTANT: This equipment must be installed in compliance with applicable Federal, State and/or Local electrical codes having jurisdiction. Do not use extension cords. Make sure that the outlet the brewer plugs into is grounded. IMPORTANT: Make sure that the Main Power Switch in the back of the unit is in the Off position before plugging in the brewer. -
Page 7: Brewing
Brewing IMPORTANT: Brewers are factory set for the correct grind and brew times for average situations. You should not need to make adjustments in the field. 1. Make sure that a new paper filter is in the brew basket and the brew basket is in place in the brewer. 2. -
Page 8: Bean Counter
Bean Counter The built-in bean counter measures relative usage of its Grind’n Brew® machine by totaling the amount of seconds the augers have fed beans into the grinder. This number directly correlates to the amount of beans used by the machine. -
Page 9: User Menu
User Menu The User Menu is accessed by pressing the SET key on the display board. Navigation is accomplished by pressing the UP, DOWN and SET keys. Feedback to the user is shown by the 3-digit numerical display. The User Menu exits after a 1 minute timeout or all modes are stepped through. This menu is disabled by the User Lockout Jumper. -
Page 10: Brew Volume Setting
Brew Volume Setting Menu This feature sets the brew time based on water volume of a desired container. Before using this feature, remove the brew basket, remove the spray head and place the desired container in place underneath the brewer. The Brew Volume Setting Menu is started by selecting a brew cycle and holding in the START switch for 5 seconds. -
Page 11: Factory/Field Test Menu
Down Button: 0 Up Button: 2 Start Switch: 16 Basket Out Switch: 17 Select Button: advances Factory Test to Step 11 Output Test Mode Scroll through relay outputs with the keys. Outputs are as follows: O01: Fill Valve O02: Brew Valve... -
Page 12: Water System Errors
Water System Errors There are three system errors that can be detected by the microprocessor. These errors are: 1. Water Fill Error (Er1) – the water full detection has failed, and the fill valve has been on for at least 5 minutes. 2. -
Page 13: Maintenance
Maintenance Daily Cleaning Cabinet: The outside of the machine can be cleaned with a damp cloth, a household dusting spray or a stainless steel cleaner. Do not use any abrasive such as Scotchbrite or Brillo pads. These may mar the finish. Wipe the underside of the cabinet hood with a clean cloth. -
Page 14: Shear Plate Replacement
Shear Plate Replacement Tools Required: #2 Phillips screwdriver, large flat blade screwdriver 1. Unplug the machine. 2. Remove the front panel. Shut off the bean flow to the grinder. Single bean units require you to pull the bean shut-off valve forward. Dual bean units require you to push the bean shut-off valve back into the slots in the hopper. -
Page 15: Troubleshooting Guide
Troubleshooting Guide The following procedures must be performed by a qualified service technician. CAUTION: Unplug power cord from outlet before cleaning or servicing the unit. Problem Weak coffee Strong coffee Bitter coffee Grounds in coffee Brew basket overflowed Unpleasant taste Brewer will not brew Grinder will not start when start button is pushed... - Page 16 Troubleshooting Guide (cont.) Problem Circuit breaker continuously trips Basket Out light flashing (Display board displays “ER1”) Basket Out light flashing (Display board displays “ER2”) Basket Out light flashing (Display board displays “ER3”) Water not hot enough Water boiling (or steaming) Start switch not working (Basket Out light illuminated) No lights are on...
-
Page 17: Exploded Views
Exploded View Grind’n Brew Assembly Grind’n Brew® Coffee Systems Page 17... - Page 18 Mounting Sheet Assembly Warmer Assembly Basket Arm Assembly Page 18 Grind’n Brew® Coffee Systems...
- Page 19 NUT, 8-32 KEPS S/S 05826 TUBING, 3/8" I.D X 7 1/2" LG. SILICONE 61152 TEE, 7/16" X 7/16" X 7/16" BARBED 05826 TUBING, 3/8" I.D X 11" LG. SILICONE 61232 PLUG, 3/8" BARBED DRAIN 05826 TUBING, 3/8" I.D X 16" LG. SILICONE 82119...
- Page 20 Exploded View Hot Water Tank Assembly (Export Units) Page 20 Grind’n Brew® Coffee Systems...
- Page 21 Single Bean Upper Assembly Dual Bean Upper Assembly Grind’n Brew® Coffee Systems Page 21...
-
Page 22: Wiring Diagrams
Wiring Diagram 115/230V, 60Hz Page 22 Grind’n Brew® Coffee Systems... -
Page 24: Grindmaster Corporation
Tel (502) 425-4776 • Fax (502) 425-4664 • 1-800-695-4500 (USA & Canada only) P.O. Box 35020 • Louisville, KY 40232 • USA www.grindmaster.com • email: info@grindmaster.com © Grindmaster Corporation, 1997 0307 Form # BW-350-13 PRINTED IN USA Part #70661...
Need help?
Do you have a question about the 11 and is the answer not in the manual?
Questions and answers