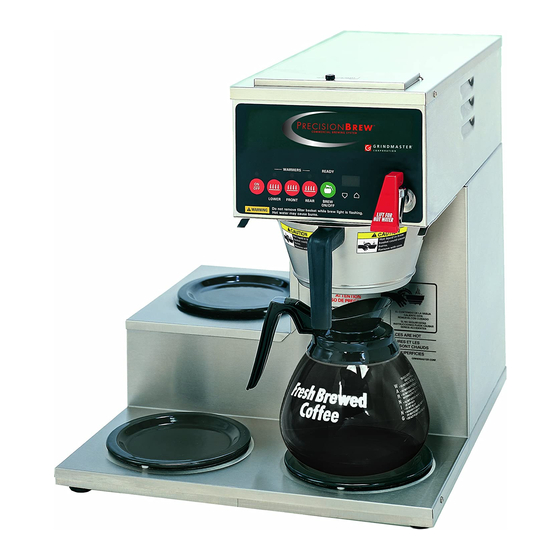
Grindmaster B-3WL Operator's Manual
Amw b-series
Hide thumbs
Also See for B-3WL:
- Parts list (1 page) ,
- Operator's manual (24 pages) ,
- Brochure & specs (6 pages)
Advertisement
Quick Links
START UP PROCEDURE
WATER CONNECTION
The National Sanitation Foundation requires the following for an NSF approved water hook-up:
• A quick disconnect water connection or enough coiled tubing so that the machine can be moved for cleaning underneath.
• An approved backflow prevention device, such as a double check valve to be installed between the machine and water supply.
A 1/4" male flare adapter is provided. Installation to a water filter system is recommended to prevent lime and scale build-up in the machine.
• Water pipe connections and fixtures directly connected to portable water supply shall be sized, installed and maintained in accordance with
federal, state and local codes.
• Flush the water line to purge any debris from the supply line.
Connect a 1/4" pressurized water line to the 1/4" male connection
(on rear of brewer) and turn the water supply on.
a) Minimum water pressure to the machine: 30 psi
b) Maximum water pressure to the machine: 80 psi
NOTE: Single head machines may be used without a pressurized water
supply. (See Pour-Over Mode section)
ELECTRICAL CONNECTION
NOTE: Wiring connections should be performed by a qualified technician.
(Refer to serial tag to verify model number of your machine)
• Remove front panel.
• Connect electrical service through rear of machine to terminal block
(inside front panel) marked L1, N, and L2. (See Figures A and B)
• On dual volt units, flip voltage switch (inside front panel next to terminal
block) to 120V for 120 Volt service or 240V for 120/208, or
120/240 Volt service. (See Figures A, B and table below)
• Re-install front panel.
• Turn on (plug-in) electrical service to brewer.
• Water tank will fill after a 7-second delay. The machine will make a
hissing sound when this occurs. On single head models, allow
approximately 1.5 minutes for the brewer to fill. On two head models, allow approximately five minutes for the brewer to fill.
NOTE: If water supply is inadequate or not connected, display will read "P-O" after 4 minutes of fill time (Refer to Pour-Over Mode
section). If Fill Cycle times out and display reads "P-O" before tank is full, turn unit OFF then ON again to reset and continue filling.
• The tank will begin heating slightly before machine fills.
• Turn brewer on by pressing ON/OFF switch in front of machine. (Light will illuminate)
• The brewer settings can be adjusted through the front touch pad. (Refer to Adjustments section)
• The water will be hot and the brewer will be ready to brew when "READY" light illuminates.
• Set Brew volume. (Refer to Setting Brew Volume section)
POWER REQUIREMENTS:
Applied Volts
Models
B-3, B-3WL, B-3WR
120
B-SAP, B-ID
B-3, B-3WL, B-3WR
B-SAP, B-ID, B-DAP, B-DGP
120/208
B-6
B-DAP, B-DGP (30A)
B-3, B-3WL, B-3WR
B-SAP, B-ID, B-DAP, B -DGP
120/240
B-6
B-DAP, B-DGP (30A)
AMW B-SERIES
INSTALLATION
(Refer to serial tag for voltage to be supplied.)
Watts
Amps
1800
15
5-15P, 5-20P for CUL
1780
14.9
2920
14.1
2620
12.6
5110
24.6
4510
21.7
3800
15.9
3500
14.6
6600
27.5
6000
25
For 120V, 15A or 20A Service
(2 Wire + Ground)
L1
N
Figure A
For 120/208-240V, 20A Service
(3 Wire + Ground)
L1
N
Figure B
NEMA Plug
Cord AWG
3X14
L14-20P
4X12
L14-30P
4X10
L14-20P
4X12
L14-30P
4X10
OPERATOR MANUAL
O
D
V
U
,
N
UAL
OLT
NITS
F
S
"120V"
LIP
WITCH TO
L2
C
N
(N)
ONNECT
EUTRAL
C
H
(L1)
ONNECT
OT
TO
C
G
ONNECT
ROUND TO
O
D
V
U
,
N
UAL
OLT
NITS
F
S
"120V"
LIP
WITCH TO
L2
C
H
(L1)
ONNECT
OT
TO
C
G
S
ONNECT
ROUND TO
C
N
(N)
ONNECT
EUTRAL
C
H
(L2)
ONNECT
OT
TO
Connections
Hot to L1
Neutral to N
Ground to ground screw
Hot to L1
Neutral to N
Hot to L2
Ground to ground screw
Hot to L1
Neutral to N
Hot to L2
Ground to ground screw
M
TO
IDDLE
L
S
EFT
IDE
S
CREW
L
S
EFT
IDE
CREW
M
TO
IDDLE
R
S
IGHT
IDE
Advertisement

Related Manuals for Grindmaster B-3WL


Summary of Contents for Grindmaster B-3WL
- Page 1 • The water will be hot and the brewer will be ready to brew when “READY” light illuminates. • Set Brew volume. (Refer to Setting Brew Volume section) POWER REQUIREMENTS: Applied Volts Models B-3, B-3WL, B-3WR B-SAP, B-ID B-3, B-3WL, B-3WR B-SAP, B-ID, B-DAP, B-DGP 120/208...
-
Page 2: Factory Settings
Page 2 FACTORY SETTINGS (for each dispense head) • Tank temperature is set at 200 degrees F. • Brew time is pre-set at 2:20. (Volume/time to be set on-site) • Pulse Brew is set for 1 pulse, 20 sec on, 20 sec off. •... -
Page 3: Brewing Procedure
B-SERIES ADJUSTMENTS (cont.): Refer to B-Series Programming Chart on page 5. NOTE: Set each dispense head individually. Pour-Over Mode Left display controls this. • The display will read “P-O” (pour-over). • Press “BREW” button to proceed to the next setting. •... - Page 4 Page 4 LOW TEMP / NO BREW MODE: When set to “ON”, a brew cycle cannot be initiated until tank is hot and “READY” light is ON. When set to “OFF”, a brew cycle may be initiated at any time. POUR-OVER MODE: Note: Not available on B-6, B-DAP, and B-DGP (twin) models.
- Page 5 B-SERIES Page 5 Programming for B-Series...
- Page 6 Page 6 Models B-3, B-3WR, B-3WL, B-SAP & B-ID Parts List Model B-3 Dual Voltage Unit Shown B-SERIES A12124 Spray Head Deflector Kit A531-072 Relay, Heater A554-109 Transformer 30VA, 24V ct A71934 Controller Kit A61467 Switch, 120 or 240 Heater...
- Page 7 B-SERIES Models B-3, B-3WR, B-3WL, B-SAP & B-ID Parts List A62305 Thermostat, Hi-Limit A71567 Thermistor A71561 Element, 120V/1500W A544-008 Grommet, Probe (3) A61243 Grommet, Dump Valve A71684 24V Dump Valve A71933 Touch Pad w/Cable (in Controller Kit A71934) Dual Voltage Unit Shown...
- Page 8 Page 8 Models B-6, B-DGP & B-DAP Parts List A531-072 Relay, Heater A71683 Valve, Inlet A71619 Brew Basket Assy. (not shown) (2) A13029 Warmer Heater (not shown) A71577 Warmer Plate (not shown) A71431 Gourmet Brew Basket Assy (optional for B-DAP, B-DGP) (not shown) Model B-6 Shown B-SERIES A71822...
- Page 9 B-SERIES Models B-6, B-DGP & B-DAP Parts List A62305 Thermostat Hi-Limit A71567 Thermistor A61243 Grommet Dump Valve A71684 Valve Dump Touch Pad w/ Cable (2) (in Controller Kit - pn A71934) A71936 Element, 240V/6000W A71562 A71508 Element, Heat Sensor 240V/3500W A61108 Level Probe...
-
Page 10: Troubleshooting Guide
One indicator light will not illuminate If you still need help, call an authorized dealer in your area or our Technical Service Department. You can reach Grindmaster Corporation’s Technical Service Department at 800-695-4500 (USA & Canada only) or 502-425-4776 Monday-Friday, 8:00 AM - 6:00 PM EST. Please have the model and serial number ready so that accurate information can be given. - Page 12 Grindmaster® Coffee Grinders and Brewers • PrecisionBrew™ Brewing Systems • Espressimo® Espresso Machines Crathco® Hot Beverage Dispensers • Crathco® Cold and Frozen Beverage Dispensers • AMW Coffee and Tea Systems Tel (502) 425-4776 • Fax (502) 425-4664 • 1-800-695-4500 (USA & Canada only) P.O.
Need help?
Do you have a question about the B-3WL and is the answer not in the manual?
Questions and answers