Table of Contents
Advertisement
Quick Links
Advertisement
Table of Contents

Related Manuals for Grindmaster Precision Brew


Summary of Contents for Grindmaster Precision Brew
- Page 1 Operator Manual 0505 Form # PD-305-01 Part # 94148...
-
Page 3: Table Of Contents
ABLE OF ONTENTS Important Safeguards............2 Product Overview..............5 Preparing the Brewer for Use..........6 Brewing Instructions..............7 Brewer Features..............8 Cleaning..............10 Troubleshooting..............11 Specifications..............12 Warranty................13 Thank you for purchasing The PrecisionBrew™ Single Cup Brewing System. The PrecisionBrew™ Single Cup Brewing System is the perfect brewer for people who demand high performance and style from their kitchen appliances. -
Page 4: Important Safeguards
READ ALL INSTRUCTIONS Important Safeguards This is the safety alert symbol. It is used to alert you to potential personal injury hazards. Obey all safety messages that follow this symbol to avoid possible injury or death. WARNING indicates a potentially hazardous situation which, if not avoided, could result in death or serious injury. - Page 5 Important Safeguards (continued) Do not attempt to open the brewing chamber while brewing. • Risk of scalding. Do not touch metal surfaces of the brew basket or any part of the • brewing chamber. Risk of burns. Do not tilt the brewer or turn upside down. •...
- Page 6 Important Safeguards (continued) Do unplug brewer before moving machine. • Do latch pod door securely by using the thumb grip at the center • of the brew chamber door. SAVE THESE INSTRUCTIONS The brewer is not ready to plug in. Follow “Preparing the Brewer for Use”...
-
Page 7: Product Overview
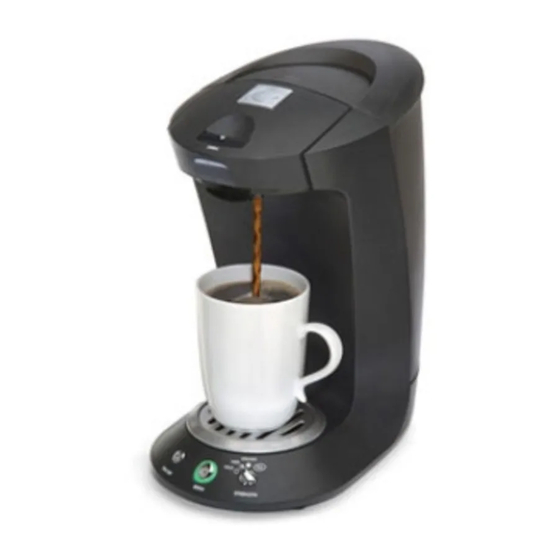
Product Overview Water Reservoir Water Reservoir Carry Handle Brew Chamber Door Latch Brew Chamber Door Thumb Grip Water Reservoir Brew Spout Cup Grate & Drip Tray On/Off Button BREW Strength Control BREW Button *Mug not included Coffee or Tea Pod EasyPod Brew Basket Page 5... -
Page 8: Preparing The Brewer For Use
Preparing the Brewer for Use - AutoPrime & Flush This procedure is only required prior to initial use. Step 1: Fill water reservoir with clean, room temperature tap or bottled water to the MAX indicator line. Step 2: Place a container with a capacity of at least 32 ounces (1 L) on the cup grate, under the spout. -
Page 9: Brewing Instructions
Brewing Instructions Step 1: After the unit has been prepared for use (refer to page 6 for instructions), the water reservoir will be low (the BREW button may be flashing aqua indicating low water level). Refill the water reservoir to the MAX indicator line. The brewer will begin to heat the water and the BREW button will slowly pulse red. -
Page 10: Brewer Features
Brewer Features Cup Volume: The brewer is factory preset to dispense approximately 9 fluid ounces (266 ml) of water without a coffee pod installed. Depending on the type of coffee pod used, the coffee pod will absorb approximately 1 fluid ounce (30 ml) of water during the brew cycle. - Page 11 Brewer Features (continued) BREW Button: Green Light Indicator Off - Power is not applied to the machine. Steady Green - Water is at operating temperature and ready to brew. Aqua Light Indicator Steady Aqua - BREW button has been held down for more than 5 seconds and pump is priming the hot water tank.
-
Page 12: Cleaning
Cleaning Descaling the Water Reservoir and Hot Water Tank Regular descaling will prolong the life of your brewer and will guarantee optimal brewing results for a long time. If the machine is used twice a day on average, it must be descaled once every 3 months. Step 1: Fill one-fourth of the water reservoir with white vinegar, then fill with clean tap water up to the MAX line. -
Page 13: Troubleshooting
If you need further assistance, please call our Customer Service Department at (800) 695-4500 (USA and Canada only) (ext. 4) (Monday - Friday, 8 am - 6 pm EST) or visit www.grindmaster.com. Please have the model and serial number (located on the base of the unit) ready so that accurate information may be given. -
Page 14: Specifications
Specifications Model GPOD001 V V o o l l t t a a g g e e 120 VAC W a a t t t t s s 1300 A A m m p p s s 10.8 F F r r e e q q u u e e n n c c y y 60 Hz W a a t t e e r r R R e e s s e e r r v v o o i i r r C C a a p p a a c c i i t t y y 38 fl. -
Page 15: Warranty
Warranty lasts for 90 days from the first to occur (a) The date of retail purchase (you will be required to provide proof of sale) (b) 90 days after the date of manufacture from Grindmaster Corporation. Warranty coverage lasts for a total of 180 days from the date of manufacture. - Page 16 Grindmaster® Coffee Grinders and Brewers • Espressimo® Espresso Machines Crathco® Hot Beverage Dispensers • Crathco® Cold and Frozen Beverage Dispensers American Metal Ware® Coffee and Tea Systems Tel (502) 425-4776 • Fax (502) 425-4664 • 1-800-695-4500 P.O. Box 35020 • Louisville, KY 40232 • USA www.grindmaster.com •...
Need help?
Do you have a question about the Precision Brew and is the answer not in the manual?
Questions and answers