Citizen CMP-20 Series User Manual
Cmp-20 series mobile thermal printer
Hide thumbs
Also See for CMP-20 Series:
- User manual (35 pages) ,
- Service manual (27 pages) ,
- Technical manual (22 pages)
Table of Contents
Advertisement
Advertisement
Table of Contents

Related Manuals for Citizen CMP-20 Series


Summary of Contents for Citizen CMP-20 Series
- Page 1 MOBILE THERMAL PRINTER MODEL CMP-20 series User’s Manual...
- Page 2 WEEE MARK If you want to dispose of this product, do not mix it with general household waste. There is a separate collection systems for used electronics products in accordance with legislation under the WEEE Directive (Directive 2002/96/ EC) and is effective only within European Union. Wenn Sie dieses Produkt entsorgen wollen, dann tun Sie dies bitte nicht zusammen mit dem Haushaltsmüll.
-
Page 3: Declaration Of Conformity
Declaration of Conformity This printer conforms to the following Standards: The Low Voltage Directive 2006/95/EC, the EC/R&TTE Directive, the RoHS Directive 2002/95/EC, and the WEEE Directive 2002/96/EC. LVD : EN60950-1 EC/R&TTE: EN55022 Class B EN301 489-1 EN301 489-17 EN300 328 EN55024 FCC Compliance Statement for American Users This equipment has been tested and found to comply with the limits for a Class... -
Page 4: General Precautions
• If you find loss of information, error, or uncertain matter, please contact your CITIZEN SYSTEMS dealer. • If you find any disordered or missing page (s), contact you CITIZEN SYSTEMS dealer for replacement. CITIZEN is a registered trade mark of Citizen Holdings Co., Japan CITIZEN es una marca registrada de Citizen Holdings Co., Japón... - Page 5 SAFETY PRECAUTIONS What the Icons Mean Precautions and notices necessary to follow for preventing hazards to the user or other person or their properties are defined as shown below. Hazards and degrees of damage that may be caused by ignoring the instructions are categorized as shown below.
- Page 6 Precautions in Handling Printer WARNING z If the product continues to be used when heat or smoke is generated or an abnormal odor is produced, a fire may occur. Immediately turn the printer power off, and carefully but quickly remove the battery, then contact our service agent. z If any foreign matter (metal tip, water, liquid) enters the product, immediately turn the printer power OFF, and carefully but quickly remove the battery, then contact our...
- Page 7 Precautions on Using Printer WARNING z Do not touch the print head or paper cutter while replacing print paper. Heated print head may cause burn. The cutter may cause injury to the hand. CAUTION z Use of print paper other than specified may result in not only deteriorated print quality but shortened life of print head (printing portion).
- Page 8 Precautions on Using Battery DANGER z Leaked liquid from the battery may result in loss of eyesight if it enters the eye. Immediately wash eyes with fresh water and get medical care. z If liquid from the battery is ingested, immediately seek medical attention.
- Page 9 CAUTION z Do not dip battery in water or sea water. Wet battery may generate heat or may be subject to corrosion. z Do not use or leave battery at high temperature. Using or leaving battery in a place of high temperature may result in liquid leakage, deteriorated performance, or shortened lifetime.
- Page 10 Precautions on Using Thermal Paper CAUTION z Print density may change with different kinds of paper. z Observe the following when using thermal paper. Thermal paper is not resistant to discoloration, deterioration in quality, and thin printing. • Do not leave printed thermal paper exposed to light for a long time.
- Page 11 Precautions on Using Special Serial Cable WARNING z With one side of the connector connected to this product, do not touch the metal part of the other connector. CAUTION z Static electricity may cause breakdown of internal circuit of this product. z Do not leave this product with a cable wound around it for a long time.
-
Page 12: Table Of Contents
THE TABLE OF CONTENTS GENERAL OUTLINE ........... 13 1.1 Features .................13 1.2 Unpacking ..............14 1.3 Model Classifications .............16 1.4 Basic Specifications ............17 2. EXPLANATION OF PRINTER PARTS ....19 2.1 Printer Appearance ............19 2.2 Operation Panel .............21 OPERATION ............22 3.1 Setting/Replacing the paper roll ........22 3.2 Installing Belt Clip............23 3.3 Installing Battery ............24 3.4 Charging the Battery ............25... -
Page 13: General Outline
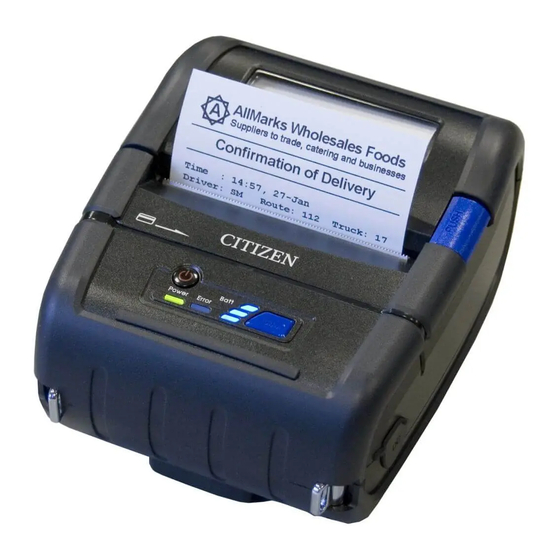
1. GENERAL OUTLINE CMP-20 is a compact, full featured portable line thermal printer, which can be used in a large variety of job environments. Bluetooth/WiFi communication with a PDA or similar device is useful for business activities at the point of sale or service. 1.1 Features z Compact and Robust z High speed and low noise emission of the line thermal printing... -
Page 14: Unpacking
1.2 Unpacking Standard Printer Battery Belt Clip (CMP-BA20) Charger EC Plug Serial Cable (CMP-AD20US/EU) (U model only) (CA20-S01) Paper Roll CD-ROM Quick Start Guide... - Page 15 Option Battery Cradle Car Charger USB Cable (CMP-BC20) (CMP-CC20) (CA20-U01) Leather Case Strap (SC20-01) (STP20-01)
-
Page 16: Model Classifications
1.3 Model Classifications Classified by the following designation. CMP-20BT U MC Reader None : Without reader : Magnetic stripe reader : IC card reader MC : Magnetic stripe reader + IC card reader Destination : North Americas : Europe Interface None : USB and Serial : USB, Serial and Bluetooth WF : USB, Serial and WiFi... -
Page 17: Basic Specifications
1.4 Basic Specifications Printing Method Direct line thermal printing Printing Speed Max. 80mm/sec Resolution 203 DPI x 203 DPI Print width 48mm, 384dot Character ASCII Character, ALPHA NUMERIC Character, Extension Character, 18 codepages, 13 international characters Font Font A (12 x 24 dot), Font B (9 x 17 dot) Number of columns 32 (Font A), 42 (Font B) Barcode... - Page 18 MSR (Optional) Card Standard ISO7811/2 Track Track 1 & 2 (Track 2 & 3 are optional) Magnet Head Life 300,000 Passes or more Battery Charger Input AC100~240V, 50/60 Hz Output 8.4V, 800~1400 mA Battery Battery type Li-ion Output 7.4V, 1800mAh Charging time 150 minutes Battery status display...
-
Page 19: Explanation Of Printer Parts
2. EXPLANATION OF PRINTER PARTS 2.1 Printer Appearance Paper Cover Set paper roll inside this cover. (2) Manual Cutter (Tear Bar) To cut the printed paper, gently pull the paper from the edge of the paper at the angle so that paper firmly contacts the serrated cutter. - Page 20 (6) Control Panel Refer to section 2.2 Operation Panel. (7) DC jack Connect Charger for recharging battery. (8) MSR Slot (Optional) Swipe magnetic stripe. (9) IC Card Slot (Optional) Insert IC card. (10) Battery Refer to section 3.3 Installing Battery to 3.5 Removing Battery (with Belt Clip).
-
Page 21: Operation Panel
2.2 Operation Panel Button/LED Name Function This button is used to turn the printer on and off. Power When the printer is off, press this button for approximately 3 Button seconds and it will turn on the power. When on, pressing the button will switch off the printer. -
Page 22: Operation
3. OPERATION 3.1 Setting/Replacing the paper roll Press the Blue Paper Cover Open button and lift the paper cover. (2) Place the paper roll as shown. Make sure the paper is placed in right direction. (3) Pull a short length of paper out of the printer and then press center of the paper cover to close the cover. -
Page 23: Installing Belt Clip
3.2 Installing Belt Clip Insert screw into belt clip. (2) Tighten the screw with driver as shown. NOTE The belt clip is included in the pack as a standard item but does not need to be used or installed! -
Page 24: Installing Battery
3.3 Installing Battery Align battery hook as shown in the picture. (2) Push the battery into the printer until it locks in place. (3) To release or remove the battery, gently pull the release catch towards the battery module and rotate the battery from the printer. -
Page 25: Charging The Battery
3.4 Charging the Battery Be sure that the printer is turned off and AC plug is correct one. If AC plug is wrong, change the plug to correct one. (2) Open the DC Jack cover by pulling on the rubber cover and insert DC JACK into the printer. -
Page 26: Removing Battery (With Belt Clip)
3.5 Removing Battery (with Belt Clip) Rotate the belt clip as shown. (2) Remove the battery as shown. -
Page 27: Wireless Communication
3.6 Wireless Communication Bluetooth Connection The Printer can be connected to devices equipped with a Bluetooth interface such as PDAs, PCs or mobile telephones and handheld scanners. (2) Use the Bluetooth connection function supported by the device to connect to the printer. (3) The default PIN code for pairing is "0000"... - Page 28 Standard 802.11b, 802.11g Communication Speed (Max) 54M bps Transmission Distance (Max) 100m (Indoors without obstructs) • The distance depends on the environment. Channel 1-14 Security 64/128 WEP , WPA...
-
Page 29: Interface Cable Connection
3.7 Interface Cable Connection Connect USB or Serial cable into the cable connector on the printer. Serial NOTE Use the cable offered by the manufacturer (Serial). (2) Connect the interface cable into the USB or Serial port of the device (PDA, PC, etc.). -
Page 30: Self Test
3.8 Self Test Turn off the power pressing the Power Button for approximately 3 seconds. (2) Whilst pressing and holding the Paper FEED button, press the Power Button. (3) The printout is produced. - Page 31 NOTE 1. To print ASCII pattern additionally, press the Paper Feed button once more. 2. After printing ASCII pattern, the self test will be finished automatically. 3. If the Paper Feed button is not pressed to print ASCII pattern, self test will be finished automatically after 30 seconds.
-
Page 32: Reading Magnetic Stripe
3.9 Reading Magnetic Stripe Optional Insert and swipe the card in the direction of the arrow as shown in the picture. Card Standard ISO 7811/2 Dual Track 1, 2 Track or 2 ,3 Track Card Swipe Speed 10cm ~ 15cm/sec (4 ~ 6 inch/sec) Magnetic Head Life 300,000 passes (minimum) -
Page 33: Reading Ic Card
3.10 Reading IC Card Optional Insert the card in the direction of the arrow as shown in the picture. -
Page 34: Leather Case Usage
3.11 Leather Case Usage Optional Open the leather case. (2) Place the printer into the leather case. (3) Close the Hook and loop (4) Fasten to the belt by using fastener, and stick the cover. the clip at the rear of the leather case. - Page 35 6-1-12, Tanashi-cho, Nishi-Tokyo-shi Tokyo, 188-8511, Japan Tel: +81 (0) 42 468 4608 Fax: +81 (0) 42 468 4687 http://www.citizen-systems.co.jp PM74901-01F PMC-1111...
Need help?
Do you have a question about the CMP-20 Series and is the answer not in the manual?
Questions and answers