Table of Contents
Advertisement
Quick Links
Advertisement
Table of Contents

Related Manuals for HiTi Digital 640 DL


Summary of Contents for HiTi Digital 640 DL
- Page 1 Hi-Ti 640 DL Photo Printer User Manual June 21, 2002...
- Page 2 Reproduction, adaptation, or translation of this manual is prohibited without prior written permission of Hi-Touch Imaging Technologies, except as allowed under the copyright laws. Hi-Touch Imaging Technologies makes no warranty of any kind with regard to this material, including, but not limited to, the implied warranties of merchantability and fitness for a particular purpose.
-
Page 3: Online Support
Customer Service We're delighted that you choose HiTi Printer. In order to provide you the best service, HiTi Imaging Technologies, Inc. provides a full-year of free customer support service worldwide. If you need help or just have a question, you may reach our customer representatives via phone, fax, or email. -
Page 4: Contact Information
• Printer Model Number • The version of Printer driver. You can get it by choosing Control Panel > Printer > HiTi 640 DL photo printer. Click Properties > About on the Printer dialogue box. • The version of the PhotoDésirée MiniLab Edition you are using •... -
Page 5: Table Of Contents
Using PhotoDésirée to Print Your Photos ... 11 Working Flow ...12 Setting Display Resolution ...13 Application in a View ...14 Installing PhotoDésirée MiniLab Edition ...15 Opening PhotoDésirée MiniLab Edition ...16 Opening Photos ...17 Hi-Ti 640 DL Photo Printer User Manual Contents... - Page 6 HiTi 640 DL Photo Printer User Manual Chapter 4 Chapter 5 Chapter 6 Chapter 7 Editing Photos ...18 Choosing Print Formats and Amounts ...19 Printing Your Photos ...20 Sending Print Jobs to Multiple Printers ...21 Pricing Your Photos ...22 Viewing Prices ...23 Modifying Prices ...24...
- Page 7 In Windows 2000 environment ...67 Configuring Driver Settings ...70 In Windows 98 environment ...70 In Windows 2000 environment ...79 Uninstalling Printer Driver ...83 In Windows 98 environment ...83 In Windows 2000 environment ...84 Hi-Ti 640 DL Photo Printer User Manual...
- Page 8 HiTi 640 DL Photo Printer User Manual viii www.hi-ti.com...
-
Page 9: Chapter 1 Introduction
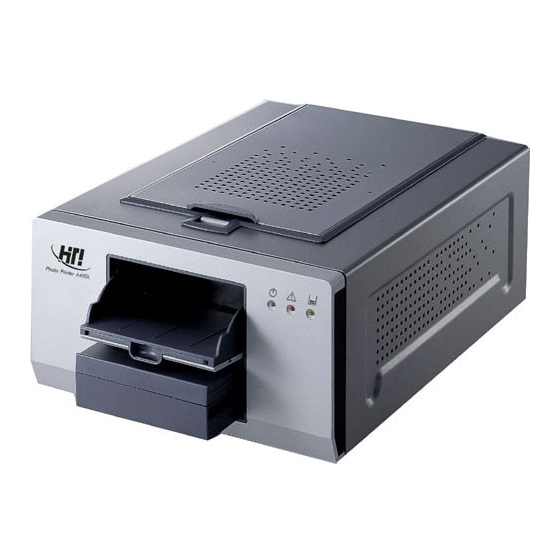
Thanks you for purchasing HiTi 640 DL Photo Printer, the best companion for your digital photo business. You take the shots and HiTi Photo Printer brings quality prints in less than 70 seconds, making it easier than ever to print your digital photos for your customers. -
Page 10: Maintenance
HiTi 640 DL Photo Printer User Manual Maintenance Printer To clean the printer, use a clean soft dry cloth to wipe the printer. If stronger cleaning is required, moisten the • cloth with neutral solvent, then wipe the printer again with a soft dry cloth. -
Page 11: Chapter 2 Setting Up Your Printer
Chapter 2 This chapter contains the following topics for setting up your printer: Unpacking Your Printer • Setting up Your Printer • Installing or Replacing Ribbon Cartridges • Loading Paper • Installing Printer Driver • www.hi-ti.com Setting up Your Printer... -
Page 12: Unpacking Your Printer
HiTi 640 DL Photo Printer User Manual Unpacking Your Printer Before you begin to install your printer, check if you have the following items: printer software CD USB cord Unpacking Your Printer paper cassette documentation power cord www.hi-ti.com... -
Page 13: Setting Up Your Printer
HiTi 640 DL Photo Printer User Manual Setting up Your Printer Connect the power cord to the power connection. Connect the printer to your computer using the USB cord. Insert the ribbon cartridge into the printer. For more information, see Installing or Replacing Ribbon Cartridges on Page 6 of the user guide. -
Page 14: Installing Or Replacing Ribbon Cartridges
Hold the ribbon cartridge as the figure illustrated. Be sure to point the arrow sign towards the left-hand side of the printer. Insert the cartridge all the way into the printer until it is completely installed. Close the top cover. -
Page 15: Loading Paper
HiTi 640 DL Photo Printer User Manual Loading Paper Hi-Ti 640 DL photo printer allows you to print different types of paper and sticker for your digital photos. Again, to avoid unexpected error message, you must use genuine HiTi photo paper. Using other company's photo paper will result in paper jam and color shift errors. - Page 16 Loading Paper Place a stock of paper into the paper cassette. The printer allows you to load 100 sheets at a time in maximum. Load the paper with print side (glossy) face-up; the • printed photo faces up in the output tray. Be sure the paper is in the direction with the narrow edge side sitting at the inner side of the paper cassette.
-
Page 17: Installing Printer Driver
Note: When you set up the printer for the first time, be sure to turn off the printer before you begin to install printer driver software. - Page 18 Installing Printer Driver Note: Hi-Ti provides three ways for installing printer driver. For detailed descriptions, refer to the Appendix, Driver Management section in this user manual. HiTi 640 DL Photo Printer User Manual www.hi-ti.com...
-
Page 19: Chapter 3 Using Photodésirée To Print Your Photos
Chapter 3 After you have successfully set up the printer and installed the printer driver, let's print an image from HiTi PhotoDésirée where you can customize digital images into calendars, poster or greeting cards. The PhotoDésirée’s ease-of-use user interface lets you easily adjust the saturation, contrast, sharpness, brightness or hues of your photos in any way you like. -
Page 20: Working Flow
HiTi 640 DL Photo Printer User Manual Working Flow Working Flow The following figure illustrates basic working flows of using PhotoDésirée software to print your digital images. PhotoDésirée Open MiniLab edition Edit images (Invoke ImagEnhancer) Open images Set prices Apply templates... -
Page 21: Setting Display Resolution
HiTi 640 DL Photo Printer User Manual Setting Display Resolution Before running PhotoDésirée, make sure the monitor display resolution is set to 1024 x 768 pixels or higher, and the color setting is set to the Hi Color (16 bit) or True Color (24 bit) mode. -
Page 22: Application In A View
HiTi 640 DL Photo Printer User Manual Application in a View Open Images Open images for print Print Formats Show print formats and amounts Image Index Area Place images that are opened Price Calculation Area Show prices of a printing... -
Page 23: Installing Photodésirée Minilab Edition
HiTi 640 DL Photo Printer User Manual Installing PhotoDésirée MiniLab Edition PhotoDésirée is the application where you can edit photos for print. Insert "Software CD" into CD-ROM drive. The Software CD can be found in the package that is shipped with the printer. -
Page 24: Opening Photodésirée Minilab Edition
Opening PhotoDésirée MiniLab Edition Opening PhotoDésirée MiniLab Edition Select Start > Programs > HiTi > MiniLab > MiniLab from Windows start menu. The main window of PhotoDésirée MiniLab edition opens on the screen. HiTi 640 DL Photo Printer User Manual www.hi-ti.com... -
Page 25: Opening Photos
HiTi 640 DL Photo Printer User Manual Opening Photos Click the Add Image button. On the Add Images window that opens, select the image(s) you want to print. Select All: Choose this when you want to select all • images in the folder. If there is any sub-folder under this folder, check the Include Subfolder selection item. -
Page 26: Editing Photos
For more information about pricing, see Photos starting on Page 25. Click OK. The image edited will show in the Special Handling area on the right side of the window. HiTi 640 DL Photo Printer User Manual starting on Pricing Your www.hi-ti.com... -
Page 27: Choosing Print Formats And Amounts
HiTi 640 DL Photo Printer User Manual Choosing Print Formats and Amounts You can choose to print your digital photos in different formats and specify the amounts you want to print for each type. The available print formats are: 4 x 6 inch photo •... -
Page 28: Printing Your Photos
If you want to print multiple images at a time, hold the shift key while keep clicking other images to select them. Click the Print button. HiTi 640 DL Photo Printer User Manual index card format print index button print button... -
Page 29: Sending Print Jobs To Multiple Printers
Sending Print Jobs to Multiple Printers HiTi 640 DL printer now enables you to work more efficientlly by allowing you to send print jobs to multiple printers at the same time. When you hit the Print button, the printer automatically detects what type the photo paper is required and sends the print job right to the printer with correct paper type/size installed. -
Page 30: Pricing Your Photos
HiTi 640 DL Photo Printer User Manual Pricing Your Photos One of the functions that empowers the PhotoDésirée MiniLab edition to be your best business partner is its embedded price and customer database system. The pricing system in the PhotoDésirée MiniLab edition is able to automatically calculate the price of all printing jobs in your store, letting you hassle-free from all those calculation works. -
Page 31: Viewing Prices
Hi-Ti 640 DL Photo Printer User Manual sticker 4x4x2 photo sticker 4x4 total amount 1 inch ID photo 2 inch ID photo open Valuation System... -
Page 32: Modifying Prices
Edit or Delete button. To query a print job, enter the Job ID or customer name you want to query and click the Query button. The jobs that match your query criteria will display in the dialog box. HiTi 640 DL Photo Printer User Manual www.hi-ti.com... - Page 33 HiTi 640 DL Photo Printer User Manual Click the OK button to apply the changes and close the dialog box. To modify the prices: Click the Price Setting button. The options available are: Normal Price: Modify the price for original prints •...
-
Page 34: Adding/Editing Customer Data
Click the Data System button to open the Data System window. The contact information of the customer displays. Do the options by clicking the appropriate buttons. Click OK when you’re done with the changes. HiTi 640 DL Photo Printer User Manual www.hi-ti.com... -
Page 35: Chapter 4 Introducing Imagenhancer
Chapter 4 The ImagEnhancer window is the place where you can customize your digital photos by taking advantages provided in the ImagEnhancer. The available functions are: Assigning Templates • Adjusting Colors • Adding Texts • Adding Calendars • Rotating Images •... -
Page 36: Assigning Templates
• on the preview pane. Check the result from the preview pane. If you don't like the result, double click on another template to replace the original one. Click the Check button. HiTi 640 DL Photo Printer User Manual www.hi-ti.com... -
Page 37: Adjusting Colors
HiTi 640 DL Photo Printer User Manual Adjusting Colors Adjust the color setting of your photo to the way you like by selecting either of the color setting items. Or check the Mirabella checkbox to view the Mirabella window where ImagEnhancer automatically creates 9 images with different settings in lightness and basic skin tones. -
Page 38: Adding Texts
Check the result from the preview pane. If you want to modify the text, double click the text block from the preview pane to make the changes. Repeat the above steps until you're satisfied with the result. HiTi 640 DL Photo Printer User Manual www.hi-ti.com... -
Page 39: Adding Calendars
HiTi 640 DL Photo Printer User Manual Adding Calendars Double click on the image to which you want to add calendar. The ImagEnhancer window shall then open. Click the Add Calendar Icon to bring up the Add Calendar dialog box. -
Page 40: Rotating Images
You may also move the slider to set the image rotation degree. Check the result from the Preview pane. Click the Check button to apply the change to the image and close the ImagEnhancer window. HiTi 640 DL Photo Printer User Manual www.hi-ti.com... -
Page 41: Adjusting Image Layouts
HiTi 640 DL Photo Printer User Manual Adjusting Image Layouts Double click on the image which you would like to adjust its layout. Then, the ImagEnhancer window shall open up on the screen. Choose to position the image by the width or height of the print paper. - Page 42 HiTi 640 DL Photo Printer User Manual Adjusting Image Layouts www.hi-ti.com...
-
Page 43: Frequently Asked Questions
Load the paper or paper cassette correctly. feeding correctly. Paper jammed Remove the jammed paper. If this does not work, turn off the printer and restart it after 1 minute. The printer will automatically eject the jammed paper. on page 38 for detailed descrip-... - Page 44 Possible Cause Solution When you open the cover of Turn off the printer and close the cover of the rib- the ribbon cartridge, the printer bon cartridge. Then turn the printer back on. The will stop itself, as well as the printer will try to eject the jammed paper.
- Page 45 98/ME or 2000. Windows 2000 installs a uni- Remove the Windows 2000 universal USB printer versal USB printer driver driver, and re-install the HiTi printer driver for Win- instead of HiTi printer driver. dows 2000. Hi-Ti 640 DL Photo Printer User Manual Intel chipset software: http://support.intel.com/support/chipsets/...
- Page 46 Use the USB cable shipped with the HiTi package. Unqualified USB cable The USB cable is shorter than 1.5 meter. Printing Results Table 5-3. Possible Cause Solution Use the Clean Kit to clean the printer. on the thermal printing head, ribbon cartridge, or print paper. www.hi-ti.com...
- Page 47 The AC voltage is not stable. Use another power connections. You may directly touch the Hold the tear line side of the photo printer while print side of the photo paper or loading the photo paper. the ribbon.
- Page 48 Print to photo printer and other While printing photos, assign printing jobs to the printer at the same time. photo printer only. Otherwise, an error in printing queue management conflict may occur. The image resolution is too Adjust your photo to be 1600 x 1200 pixels or low.
- Page 49 The software conflicts with a Disconnect the peripheral device or cables. peripheral device connected to the printer. Printer driver or PhotoDésirée Re-install the printer software. is not installed properly. Hi-Ti 640 DL Photo Printer User Manual...
- Page 50 HiTi 640 DL Photo Printer User Manual www.hi-ti.com...
-
Page 51: Chapter 6 Troubleshootings
Chapter 6 This chapter contains tips that can help you identify and solve problems if HiTi photo printer is not working properly. However, before you go over the lists, we would like to suggest that you should: Make sure that cable connections are secured; or Make sure that you are using the correct cable for your operating system. -
Page 52: Led Signal Lights
LED Signal Lights The LED signal lights on the front of the printer are designed to blink when there is something wrong with the printer. If the printer stops operating and a LED signal light is on or blinking, check the following procedure to see what problem the printer may have. - Page 53 LED Signal Lights Red Signal Light Indicate problems and notify users a problem occurs on the printer. Different blinking times indicate different problems. Blinking Times Reason Ribbon door is opened. No ribbon cartridge installed. Run out the ribbon cartridge. No paper left in the paper cassette.
- Page 54 USB printer and will slow down the transfer speed. Intel chipset software: http://support.intel.com/support/chipsets/ Via chipset driver: http://www.via.com.tw/jsp/en/dr/driver.jsp e. Turn off the printer and PC and restart them after 1 minute. If the problem remains, contact your venders for help. LED Signal Lights www.hi-ti.com...
-
Page 55: Error Messages
Error Messages Error Messages When the printer is not running properly, an error message will pop up on the screen as recorded in the following section. Error Message Cause No Printer Printer driver is not installed successfully. Printers are off-line or paused. - Page 56 HiTi 640 DL Photo Printer User Manual Error Message Cause No paper left in the paper No paper cassette. Paper is incorrectly loaded in the paper cassette. Paper cassette is incorrectly installed. No Ribbon Cartridge No ribbon cartridge in the printer.
- Page 57 You have no privilege to save temporary files. www.hi-ti.com Hi-Ti 640 DL Photo Printer User Manual Solutions Upgrade the memory of your PC to 64 MB RAM or above. Set your monitor resolution to be 800 X 600 or higher.
- Page 58 HiTi 640 DL Photo Printer User Manual Error Messages www.hi-ti.com...
-
Page 59: Specification, Regulatory And Warranty
4x7 inches with detachable boundary Paper Cassette 100 sheets Ribbon Cartridge 100 images www.hi-ti.com Specification, Regulatory and Warranty I/O Interface Dimension (mm) Weight Hi-Ti 640 DL Photo Printer User Manual USB 1.1 264 (W) x148.9 (H) x 368.2 (L) 8 Kgw... -
Page 60: Package Contents
HiTi 640 DL Photo Printer User Manual Package Contents HiTi Photo Printer 640 DL x1 • Photo Paper Cassette x1 • Software CD-Rom x1 • User Manual x1 • Quick Installation Guide x1 • USB Cable x1 • Power Cord x1 •... -
Page 61: System Requirements
System Requirements Operation System: Windows 98/ME/2000/XP • Pentium PC designed to run Windows 98/ME/2000/XP • 128 MB DRAM or greater • 100 MB hard disk space or greater • USB port • www.hi-ti.com Hi-Ti 640 DL Photo Printer User Manual... -
Page 62: Limited Warranty Statement
1 year A. Extent of Limited Warranty Hi-Touch Imaging Technologies (HiTi) warrants to the end-user customer that the HiTi products specified above will be free from defects on materials and workmanship for the duration specified above, which duration begins on the date of purchase by the customer. - Page 63 For HiTi printer products, the use of a non-HiTi ribbon cartridge, or a refilled ribbon cartridge, non-HiTi photo paper or sticker. HiTi will charge its standard time and materials charges to service the printer for the particular failure of damage.
-
Page 64: Safety Instructions
HiTi 640 DL Photo Printer User Manual To the extent allowed by local law, except for the obligations specifically set forth in this warranty statement, in no event shall HiTi or its third party suppliers be liable for direct, indirect, special, incidental, or consequential damages, whether based on contract, tort, or any other legal theory and whether advised of the possibility of such damages. -
Page 65: Fcc Information
If these equipment doses cause harmful interference to radio or television reception, which can be determined by interference by on or more of the following measures: Reorient or relocate the receiving antenna. www.hi-ti.com Hi-Ti 640 DL Photo Printer User Manual... - Page 66 HiTi 640 DL Photo Printer User Manual Increase the separation between the equipment and receiver. Never push objects of any kind into these products through cabinet openings as they may touch dangerous voltage points or short out parts that could result in a fire or electric shock. Never spill liquid of any kind on the product.
-
Page 67: Appendix Printer Driver Details
Appendix This appendix provides extensive information on how you can adjust your printer settings and functions to meet your printing expectation, including installing printer driver and configuring printer settings. The topics covered in this appendix are: Installing Printer Driver •... -
Page 68: Installing Printer Driver
Installing Printer Driver In Windows 98 environment Although there are three methods available for installing printer driver, we recommend you use the first one as it is the most straight-forward and easy to follow. The three methods are: Install printer driver, then plug in the USB cable cord •... - Page 69 If CD-ROM does not start automatically, you can initiate it by double-clicking the CD-ROM drive from Windows Explorer or by double-clicking the My Computer icon. Select Install HiTi Photo Printer 640DL Driver from the Welcome window. The Installing Printer Driver message box appears. Click Start to start the installation process.
- Page 70 Once the power is switched on, a message box saying the USB connection is connected will display on the screen. Choose USB001-HiTi-640DL as the port for use with the printer. Note that the port status should be "connected." Click Next.
- Page 71 HiTi 640 DL Photo Printer User Manual Select if you want to set the printer as the "default printer." Choose Yes if you’re sure only photo printing will be processed from this computer. Click Finish. The installation is complete. www.hi-ti.com...
- Page 72 The Add Printer Wizard is invoked. Click Next to begin the installation process. Choose if the printer is a local printer or is connected to a network system, e.g., LAN. Choose Local printer if the printer does not belong to a network system. Click Next.
- Page 73 HiTi 640 DL Photo Printer User Manual Choose HiTi and HiTi 640 DL Photo Printer as the manufacture and model of the printer driver. Click Next. If you can’t find them in the scroll-down list, click Have Disk to locate them from the CD-ROM. Usually, you can simply type "D:\"...
- Page 74 Installing Printer Driver Choose USB001-HiTi-640DL as the port for use with the printer. Note that the port status should be "connected." Click Next. Select if you want to set the printer as the "default printer." Choose Yes if you’re sure that only photo printings will be processed on this computer.
-
Page 75: In Windows 2000 Environment
If CD-ROM does not start automatically, you can initiate it by double-clicking the CD-ROM drive from Windows Explorer or by double-clicking the My Computer icon. Select Install HiTi Photo Printer 640 DL Driver from the Welcome window. The Installing Printer Driver message box appears. Click Start to start the installation process. - Page 76 The system starts to copy driver files from the CD-ROM. When done, click OK. Then, connect the USB cable cord to the printer and your personal computer. Switch on the power of the printer. The Windows 2000 PnP system will find the driver automatically.
- Page 77 HiTi 640 DL Photo Printer User Manual If you want to check your printer device, select Control Panel > System Properties > Hardware from Windows Start menu. Click Device Manager to open the Device Manager window. www.hi-ti.com Installing Printer Driver...
-
Page 78: Configuring Driver Settings
To configure driver settings, first open the Printers windows by choosing Control Panel > Printers from Windows Start menu. Click the HiTi USB Printer icon and right-click Properties from the pop-up menu. The Printer Property window displays on the screen. - Page 79 This General category contains printer’s general information, like printer name or descriptions. You can also choose what separator page to use when printing from this printer. Click Print Test Page if you want to test if the printer • works properly.
- Page 80 Configuring Driver Settings Details The Details category contains information about the port and printer driver version used by this printer. You can add, delete or capture ports connected to this printer by selecting from the drop-down list. The default time-out setting is also included in this •...
-
Page 81: Color Management
Click Apply to apply the changes you make. Or click OK • to apply the changes and close the Printer Properties window. For more detailed information, click Help to view Windows online help file. - Page 82 The Sharing category is ONLY available when you install Microsoft Networks function on the computer connected with the photo printer. This also means that the printer is located in a local LAN environment and you can share it as a public printer.
- Page 83 Page 76 for more information. Click Apply to apply the changes you make. Or click OK • to apply the changes and close the Printer Properties window. For more detailed information, click Help to view Windows online help file.
-
Page 84: Preview Function
Click Print to start printing. Click Reset All to ignore the changes you make and restore the default settings. Click Cancel to close the Printer Properties window without saving the changes you make. For more detailed information, click Help to view Windows online help file. - Page 85 If you wish to do no configuration changes, don’t make any selections. Click Apply to apply the changes you make. Or click OK to apply the changes and close the Printer Properties window. For more detailed information, click Help to view Windows online help file.
- Page 86 The corporate web site address is also listed for your reference. Click OK to apply the changes and close the Printer Properties window. For more detailed information, click Help to view Windows online help file.
-
Page 87: In Windows 2000 Environment
To configure the driver settings, first open the Printers windows by choosing Control Panel > Printers from Windows Start menu. Click the HiTi USB Printer icon and right-click Properties from the pop-up menu. The Printer Property window displays on the screen. - Page 88 Configuring Driver Settings General This General category contains printer’s general information, like printer name or descriptions. You can add or modify the location and comment of the printer. Click Print Test Page to test if the printer works properly. •...
-
Page 89: Printer Preferences
Windows 98 environment Click Apply to apply the changes you make. Or click OK • to apply the changes and close the Printer Properties window. For more detailed information, click Help to view Windows online help file. - Page 90 The HiTi photo printer creates a "virtual printer port" for printing through the USB port when you install the printer driver. Make sure the HiTi USB Photo Printer 640 DL is checked and the status is Connected. Click Apply to apply the changes you make. Or click OK to apply the changes and close the Printer Properties window.
-
Page 91: Uninstalling Printer Driver
Choose Control Panel > Printers > Uninstall HiTi USB Photo Printer 640DL from Windows Start menu. Click Add/Remove. Click Start to uninstall the driver software from the machine. -
Page 92: In Windows 2000 Environment
Windows Start menu. Choose Uninstall HiTi USB Photo Printer. Click Start to uninstall the driver software from the machine. The uninstallation is complete. Note: You don’t need to restart your machine to complete the uninstallation. HiTi 640 DL Photo Printer User Manual www.hi-ti.com...
Need help?
Do you have a question about the 640 DL and is the answer not in the manual?
Questions and answers