Table of Contents
Advertisement
Quick Links
Sommario
SaFETY ...................................................................................16
Fundamental safety warnings ...................................................... 16
DESiGNaTED USE ...................................................................18
iNSTrUCTioNS ......................................................................18
DESCriPTioN oF THE aPPLiaNCE ........................................19
USiNG THE aPPLiaNCE For THE FirST TimE ......................19
PrEParaTioNS For USE ......................................................19
What water to use ........................................................................ 19
Filling the tank .............................................................................. 20
Adjusting plate temperature. ...................................................... 20
STEam iroNiNG.....................................................................21
DrY iroNiNG .........................................................................21
VErTiCaL iroNiNG ................................................................21
TUrBo FUNCTioN .................................................................22
SPraY BUTToN ......................................................................22
No-DriP SYSTEm .................................................................23
aUTo-oFF ..............................................................................23
aFTEr iroNiNG .....................................................................23
Cleaning and maintenance .......................................................... 24
Limescale prevention and SELF CLEAN ....................................... 24
DiSPoSaL ...............................................................................25
15
GB
Advertisement
Table of Contents

Related Manuals for DeLonghi FXG 24A T


Summary of Contents for DeLonghi FXG 24A T
-
Page 1: Table Of Contents
Sommario SaFETY ...................16 Fundamental safety warnings ............16 DESiGNaTED USE ..............18 iNSTrUCTioNS ..............18 DESCriPTioN oF THE aPPLiaNCE ........19 USiNG THE aPPLiaNCE For THE FirST TimE ......19 PrEParaTioNS For USE ............19 What water to use ................ 19 Filling the tank ................20 Adjusting plate temperature. -
Page 2: Safety
SaFETY Fundamental safety warnings Danger! This is an electrical appliance and may cause electric shock. You should therefore respect the following safety warnings: • Never touch the appliance with damp hands. • Never use the appliance with bare or wet feet. • Never immerse the appliance in water. • Never unplug the appliance by pulling the power cable or the appliance itself. • If the socket and power cable plug are incompatible, the socket should be changed for a suitable type by a qualified professional only who should ensure that the cross-section of the wires leading to the socket is suitable for the power... - Page 3 plugging from the mains. • In the event of malfunction and/or faulty operation, switch off the appliance and take it to Customer Services. • Before plugging the appliance in, check that the mains vol- tage corresponds to the voltage (V) indicated on the rating plate of the iron.
-
Page 4: Designated Use
ces centre. • The iron should be placed on a flat surface extremely resi- stant to high temperatures. DESiGNaTED USE • This appliance must be used exclusively for the purpose for which it was expressly conceived. Any other use is conside- red improper and thus dangerous. • The manufacturer is not liable for damage caused by inap- propriate, incorrect or irresponsible use or for damage resul- ting from repairs carried out by unqualified personnel. iNSTrUCTioNS Read these instructions carefully before using the appliance. • Failure to respect these instructions may result in burns or damage to the appliance. The manufacturer is not liable for damage deriving from fai- lure to respect these instructions. Please note: Keep these instructions If the appliance is passed to other persons, they must also be provided with these instructions. -
Page 5: Using The Appliance For The First Time
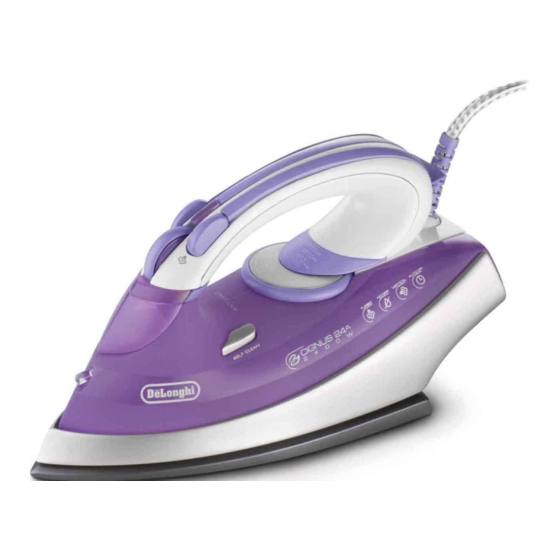
i. “Self Clean” button L. “Turbo” button m. Water measure USiNG THE aPPLiaNCE For THE FirST TimE • The first time you use the iron, remove the plate protection (if present). • When used for the first time, the appliance may give off smoke and an odour for several minutes. This is caused by heating and subsequent drying of the sealers used in as- sembling the appliance. -
Page 6: Adjusting Plate Temperature
• Close the tank fill hole cap. adjusting plate temperature. Please note: On the back of the iron there is a useful guide giving informa- tion on the temperature to set according to the garment being ironed: • Plug the iron into the mains socket. (Models with auto-off only: the light F comes on to indicate that the appliance is connected to the mains electricity supply.) • The “steam ready” light G comes on. • Select the required temperature by turning the thermostat knob H (fig. 3). -
Page 7: Dry Ironing
• Wait for the “steam ready” light G to go off. To discharge steam, just place the iron in a horizontal position. Steam stops when the iron is placed upright on the rear rest (the recommended position during pauses in ironing). DrY iroNiNG • Set plate temperature as described above. • Move the steam regulator to the position (“dry”). • Wait for the “steam ready” light G to go off. The iron is ready to use. If the fabric to be ironed is slightly damp or you iron fast, you can use a higher temperature. If, on the other hand, the garments are dry or you iron slowly, you are recommended to use a lower temperature. VErTiCaL iroNiNG This function enables delicate garments to be steamed without resting them on the ironing board. Pay particular attention to the temperature when steaming curtains. -
Page 8: Turbo Function
ments, elements, people and animals. TUrBo FUNCTioN Press this button to obtain a powerful jet of steam, useful to eli- minate creases. • Set plate temperature to maX. • Move the steam regulator to the steam posi- tion. • Wait for the “steam ready” light G to go off. • Press and release the Turbo button (L). To use the turbo function correctly, wait a few seconds between one burst of steam and the next. SPraY BUTToN If during ironing, you note particularly resistant creases or if your garment requires a higher level of dampness, you can use the spray. -
Page 9: Auto-Off
aUTo-oFF (Certain models only) • If the iron is left unused in a horizontal position for 30 secon- ds, it goes off automatically. • If the iron is not used in an upright position, the auto-off device trips after 8 minutes. The light (F) flashes to indicate auto-off. To begin ironing again, shake the iron slightly forwards until the light (F) comes on ste- adily. aFTEr iroNiNG To extend the working life of the iron, whenever you finish iro- ning, you are recommended to empty the tank as follows: • Unplug from the mains socket. • Empty the iron by holding it tip downwards and shaking it gently over a basin or sink. • To dry residual moisture, turn the iron on again with the ther- mostat at maximum for about 2 minutes. -
Page 10: Limescale Prevention And Self Clean
Limescale prevention and SELF CLEaN The resin filter installed in the tank filters impurities, thus ensu- ring constant steam delivery during ironing. The resin softens the water and improves the long term perfor- mance of the iron. However, if the amount of stream drops during use, this could be caused by excessive build-up of limescale. To remove, proceed as follows: • Fill the tank. • Plug the appliance into the mains and place the thermostat in the MAX position. • When the iron has reached the required temperature (light off), unplug the appliance. • Place over a sink and leave the appliance in a horizontal position. - Page 11 Disposing of a household appliance separately avoids possible negative consequences for the environment and health deriving from inappropriate disposal and enables the constituent mate- rials to be recovered to obtain significant savings in energy and resources. As a reminder of the need to dispose of household appliances separately, the product is marked with a crossed-out wheeled dustbin.
Need help?
Do you have a question about the FXG 24A T and is the answer not in the manual?
Questions and answers