
Related Manuals for Barco RLM W6


Summary of Contents for Barco RLM W6
- Page 1 Please read this manual before using this projector RLM W6 USER’S GUIDE User’s Guide...
-
Page 2: Table Of Contents
Contents Warning, Notices and Safety Instructions Notice Description pertaining to FCC Rules Part 15 Warning and Safety Instructions Notices you should read prior to theinstallation of the projector Projector parts and functions Front view Rear view Bottom view Range of effective remote control signalreception Installing batteries in the remote control Quick installation of the projector. - Page 3 Contents Using the remote control OSD Menu Tree OSD Menu description OSD Description INPUT IMAGE LAYOUT LAMP ALIGNMENT Control Service Lamp and filter maintenance Lamp replacement Cleaning the filter Simple troubleshooting and definition of the LED indicators LED STATUS Projector specifications...
-
Page 4: Warning, Notices And Safety Instructions
Warning, Notices and Safety Instructions Notice Please write down your projector model number and serial number and keep the information for maintenance purposes in the future. Should the equipment be lost or stolen, the information could also be used for the police report. Model number: Serial number: Please check the accessories that come with the projector with the following list. -
Page 5: Warning And Safety Instructions
Direct or indirect hit of a laser beam on to the projector lens can severely damage the Digital Mirror Devices (DMD™). Sun light Warning Avoid using the RLM W6 in direct sun light. Sun light on the projector lens can severely damage the Digital Mirror Devices (DMD™). Never look into the projector light source directly This equipment contains a high brightness light source and a portion of the light emitted by the projector is ultraviolet light. -
Page 6: Carrying The Projector
Warning, Notices and Safety Instructions Do not overload wall outlets/extension cords Pay attention to the current load of the outlet you are using, be it wall outlet or extension cord outlet to prevent fire or electric shock. Cleaning When cleaning the projector, be sure to unplug it from the wall outlet to prevent electric shock. -
Page 7: Notices You Should Read Prior To Theinstallation Of The Projector
Warning, Notices and Safety Instructions Should you encounter any of the following situation, please unplug your projector from the wall outlet and contact a qualified service personnel for assistance: • Damaged power cord or power plug. • If a foreign object has fallen into the projector or if you have spilled water or other liquid into the projector. -
Page 8: Do Not Tilt The Projector More Than 15 Degrees
Warning, Notices and Safety Instructions cleaned routinely to prolong the projector's lifecycle. Cleaning of the projector's interior should only be performed by qualified service personnel dispatched by your local dealer and you should not attempt to clean the inside of the projector by yourself. If other light source is directly projected onto the projector screen, the color of the image from the projector will appear to be pale and the image quality will be lower. - Page 9 Warning, Notices and Safety Instructions Name and quantity of toxic/hazardous substances/elements contained in the product...
-
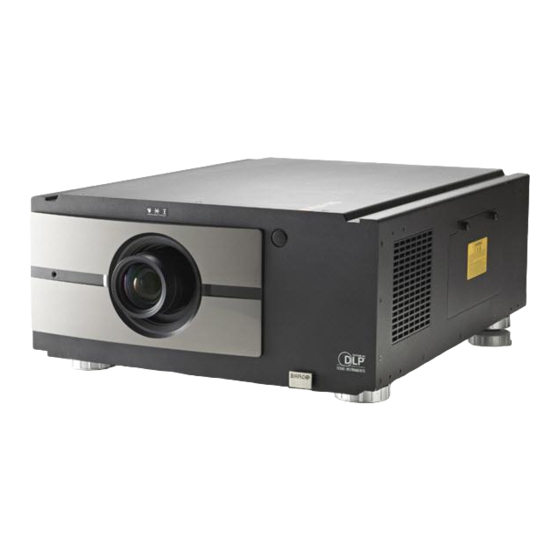
Page 10: Projector Parts And Functions
Projector parts and functions Front view Adjustable foot Adjust the height and angle of the projector with the adjustable foot Infrared receiver Ventilation inlet The internal cooling fan draws cool air from the ventilation Lens inlet into the projector. Lens cover Adjustable foot Rear view... - Page 11 Projector parts and functions IR ext. S-VIDEO Receives input signal from compatible Niles or Xantech Standard S-Video input that connects to DVD players, IR repeater systems. satellite receiver or Super VHS (S-VHS) VCR. 12V TRIGGER VIDEO (3.5-mm, mini phone jack) Connects to VCR, laser disc players or other Offers 12 (+/- 1.5) V of output for 350mA component image sources.Also connects to the...
-
Page 12: Bottom View
Projector parts and functions Bottom view Adjustable foot Adjust the height and angle of the projector with the adjustable foot Mounting bracket screw hole These screw holes are used to mount the projector to its designated mounting bracket using 3 M8x15 screws and 3 M8x40 bolts. -
Page 13: Range Of Effective Remote Control Signalreception
Projector parts and functions Range of effective remote control signal reception The diagram below illustrates the range of effective remote control signal reception. 40° 40° Note: Avoid placing the remote control at places of high temperature or humidity as it could cause the remote control to malfunction. -
Page 14: Quick Installation Of The Projector
Quick installation of the projector Quick installation of the projector. 1. Orient the projector towards the screen Screen 12V TRIGGER RGB-S 350mA RS-232 IR ext. S-VIDEO VIDEO YUV 1 RGB-HV/SOG B/Pb R/Pr HDMI HDMI RGBHV / YUV 2 Desk Top or Notebook 2. - Page 15 Quick installation of the projector 5. Adjusting the projector's angle a. Please use the adjustable feet to change the angle of the projector in order to achieve the most suitable angle for projection on the screen. b. Adjusting the lens by horizontal and vertical lens shift Method 1: Press the ENTER button on the remote control to access Lens Control...
-
Page 16: Correcting Keystoning Caused By Projection Angle
Quick installation of the projector Press the MENU button on the remote control and choose Alignment Lens Control; then use the ▼ ▲ buttons to adjust the size of the image that is projected onto the screen. Original image size Zoom out Zoom in 7. -
Page 17: Throw Distance
Installing the projector Throw distance Throw Distance (TD) = Screen Width (W) x Throw Ratio (TR) Coupled with the available projection lenses, the projector offers the following throw ratios: • R9832740-RLD Lens (0.77 : 1) • R9832741-RLD Lens (1.16 : 1) Note: Projection lenses are optional •... -
Page 18: Installing The Projector
Installing the projector Frontal projection - ceiling mode Rear projection - ceiling installation Advantage: does not occupy floor space Advantage: the projector is completely does not draw attention to it. hidden from plain view this setup Eliminates the possibility that usually offers better reduction of someone would accidentally ambient noise. -
Page 19: Horizontal And Vertical Lens Shift
Installing the projector Horizontal and vertical lens shift In addition to using the adjustable feet to adjust projection angle, you can also use the Lens Shift function to adjust the projected image. Moving the lens vertically The distance of vertical lens movement is 100% of half the screen height in both directions. For instance, if you are using a 80"... -
Page 20: Installing The Projector
Installing the projector Connecting the projector to other devices HDMI / DVI connection Signals from image source offer the best projection image quality when sent through HDMI. Therefore, try to use input devices with HDMI output as the source of image. 12V TRIGGER RGB-S 350mA... -
Page 21: Rgb Connection
Installing the projector RGB connection Connect your PC or other devices with RGB output to the RGB input connectors on the projector to be used as the source of image input. 12V TRIGGER RGB-S 350mA RS-232 IR ext. S-VIDEO VIDEO YUV 1 RGB-HV/SOG B/Pb... -
Page 22: Rgbs Connection
Installing the projector RGBs connection If the source equipment uses composite image synchronized connectors to output RGB, please connect the green, blue and red connectors to the Y, Pb, Pr jacks at the COMPONENT1/SCART inputs and the synchronized output to the VIDEO jack. Synchronize Green Blue Red SCART RGBS... -
Page 23: S-Video/Video Connection
Installing the projector S-Video/Video connection If the image input device offers both S-Video and Video connection, it is recommended that you choose S-Video to obtain better image quality.If both the S-Video and Video inputs are connected to the projector, the projector will prioritize S-Video signal input and image from the Video input will not be played. -
Page 24: Turning On The Projector
Installing the projector Turning on the projector Refer to the instructions covered in Chapter III on "Quick installation of the projector". Changing OSD language By factory default, the OSD menu of the projector is displayed in English. If you wish to switch to a different language, you can go to MENU ... -
Page 25: Adjusting Screen Orientation
Installing the projector Adjusting screen orientation By default, the projector is configured for "frontal projection - desktop installation". If you choose to install your projector in other setups, be sure to adjust the screen orientation to achieve the correct projection mode. Frontal projection - ceiling mode Press MENU... -
Page 26: Adjusting The Projector Lens
Installing the projector Rear projection - desktop installaion Press MENU ALIGNMENT Rear Projection and choose ON; the projector is now configured for "rear projection - desktop installation". Correct Picture canoe Rear projection - ceiling mode Press MENU ... -
Page 27: Using The Remote Control
Using the remote control You can configure the input source that corresponds to each button in the OSD Menu. To do so: When press MENU > CONTROL > Button 1~5; INPUT ▼▲ use the buttons to choose from diffferent sources of input. You can choose from: HDMI 1,HDMI 2,RGB D-15,YUV 1,RGBHV/YUV 2,Composite Video,S-Video and RGB-S. - Page 28 Using the remote control AUTO IMAGE This button is used to Resync the Use this button to display or image; when the image signal disable PIP. becomes unstable or image SWAP SWAP quality deteriorates simply press Use this button to switch the this button and the projector will sources of image PIP display.
-
Page 29: Osd Menu Tree
OSD Menu description OSD Menu Tree OSD Menu Zoom Crop Zoom Tree HDMI1 HDMI2 RGB D-15(RGB-HV/ SOG)YUV1(RGB-S) HDMI1 Main Select YUV2(RGBHV/YUV2) HDMI2 Composite Video(Video) RGB D-15(RGB-HV/ S-Video SOG)YUV1(RGB-S) Input Selection RGBHV/YUV2 RGB-S Composite Video(Video) HDMI1 S-Video LAYOUT HDMI2 RGB-S RGB D-15(RGB-HV/ Auto SOG)YUV1(RGB-S) Input Locking... - Page 30 OSD Menu description English Rear Projection French Spanish Ceiling Mode German Control Language Portuguese Zoom/Focus Chinese Simplified Lens Control Shift Chinese Traditional Japanese Horizontal Keystone Keystone Korean Vertical Keystone Model Dynamic On (1~12 Pattern) ALIGNMENT Contrast Off (0 off) Serial Number Software Version Gamma 2.35...
-
Page 31: Osd Description
OSD Menu description OSD Description 1. Press the MENU button on the remote control or on the back of the projector to bring up the OSD Menu. 2. You will see seven functional menus (Input, Image, Layout, Lamp, Alignment, Control and Service). Press or to select the desired sub menu. 3. -
Page 32: Auto Power Off
OSD Menu description frequency in order to achieve optimal image output. If the frequency of the input signal falls between 24~31Hz, the projector will automatically double the vertical refresh frequency. If the frequency of the input signal falls between 31~48Hz or exceeds 62Hz, the projector will automatically set the frequency to 60Hz. -
Page 33: Image
OSD Menu description Auto Image Adjust You can configure the Auto Image Adjust function to one of the following three modes: =NEVER • Auto =When not done before(or when done first time) • Always =When new source selected or new source connected. •... - Page 34 OSD Menu description Brightness Use to adjust the brightness of the projected image.You can connect the projector to an external image source to display an image resembling the one shown (PLUGE, Picture Line- Up Generation Equipment) for adjustment. Although there are numerous versions of PLUGE image, they are typically comprised of blocks of black, white and gray on top of a black background.
- Page 35 OSD Menu description Tint Use to adjust the tint (balance between magenta and green) of the projected image. Lowering the value will make the image appear redder; increasing the value will make the image appear greener. Reduced tint Original image Enhanced tint ...
-
Page 36: Noise Reduction
OSD Menu description Noise Reduction Use to adjust the noise of the projected image. This function is suitable for the elimination of image noise from interleaving SD input.Generally speaking, reducing image noise will lower the value of high frequency detail and make the image appear more mellow. ... -
Page 37: Aspect Ratio
OSD Menu description Gain This refers to the control of color imbalance in the brighter areas of the projected image.It is recommended that you use an external test image with many areas of white (i.e. an image of 80IRE-window). If you notice minimal amount of red, green or blue in the gray areas, lower the gain of the corresponding color accordingly.This function is used to increase or decrease the range of color input for the entire image. - Page 38 OSD Menu description Native input Output aspect ratio Output aspect ratio Output aspect ratio 16:9 Output aspect ratio Output aspect ratio Output aspect ratio Output aspect ratio 1.88 2.35 Letterbox Native Cropped portion of the image Note that when used for commercial purposes, including: projection of image in movie theatres, hotels, cafeteria and other public venues, compression or extension of image achieved through the change of aspect ratio may constitute copyright infringement to the rightful owner of the image.
-
Page 39: Auto Image
OSD Menu description H Start • Use to adjust the projected image's horizontal position. If the projected image is not at the center of the screen (i.e. shifted to right or left) and ends up being cropped, use this function to adjust the image's horizontal position.The following image is an example of test image from an external signal source: Native picture Skewed left... -
Page 40: Layout
OSD Menu description LAYOUT Zoom Due to the fact that some consumers may still be using older television systems, some TV programs may not display the edges of the image. Use this function to hide the image edge by choosing one of the following three options: •... -
Page 41: Pip Select
OSD Menu description PIP Select Sub picture Main picture Use this function to select the source for the sub window. You can choose from HDMI1, HDMI2, RGB D-15(RGB-HV/SOG), YUV1, RGBHV/YUV2, Composite Video(Video), S-Video, RGB-S and so forth. PIP Position You can choose to display Top Left Top Right sub window in five different... -
Page 42: Lamp
OSD Menu description LAMP This chapter covers information on the projector lamp. Mode • When set to Eco mode, the wattage of the lamp will be at 230W. If the surrounding environment is sufficiently dark or if you do not require intense brightness, you can set the lamp to Eco mode to prolong its usage life. -
Page 43: High Altitude Mode
OSD Menu description High Altitude Mode Use this function to control the projector's cooling fan. You can set it to Off or On. The default setting is Off. Under normal circumstances, the projector will operate normally with this function set to Off. -
Page 44: Alignment
OSD Menu description ALIGNMENT Rear Projection The default setting is Off. Whenyou have set up the projector for rear projection, please set it to ON. For more information on different modes of projection, refer to Chapter IV _ Projector installation. Ceiling Mode The default setting is Off. -
Page 45: Dynamic Contrast
OSD Menu description Dynamic Contrast Use this function to configure the projector to automatically adjust image contrast from the source upon start up or shut down. When activated, the projector will dynamically adjust the image contrast from the beginning of the projection until the content has ended. Gamma Different Gamma settings will affect viewers' perception of the image. -
Page 46: Control
OSD Menu description Control IR Address Use this function to configure the projector's IR code receive commands from the remote control. The default value is 1.If you have other equipment in your home that could pick up the command from the projector's remote control, it is recommended that you set the remote control code to 2. -
Page 47: Menu Position
Bottom Right Bottom Left Start Up Logo You can use this function to have the projector display the Barco logo in the start up screen. to display the Barco logo during start up and to display a blank image. Start Up Chime Set it to On to have the projector play a sound effect during start up;... -
Page 48: Auto Source
OSD Menu description Trigger1 ~2 The projector comes with two sets of Trigger output. You can configure two different devices connected to the projector via the trigger ports to be automatically turned on when the projector is on. There will be a 2-3 second delay prior to activation to prevent operation of this function when the user is choosing the desired aspect ratio. -
Page 49: Service
OSD Menu description Service BARCO RLM W6 INPUT IMAGE LAYOUT LAMPS ALIGNMENT CONTROL SERVICE Model : RLM W6 Serial Number : 1688886661220 Software Version : MP02-GP02-0001-00 Active/PIP Source : HDMI 1 / RGB D-15 Pixel Clock Signal Format : 1920x1200@60Hz H/V Refresh Rate : H: 74.019 KHz V: 60 HZ... -
Page 50: Lamp And Filter Maintenance
Lamp and filter maintenance Lamp replacement The lifecycle of ordinary projection lamp typically lasts for 1500-2000 hours before requiring replacement (different lamp configurations will affect lamp life). From the OSD Menu, you can go to LAMPS Lamp1 or 2 Run Time to check how long a lamp has 5. -
Page 51: Cleaning The Filter
Lamp and filter maintenance Cleaning the filter In order to keep the interior of the projector clean, the projector is equipped with a filter to keep out dust and other small particles. It is Take out the filter recommended that you clean the projector's and clean it. -
Page 52: Simple Troubleshooting And Definition Of The Led Indicators
Simple troubleshooting and definition of the LED indicators The following table offers a list of common problems with projectors and how to troubleshoot. If the recommended solutions fail to resolve your problem, contact your local dealer to arrange for servicing; do not attempt to service the projector by yourself. Problem Possible cause Solution... -
Page 53: Led Status
Simple troubleshooting and definition of the LED indicators 1. During projection, the lamp The lamp might have been damaged; check the The lamp has reached the end of its service life; suddenly goes off and the LED indicator on the rear panel of the projector please replace it. -
Page 54: Projector Specifications
Projector specifications Specifications Description Specifications Brightness - Standard 5400 ANSI lumens Resolution 1920 × 1200 (Native) Micro display 3 × DLP 0.67" DMD Contrast - Standard 1800 : 1 Full view Luminence uniformity - Standard Lamp 2 × 280W UHP Zoom lens: 1.45~1.74 1.74~2.17... - Page 55 Projector specifications Signal Frame Resolution References Type Rate 640×480 59.94 VESA DMT, CEA-861D Format 1 × × 640×480 74.99 VESA DMT × × 640×480 VESA DMT × × 800×600 60.32 VESA DMT × × 800×600 VESA DMT × × 800×600 85.06 VESA DMT ×...
- Page 56 Projector specifications 516.76 •...
Need help?
Do you have a question about the RLM W6 and is the answer not in the manual?
Questions and answers