Table of Contents
Advertisement
Quick Links
Download this manual
See also:
Owner's Manual
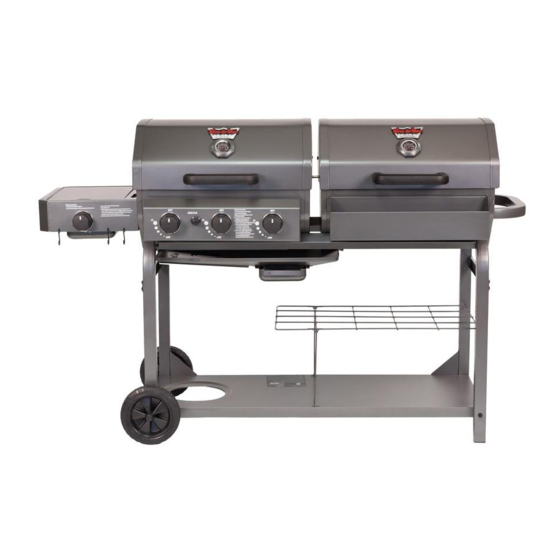
OWNER'S MANUAL
Double Play Model# 5252
Charcoal and LP
Gas Grill
A propane gas cylinder is required for
operation. This gas grill is not intended
for commercial use.
SAVE THESE INSTRUCTIONS FOR FU-
TURE REFERENCE. IF YOU ARE ASSEM-
BLING THIS UNIT FOR SOMEONE ELSE,
GIVE THIS MANUAL TO HIM OR HER TO
SAVE FOR FUTURE REFERENCE.
FOR CUSTOMER SERVICE, CALL 912-
638-4724
WARNING:
Improper installation, adjustment, al-
teration, service or maintenance could
cause injury or property damage Read
the installation, operation and mainte-
nance instructions thoroughly before
assembling or servicing this equip-
ment.
Failure to follow these instructions
could result in fire or explosion that
could cause property damage, person-
al injury or death.
OM5252 B.2
Keep your receipt with this manual for
Warranty.
(outside any enclosure)
DANGER:
DO NOT use gas grill for indoor cook-
ing or heating. TOXIC fumes can accu-
mulate and cause asphyxiation. Do
not use in or on boats or recreational
vehicles.
PROP 65 WARNING:
Chemicals known to the state of Cali-
fornia to cause cancer, birth defects
or other reproductive harm are creat-
ed by the combustion of propane.
™ & © Char-Griller / A&J Mfg.
WARNING
!
For Outdoor Use Only
Patented
Advertisement
Table of Contents

Subscribe to Our Youtube Channel
Related Manuals for King-Griller 5252


Summary of Contents for King-Griller 5252
- Page 1 OWNER’S MANUAL Double Play Model# 5252 Charcoal and LP Gas Grill Patented A propane gas cylinder is required for operation. This gas grill is not intended Keep your receipt with this manual for for commercial use. Warranty. WARNING SAVE THESE INSTRUCTIONS FOR FU- For Outdoor Use Only TURE REFERENCE.
-
Page 2: If You Smell Gas
! Danger If you smell gas: 1. Shut off gas to the appliance. 2. Extinguish any open flame. 3. Open Lid. 4. If odor continues, keep away from the appliance and immediately call your gas supplier or your fire depart- ment. - Page 3 Page intentionally left blank for notes OM5252 B.2 ™ & © Char-Griller / A&J Mfg.
- Page 4 WARNING FOR YOUR SAFETY 1.DO NOT store or use gasoline or any other flammable vapors and liquids within 25 feet (8m) of this or any other appliance. 2. When cooking with oil/grease, do not allow the oil/grease to exceed 350°F (177°C). Do not store or use extra cooking oil in the vicinity of this or any other appliance.
- Page 5 10. Do not touch metal parts of grill until it has completely cooled (about 45 minutes) to avoid burns, unless you are wearing protective gear (BBQ mittens, pot holders, etc.) 11. Do not alter this grill in any manner 12. Clean and inspect the hose before each use. If there is evidence of abrasion, wear, cuts, or leaks, the hose must be replaced prior to operating the appliance.
- Page 6 ™ & © Char-Griller / A&J Mfg. OM5252 B.2...
-
Page 7: Table Of Contents
ITEM PART NAME PART NUMBER GAS GRILL HOOD 30-0001 CHARCOAL GRILL HOOD 30-0005 GAS GRILL BODY 30-0007 CHARCOAL GRILL BODY 30-0006 THERMOMETER 55-0001 HOOD HANDLE 55-0002 WARMING RACK 20-0001 BURNER (short wire) 80-0001 BURNER (long wire) 80-0002 BASE 20-0009 FLARE-UP SHIELD 10-0001 FRONT SHORT LEG 20-0016... - Page 8 Assembly: Requires 2 people. Get another person to help. Tools Needed: Pliers, Phillips Head Screwdriver and a 7/16” Nut Driver. NOTE: Do Not tighten any bolts unless instructed to do so. Tightening too soon may prohibit parts from fitting together. All Hex Nuts should be on the inside of the grill unless stated other- wise.
-
Page 9: Om5252 B.2 ™ & © Char-Griller / A&J
Step 1 Attach the LEG CROSSBAR to the frame as shown making sure that the holes on the CROSSBAR are facing inward. See Below. Left Leg Right Leg Leg Crossbar Step 2 Attach Leg Assembly to the base using (4) 2” BOLTS and four (4) ¼” FLAT WASHERS as shown. - Page 10 Step 3 Attach WIRE SHELF to the LEGS (as shown below). Step 4 Install the LEG BRACES to the LEGS using eight (8) LOCK WASHERS and eight (8) ½” BOLTS as shown. Remember to NOT tighten the bolts until completing step 6. ™...
-
Page 11: Wheel
Step 5 Insert the AXLE through the SHORT LEGS and through the BASE. Install one WASH- ER, COTTER PIN and HUB CAP onto the AXLE then slide the AXLE through WHEELS and legs as shown. Finish by attaching 2nd WASHER, COTTER PIN and HUB CAP. Wheel Axle Large Cotter Pin... - Page 12 Step 7 Attach the CATCH PAN to the underside of the GRILL BODIES by sliding it into the guides/rails as shown. Make sure that the side of the catch pan marked “Wheel Side” is on the side of the grill with the wheels. From the front of the grill, slide the GREASE TRAY into the guides/rails under the CATCH PAN.
- Page 13 Step 9 Install the SIDE BURNER and the CONTROL PANEL to the firebox. Make sure the VALVE tip is completely inside of the hole at the end of the BURNER TUBE. Attach with eight (8) ½” BOLTS and eight (8) LOCK WASHERS. From inside the GAS GRILL BODY the BOLTS will first go through the Lock Washers then GRILL BODY and then screw into the SIDE BURNER.
-
Page 14: 2/5" Flat Washer
Step 11 Install the CONDIMENT BASKET to the CHARCOAL GRILL BODY using four (4) LOCK WASHERS and four (4) ½” BOLTS. From inside the GRILL BODY the BOLTS go through a LOCK WASHER and then through the GRILL BODY and then screw into the CONDIMENT BASKET. -
Page 15: Thermometer
Step 13 Attach the SIDE HANDLE to the right side of the CHARCOAL GRILL BODY using two (2) ½” BOLTS and two (2) LOCK WASHERS as shown. From inside the GRILL BODY insert each BOLT through a LOCK WASHER and then through the GRILL BODY and then screw into the SIDE HANDLE. -
Page 16: Hinge Pin
Step 16 Attach HOODS to the GRILL BODIES using HINGE PINS as shown. Have your helper stand behind the grill to hold the HOODS in place and keep them from falling. First place the GAS HOOD onto the GRILL BODY in the closed position then screw the left HINGE PIN into place. -
Page 17: Warming Rack
Step 17 Install the DAMPER to the CHARCOAL GRILL HOOD using one (1) ½” BOLT. The BOLT should first go through a FLAT WASHER then the CHARCOAL GRILL HOOD then the DAMPER then another FLAT WAHSER then a LOCK WASHER and then secured with a HEX NUT. -
Page 18: Flare-Up Shield
Step 19 Set the POT STAND in place over the SIDE BURNER. Next install the three (3) FLARE- UP SHIELDS over the BURNER TUBES then hang the FIRE GRATE/ ASH PAN from the FIRE GRATE HANGERS on the catch tabs that are welded to the inside of the CHAR- COAL GRILL BODY sides. -
Page 19: Leg Brace.
Step 21 1. Place a standard 20 lb. Type 1 LP gas cylinder (see below, not included) into the cart assembly and connect the cylinder with the gas hose/regulator as shown. (See page 19 for further instructions). 2. Turn the Screw on the left side of the base panel clockwise to secure the stand- ard 20 lb. - Page 20 Step 22 Install Igniter battery by turning the Igniter push button cap counter-clockwise until the igniter button detaches, then install a AA battery making sure the positive(+) end is under the push button. Then re-attach the igniter button by turning it clockwise. Press the igniter button and make sure all 3 igniters that are attached to the burner tubes are creating a spark.
- Page 21 Fully Assembled Caution: Use only the regulator provided! If a replacement is necessary, please call our customer service department, 912- 638-4724. Do NOT use replacement parts that are not intended for this grill. Hint: The paper label that is affixed to the hood is more easily removed when the hood is warm.
-
Page 22: Cooking Grate
Lighting Burner With a Match: 1. Place a match in the end of the match holder that is installed on the side of Grill Housing. Once lit, immediately place the flame through the cooking grates as shown near the burner ports. 2. -
Page 23: Side Burner
Side Burner 1. Open lid during lighting. Lid must be open when burner is on. 2. Burner valves must be in the “off” position. 3. Open cylinder valve. 4. Push in side burner valve knob fully and rotate slowly about ¼ turn counter- clockwise until a click is heard. -
Page 24: Connecting Gas Cylinder
Connecting Gas Cylinder: The propane gas supply cylinder to be used must be constructed and marked in accordance with the Specifications for propane gas Cylinders of the U.S. Depart- ment of Transportation (DOT), or the National Standard of Canada, CAN/CSA B339, Cylinders, Spheres and Tubes for Transportation of Dangerous Goods;... - Page 25 GRILL PREPARATION & OPERATING INSTRUCTIONS PLEASE NOTE: NO RETURNS ON USED GRILLS Read all safety warnings and instructions carefully before assembling and operating your grill. 1. Note: The interior of the grills are not painted, they are coated with vegetable oil. DO NOT remove this coating.
-
Page 26: Cleaning The Burner Assembly
Cleaning the Burner Assembly • Remove grease collector. • Remove cooking grates and heat shield. • Remove burner by unscrewing nut from beneath burner “foot” using a screw- driver and pliers. • Lift burner up and away from gas valve orifice. •... - Page 27 Stand in front of the grill to operate the controls. Note: Before starting the grill, check for leaks. Make sure the regulator valve is securely fastened to the burner and the cylinder. To prevent fire or explosion hazard when testing for a leak: 1.
-
Page 28: Lighting Your Grill
Lighting Your Grill Danger: Failure to open hood while igniting the grill or not waiting 5 minutes to al- low the gas to clear if the grill does not light, may result in an explosive flare-up which can cause serious bodily injury or death. Before cooking on this grill for the first time, operate the grill for about 15 minutes with the lid closed and the gas turned on “high”. - Page 29 Gas Grill Trouble Shoo ng Problem Possible Cause Preven on/Cure Burner will not light Wires/or electrode cov‐ Clean wire and/or electrode, with rub‐ using knobs ered with cooking residue. bing alcohol Electrode and burners are Wipe dry with cloth wet. Electrode cracked or bro‐...
- Page 30 Gas Grill Troubleshooting, continued Prevention/Cure Problem Possible Cause Flame is yellow or or- New burner may have resid- Burn Grill for 15 minutes ange. ual Manufacturing oils. with the lid closed. Insect nests in venturi. Clean venturi. Food residue, grease or sea- Clean burner.
-
Page 31: Grease Tray
GRILL PREPARATION & CHARCOAL GRILL OPERATING INSTRUCTIONS PLEASE NOTE: NO RETURNS ON USED GRILLS Read all safety warnings and instructions carefully before assembling and operating your grill. 1. Note: The interior of the grills are not painted, they are coated with vegetable oil. DO NOT remove this coating. - Page 32 GRILLING RECIPES DIRECT METHOD STEAK (& ALL MEATS): Cook food directly above coals/heat. Generally speaking, to grill meats, raise fire grate to high position (hot) and sear for one minute on each side with the lid open to seal in flavor and juices. Then lower fire grate to medium position with lid closed and cook to desire doneness.
- Page 33 KABOBS: Alternating on skewers any combination of meat, onions, tomatoes, green peppers, mushrooms, zucchini, circular slice of corn-on-the-cob, or pineapple. Meat could consist of chunks of shrimp, scallops, lobster, chicken, sausage, pork, beef, etc. Marinate the meat in refrigerator for several hours. Grill each side approximately 7 minutes turning occasionally while basting with marinade.
- Page 34 SMOKIN’ RECIPES: using the Charcoal Grill side of the Duo with a WATER PAN (also called INDIRECT METHOD). Pan not included. Disposable bread pan is recommended. SMOKE BY COOKING SLOWLY (See chart on page 27 for smoking times). 1) Place water/drip pan on left side of fire grate.
- Page 35 SMOKED HOT DOGS STUFFED: Slit hot dogs lengthwise, within 1/4 inch of each end. Stuff hot dogs with cheese and relish and wrap in bacon. Place on cooking grid over drip pan and smoke 15-20 minutes or until bacon is crisp. SMOKED CHICKEN PARTS AND HALVES: Rinse pieces in cold water and pat dry with paper towels.
- Page 36 CHICKEN MARINADE: Combine 1/2 cup soy sauce, 1/4 cup vegetable oil, 1/4 cup red wine vinegar, 1 teaspoon oregano, 1/2 teaspoon sweet basil, 1/2 teaspoon gar- lic powder with parsley, 1/4 teaspoon pepper. Pour over chicken pieces in nonmet- al dish. Cover and refrigerate overnight, turning occasionally. Use marinade to baste chicken while cooking.
- Page 37 Page intentionally left blank for notes OM5252 B.2 ™ & © Char-Griller / A&J Mfg.
- Page 38 P.O. Box 30864 Sea Island, GA 31561 912-638-4724 www.CharGriller.com Warranty Information – Gas Grill Char-Griller® will repair or replace any defective part of its grillers/ smokers for a period of up to one year from the date of purchase. Char-Griller® will also repair or replace the body (lid and bottom half) of its grillers/smokers if the metal is rusted through or burned through for a period up to five years.
Need help?
Do you have a question about the 5252 and is the answer not in the manual?
Questions and answers