ACP Microwave Oven Owner's Manual
Hide thumbs
Also See for Microwave Oven:
- Owner's manual (13 pages) ,
- Owner's manual (12 pages) ,
- Owner's manual (16 pages)
Table of Contents
Advertisement
Available languages
Available languages
Quick Links
Owner's Manual
C
M
ommercial
Keep these instructions for future reference.
If the oven changes ownership, this manual
must accompany oven.
O
icrowave
ven
Contents
........................... 2
P
RECAUTIONS TO AVOID POSSIBLE
EXPOSURE TO EXCESSIVE
MICROWAVE ENERGY
I
MPORTANT SAFETY INSTRUCTIONS
......................... 5
......................................... 5
................................. 12
.......................... 13
...................
3
... 3
........................ 6
........................ 8
........................ 9
...................... 10
.......................11
............... 14
Advertisement
Table of Contents

Related Manuals for ACP Microwave Oven


Summary of Contents for ACP Microwave Oven
- Page 1 Owner’s Manual Contents ......2 RECAUTIONS TO AVOID POSSIBLE EXPOSURE TO EXCESSIVE ....MICROWAVE ENERGY ... 3 MPORTANT SAFETY INSTRUCTIONS ......5 ......... 5 ......6 ommercial icrowave ......8 ......9 Keep these instructions for future reference....... 10 If the oven changes ownership, this manual .......11 must accompany oven.
- Page 2 0RGHO ,GHQWLÀFDWLRQ _____________________________ _______________________ ________________________ ___________________________ ___________________ __________________________________________ __________________________________________ __________________________________________...
-
Page 3: Important Safety Instructions
IMPORTANT SAFETY INSTRUCTIONS Recognize this symbol as a SAFETY message WARNING PRECAUTIONS TO AVOID POSSIBLE EXPOSURE TO EXCESSIVE MICROWAVE ENERGY A. DO NOT B. DO NOT DO NOT SAVE THESE INSTRUCTIONS... - Page 4 IMPORTANT SAFETY INSTRUCTIONS WARNING WARNING CAUTION Popping time varies depending on oven wattage. Do not SAVE THESE INSTRUCTIONS...
- Page 5 Installation Unpacking Oven WARNING Do not attempt to use oven if damaged. WARNING Radio Interference Care and Cleaning Grounding/Earthing Instructions Oven MUST be grounded. Oven Placement Do not use an extension cord. Oven Clearances Oven Stacking External Equipotential Earthing Terminal (export only)
-
Page 6: Manual Time Entry
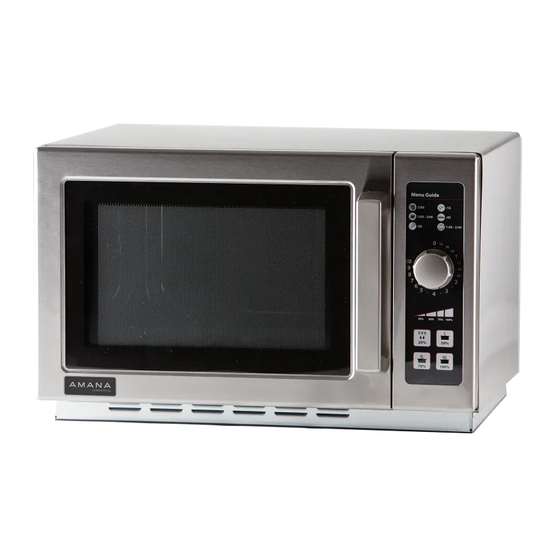
Display and Features (some models) Single Key Programming (example of key 1 shown) START Key Double Key Programming STOP/RESET Key (some models) Manual Time Entry 10 Programmable QTY X2 Key Hold Keys 20% Power Defrost Braille Touch Keys 50% Power 70% Power Time Entry Programming the Oven Control. -
Page 7: Cooking Displays
Display and Features (some models) Cooking Display DISPLAYS DESCRIPTION READY displays when oven control will accept READY entries. Displays cooking time. If stage cooking is 00:00 programmed, total cooking time is displayed. HOLD Display These settings display the current power level used Some items in the display can be seen for the microwave. -
Page 8: Using The Oven Control
Using the Oven Control (Electronic Control) Manual Time Entry Interrupting Operation READY READY 0000 POWER LEVEL QTY X2 Key POWER, COOK LEVEL READY Programmed Keys READY Programming the Oven Control User Options POWER Factory Settings Time Time 10 sec. 1:30 min. 20 sec. -
Page 9: Programming The Oven Control
Programming the Oven Control (Electronic Control) The display shows Programming Keys PROGRAM User Option PROGRAM READY User Option PROGRAM Canceling Mistakes PROGRAM QTY X2 Programming Programming Multiple Stages... -
Page 10: Changing User Options
User Options (Electronic Control) Changing user options Didn’t like an option? My changes weren’t saved. 0P: -- 0P: -- Numbered Keys Display Options (Factory Settings in Bold) OP:10 3 second continuous beep. End of Cycle Beep OP:11 Continuous beep until door is opened. OP:12 5 beeps bursts until door is opened. -
Page 11: Digital Dial Operation
Digital Dial Operation Dial option is available on some models only. Oven Wall Clearances of 0.2 Ohms DO NOT power spray No metal pans So...how do I use it? (Digital Dial) Heating Interrupting Operation Changing Time and Canceling Mistakes... -
Page 12: Dial Operation
Dial Operation Dial option is available on some models only. Oven Wall Clearances of 0.2 Ohms No metal pans DO NOT power spray So...how do I use it? (Dial) Heating 100% Interrupting Operation Changing Time and Power/Canceling Mistakes... -
Page 13: Care And Cleaning
PART CARE AND CLEANING RECOMMENDATION Clean microwave oven with mild detergent in warm water using soft sponge or cloth. Wring sponge or cloth to remove excess water before wiping equipment. If desired, boil a cup of water in microwave oven to loosen soil before cleaning. -
Page 14: Before Calling For Service
Before Calling for Service C on rm oven is p lug ged into dedic ated circu it. C on rm oven is o n g round ed a nd p olarized c ircuit. O ven does not opera te. (C ontact e lectric ian to con rm ) C hec k fuse or circuit break er. - Page 15 Manual del Propietario Contenido RECAUCIONES PARA EVITAR UNA POSIBLE EXPOSICIÓN A UN EXCESO ..DE ENERGÍA DE MICROONDAS .. 3 MPORTANTES NORMAS DE SEGURIDAD Horno Microondas Comercia Conserve estas instrucciones como material de referencia. Si el horno cambiara de dueño, cerciórese de que vaya acompañado del manual.
- Page 16 ,GHQWLÀFDFLyQ GHO 0RGHOR...
- Page 17 IMPORTANTES NORMAS DE SEGURIDAD Reconozca este símbolo como mensaje de SEGURIDAD ADVERTENCIA PRECAUCIONES PARA EVITAR UNA POSIBLE EXPOSICIÓN A UN EXCESO DE ENERGÍA DE MICROONDAS GUARDE ESTAS INSTRUCCIONES...
- Page 18 IMPORTANTES NORMAS DE SEGURIDAD ADVERTENCIA ADVERTENCIA ATENCIÓN El tiempo necesario para que empiecen a saltar las palomitas varía de acuerdo con el vatiaje del horno. GUARDE ESTAS INSTRUCCIONES...
- Page 19 Instalación Desempaque del Horno ADVERTENCIA Si el horno ha sufrido algún daño, no intente utilizarlo. ADVERTENCIA Interferencia de Radio Cuidado y Limpieza Instrucciones de Puesta a Tierra El horno DEBE ponerse a tierra. Ubicación del Horno No utilice cables de extensión. A—...
- Page 20 Pantalla y Funciones (algunos modelos) Programación de Tecla Simple (se muestra como ejemplo la tecla 1) Tecla START (ARRANCAR) Programación de Dos Teclas (algunos modelos) Tecla STOP/RESET (PARAR/RESTABLECER) Ingreso de Tiempo Manual Tecla X2 10 Teclas Programables Retener, Mantener Descongelar, 20% Potencia Teclas Táctiles Braille 50% Potencia Programación de los Controles del Horno.
- Page 21 Pantalla y Funciones (algunos modelos) Pantalla de Cocción MUESTRA DESCRIPCIÓN La pantalla indica READY (LISTO) cuando el READY control del horno está listo para aceptar entradas. Muestra el tiempo de cocción. Si se programa una 00:00 etapa de cocción, aparece el tiempo total de cocción. Pantalla HOLD Estos ajustes muestran el nivel actual de potencia...
- Page 22 Uso de los Controles del Horno (Control Electrónico) Ingreso de Tiempo Manual Para Interrumpir el Funcionamiento READY READY POWER LEVEL Tecla X2 POWER, COOK LEVEL READY Teclas Programadas READY Programación de los Controles del Horno Opciones para el Usuario POWER Ajustes de Fábrica Tecla Tiempo...
- Page 23 Programación de los Controles del Horno (Control Electrónico) La pantalla Programación de las Teclas indica Opciones para el Usuario READY Opciones para el Usuario. Para Cancelar Errores Programación de X2 Programación de Etapas Múltiples...
- Page 24 Opciones para el Usuario (Control Electrónico) Cambio de las opciones para el usuario ¿No le gusta una opción? Mis cambios no están guardados. Teclas Numéricas Pantalla Opciones (Ajustes de Fábrica en Negritas) OP:10 Pitido continuo de 3 segundos. Pitido de Fin de Ciclo OP:11 Pitido continuo hasta que se abra la puerta.
- Page 25 Operación con Cuadrante Digital ESTILO 1 La opción de cuadrante está disponible sólo en algunos modelos. Espacio Libre Alrededor de las Paredes del Horno 0,2 ohm NO rocíe con pistola No use cacerolas metálicas Y entonces... ¿cómo lo uso? (Cuadrante Digital) Para Cocinar Para Interrumpir el Funcionamiento Para Cambiar el Tiempo de Cocción y...
- Page 26 Operación con Cuadrante Digital ESTILO 2 La opción de cuadrante está disponible sólo en algunos modelos.
- Page 27 Operación con Cuadrante ESTILO 3 La opción de cuadrante está disponible sólo en algunos modelos. Espacio Libre Alrededor de las Paredes del Horno 0,2 ohm No use cacerolas metálicas NO rocíe con pistola Y entonces... ¿cómo lo uso? (Cuadrante) Para Cocinar 100% Para Interrumpir el Funcionamiento Para Cambiar el Tiempo y la Potencia de Cocción y...
-
Page 28: Cuidado Y Limpieza
Cuidado y Limpieza PIEZA RECOMENDACIÓN SOBRE EL CUIDADO Y LA LIMPIEZA Limpie el microondas aplicándole una solución de detergente suave y agua tibia mediante una esponja o un trapo sin asperezas. Antes de limpiar el equipo, elimine el exceso de agua en la esponja o el trapo. - Page 29 2. Desenchufe el horno, espere 1 minuto y vuelva a enchufar el horno. Es posible que la desconexión del suministro eléctrico pueda eliminar el código de servicio. Si el fallo persiste, llame a ACP ComServ libre de cargo al 1-866-426-2621 dentro de EE.UU. o Canadá.
- Page 30 Manuel du propriétaire Table des matières RÉCAUTIONS POUR ÉVITER LE RISQUE ’ EXPOSITION À UN RAYONNEMENT ... 3 EXCESSIF DES MICRO ONDES .. 3 ONSIGNES DE SÉCURITÉ IMPORTANTES Four à micro-ondes commercial Conserver ces instructions pour les consulter ultérieurement. Si le four change de propriétaire, ce manuel doit être joint au four.
- Page 31 ,GHQWLÀFDWLRQ GX PRGqOH...
- Page 32 CONSIGNES DE SÉCURITÉ IMPORTANTES Ce symbole est associé à une consigne de SÉCURITÉ AVERTISSEMENT PRÉCAUTIONS POUR ÉVITER LE RISQUE D’EXPOSITION À UN RAYONNEMENT EXCESSIF DES MICRO-ONDES NE PAS NE PAS NE PAS CONSERVER CES INSTRUCTIONS...
- Page 33 CONSIGNES DE SÉCURITÉ IMPORTANTES AVERTISSEMENT AVERTISSEMENT ATTENTION Le temps d’éclatement varie selon la puissance du four. CONSERVER CES INSTRUCTIONS...
- Page 34 Installation Déballage du four AVERTISSEMENT Ne pas essayer d’utiliser le four s’il est endommagé. AVERTISSEMENT Interférence radioélectrique Entretien et nettoyage. Instructions de mise à la terre Le four DOIT être mis à la terre. Emplacement du four Ne jamais utiliser de rallonge électrique.
- Page 35 Programmation à touche unique (illustration de la touche 1) Touche DÉMARRER Programmation à deux touches (sur certains modèles) Touche ARRÊT/RÉINITIALISER Entrée manuelle du temps de cuisson Touche X2 10 touches programmables Temps d’arrêt Puissance de décongélation 20 % Touches Braille Puissance 50 % Programmation des commandes du four.
- Page 36 Affichage de cuisson AFFICHAGES DESCRIPTION READY (PRÊT) s’affiche lorsqu’une commande de READY four peut accepter des entrées. Affiche le temps de cuisson. Si une cuisson par 00:00 étapes est programmée, le temps total de cuisson s’affiche. HOLD Ces réglages affichent le niveau de puissance actuel utilisé...
- Page 37 Utilisation des commandes du four Entrée manuelle du temps de cuisson Interruption du fonctionnement READY READY ( POWER LEVEL Touche X2 POWER LEVEL, COOK LEVEL ( Touches programmées READY READY Programmation des commande du four Options de l’utilisateur POWER Réglages en usine Touche Temps de cuisson Touche...
- Page 38 Touches de programmation indique Options de l’utilisateur READY Options de l’utilisateur. Annulation des erreurs Programmation X2 Programmation des étapes multiples...
- Page 39 Options de l’utilisateur Une option ne convient pas? pas été enregistrées. Options Touches numériques Afficheur (les réglages d'usine sont en indiqués en caractères gras) OP:10 Bip continu de 3 secondes. Bip de fin de cycle OP:11 Bip continu jusqu’à ce que la porte soit ouverte. OP:12 5 bips soudains jusqu’à...
- Page 40 STYLE 1 L’option avec sélecteur est disponible sur certains modèles seulement. Dégagements du four par rapport au mur 0,2 ohm NE PAS nettoyer avec un Pas de plats en métal pulvérisateur à moteur Cuisson Interruption du fonctionnement Changement de la durée de cuisson et annulation des erreurs...
- Page 41 STYLE 2 L’option avec sélecteur est disponible sur certains modèles seulement.
- Page 42 Utilisation du sélecteur STYLE 3 L’option avec sélecteur est disponible sur certains modèles seulement. Dégagements du four par rapport au mur 0,2 ohm Pas de plats en métal NE PAS nettoyer avec un pulvérisateur à moteur Cuisson 100% Interruption du fonctionnement Changement de la durée de cuisson et de la puissance/annulation des erreurs...
-
Page 43: Entretien Et Nettoyage
Entretien et nettoyage PIÈCE RECOMMANDATION POUR L’ENTRETIEN ET LE NETTOYAGE Nettoyer le four à micro-ondes avec un détergent doux dans de l'eau tiède, en utilisant une éponge ou un chiffon doux. Essorer l’éponge ou le chiffon pour expulser l’excès d’eau avant d’essuyer l’équipement. - Page 44 Débrancher l’alimentation électrique risque de supprimer le code de service. Si la défaillance persiste, communiquer avec le service à la clientèle ACP ComServ sans frais en composant le 1 866 426-2621 aux États-Unis ou au Canada. Placer une tasse d’eau dans le four.
-
Page 45: Table Of Contents
Benutzerhandbuch Inhalt Modellkennzeichnung ......2 ORSICHTSMASSNAHMEN GEGEN MÖGLICHE ÜBERMÄSSIGE ...3 MIKROWELLENBESTRAHLUNG ..3 ICHTIGE SICHERHEITSHINWEISE Erdungsanleitung ........5 Aufbau .............5 Anzeige und Funktionen ......6 Benutzung des Tastenfelds (bei Modellen Gewerbliches Mikrowellengerät mit elektronischer Bedienung) .....8 Diese Anleitung zur späteren Bezugnahme aufbewahren. Programmierung des Tastenfelds Im Falle eines Besitzerwechsels muss dieses Handbuch (bei Modellen mit elektronischer dem Gerät beigefügt werden. - Page 46 0RGHOOLGHQWLÀ]LHUXQJ Wenn Sie sich mit ACP in Verbindung setzen, geben Sie bitte Innerhalb der Garantiezeit erforderlicher Service muss von einem befugten ACP-Kundendienstunternehmen die folgenden Informationen auf: der Garantie, dass Sie sich bei Servicebedarf an ein befugtes ACP-Kundendienstunternehmen wenden. Modellnummer: ________________________________ Herstellungsnummer: ___________________________ Seriennummer oder S/N-Nr.: ______________________...
-
Page 47: Vorsichtsmassnahmen Gegen Mögliche Übermässige Mikrowellenbestrahlung
WICHTIGE SICHERHEITSHINWEISE Dieses Symbol kennzeichnet SICHERHEITSHINWEISE WARNUNG geöffnet und der Inhalt vor dem Verzehr gerührt oder Anweisungen LESEN. geschüttelt werden, um Verbrennungen zu vermeiden. LESEN UND BEFOLGEN. Für die Wartung sind Spezialwerkzeuge erforderlich. den in diesem Handbuch enthaltenen Installationsanweisungen installieren bzw. aufstellen. oder blockieren. - Page 48 WICHTIGE SICHERHEITSHINWEISE WARNUNG WARNUNG Folgendes beachten, um die Gefahr eines Brandes im Flüssigkeiten, wie beispielsweise Wasser, Kaffee oder Flüssigkeiten über ihren Siedepunkt hinaus erhitzt werden, ohne dass dies erkennbar ist. Nicht immer zeigt beaufsichtigen, wenn Papier, Plastik oder andere sich ein Brodeln oder Aufwallen der Flüssigkeit, wenn das entzündbare Materialien zur Unterstützung des Drahtverschlüsse von Papier- oder Kunststofftüten von Körperverletzungen zu vermeiden:...
-
Page 49: Aufbau
Aufbau Auspacken des Geräts WARNUNG um die Gefahr eines elektrischen Nicht versuchen, ein beschädigtes Gerät zu betreiben. Schlags oder Todesgefahr zu verhindern. an das Netz einige Stunden warten. WARNUNG Funkstörungen Um die Gefahr eines elektrischen Schlags oder Todesgefahr zu vermeiden, darf der Netzstecker Erdungshinweise Abschnitt reinigen. -
Page 50: Anzeige Und Funktionen
Anzeige und Funktionen (einige Modelle) START-Taste Ein-Tasten-Programmierung (gezeigtes Beispiel: Taste 1) begonnen. Diese Taste wird ebenfalls zur und Leistungsstufe programmiert werden. Die gewünschte Taste einmal drücken, um den programmierten Garvorgang zu starten. verwendet. Zwei-Tasten-Programmierung STOP/RESET-Taste (bestimmte Modelle) ein laufender Garvorgang beendet, die Programmierzyklus bzw. - Page 51 Anzeige und Funktionen (einige Modelle) Garzeitanzeige ES WIRD ANGEZEIGT BESCHREIBUNG READY (BEREIT) wird eingeblendet, wenn das READY Gerät für die Programmierung bereit ist. Zeigt die Garzeit an. Wurde stufenweises Garen 00:00 programmiert, wird die Gesamtlaufzeit angezeigt. Anzeige HOLD Diese Einstellungen zeigen die aktuelle Leistungsstufe Es ist möglich, dass einige Elemente der Mikrowelle an.
-
Page 52: Benutzung Des Tastenfelds (Bei Modellen Mit Elektronischer Bedienung)
Benutzung des Tastenfelds (Modelle mit elektronischer Bedienung) Unterbrechen Manuelle Zeiteingabe des Betriebs Tür oder durch Drücken der STOP/ READY eingeschaltet. Auf der Anzeige wird weiterhin die READY leuchten auf. Wiederaufnehmen des Betriebs die den Vorgang wiederholen. POWER LEVEL (LEISTUNGSSTUFE) Taste X2 und die entsprechende Einstellung. - Page 53 Programmierfunktionen (Modelle mit elektronischer Bedienung) Auf der Anzeige wird Programmierungstasten eingeblendet Tasten-Programmierung möglich ist, siehe den Abschnitt Programmierung eingestellt wurde, . Der Wert der Garzeit oder die Leistungsstufe einer erscheint bei der Programmierung der auf der READY Anzeige. Um die Standardeinstellung Programmiermodus wird verlassen.
- Page 54 (Modelle mit elektronischer Bedienung) Soll eine ursprüngliche Einstellung wiederhergestellt werden? und maximale Einschaltdauer können individuell eingestellt werden. Die Die werkseitigen Einstellungen sind fett gedruckt. Wenn die wiederhergestellt werden sollen, brauchen lediglich die fett gedruckten und der Programmiermodus wird verlassen. Wurden die vorgenommenen Änderungen nicht gespeichert?
-
Page 55: Bedienung)
Betrieb mit der Digital-Drehknopf-Bedienung Stil 1 Drehknöpfe sind nur an einigen Modellen vorhanden. Einbauabstände zur Wand Der Schaltvorgang dieses A — Bei Modellen für den nordamerikanischen Speiseleitung Spannungsschwan- Markt (UL/CSA) an der Oberseite des kungen verursachen. Unerwünschte Versorgungsspannungsbedingungen einhalten. Bei internationalen Modellen Anschluss an ein Stromversorgungsnetz 0,2 Ohm am Anschlusspunkt der Stromversorgung... -
Page 56: Bedienung)
Betrieb mit der Digital-Drehknopf-Bedienung Stil 2 Drehknöpfe sind nur an einigen Modellen vorhanden. - Page 57 Betrieb mit der Drehknopf-Bedienung Stil 3 Drehknöpfe sind nur an einigen Modellen vorhanden. Einbauabstände zur Wand Der Schaltvorgang dieses A — Bei Modellen für den nordamerikanischen Speiseleitung Spannungsschwan- Markt (UL/CSA) an der Oberseite des kungen verursachen. Unerwünschte Versorgungsspannungsbedingungen einhalten. Bei internationalen Modellen Anschluss an ein Stromversorgungsnetz 0,2 Ohm am Anschlusspunkt der Stromversorgung...
- Page 58 TEIL PFLEGE- UND REINIGUNGSEMPFEHLUNGEN Zum Reinigen des Geräts einen Schwamm oder ein weiches Tuch in eine Lösung aus mildem Reinigungsmittel und warmem Wasser tauchen. Den Schwamm oder das Tuch gut auswringen. Vor dem Reinigen ggf. eine Tasse Wasser im Gerät kochen lassen, um den Schmutz zu lösen.
-
Page 59: Bevor Sie Den Kundendienst Anrufen
2. Den Stecker des Geräts aus der Steckdose ziehen, eine Minute lang warten und den Stecker wieder einstecken. das Gerät weiterhin nicht funktioniert, ACP ComServ gebührenfrei unter 1-866-426-2621 (in den USA und Kanada) anrufen. Gerät läuft, das Kochgut wird jedoch Das Gerät eine Minute lang mit voller Leistung (100 %) betreiben.
Need help?
Do you have a question about the Microwave Oven and is the answer not in the manual?
Questions and answers