Table of Contents
Advertisement
Quick Links
Download this manual
See also:
User Manual
Advertisement
Table of Contents

Subscribe to Our Youtube Channel
Related Manuals for Alto HPA6


Summary of Contents for Alto HPA6
- Page 1 OWNER'S MANUAL HPA6 6-CHANNEL HEADPHONE AMPLIFIER www.altoproaudio.com Version 2.4 SEPTEMBER 2007 English...
-
Page 2: Important Safety Instruction
IMPORTANT SAFETY INSTRUCTION CAUTION WARNING To reduce the risk of electric shock RISK OF ELECTRIC SHOCK and fire, do not expose this equipment DO NOT OPEN to moisture or rain. TO REDUCE THE RISK OF ELECTRIC SHOCK PLEASE DO NOT REMOVE THE COVER OR Dispose of this product should THE BACK PANEL OF THIS EQUIPMENT. -
Page 3: In This Manual
7. WARRANTY...................10 1. INTRODUCTION Thank you for your purchasing of the HPA6, 6-channel headphone amplifier . It is just one of the many Alto products that a talented, multinational T eam of Audio Engineers and Musicians have developed with their great passion for music. Y our HPA6 has been designed for applications such as recording, broadcast and Live events. -
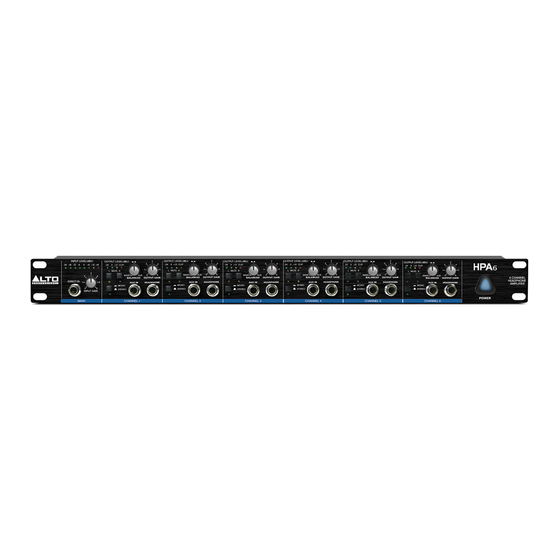
Page 4: Control Elements
MAIN SECTION: 1 DIRECT IN You can use this socket to feed and additional stereo signal into your HPA6. This socket is in "priority". It means that when you insert the jack, the signal fed into the MAIN input on the rear panel will be disconnected. - Page 5 When the MODE switch is engaged this Led will light up. 8 HEADPHONE OUT This connector is wired in parallel with the correspondent output connector on the rear panel. It is useful to connect headphones when your HPA6 is installed into a rack. 9 BALANCE CONTROL This knob has a double function.
- Page 6 These connectors are used to output the stereo signal via the balanced 1/4" TRS phone jack or XLR connector . Y ou can also use these connectors to link as many additional HPA6 as you wish if you need to use many headphones channels. 15 HEADPHONE OUT (1 to 12) These are 12 additional outputs for headphone (two for every channel) wired in parallel with the output available on the front channel.
-
Page 7: Using The Main In Connectors
First connect a signal source to the MAIN IN connectors on the rear panel of your HPA6. Set the Input Gain (Main section) and the Balance control (Channel section) on center position. Output gain of each channel must be turned down at this stage. -
Page 8: Rack Mounting
6 different musicians. Connect the Aux Sends or Subgroups outputs directly to the AUX IN input of your HPA6. Y ou need a mixer with 6 Aux sends output or with 6 subgroups such as the Alto L Series mixer . Now rotate the BALANCE control on your HPA6 fully to the left. -
Page 9: Installation And Connection
4.1 Mains Connection Please ensure that the HPA6 is set to the correct supply voltage before plugging the power cord into the wall outlet, use the same fuse as marked on the fuse holder at the AC power connection socket. The mains connection of the HPA6 is made by using the enclosed mains cord and a standard IEC receptacle. - Page 10 5. INSTALLATION AND CONNECTION Balanced Ring Ring SLEEVE RING TIP TIP RING SLEEVE Sleeve Sleeve Ring Sleeve TIP RING SLEEVE Unbalanced Ring TIP RING SLEEVE Sleeve TIP SLEEVE Sleeve Centre Screen TIP SLEEVE SLEEVE TIP Sleeve Sleeve Ring Ring TIP RING SLEEVE SLEEVE RING TIP Sleeve Sleeve...
-
Page 11: Technical Specification
6. TECHNICAL SPECIFICATION AUDIO INPUT Main Input XLR and 1/4" jack Connectors Type RF filtered, servo balanced input Impedance 50 kOhms balanced, 25 kOhms unbalanced Max. input level +21 dBu balanced and unbalanced(unity gain) typ.40 dB, >55 dB @ 1kHz CMRR AUX IN and DIRECT IN input Connectors... -
Page 12: Warranty Registration Card
7. WARRANTY 1. WARRANTY REGISTRATION CARD To obtain Warranty Service, the buyer should first fill out and return the enclosed Warranty Registration Card within 10 days of the Purchase Date. All the information presented in this Warranty Registration Card gives the manufacturer a better understanding of the sales status, so as to provide a more effective and efficient after-sales warranty service. - Page 13 SEIKAKU TECHNICAL GROUP LIMITED NO. 1, Lane 17, Sec. 2, Han Shi West Road, Taichung 40151, Taiwan http://www.altoproaudio.com Tel: 886-4-22313737 email: alto@altoproaudio.com Fax: 886-4-22346757 All rights reserved to ALTO. All features and content might be changed without prior notice. Any photocopy, translation, or reproduction of part of this manual without written permission is forbidden.
Need help?
Do you have a question about the HPA6 and is the answer not in the manual?
Questions and answers