
Related Manuals for Alto HPA4


Summary of Contents for Alto HPA4
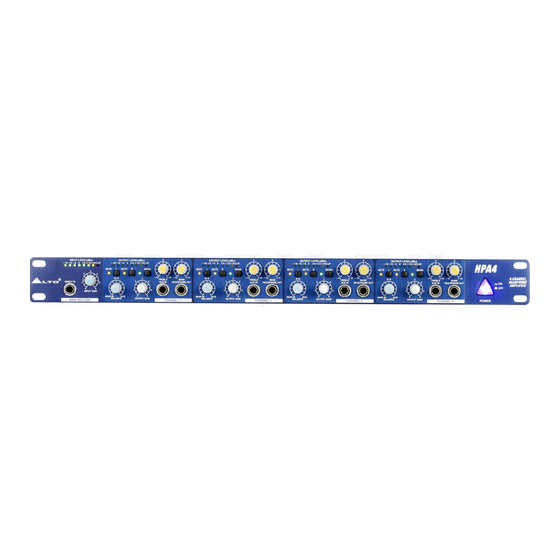
- Page 1 User's Manual HPA4 4-Channel HEADPHONE AMPLIFIER www.altoproaudio.com Version 2.0 February 2003 English...
- Page 2 the recommended fuse type as indicated in this SAFETY RELATED SYMBOLS manual. Do not short-circuit the fuse holder. Before replacing the fuse, make sure that the product is CAUTION OFF and disconnected from the AC outlet. RISK OF ELECTRIC SHOCK DO NOT OPEN Protective Ground This symbol, wherever used, alerts you to the pre-...
- Page 3 HPA4 4-Channel Headphone Amplifier is the result of many hours of listening and tests involving common people, area experts, musicians and technicians.
-
Page 4: Table Of Contents
Wiring Configuration b. In Line Connection 4.3 Rack Mounting 5. APPLICATION............................8 5.1 Use the HPA4 as a Headphone Amplifier 5.2 Use the HPA4 as Independent Power Amplifiers 5.3 The HPA4 in Studio Application 5.4 The HPA4 in Mono/Stereo Application 6. -
Page 5: Introduction
The HPA4 4-Channel Headphone Amplifier provides Main Inputs on the rear panel and Direct In Input on the front panel to drive any or all of the 4 stereo headphone amplifiers, when using the Direct In Input, the Main Inputs signal will be interrupted automatically, the Main Outputs on the rear panel can be used to interlink any number of HPA4s for expanding. - Page 6 1. Direct In Input The Direct In Input is used to feed the external program sources into the main signal path, comparing to the Main Input on the rear panel, this input presents the priority character. 2. Input Gain Control This control sets the input signal level coming from Main In.
-
Page 7: The Rear Panel
3.2 The Rear Panel PUSH PUSH AC INPUT 110-120V TIP/PIN 2 TIP/PIN 2 TIP/PIN 2 TIP/PIN 2 95-120V /210-240V 60-50Hz RING/PIN 3 RING/PIN 3 RING/PIN 3 RING/PIN 3 Rated Power Consumption 40W SLEEVE/PIN 1 SLEEVE/PIN 1 SLEEVE/PIN 1 SLEEVE/PIN 1 220-240V FUSE: TIDE... -
Page 8: Installation & Connection
XLR Type alanced b. In Line Connection For these applications, the HPA4 4-Channel Headphone Amplifier provides XLR connectors and 1/4" TRS phone jack to easily interface with most professional audio devices. Follow the configuration examples below for your particular connection. -
Page 9: Rack Mounting
This is the basic application for HPA4 4-Channel Headphone Amplifier. While using the HPA4 as a Headphone Amplifier, please apply the program source to Main / Direct In Inputs, and connect the headphone cable to one of the appropriate outputs. Ensure the Balanced Control adjusted to the complete counter-clockwise position, and turn up the Input Gain control. -
Page 10: Use The Hpa4 As Independent Power Amplifiers
5.2 Use the HPA4 as Independent Power Amplifiers Instead of using the HPA4 as the Headphone Amplifier, in many particular circumstances, it can also be conducted as the independent power amplifiers, as for this kind of application, please turn the Balanced Control to complete clockwise. -
Page 11: The Hpa4 In Mono/Stereo Application
5.4 The HPA4 in Mono / Stereo Application The HPA4 4-Channel Headphone Amplifier can be switched between the Mono and Stereo operational mode via Mode Switch control. Press the Mode Switch for Mono application, the Mono LED (8) lights up. In Mono application, the input two signals are combined together and the resulting mono signal routes to both the Left and Right Head- phone Out Outputs. -
Page 12: Technical Specifications
6. TECHNICAL SPECIFICATIONS AUDIO INPUT MAIN input X R and 1/4" jack Connectors Type HF filtered, servo balanced input Impedance 40 kOhms balanced, 20 kOhms unbalanced Max.input level +21 dBu balanced and unbalanced typ.40 dB, >55 dB @ 1kHz CMRR AUX IN and DIRECT IN input 1/4"... -
Page 13: Warranty
7. WARRANTY 1. WARRANTY REGISTRATION CARD To obtain Warranty Service, the buyer should first fill out and return the enclosed Warranty Registration Card within 10 days of the Purchase Date. All the information presented in this Warranty Registration Card gives the manufacturer a better understanding of the sales status, so as to purport a more effective and efficient after-sales warranty service. - Page 14 Tel: 886-4-22313737 email: info@altomobile.com Fax: 886-4-22346757 All rights reserved to ALTO Mobile. Due to continued development in response to customer feedback, product features, specifications and/or internal/external design may be changed without prior notice. No photocopying, translation or reproduction of any part of this user manual is allowed without prior written permission.Copyright...
Need help?
Do you have a question about the HPA4 and is the answer not in the manual?
Questions and answers