Alto HPA6 User Manual
6-channel headphone amplifier
Hide thumbs
Also See for HPA6:
- User manual (14 pages) ,
- User manual (40 pages) ,
- Owner's manual (14 pages)

Related Manuals for Alto HPA6


Summary of Contents for Alto HPA6
- Page 1 User's Manual HPA6 6-Channel HEADPHONE AMPLIFIER www.altoproaudio.com Version 1.0 April 2002 English...
- Page 2 SAFETY RELATED SYMBOLS wire or disconnect the wiring of protective grounding terminal. CAUTION Operating Conditions RISK OF ELECTRIC SHOCK DO NOT OPEN This apparatus shall not be exposed to dripping or splashing and that no objects filled with liquids, This symbol, wherever it appears, alerts you such as vases, shall be placed on this apparatus.
- Page 3 HPA6 6-Channel Headphone Amplifier is the result of many hours of listening and tests involving common people, area experts, musicians and technicians.
-
Page 4: Table Of Contents
Wiring Configuration b. In Line Connection 4.3 Rack Mounting 5. Application........................8 5.1 The HPA6 as a Headphone Amplifier 5.2 The HPA6 as Independent Power Amplifiers 5.3 The HPA6 in Studio Application 5.4 The HPA6 in Mono/Stereo Application 6. Technical Specifications ....................10... -
Page 5: Introduction
Headphone Amplifier performs a number of necessary tasks, not all of which are headphone related. The HPA6 6-Channel Headphone Amplifier provides Main Inputs on the rear panel and Direct In Input on the front panel to drive any or all of the 6 stereo headphone amplifiers, when using the Direct In Input, the Main Inputs signal will be interrupted automatically, the Main Outputs on the rear panel can be used to interlink any number of HPA6s for expanding. -
Page 6: The Rear Panel
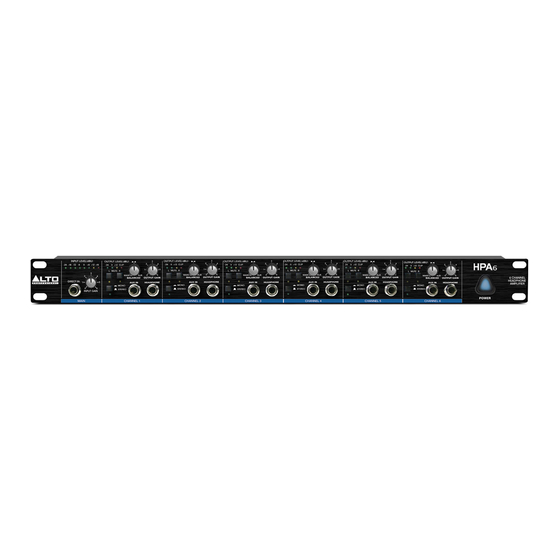
3.1 The ront anel INPUT LEVEL(dBu) OUTPUT LEVEL(dBu) 12 CLIP MUTE R MAIN IN BALANCED OUTPUT GAIN DIRECT IN AUX IN HEADPHONE OUT MONO STEREO INPUT GAIN MAIN SECTION CHANNEL 1 1.Direct In Input: The Direct In Input is used to feed the signals coming from an external source. While using the Direct In Input, the Main signal applied on the rear panel is interrupted automatically. - Page 7 13. Fuse holder / Voltage selector This is a dual voltage unit. Before you attempt to connect and operate the unit, please make sure that your local voltage matches the voltage on the fuse-holder cover. Caution: The fuse protecting the AC supplies circuits of this unit. The fuse can only be changed by a qualified technician, in the event of a fault or changing the supply voltage.
-
Page 8: Installation & Connection
AC power until voltage has been correctly set. The mains connection of the LTO HPA6 6-Channel Headphone Amplifier is made by using the en- closed mains cable and a standard IEC receptacle. It meets all of the international safety certifica- tion requirements. -
Page 9: Rack Mounting
If this is not enough, you can interlink any number of HPA6 via the Main Outputs. -
Page 10: The Hpa6 As Independent Power Amplifiers
5.2 The HPA6 as Independent Power Amplifiers In addition to use the HPA6 as the Headphone Amplifier, each of the 6-Channel's power amplifiers can also be used independently. The Aux In Inputs in combination with the Balanced Control serve this application. -
Page 11: The Hpa6 In Mono/Stereo Application
5.4 The HPA6 in Mono / Stereo Application The HPA6 6-Channel Headphone Amplifier can be switched between the Mono and Stereo operational mode via Mode Switch control. Press the Mode Switch for Mono application, the Mono LED (8) lights up. - Page 12 POWER AMPLIFIER Max.output power +21dBm Min.output impedance 100Ohms Max.gain +20dB FUNCTION CONTROLS Input level variable Balanced per channel mix between aux and main signal Output level per channel variable FUNCTION SWI CHES Left mute mutes the left signal of this channel mutes the right signal of this channel Right mute Mode...
-
Page 13: Warranty
7. WARRANTY 1. WARRANTY REGISTRATION CARD To obtain Warranty Service, the buyer should first fill out and return the enclosed Warranty Registration Card within 10 days of the Purchase Date. All the information presented in this Warranty Registration Card gives the manufacturer a better under- standing of the sales status, so as to purport a more effective and efficient after-sales warranty service.
Need help?
Do you have a question about the HPA6 and is the answer not in the manual?
Questions and answers