
Related Manuals for Kramer 910


Summary of Contents for Kramer 910
-
Page 1: User Manual
Kramer Electronics, Ltd. Preliminary USER MANUAL Model: Digital Audio Preamplifier... -
Page 2: Table Of Contents
Safety Instructions Recycling Kramer Products Quick Start Overview Your 910 Digital Audio Preamplifier Installing the 910 in a Rack Connecting the 910 Digital Audio Preamplifier Connecting the RS-232 Port Connecting the ETHERNET Port 6.2.1 Connecting the ETHERNET Port Directly to a PC (Crossover Cable) 6.2.2... - Page 3 10.15 Backward Support Figures Figure 1: 910 Digital Audio Preamplifier Figure 2: Connecting the 910 Digital Audio Preamplifier Figure 3: Local Area Connection Properties Window Figure 4: Internet Protocol (TCP/IP) Properties Window Figure 5: Connect Screen Figure 6: Device Properties Screen...
-
Page 4: Introduction
Our 1,000-plus different models now appear in 11 groups that are clearly defined by function. Thank you for purchasing the Kramer 910 Digital Audio Preamplifier, which is ideal for: • Professional audio applications • Sound studios •... -
Page 5: Achieving The Best Performance
• Avoid interference from neighboring electrical appliances that may adversely influence signal quality • Position your Kramer 910 away from moisture, excessive sunlight and dust This equipment is to be used only inside a building. It may be connected only to other equipment that is installed inside a building. -
Page 6: Quick Start
Getting Started Quick Start This quick start chart summarizes the basic setup and operation steps. -
Page 7: Overview
Overview Overview The 910 is a high-performance stereo audio preamplifier. It accepts balanced and unbalanced stereo audio, S/PDIF digital audio, and microphone inputs, processes the signals, and outputs them to balanced, unbalanced and S/PDIF outputs. The 910 has the following features: •... -
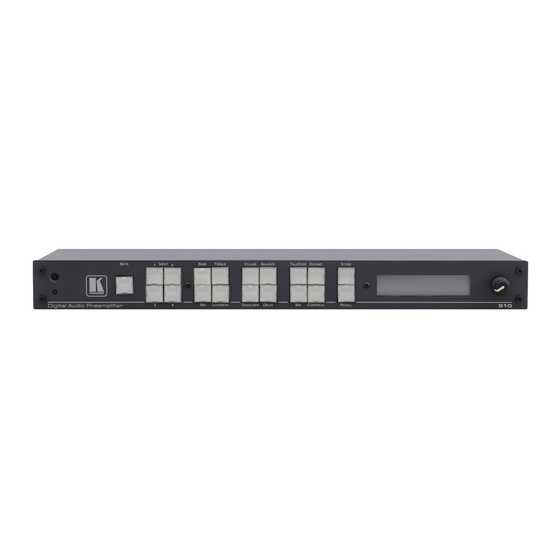
Page 8: Figure 1: 910 Digital Audio Preamplifier
Your 910 Digital Audio Preamplifier Figure 1: 910 Digital Audio Preamplifier... -
Page 9: Table 1: 910 Digital Audio Preamplifier Functions
Your 910 Digital Audio Preamplifier Table 1: 910 Digital Audio Preamplifier Functions Feature Function IR Receiver The red LED illuminates when receiving signals from the infrared remote control transmitter MUTE Button Press to toggle between turning off (muting) and turning on the... - Page 10 ETHERNET RJ-45 Connector Connects to the PC or other serial controller through computer networking LAN for remote control Power Connector with Fuse AC connector enabling power supply to the 910 Power Switch Illuminated switch for turning the unit on and off...
-
Page 11: Installing The 910 In A Rack
Installing the 910 in a Rack Installing the 910 in a Rack This section describes how to install the 910 in a rack. KRAMER: SIMPLE CREATIVE TECHNOLOGY... -
Page 12: Connecting The 910 Digital Audio Preamplifier
(not shown in Figure 1 Switch off the power to each device before connecting it to the 910. After connecting the 910, switch on its power and then switch on the power to each device 2 We recommend that you use only the power cord supplied with this device... -
Page 13: Connecting The Rs-232 Port
PC. Is a shielded cable is used, connect the shield to pin 5. Note: There is no need to connect any other pins. Connecting the ETHERNET Port You can use the Ethernet port to control the 910. • To connect directly to a PC using a crossover cable, see Section 6.2.1... -
Page 14: Connecting The Ethernet Port Directly To A Pc (Crossover Cable)
6.2.1 Connecting the ETHERNET Port Directly to a PC (Crossover Cable) You can connect the Ethernet port of the 910 to the Ethernet port on your PC, via a crossover cable with RJ-45 connectors. This type of connection is recommended for identification of the... -
Page 15: Connecting The Ethernet Port Via A Network Hub (Straight Through Cable)
6.2.2 Connecting the ETHERNET Port via a Network Hub (Straight Through Cable) You can connect the Ethernet port of the 910 to the Ethernet port on a network hub or network router, via a straight through cable with RJ-45 connectors. -
Page 16: Figure 5: Connect Screen
Connecting the 910 Digital Audio Preamplifier Figure 5: Connect Screen 2. Select the method to connect to the Ethernet port of the 910. Select: • Ethernet, if you know the IP address number or the machine name. The default name for the machine is KRAMER_XXXX •... -
Page 17: Connecting Via Usb
4. If required, make changes and press Set. If not, click Close. Connecting via USB To connect the 910 via the USB port, you must plug the USB cable into the PC and install the Kramer USB driver downloaded from our Web site at http://www.kramerelectronics.com... -
Page 18: Operating The 910 Digital Audio Preamplifier
• RC-IR2 Infrared remote control transmitter, (see Section 7.3 Using the Front Panel Buttons The 910 is operated from its front panel buttons as follows (for an explanation of the front panel button functions see Table 1. Select an input from 1 to 4 by pressing its INPUT button. -
Page 19: Table 2: 910 Front Panel Button Functions
Operating the 910 Digital Audio Preamplifier Table 2: 910 Front Panel Button Functions Button Display Function Meaning/Range Notes MUTE Mute When pressed, stops all output INPUT 1 Unbalanced stereo INPUT 2 Balanced stereo Only one input lights when selected, multiple buttons light when MIX pressed... -
Page 20: Controlling The 910 From The Pc
You can download and upgrade the latest version of firmware according to the recommendation of Kramer Technical Support. 1 Available on our Web site at http://www.kramerelectronics.com 2 The firmware is installed using the P3K software available from the Kramer Web site http://www.kramerelectronics.com... -
Page 21: Technical Specifications
Technical Specifications Technical Specifications The 910 technical specifications are shown in Table Table 3: 910 Technical Specifications INPUTS: 1 unbalanced stereo audio on an RCA connector; 1 balanced stereo audio on a 5-pin terminal block; 1 S/PDIF on an RCA connector;... -
Page 22: Protocol 3000 Syntax
Protocol 3000 Syntax Protocol 3000 Syntax Host Message Format Start Address (optional) Body Delimiter Destination_id@ Message 9.1.1 Simple Command Command string with only one command without addressing: Start Body Delimiter Command SP Parameter_1,Parameter_2,… 9.1.2 Command String Formal syntax with commands concatenation and addressing: Start Address Body... -
Page 23: 910 Commands In Protocol 3000
HyperTerminal Application) and uses a data rate of 115200 baud, with no parity, 8 data bits, and 1 stop bit. This section describes all commands sent to the 910. For an explanation of Section 10 the syntax and use of Protocol 3000, see 10.1 Help Commands... -
Page 24: Basic Routing Commands
910 Commands in Protocol 3000 10.4 Basic Routing Commands Switch audio AUD IN>OUT, IN>OUT, … AUD IN>OUT, IN>OUT, …RESULT Short form: A IN>OUT, IN>OUT, … Read audio connection AUD? OUT AUD IN>OUT Short form: A? OUT AUD IN>1, IN>2, …... -
Page 25: Audio Parameter Commands
910 Commands in Protocol 3000 10.6 Audio Parameter Commands Command Syntax Response Set simple audio volume VOLUME VOLUME VOLUME VOLUME RESULT Short form: VOL VOLUME Increase/decrease VOLUME +/- VOLUME +/- RESULT simple audio volume Short form: VOL +/- Read simple audio level... -
Page 26: Identification Commands
Numeric value of present audio processing stage. For example: ‘0’ for input level, ‘1’ for pre-amplifier, ‘2’ for amplifier (OUT) etc. CHANNEL = Input or Output # VOLUME / BASS / TREBLE / MID_RANGE = Audio parameter in Kramer units, minus sign precedes negative values. ++ increase current value, -- decrease current value. -
Page 27: Machine Information Commands
910 Commands in Protocol 3000 Command Syntax Response Set DHCP mode NET-DHCP DHCP_MODE NET-DHCP DHCP_MODE RESULT Short form: NTDH Read subnet mask NET-DHCP? NET-DHCP DHCP_MODE Short form: NTDH? DHCP_MODE = ‘0’ – Don't use DHCP (Use IP set by factory or IP set command). -
Page 28: Entering Commands
10.11 Entering Commands You can directly enter all commands using a terminal with ASCII communications software, such as HyperTerminal, Hercules, etc. Connect the terminal to the serial, Ethernet, or USB port on the Kramer device. To enter , press the Enter key. -
Page 29: Maximum String Length
910 Commands in Protocol 3000 Commands in the string do not execute until the closing character is entered. A separate response is sent for every command in the chain. 10.14 Maximum String Length 64 characters 10.15 Backward Support Protocol 2000 is transparently supported by Protocol 3000. You can switch between protocols using a switch protocol command from either platform. - Page 31 For the latest information on our products and a list of Kramer distributors visit www.kramerelectronics.com where updates to this user manual may be found. We welcome your questions, comments and feedback. Safety Warning: Disconnect the unit from the power supply before opening/servicing.
Need help?
Do you have a question about the 910 and is the answer not in the manual?
Questions and answers