
Related Manuals for Kramer VS-402XL


Summary of Contents for Kramer VS-402XL
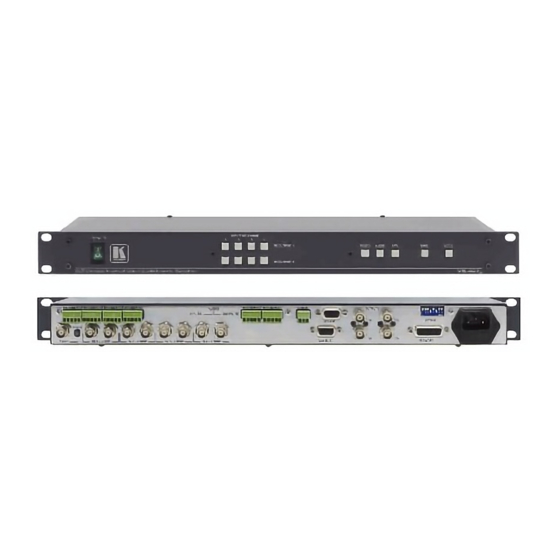
- Page 1 Kramer Electronics, Ltd. USER MANUAL Models: 402XL, 4x2 Vertical Interval Video-Audio Matrix Switcher 602XL, 6x2 Vertical Interval Video-Audio Matrix Switcher...
-
Page 2: Table Of Contents
Contents Contents Introduction Getting Started Quick Start Overview Your Vertical Interval Video-Audio Matrix Switcher Installing in a Rack Connecting a Vertical Interval Video-Audio Matrix Switcher Controlling via RS-232 (for example, using a PC) Controlling via RS-485 Setting the DIP-switches 6.3.1 Setting the MACHINE # Connecting the REMOTE Connector Connecting the Balanced/Unbalanced Stereo Audio Input/Output... - Page 3 Figure 1: Vertical Interval Video-Audio Matrix Switchers Figure 2: VS-602XL Underside Figure 3: Connecting the VS-402XL Vertical Interval Video-Audio Matrix Switcher Figure 4: Connecting a PC without using a Null-modem Adapter Figure 5: Controlling via RS-485 (for example, using an RC-3000)
-
Page 4: Introduction
Scan Converters and Scalers; GROUP 8: Cables and Connectors; GROUP 9: Room Connectivity; GROUP 10: Accessories and Rack Adapters; GROUP 11: Sierra Products 2 Download up-to-date Kramer user manuals from the Internet at http://www.kramerelectronics.com 3 The complete list of Kramer cables is on our Web site at http://www.kramerelectronics.com... - Page 5 Getting Started KRAMER: SIMPLE CREATIVE TECHNOLOGY...
-
Page 6: Overview
Overview Overview The Kramer VS-602XL (a 6x2 switcher) and VS-402XL (a 4x2 switcher) are high performance vertical interval matrix switchers for composite video and stereo balanced audio signals. Both the VS-602XL and the VS-402XL feature: • A video bandwidth that exceeds 300MHz, ensuring that they remain transparent even in the most critical applications •... -
Page 7: Figure 1: Vertical Interval Video-Audio Matrix Switchers
Your Vertical Interval Video-Audio Matrix Switcher VS-406xl VS-402xl Figure 1: Vertical Interval Video-Audio Matrix Switchers KRAMER: SIMPLE CREATIVE TECHNOLOGY... -
Page 8: Table 1: Vertical Interval Video-Audio Matrix Switcher Features
Attach a specific PIN to PIN 9 or PIN 10 to switch an input via a remote contact closure switch (refer to section Power Connector with Fuse AC connector enabling power supply to the unit 1 Four on the VS-402XL; six on the VS-602XL 2 Refer to section 8.1.2 3 Refer to section 8.1.1... -
Page 9: Figure 2: Vs-602Xl Underside
Adjusts the equalization level (EQ.) for OUTPUTS 1 and 2 1 The underside of the VS-402XL unit contains four TERM switches 2 The factory default 3 Insert a screwdriver into the small hole and carefully rotate it, trimming the OUTPUT level or EQ level... -
Page 10: Installing In A Rack
5. The machine is earthed (grounded) in a reliable way power and is connected only to an electricity socket with • If you are using a Kramer rack grounding. Pay particular attention to situations where adapter kit (for a machine that is not electricity is supplied indirectly (when the power cord 19"), see the Rack Adapters user... -
Page 11: Connecting A Vertical Interval Video-Audio Matrix Switcher
A REMOTE contact closure switch (see section 6.4) 1 Switch OFF the power on each device before connecting it to your VS-402XL/VS-602XL Switcher. After connecting your VS-402XL/VS-602XL Switcher, switch on its power and then switch on the power on each device. Switching on the VS-402XL/VS-602XL Switcher, recalls the last status prior to powering down 2 Balanced or unbalanced (see section 6.5) -
Page 12: Figure 3: Connecting The Vs-402Xl Vertical Interval Video-Audio Matrix Switcher
Connecting a Vertical Interval Video-Audio Matrix Switcher Figure 3: Connecting the VS-402XL Vertical Interval Video-Audio Matrix Switcher... -
Page 13: Controlling Via Rs-232 (For Example, Using A Pc)
Figure 4 illustrates Figure 4: Connecting a PC without using a Null-modem Adapter You can connect up to eight VS-402XL/VS-602XL units to the PC via the Null-modem adapter and the RS-232 port, and the RS-485 ports, as Figure 13 illustrates. -
Page 14: Controlling Via Rs-485
1 2 3 4 5 6 7 8 G RS-485 RS-232 IN RS-232 OUT RC-3000 VS-602 xl Figure 5: Controlling via RS-485 (for example, using an RC-3000) 1 You can control up to 8 VS-402XL/VS-602XL units, as section 7.3.2 describes... -
Page 15: Setting The Dip-Switches
, specifying which VS-402XL/VS-602XL unit is being controlled when several VS-402XL/VS-602XL units connect to a PC or serial controller. Set the MACHINE # on a VS-402XL/VS-602XL unit via DIPs 1, 2 and 3, according to Table 4. When using a standalone VS-402XL/VS-602XL unit, set the MACHINE # to 1. -
Page 16: Connecting The Remote Connector
Connecting a Vertical Interval Video-Audio Matrix Switcher Table 4: Machine # DIP-switch Settings MACHINE # DIPSWITCH Master OFF OFF OFF OFF OFF OFF ON OFF OFF ON OFF ON OFF ON 6.4 Connecting the REMOTE Connector Connecting the REMOTE connector to a contact closure switch enables you to route an input to an output by remote control. -
Page 17: Connecting The Balanced/Unbalanced Stereo Audio Input/Output
Figure 10 illustrate how to wire a balanced/unbalanced input and/or output connection: Figure 8: Connecting a Balanced Stereo Audio Input/Output Figure 9: Connecting an Unbalanced Stereo Audio Input Figure 10: Connecting an Unbalanced Stereo Audio Output KRAMER: SIMPLE CREATIVE TECHNOLOGY... -
Page 18: Cascading Vertical Interval Video-Audio Matrix Switchers
Figure 11 illustrates. 1 You can interconnect VS-402XL units with VS-602XL units, and you are not limited to cascading VS-602XL units with VS-602XL units. For example, for a 10x2 vertical interval video-audio matrix switcher, interconnect a VS-402XL unit with a... - Page 19 Set DIP 6 ON on all eight VS-402XL/VS-602XL units (enabling the Reply option in accordance with Protocol 2000) Set DIP 7 OFF on all eight VS-402XL/VS-602XL units (as the PC connects via the RS-232 port) Set DIP 8 OFF on all eight VS-402XL/VS-602XL units Note: The output signals at OUTPUT 1 and OUTPUT 2 are the same on all the cascaded VS-402XL/VS-602XL units.
-
Page 20: Cascading A Set Of Units In A (Rgb) Parallel Configuration
Cascading Vertical Interval Video-Audio Matrix Switchers Null-modem Adapter connects to PC RS-232 In Port Enlarged View G B A SETUP DIPSWITCHES RS-485 Machine # 1 (= Master) SETUP DIPSWITCHES Machine # 2 Up to 8 Units SETUP DIPSWITCHES Machine # 8 Figure 11: Cascading Units in an Input Expansion Configuration 7.2 Cascading a set of Units in a (RGB) Parallel Configuration You can cascade a set of, for example, three VS-602XL units to form a 6x2... -
Page 21: Figure 12: Cascading A Set Of Three Units In A (Rgb) Parallel Configuration
Null-modem Adapter connects to PC RS-232 In Port SETUP DIPSWITCHES Machine # 1 (= Master) SETUP DIPSWITCHES Machine # 1 SETUP DIPSWITCHES Machine # 1 Figure 12: Cascading a set of three Units in a (RGB) Parallel Configuration KRAMER: SIMPLE CREATIVE TECHNOLOGY... -
Page 22: Cascading Individual Units In A Control Configuration
1. Connect the composite video sources and acceptors, as well as the appropriate audio sources and acceptors, as section describes. 2. Connect the RS-232 port on the first VS-402XL/VS-602XL unit to the PC using the Null-modem adapter provided with the machine (recommended), as section describes. -
Page 23: Control Configuration Via Rs-485
VS-402XL/VS-602XL units. (If using shielded twisted pair cable, the shield is usually connected to the “G” (Ground) PIN of the first unit). 3. Set the first VS-402XL/VS-602XL unit as MACHINE # 1 and the following seven VS-402XL/VS-602XL units as MACHINE # 2 to MACHINE # 8,... -
Page 24: Figure 14: Cascading Individual Units In A Control Configuration Via Rs-485
Cascading Vertical Interval Video-Audio Matrix Switchers Set DIP 4 ON on the last unit (terminating the RS-485 line at 120 Ω). Set DIP 4 OFF on the other units Set DIP 6 ON on all eight units (enabling the Reply option in accordance with Protocol 2000) ... -
Page 25: Looping Units In An Increased Output Configuration
) serial commands transmitted by a touch screen system, PC, or other serial controller • A remote contact closure switch 1 Set DIP 7 ON on all VS-402XL/VS-602XL units when a PC or touch screen system functions via the RS-485 serial port KRAMER: SIMPLE CREATIVE TECHNOLOGY... -
Page 26: Choosing The Audio-Follow-Video Or Breakaway Option
1 When cascading units in an input expansion configuration or RGB(H) mode, as section describes, pressing the front panel AFV button on one interconnected VS-402XL/VS-602XL unit also illuminates the AFV button on the other VS-402XL/VS-602XL units. However, pressing the VIDEO or AUDIO button on an interconnected VS-402XL/VS-602XL unit does not illuminate the corresponding VIDEO or AUDIO buttons on the other VS-402XL/VS-602XL units. -
Page 27: Technical Specifications
Technical Specifications Technical Specifications Table 5 includes the technical specifications Table 5: Technical Specifications of the VS-402XL/VS-602XL 6 (4) composite video with loops, 1 Sync - 1Vpp/75 Ω on BNC connectors INPUTS: with sync select switch 6 (4) balanced audio stereo, +4dBm/33kΩ on detachable terminal blocks 2x2 composite video, 1Vpp/75Ω... -
Page 28: Table Of Hex Codes For Serial Communication
Table of Hex Codes for Serial Communication 10 Table of Hex Codes for Serial Communication Table 6 lists the Hex values for a single machine (MACHINE # 1): Table 6: VS-402XL/VS-602XL Hex Codes for Switching via RS-232/RS-485 Switching Video Channels Switching Audio Channels OUT 1... -
Page 29: Communication Protocol
Communication Protocol 11 Communication Protocol This protocol, which enables RS-232 communication between the VS-402XL/VS-602XL and the PC, uses 4 bytes of information, and data is at 9600 baud, no parity, 8 data bits and 1 stop bit. Table 7: Protocol Definitions... -
Page 30: Table 8: Instruction Codes
Communication Protocol Table 8: Instruction Codes INSTRUCTION DEFINITION FOR SPECIFIC INSTRUCTION NOTE DESCRIPTION INPUT OUTPUT RESET VIDEO SWITCH VIDEO Set equal to video input which Set equal to video output is to be switched which is to be switched (0 = disconnect) (0 = to all the outputs) SWITCH AUDIO Set equal to audio input which... - Page 31 NOTE 16 - The reply to the “REQUEST WHETHER PANEL IS LOCKED” is as NOTE 4 above, except that here the OUTPUT is assigned with the value 0 if the panel is unlocked, or 1 if it is locked. KRAMER: SIMPLE CREATIVE TECHNOLOGY...
- Page 32 EXCLUSION OF DAMAGES The liability of Kramer for any effective products is limited to the repair or replacement of the product at our option. Kramer shall not be liable for: 1. Damage to other property caused by defects in this product, damages based upon inconvenience, loss of use of the product, loss of time, commercial loss;...
- Page 33 For the latest information on our products and a list of Kramer distributors, visit our Web site: www.kramerelectronics.com, where updates to this user manual may be found. We welcome your questions, comments and feedback. Safety Warning: Disconnect the unit from the power supply before opening/servicing.
Need help?
Do you have a question about the VS-402XL and is the answer not in the manual?
Questions and answers