NetComm NB9WMAXX Mac User Manual
Adsl2+ wireless router
Hide thumbs
Also See for NB9WMAXX:
- User manual (88 pages) ,
- Quick start manual (17 pages) ,
- Specifications (2 pages)
Advertisement
Quick Links
Download this manual
See also:
User Manual
ADSL2+ Wireless Router
Start Here
Mac User Guide
This User Guide provides basic instructions for connecting your NB9WMAXX to an Apple
Macintosh computer and to the Internet.
Ethernet Installation
1.
2.
Airport Installation
3.
Modem Set-up
Before you can use this User Guide, you must have already established an ADSL service
with your Internet Service Provider (ISP).
These instructions provide a basic set-up configuration that should get home or small office
Macs up and running. This will be sufficient for most users.
If you need to perform more advanced configurations, please see the comprehensive User
Guide on the supplied CD-ROM for additional instructions.
NOTE:
NetComm Technical Support for this product only covers the essential installation and features outlined in this User Guide. For
detailed information regarding the advanced features of this product, please see the configuring sections in the NB9WMAXX
User Guide on the supplied CD-ROM.
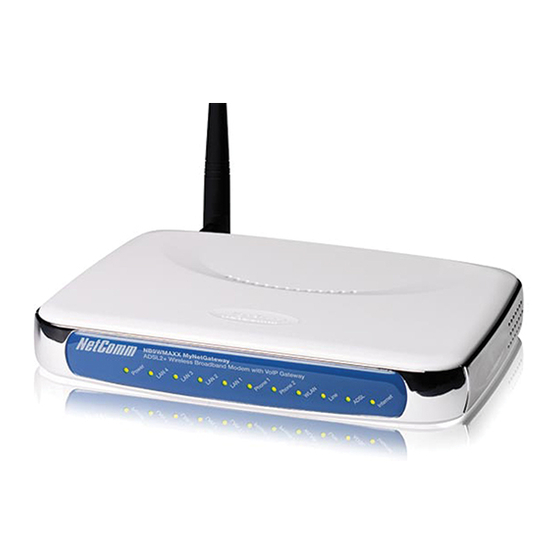
Connecting your NB9WMAXX
The NetComm NB9WMAXX Modem can be connected directly to your Mac via an
Ethernet interface. In addition, you can use your Mac's Airport to connect to the
NB9WMAXX wirelessly.
Warning: Before you begin, turn the power off for all devices. These include your Mac and your NB9WMAXX Modem.
Advertisement

Related Manuals for NetComm NB9WMAXX


Summary of Contents for NetComm NB9WMAXX
- Page 1 The NetComm NB9WMAXX Modem can be connected directly to your Mac via an Ethernet interface. In addition, you can use your Mac’s Airport to connect to the NB9WMAXX wirelessly. Warning: Before you begin, turn the power off for all devices. These include your Mac and your NB9WMAXX Modem.
-
Page 2: Ethernet Installation
Ethernet port of your NB9WMAXX ADSL Modem. 3. Attach the power connector. Connect the AC power adapter to the Power connector on the back of the NB9WMAXX and plug in the adapter into a wall outlet or power strip. 4. - Page 3 ADSL2+ Wireless Router Mac User Guide Ethernet 2. The Systems Preferences window opens. Installation (cont) In the Systems Preferences window, locate the “Internet and Network” heading and click once on the Network icon. The Network window opens.
- Page 4 ADSL2+ Wireless Router Mac User Guide Ethernet 4. If you want to use this Mac in more than place (perhaps at home as well as at your Installation workplace) or on more than one network, you can achieve this easily by setting up a Location for each place or network.
- Page 5 If your Mac does not accept an IP address from the DHCP server in your Installation NB9WMAXX and the IP address field remains blank, try selecting “Using DHCP with manual address” from the “Configure” popup menu (“Configure iPV4” if you’re using Mac OS 10.3) and entering 192.168.1.3 in the “IP address”...
- Page 6 Step 2 – Set up your Mac This is how to configure your Mac to work with your NB9WMAXX ADSL Modem. Please note that, while it may be possible to connect wirelessly to the NB9WMAXX using Mac OS 9.x,only Mac OS X is supported. 1.
- Page 7 ADSL2+ Wireless Router Mac User Guide Airport The Systems Preferences window opens. Installation In the Systems Preferences window, locate the “Internet and Network” heading and 3. click once on the Network icon. The Network window opens.
- Page 8 ADSL2+ Wireless Router Mac User Guide Airport 4. If you want to use this Mac in more than place (perhaps at home as well as at your Installation workplace) or on more than one network, you can achieve this easily by setting up a Location for each place or network.
- Page 9 ADSL2+ Wireless Router Mac User Guide Airport 8. Click the pop-up menu “By default, join” and select “Preferred networks”. Select Installation “wireless” from the list that is displayed. (cont) 9. With “wireless” selected, click on the “Edit” button at the foot of the list. The following dialogue box is displayed.
- Page 10 ADSL2+ Wireless Router Mac User Guide Airport Installation (cont) Click OK. 11. 12. Click on the TCP/ IP tab. The TCP/IP settings will be displayed. Click on the “ConfigureiPV4” pop-up menu and select “Using DHCP”. Click on Apply Now to save the changes.
- Page 11 ADSL2+ Wireless Router Mac User Guide Airport 14. Click on the “Show” pop-up menu and select “Network Status”. Check to see that Installation the bullet alongside “Airport” is green. (cont) 15. Close the Network window by clicking the red close button (System 10.3 and 10.4) or select “Quit System Preferences”...
- Page 12 Enter the username and password. The default username is “admin”. The default password is “admin”. Click on OK. 4. The NB9WMAXX Integrated device will be displayed. Click on ‘BASIC’ then ‘ADSL QUICK SET UP’ - enter the username and password that your ISP has provided and click on “save and reboot”.
- Page 13 ADSL2+ Wireless Router Mac User Guide Modem After two minutes, “internet” light will come up and you should see the Basic - 6. Set-up >Home page indicating ADSL service is connected. (cont) You have now completed the set-up which will be sufficient for most uses. You 7.
Need help?
Do you have a question about the NB9WMAXX and is the answer not in the manual?
Questions and answers