Table of Contents
Advertisement
Quick Links
Advertisement
Table of Contents
Troubleshooting

Related Manuals for Toshiba Pockey PC e800


Summary of Contents for Toshiba Pockey PC e800
- Page 1 TOSHIBA Pocket PC e800 TOSHIBA Pocket PC e800 User's Manual...
-
Page 2: Copyright Information
Introduction Thank you very much for your purchase of this Toshiba Pocket PC. Please be sure to read this user’s guide before using the Toshiba Pocket PC, and ensure that you are aware of correct the handling procedures. ■ Please be sure to read the “Safety... -
Page 3: Safety Instructions
Safety instructions All safety instructions must be read carefully and must be fully understood, before attempting to use your Toshiba Pocket PC. This manual contains the safety instructions that must be observed in order to avoid potential hazards that could result in personal injuries or could damage your computer. - Page 4 Never come closer than 16 cm (6 inches) to a person with a heart pacemaker implant when using this Pocket PC in combination with a mobile cellular telephone. Failure to do so could result in interference with the function of the pacemaker. WARNING Never use a Pocket PC while driving an automobile or any other moving vehicle.
- Page 5 Never attempt to disassemble, repair or make any modification to your Pocket PC. Disassembly, modification or any attempt at repair could cause bodily injury or property damage, as well as damage to the Pocket PC itself. Failure to follow the above directions concerning use and storage could result in damage to your Pocket PC or bodily injury and property damage due to battery liquid leakage, fire, or rupture.
- Page 6 WARNING Always ensure the power plug pins are clean and free of dust or other foreign material by wiping the pins with a clean dry cloth. Dust or other foreign material accumulation on the power plug pins could cause fire. Always unplug the power plug from an outlet by grasping the power plug itself.
- Page 7 If you connect your Pocket PC to a computer via the optional docking cradle for data transfer or data restoration purposes, Toshiba will not be responsible for any Pocket PC or computer malfunction, problems with data transfer or data modifications/loss that may occur in these environments.
- Page 8 Pocket PC or malfunction of the Pocket PC functions. Limitation of liability ■ Toshiba Corporation is in no way liable for any damage resulting from earthquakes, lightning, wind, flood; or fire, actions on the part of a third party, or other accidents beyond the control of Toshiba Corporation;...
- Page 9 Usage conditions for Bluetooth The Bluetooth was not developed or produced for use with equipment in systems that directly support the medical welfare of individuals or systems that are critical for the maintenance of public welfare and safety. Do not use the Bluetooth for these purposes.
- Page 10 This product was designed to fulfill the EMC (electromagnetic compatibility) requirements for “residential, commercial and light industry environments”. Toshiba does not approve the use of this product in working environments other than “residential, commercial and light industry environments”. For example, the following environments are not approved: ■...
- Page 11 Only peripherals complying with the FCC class B limits may be attached to this equipment. Operation with non-compliant peripherals or peripherals not recommended by Toshiba is likely to result in interference to radio and TV reception. Shielded cables must be used between the external devices and the computer’s USB ports, external monitor port, PS/2 keyboard port...
- Page 12 Note that Canadian Department of Communications (DOC) regulations provide, that changes or modifications not expressly approved by TOSHIBA Corporation could void your authority to operate this equipment. This Class B digital apparatus meets all requirements of the Canadian Interference-Causing Equipment Regulations.
- Page 13 (1) This device may not cause harmful interference, and (2) this device must accept any interference received, including interference that may cause undesired operation. Responsible Party: Toshiba America Information Systems, Inc. 9740 Irvine Blvd. Irvine, CA 92618-1697 Telephone Number: 1-800-Toshiba User’s Manual...
-
Page 14: Table Of Contents
Find and Organize Information ......2-32 Customize Your Toshiba Pocket PC ......2-33 Setting a Password . - Page 15 Microsoft ActiveSync Chapter 3 Microsoft Pocket Outlook Chapter 4 Calendar: Scheduling Appointments and Meetings ... . . 4-1 Using the Summary Screen ....... . . 4-2 Creating Meeting Requests .
- Page 16 Home ..........11-1 TOSHIBA Screen Resolution ......11-10 ClearVue .
-
Page 17: Chapter 1 Getting Started
TOSHIBA Pocket PC e800 Chapter 1 Getting Started Welcome Congratulations on purchasing your Toshiba Pocket PC. Due to the size and capabilities of this device, you can keep your most important business ® and personal information up-to-date and close at hand. Microsoft ®... - Page 18 See this source: The Read Me files, located in the Last-minute updates and detailed technical information Microsoft Active Sync folder on the computer and on the Pocket PC Companion CD. http://www.toshiba.co.jp/ Up-to-date information on your worldwide Toshiba Pocket PC User’s Manual...
-
Page 19: Chapter 2 Basic Skills
TOSHIBA Pocket PC e800 Chapter 2 Basic Skills Your Toshiba Pocket PC e800 is easy to learn how to use. This chapter describes the use and customization of your Toshiba Pocket PC e800. Parts Names and Function Main unit (front view) - Page 20 Basic Skills Program Button Initial Settings Program button 1 = Calendar Program button 2 = Tasks Program button 3 = Home Program button 4 = Contacts Program button 5 = Voice recorder Main unit (end view) Battery Switch Wireless Communication Switch (Wireless LAN/Bluetooth model only) Switch cover...
-
Page 21: Power Button
Press and hold. The power turns on. The screen light alternately turns on/off. Press it quickly. The power turns on. The power turns off. Battery Switch The battery switch supplies/cuts off the battery power to the Toshiba Pocket PC e800. User’s Manual... -
Page 22: Wireless Communication Switch
Basic Skills The setting of this switch at shipment is “stop”. When using the Toshiba Pocket PC e800 for the first time, open the switch cover, then slide this switch to the left (the “supply” side) with the stylus Switching the battery switch to the "stop" position at any time will lead to loss of data. -
Page 23: Hold Switch
Basic Skills Switch Cover Wireless Communication Switch Wireless LED LED indicates the status of the Wireless Communication Switch Status Wireless Communication Switch is turned OFF Orange Wireless Communication Switch is turned ON Hold Switch When the Hold switch is on, Program Buttons 1 through 5, Cursor Button, and Scroller will be disabled. -
Page 24: How To Use The Stylus
On the pop-up menu that appears, tap the action you want to perform. When you operate the touch screen of the Toshiba Pocket PC e800, use the supplied stylus. If the tip of the stylus is damaged, do not use it. If you operate the touch screen with a damaged stylus or a ballpoint pen, the touch screen may be damaged. -
Page 25: Battery Charging
Basic Skills Battery Charging When using the Toshiba Pocket PC e800 for the first time, set the battery switch to the supply side, and then charge the removable battery with the supplied AC adapter. Assembling the Cradle Prior to charging the battery, the back plate that supports the Toshiba Pocket PC e800 while charging needs to be inserted into the base of the cradle. -
Page 26: How To Attach/Detach The Main Battery Pack
Basic Skills Method 1: Connect the supplied AC adapter and the Toshiba Pocket PC e800 as shown in the figure below. Handling the cord on this product will expose you to lead, a chemical known to the State of California to cause birth defects or other reproductive harm. - Page 27 You cannot turn on the power if the Battery Pack Lock is in the Release Position. You can change the main battery without data loss because the Toshiba Pocket PC e800 has a rechargeable backup battery. However, the capacity of the backup battery is limited, therefore when you change the main battery, attach the new main battery and switch the Battery Pack Lock to the lock side as soon as possible.
-
Page 28: How To Use The Optional High Capacity Battery Pack
You cannot turn on the power if Battery Pack Lock is at the Release side. You can replace the main battery with the High Capacity Battery pack without data loss because Toshiba Pocket PC e800 has a rechargeable backup battery. However, the capacity of the backup battery is limited,... -
Page 29: How To Prolong Battery Life
■ Do not leave the Toshiba Pocket PC e800 in a place of high or low temperature. It may shorten battery life. If you have not used the Toshiba Pocket PC e800 for several days, its battery charge level reading may be inaccurate. -
Page 30: How To Use The Optional Presentation Pack
■ The removable battery gradually discharges even if the device is not being used. When the Toshiba Pocket PC e800 is left for a long time, the removable battery of the Toshiba Pocket PC e800 may completely discharge. - Page 31 Presentation Pack from the Toshiba Pocket PC e800. Connecting the Presentation Pack to the Pocket PC 1. Plug the Guide Pins into the corresponding jacks on the Toshiba Pocket PC e800. A light click is heard when the Presentation Pack is locked in place.
-
Page 32: Initial Setup
Basic Skills Initial Setup When using the Toshiba Pocket PC e800 for the first time, follow the initial setup procedures below, after the battery has been charged. 1. Move the battery switch to the “supply” position. The Toshiba Pocket PC e800 powers on automatically and the Welcome screen appears. -
Page 33: Inserting An Sd Card
Basic Skills 3. Insert the CF II Card. To remove a card: 1. Turn off the power. 2. Lightly press down the release button with the stylus. The button will pop out. Press down on the release button again. The card will withdraw slightly from the slot. - Page 34 Basic Skills 3. Insert the card with its contact surface (metal contact surface) facing the back of the Toshiba Pocket PC e800. 4. Press down on the card until it clicks into place. To remove a card: 1. Turn off the power.
-
Page 35: Connecting To A Computer
Basic Skills Connecting to a Computer Before connecting your Toshiba Pocket PC e800 to a computer, check the following. ■ ActiveSync has been installed on your computer. (See Chapter 3.) ■ The position of connecting port on the computer may differ according to the computer type. -
Page 36: To Connect Directly Using A Connection Cable
Connect the Toshiba Pocket PC e800 directly to your computer using an optional Serial Client cable. When the Toshiba Pocket PC e800 is connected to another device via a USB Sync Cable, do not plug the AC adapter directly into the Pocket PC as this may lead to interference. -
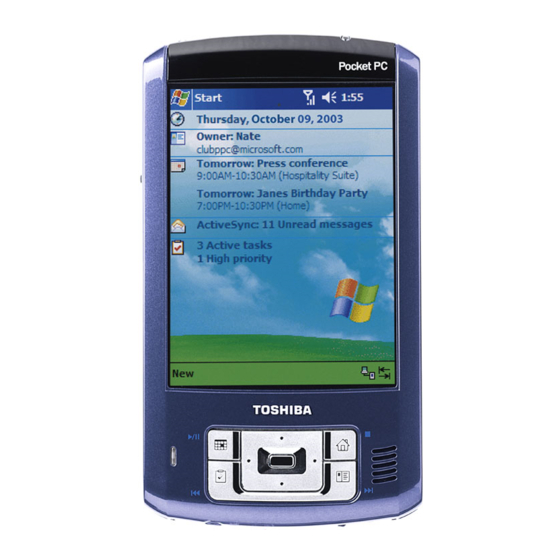
Page 37: Today Screen
Basic Skills Today Screen When you turn on your device for the first time each day (or after 4 hours of inactivity), you’ll see the Today screen. You can also display it by tapping and then Today. On the Today screen, you can see at a glance important information for the day. -
Page 38: Program
Basic Skills The following are some of the status icons you may see. Status Icon Meaning Turns all sounds on and off Main battery is charging Main battery is low Main battery is very low Main battery is full Connection is active Connection is inactive Synchronization is occurring Notification that one or more instant messages were... - Page 39 Basic Skills The following table contains a partial list of programs that are on your device. Look on the Toshiba Pocket PC Companion CD for additional programs that you can install onto your device. Icon Program Description ActiveSync Synchronize information between your device and computer.
-
Page 40: Navigation Bar And Command Bar
Basic Skills Navigation Bar and Command Bar The navigation bar is located at the top of the screen. It displays the active program and current time, and allows you to switch to programs and close screens. Use the command bar at the bottom of the screen to perform tasks in programs. -
Page 41: Pop-Up Menus
Basic Skills Pop-up Menus With pop-up menus, you can quickly choose an action for an item. For example, you can use the pop-up menu in the contact list to quickly delete a contact, make a copy of a contact, or send an email message to a contact. -
Page 42: Enter Information On Your Toshiba Pocket Pc
Basic Skills Enter Information on Your Toshiba Pocket PC You have several options for entering new information: ■ Use the input panel to enter typed text, either by using the soft keyboard or other input method. ■ Write directly on the screen. -
Page 43: To Type With The Soft Keyboard
Basic Skills When you use the input panel, your device anticipates the word you are typing or writing, and displays it above the input panel. When you tap the displayed word, it is inserted into your text at the insertion point. The more you use your device, the more words it learns to anticipate. -
Page 44: Writing On The Screen
Basic Skills When you write a letter, it is converted to typed text that appears on the screen. For specific instructions on using Block Recognizer, with Block Recognizer open, tap ? next to the writing area. To use Transcriber: With Transcriber you can write anywhere on the screen using the stylus just as you would on paper. -
Page 45: To Write On The Screen
Basic Skills To write on the screen: ■ Tap Pen to switch to writing mode. This action displays lines on the screen to help you write. Tap the Pen button and use your stylus like a pen. Some programs that accept writing may not have the Pen button. See the documentation for that program to find out how to switch to writing mode. - Page 46 Basic Skills Select the text you want to convert and tap The writing is turned into text recognize on the pop-up menu If the conversion is incorrect, you can select different words from a list of alternates or return to the original writing. To do so, tap and hold the incorrect word (tap one word at a time).
-
Page 47: Drawing On The Screen
Basic Skills Tips for getting good recognition: ■ Write neatly. ■ Write on the lines and draw descenders below the line. Write the cross of the “t” and apostrophes below the top line so that they are not confused with the word above. Write periods and commas above the line. -
Page 48: Recording A Message
Basic Skills You may want to change the zoom level so that you can more easily work on or view your drawing. Tap Tools and then a zoom level. To select a drawing: If you want to edit or format a drawing, you must select it first. ■... -
Page 49: Using My Text
Basic Skills Indicates an embedded recording. Tap to begin recording. Tap to show or hide the Recording toolbar. Using My Text When using Inbox or MSN Messenger, use My Text to quickly insert preset or frequently used messages into the text entry area. To insert a message, tap My Text and tap a message. -
Page 50: Find And Organize Information
Basic Skills Tap to select a prewritten message. Find and Organize Information The Find feature on your device helps you quickly locate information. ■ On the menu, tap Find. Enter the text you want to find, select a data type, and then tap Go to start the search. To quickly find information that is taking up storage space on your device, select Larger than 64 KB in Type. -
Page 51: Customize Your Toshiba Pocket Pc
Basic Skills Customize Your Toshiba Pocket PC next to a file name indicates the file is saved on a storage card. You can move files in File Explorer by tapping and holding the item you want to move, and then tapping Cut or Copy and Paste on the pop-up menu. -
Page 52: To Add A Program Directly From The Internet
*.exe, or *.zip file, a Setup.exe file, or several versions of files for different device types and processors. Be sure to select the program designed for the Toshiba Pocket PC e800 and your device processor type. 3. Read any installation instructions, Read Me files, or documentation that comes with the program. -
Page 53: Setting A Password
Basic Skills To add a program to the Start menu , Settings, Menus, the Start Menu tab, and then the check box for the program. If you do not see the program listed, you can either use File Explorer on the device to move the program to the Start Menu folder, or use ActiveSync on the computer to create a shortcut to the program and place the shortcut in the Start Menu folder. -
Page 54: Setting The Screen Light
Basic Skills Setting the Screen Light You can set the screen brightness for better sight according to a place of use. You can also set the time that elapses until the screen light turns off automatically after the last operation. 1. -
Page 55: Setting Power
Basic Skills 3. Set the Brightness level. 4. When finished, tap OK to return to the System tab screen. Setting Power You can set to confirm the battery remaining power and the time that elapses until the power turns off after the last operation. 1. - Page 56 Basic Skills 3. Select the Option tab to adjust when battery alarm will come on, and to enable/disable Record and Program buttons wake up. Battery alarm can be adjusted to go off from 10% to 50% of full charge. 4. Select CPU speed tab to set the CPU performance. To conserve battery power, but decrease performance, select 200 MHz.
-
Page 57: Setting Memory
Basic Skills 5. Tap Apply to change the setting, then the confirmation screen is displayed. 6. If you tap Yes, your LCD screen will become black and come back in a few seconds, and then the setting has changed. If you tap No, the setting has not changed. -
Page 58: Flash Rom Disk (Nand Flash Memory)
Basic Skills To confirm usage status of a storage card: 1. Tap Storage card tab on the Memory setting screen. 2. When finished, tap OK to return to the System tab screen. To release memory: If memory is running short of its capacity, i.e., you will receive an error message display, the following methods are available to release the memory: Transfer data to a storage card and the like and delete them from the Pocket PC, delete unnecessary files, quit a program in execution, and/... -
Page 59: Setting Advanced Sounds
2. Select the Built-in tab and adjust the Volume of the built-in speaker. 3. If using headphones, select the Headphone tab and make adjustments. Setting Microphone The Toshiba Pocket PC e800 has three settings that adjust the built-in microphone levels to capture the highest quality recordings: ■... -
Page 60: System Information
Basic Skills System Information The System Information program displays the system information such as CPU clock, CPU stepping, Boot Loader Version, OS Version, PIC Version, MAC address (Wireless LAN model only), and UUID. The information is displayed by accessing the Identity, Memory, Drivers, System, and Wireless tabs. -
Page 61: Identity Tab
Basic Skills Identity Tab The opening menu presents identification information for product service. Tabs for accessing information about Identity, Memory, Drivers, System, and Wireless settings Memory Tab The Memory tab presents information about the systems RAM, ROM, and Flash ROM Disk. Drivers Tab The Drivers tab displays the drivers used by the system’s software applications. -
Page 62: Chapter 3 Microsoft Activesync
Add and remove programs on your device. Before you begin synchronization, install ActiveSync on your PC from the Toshiba Pocket PC Companion CD. For more information on installing ActiveSync, see your Quick Start card. ActiveSync is already installed on your device. -
Page 63: Change The Synchronization Schedule
Microsoft ActiveSync Once you have set up ActiveSync and completed the first synchronization process, you can initiate synchronization from your device. To switch to ActiveSync on your device, tap , and then tap ActiveSync. For information about using ActiveSync on your PC, start ActiveSync on your PC, and then see ActiveSync Help. -
Page 64: Chapter 4 Microsoft Pocket Outlook
TOSHIBA Pocket PC e800 Chapter 4 Microsoft Pocket Outlook ® Microsoft Pocket Outlook includes Calendar, Contacts, Tasks, Inbox, and Notes. You can use these programs individually or together. For example, email addresses stored in Contacts can be used to address email messages in Inbox. -
Page 65: Using The Summary Screen
Microsoft Pocket Outlook 6. To add notes, tap the Notes tab. You can enter text, draw maps, or create directions or recordings. For more information on creating notes, “Notes: Capturing Thoughts and Ideas” on page 4-5. 7. When finished, tap OK to return to the calendar (the appointment is automatically saved). -
Page 66: Tasks: Keeping A To Do List
Microsoft Pocket Outlook 3. Tap the screen to see additional phone numbers and email address for the contact. 4. Tap on the contact to display or edit the contact details. 5. Tap and hold on the contact to display a pop-up menu of actions. To create a contact: 1. - Page 67 Microsoft Pocket Outlook To change the way information is displayed in the list, tap Tools and then Options. To create a task: 1. Tap New. 2. Using the input panel, enter a description. 3. You can enter a start date and due date or enter other information by first tapping the field.
-
Page 68: Notes: Capturing Thoughts And Ideas
Microsoft Pocket Outlook Notes: Capturing Thoughts and Ideas Quickly capture thoughts, reminders, ideas, drawings, and phone numbers with Notes. You can create a written note or a recording. You can also include a recording in a note. If a note is open when you create the recording, it will be included in the note as an icon. -
Page 69: Inbox: Sending And Receiving Email Messages
Microsoft Pocket Outlook To create a note: 1. Tap New. 2. Create your note by writing, drawing, typing, and recording. For more information about using the input panel, writing and drawing on the screen, and creating recordings, see “Notes: Capturing Thoughts and Ideas”... -
Page 70: Using The Message List
Microsoft Pocket Outlook During synchronization: ■ Messages are copied from the Inbox folder on your PC or Exchange server to the Inbox folder on your device. By default, you'll receive messages from the last three days only, the first 100 lines of each new message, and file attachments of less than 100 KB in size. -
Page 71: Composing Messages
Microsoft Pocket Outlook Composing Messages To compose a new message: 1. In the message list, tap New. 2. In the To field, enter the email address of one or more recipients, separating them with a semicolon, or select a name from the contact list by tapping Address Book. -
Page 72: Folder Behavior With A Direct Connection To An Email Server
Microsoft Pocket Outlook If you want to organize messages into additional folders, tap Tools, and then Manage Folders to create new folders. To move a message to another folder, in the message list, tap and hold the message and then tap Move on the pop-up menu. -
Page 73: Chapter 5 Companion Programs
TOSHIBA Pocket PC e800 Chapter 5 Companion Programs The companion programs consist of Microsoft Pocket Word, Microsoft ® ® Pocket Excel, MSN Messenger, Windows Media™ Player for Pocket PC, Microsoft ® Reader and Pictures. To switch to a companion program on your device, tap Programs on the menu, and then tap the program name. - Page 74 Companion Programs Pocket Word contains a list of the files stored on your device. Tap a file in the list to open it. To delete, make copies of, and send files, tap and hold a file in the list. Then, select the appropriate action on the pop-up menu. Tap to change the sort order of the list.
-
Page 75: Typing Mode
Companion Programs Typing Mode Using the input panel, enter typed text into the document. For more information on entering typed text, see Chapter 2. To format existing text and to edit text, first select the text. You can select text as you do in a Word document, using your stylus instead of the mouse to drag through the text you want to select. -
Page 76: Writing Mode
Companion Programs Writing Mode In writing mode, use your stylus to write directly on the screen. Ruled lines are displayed as a guide, and the zoom magnification is greater than in typing mode to allow you to write more easily. For more information on writing and selecting writing, see Chapter 2. -
Page 77: Drawing Mode
Companion Programs Drawing Mode In drawing mode, use your stylus to draw on the screen. Gridlines appear as a guide. When you lift your stylus off the screen after the first stroke, you’ll see a drawing box indicating the boundaries of the drawing. Every subsequent stroke within or touching the drawing box becomes part of the drawing. - Page 78 Companion Programs Use Pocket Excel to create workbooks, such as expense reports and mileage logs. To create a new file, tap , Programs, Pocket Excel, and then New. A blank workbook appears. Or, if you’ve selected a template for new workbooks in the Options dialog box, that template appears with appropriate text and formatting already provided.
-
Page 79: Msn Messenger
Companion Programs Tips for Working in Pocket Excel Note the following when working in large worksheets in Pocket Excel: ■ View in full-screen mode to see as much of your worksheet as possible. Tap View and then Full Screen. To exit full-screen mode, tap Restore. ■... -
Page 80: Working With Contacts
Companion Programs Setting Up Before you can use MSN Messenger, you must set up the instant messaging account(s) to use. For MSN Messenger Service, you must have a Microsoft Passport or Hotmail account. For Exchange Instant Messaging, you must have an Exchange account. To set up an account and sign in: 1. -
Page 81: Chatting With Contacts
Companion Programs To see others online without being seen, in the Tools menu, tap My Status and select Appear Offline. If you block a contact, you will appear offline but will remain on the blocked contact’s list. To unblock a contact, tap and hold the contact, then tap Unblock on the pop-up menu. - Page 82 Companion Programs To know if the contact you are chatting with is responding, look for the message under the text entry area. View full chat. View status of the chat. For more information on using MSN Messenger, tap and then Help. User’s Manual 5-10...
-
Page 83: Windows Media Player
Tap to play or puase Use Microsoft Windows Media Player on your computer to copy digital audio and video files to your Toshiba Pocket PC e800. You can play Windows Media and MP3 files on your Toshiba Pocket PC e800. -
Page 84: Microsoft Reader
Sample books and a dictionary are also included in the MS Reader folder in the Extras folder on the Toshiba Pocket PC e800 Companion CD. Use ActiveSync to download the files from your computer to your activated ®... - Page 85 Companion Programs To open a book, tap its title in the Library list. Tap to to scroll through the library list Tap to to select a sort order Tap to specify the books you want to display in the list Tap here to navigate to the other parts of the reader User’s Manual...
- Page 86 Companion Programs Reading a Book Each book consists of a cover page, an optional table of contents, and the pages of the book. Navigation options are listed in the bottom portion of the cover page. The first time you open a book, you’ll probably want to go to the first page or to the table of contents, if there is one.
-
Page 87: Pictures
Companion Programs Using Reader Features Reading a book electronically gives you several options not available with paper books. These options are available from any book page. Select text by dragging across the text on the page. Then, tap an option on the pop-up menu, as described here: ■... -
Page 88: Edit Pictures
Companion Programs Edit Pictures To view .jpg pictures, tap , Programs, and then Pictures. At the Pictures screen, tap the .jpg file name you want to view. You can rotate, crop, zoom, and adjust the brightness and color contrast of your .jpg pictures. -
Page 89: Set Picture As Background
Companion Programs Set Picture as Background You can use one of your own .jpg pictures as the background on the Today screen, and specify how you want it displayed on the screen, such as adjusting the transparency level. 1. In Pictures, tap the picture you want to set as the background. 2. -
Page 90: Chapter 6 Pocket Internet Explorer
TOSHIBA Pocket PC e800 Chapter 6 Pocket Internet Explorer ® Use Microsoft Pocket Internet Explorer to view Web or WAP pages in either of these ways: ■ During synchronization with your desktop computer, download your favorite links and mobile favorites that are stored in the Mobile Favorites subfolder in Internet Explorer on the desktop computer. -
Page 91: Mobile Favorites
Pocket Internet Explorer Mobile Favorites If you are using Microsoft Internet Explorer 5.0 or later on your desktop computer, you can download mobile favorites to your device. Synchronizing mobile favorites downloads Web content to your device so that you can view pages while you are disconnected from your ISP and desktop computer. -
Page 92: Using Avantgo Channels
Pocket Internet Explorer Using AvantGo Channels AvantGo is a free interactive service that gives you access to personalized content and thousands of popular Web sites. You subscribe to AvantGo channels directly from your device. Then, you synchronize your device and desktop computer, or connect to the Internet to download the content. -
Page 93: Using Pocket Internet Explorer
Pocket Internet Explorer Using Pocket Internet Explorer You can use Pocket Internet Explorer to browse mobile favorites and channels that have been downloaded to your device without connecting to the Internet. You can also connect to the Internet through an ISP or a network connection and browse the Web. -
Page 94: To View Mobile Favorites And Channels
Pocket Internet Explorer To view mobile favorites and channels: 1. Tap Favorites to display your list of favorites. Tap the favorite you want to view. Tap to add or delete a folder or favorite link. 2. Tap the page you want to view. You’ll see the page that was downloaded the last time you synchronized with your PC. -
Page 95: Chapter 7 Getting Connected
TOSHIBA Pocket PC e800 Chapter 7 Getting Connected You can use your device to exchange information with other mobile devices as well as your computer, a network, or the Internet. You have the following connection options: ■ Use the infrared (IR) port on your device to send and receive files between two devices. -
Page 96: Connect To The Internet
Getting Connected You can also send items, but not folders, from File Explorer. Tap and hold the item you want to send, and then tap Beam File on the pop-up menu. To receive information: 1. Align the IR ports so that they are unobstructed and within a close range. -
Page 97: To Create An Ethernet Connection To An Isp
Getting Connected 8. Enter your user name, password, and domain name as provided by your ISP. If a domain name was not provided, try the connection without entering a domain name. 9. You should not need to change any advanced settings. Instances where you will want to change advanced settings include: ■... -
Page 98: Connect To Work
Getting Connected Connect to Work If you have access to a network at work, you can send email messages, view intranet pages, synchronize your device, and possibly access the Internet. You can connect to work in one of two ways: ■... -
Page 99: To Create An Ethernet Connection To A Network
Getting Connected To start the connection, simply start using one of the following programs. Your device will automatically begin connecting. Once connected, you can: ■ Send and receive email messages by using Inbox. Before you can use Inbox, you need to provide the information it needs to communicate with the email server. -
Page 100: End A Connection
Getting Connected To change existing settings, in My Work Network, tap Manage existing connections, VPN tab. Select the desired VPN connection, tap Edit, and follow the instructions on the screen. 4. In Name, enter a name for the connection, such as your company's name. -
Page 101: Connect Directly To An Email Server
Getting Connected Connect Directly to an Email Server You can set up a connection to an email server so that you can send and receive email messages by using a modem or network connection and Inbox on your device. The ISP or network must use a POP3 or IMAP4 email server and an SMTP gateway. -
Page 102: Chapter 8 Wi-Fi Wireless Lan
The Wi-Fi (IEEE 802.11b) WLAN Adapter can connect your wireless Toshiba Pocket PC e800 to an existing IEEE 802.11b wireless network or from its own Wireless Network. Using the adapter in the Toshiba Pocket PC e800, you can enjoy the complete mobile and high-speed wireless Internet connectivity while in range of a Wi-Fi compatible access point. -
Page 103: Launch A Wireless Lan Configuration
Wi-Fi Wireless LAN Join an existing network Pocket PC 2003 has a interface that enables you to join to a existing network. If Pocket PC 2003 detects a wireless network, it will show the above menu. Also, if you join to encrypted network(s), Pocket PC 2003 will require entering a Network Wireless Equivalent Privacy (WEP) key. - Page 104 Wi-Fi Wireless LAN Turn Off/On Wireless LAN connection If you want to turn off/on the wireless LAN, tap the arrows icon on the navigation bar and launch the Connectivity window. If you tap the Turn Wireless off/on link on the window you can turn off/on the wireless LAN module Power Off/On the wireless LAN modules Traffic Monitor Utility (TMU) supplies the wireless LAN power off/on...
-
Page 105: Ip Address
Wi-Fi Wireless LAN IP Address IP Address Page Use the IP Address Page to view and edit the IP address, subnet mask and default gateway. Tap the icon, Settings, Advanced, Network Card, Network Adapters, then IEEE 802.11b WLAN Adapter. You can also launch by tapping Start, Settings, Connections, Connections, Advanced, Network Card, Network Adapters, then IEEE 802.11b WLAN Adapter. -
Page 106: Name Servers Page
DNS can also be used to control Internet email delivery. WINS: The Toshiba Pocket PC e800 Windows Internet Naming Service has two functions; one is a Microsoft NetBIOS name server that eliminates the broadcast needed to resolve computer names to IP addresses by providing a cache or database of translations. -
Page 107: Wireless Lan Configuration
Wi-Fi Wireless LAN Alt WINS: Alt WINS stands for Alternative Windows Internet Naming Service, which is used to substitute for the main WINS when necessary. Wireless LAN Configuration Set up a wireless network Networks that you have already configured are preferred networks and are listed in Wireless networks. -
Page 108: Configure Wireless Network
Wi-Fi Wireless LAN If you select to automatically connect to non-preferred networks, your device will detect any new networks, your device will detect any new networks and provide you the opportunity to configure them. Configure Wireless Network A wireless network can be added either when the network is detected, or manually by entering settings information. -
Page 109: Configure Network Authentication Screen
Wi-Fi Wireless LAN Configure Network Authentication Screen A wireless network can be added either when the network is detected or manually by entering settings information. To determine if authentication Information is needed, see your network administrator. Select to set WEP (Wired Equivalent Privacy). -
Page 110: Tmu Traffic Monitoring Utility
Wi-Fi Wireless LAN ■ 128 bits (HEX) Hexadecimal 26-digit English letters and numerals can be entered in Network Key. Letters and numerals that can be entered are 0-9 and A(a) - F(f). ■ Key Index: This becomes enabled when WEP is selected. Select 1 - 4. ■... -
Page 111: Wireless Lan Manager
Wi-Fi Wireless LAN Wireless LAN Manager The Wireless LAN Manager enables you to control some power management settings and also enable you to gather information on the Wireless LAN adapter. To get the status of the Wireless LAN Manager, tap the Wireless LAN Indicator icon on the navigation bar, and then tap the Info link. -
Page 112: Link Screen
Wi-Fi Wireless LAN Link Screen ■ Link Quality The Link Quality tab shows the quality of wireless LAN signal. ■ Link Information The Link Information tab shows some information about your wireless LAN adapter. ■ SSID: Displays the SSID currently connected to the access point or 802.11 ad hoc network. - Page 113 Wi-Fi Wireless LAN Power Screen ■ 802.11 Power Saving Mode: You can enable 802.11-based power management functions from this pull-down menu (Default is Auto). ■ Enable Wireless Radio/Power off: Select this to run in power saving mode. Radio/Power is turned off if there is no transmission for the time specified.
-
Page 114: Manager Screen
Wi-Fi Wireless LAN Manager Screen ■ Enable Wireless LAN Indicator: If you select this, the wireless LAN indicator is displayed in the navigation bar. ■ Transmission Rate: Select transmission rate to be used from the pull- down menu. If you select Fully Auto, the adapter is automatically set to the most suitable transmission rate. -
Page 115: Info Screen
Driver: Displays the wireless LAN driver version. ■ Utility: Displays the wireless LAN configuration utility version. Toshiba Enroller Toshiba Enroller is the tool for obtaining and administering certificates used for 802.1x validation. Please ask your network administrator for configuration details. User’s Manual... -
Page 116: Certificate Import Wizard
Wi-Fi Wireless LAN Certificate from network Enter the user name of the person obtaining the certificate. Enter the password of the user obtaining the certificate. Passwords of more than 14 letters are not permitted. Enter the URL or IP address of the certifying server (CA server). - Page 117 Wi-Fi Wireless LAN Certificate from file ■ Open Certificate: Opens the root certificate. When the root certificate is opened, the person to whom it has been issued, the person by to whom it has been issued, and the period of validity will be displayed. The root certificate is provided by the .cer file.
-
Page 118: Manage Page
Wi-Fi Wireless LAN Manage Page ■ Property: Displays information on obtained certificates. ■ Delete: Deletes certificates. Please use the greatest possible care when deleting certificates. When using EAP-TLS, one client certificate and one root certificate are required as a minimum. When using PEAP, one root certificate is required as a minimum. - Page 119 Wi-Fi Wireless LAN Root Page ■ Property: Displays information on obtained certificates. ■ Delete: Deletes certificates. Please use the greatest possible care when deleting certificates. When using EAP-TLS, one client certificate and one root certificate are required as a minimum. When using PEAP, one root certificate is required as a minimum.
-
Page 120: Advanced Page
The Toshiba Certificate Import Wizard requires an ActiveSync environment to obtain a certificate from a server. Please prepare the cradle and PC so that your Toshiba Pocket PC can connect to a Certification Authority (CA) server. -
Page 121: Start Screen
Network Authentication Screen” on page 8-8. Example: Obtaining a TLS certificate from a CA server (1) Obtaining a TLS certificate always requires an ActiveSync connection. Place your Toshiba Pocket PC e800 into the cradle and tap Next >. User’s Manual 8-20... - Page 122 Wi-Fi Wireless LAN After tapping, if there are any active synchronizing problems, the Import Wizard will alert you. Example: Obtaining a TLS certificate from a CA server (2) You have to enter your user name, password, and CA server name (or IP) to obtain certificates from server.
- Page 123 Wi-Fi Wireless LAN Example: Obtaining a TLS certificate from a CA server (3) If you succeed in obtaining a certificate from the server, the Toshiba Certificate completion screen will display. If you tap Finish, certificates are stored to the system.
- Page 124 If you don't have a certificate file, please contact to your network administrator. The Toshiba Certificate Import Wizard supports only DER-encoded root certificates. If you try to import another certificate file format, the Import Wizard will alert you.
-
Page 125: Using Configfree
Wi-Fi Wireless LAN If you succeed in obtaining a certificate from the server, the Toshiba Certificate completion screen will display. Since PEAP authentication doesn't require a client certification, the wizard will not show information about client certification. If you tap Finish, certificates are stored to the system. - Page 126 Wi-Fi Wireless LAN ConfigFree Launcher also includes shortcuts to the ConfigFree utilities. Profiles created using Profile Settings can be selected from ConfigFree Launcher. Starting ConfigFree Launcher 1. Tap , Programs, and ConfigFree. 2. Tap ConfigFree. The ConfigFree icon resides at the lower right-hand corner of the Today Screen, as shown below.
- Page 127 Wi-Fi Wireless LAN Help Displays help. Exit Exits ConfigFree Launcher and removes it from the Command bar. Profile Settings Profile Settings enables you to easily set up a network configuration. You can save the network configuration as a profile, which can then be easily selected by using ConfigFree Launcher.
- Page 128 Wi-Fi Wireless LAN Description of Main Dialog Profile List Displays a list of saved profiles. Edit Edits the profile. Export Exports the profile. Delete Deletes the profile. Properties Displays the properties of the profile. Used to add a profile. AutoSwitch... Used to configure the automatic switching among profiles.
- Page 129 Wi-Fi Wireless LAN Tap OK to start the Profile wizard. Follow the Profile wizard instructions and enter the network settings to quickly and easily configure the network. User’s Manual 8-28...
- Page 130 Wi-Fi Wireless LAN Description of Start Dialog Standard profile Select to create a standard profile. You can also select one of the following check boxes to create a profile for a specific purpose. Specific IP address Select to configure a static IP address or specific settings name server address.
- Page 131 Wi-Fi Wireless LAN Description of Finish Dialog Profile name Enter the profile name here. Execute this Select the program you want to execute after program after switching profiles. switching Finish Tap to create a profile using the information configured in the wizard. Search for Wireless Devices Search for Wireless Devices displays nearby active 802.11b access points and ad hoc networks.
- Page 132 Wi-Fi Wireless LAN View View option can be set from this menu. Help Help and the version information can be checked from this menu. Connectivity Doctor Connectivity Doctor helps resolve any networking issues that occur with your Pocket PC. Once Connectivity Doctor is started, it begins to diagnose the network and all wireless LAN devices (not including infrared, Bluetooth, or dial-up devices) and adds an exclamation mark (“!”) next to any detected problems.
- Page 133 Wi-Fi Wireless LAN Description of Command Bar Settings > Option > Check connection to Internet Service Select to ping servers. Provider Default Gateway Select to ping the default gateway server when Server diagnosing the network. DNS Server Select to ping the DNS server when diagnosing the network.
-
Page 134: Chapter 9 Toshiba Ip Phone For Pocket Pc
Launching an application To launch Toshiba IP Phone for Pocket PC, tap Start, Program, then TOSHIBA IP Phone. When you launch it for the first time, enter your G- number, password, and name. If you check “Automatic sign-in” box, TOSHIBA IP Phone for Pocket PC signs in automatically next time you launch it. -
Page 135: Bluetooth
Bluetooth-enabled PC's, modems and other peripherals and chat with other Toshiba Pocket PC's. You can use the Bluetooth to connect your Toshiba Pocket PC e800 to only one device at a time. - Page 136 ■ OPP service (Object Push Profile) This service enables you to connect to another Toshiba Pocket PC or cell phone and exchange address books and owner information. The data formats and maximum size of receiving messages are as follows.
-
Page 137: Bluetooth Settings
Bluetooth Settings Enabling Bluetooth on Your Toshiba Pocket PC e800 Enable Bluetooth on the Toshiba Pocket PC by using the “Wireless Communication Switch.” The Bluetooth icon will appear (The icon will also appear when the power is turned on using through a software switch using the antenna icon on top of the screen). -
Page 138: Bluetooth Environmental Settings
Bluetooth Environmental Settings Follow the procedure below to set the environmental settings, security settings, and the device name of the Toshiba Pocket PC e800. Once these settings are made, the setting information is stored. If you want to use the previous settings, the settings do not need to be changed. -
Page 139: Advanced Settings
■ If you want to set the Connectability Mode to Non-connectable and you are operating your Toshiba Pocket PC e800 in an environment in which there are three or more operating Bluetooth devices, you should also set the Discoverability Mode to Non-discoverable. -
Page 140: Preparing To Connect With Bluetooth
Bluetooth Preparing to Connect with Bluetooth Follow the procedure below to make preparations for a Bluetooth connection. Search for peripheral devices Bluetooth authentication and service update 1. Tap Bluetooth icon When using Bluetooth Settings for the first time, or when a remote device (connected partner) is deleted, the dialog box shown above appears on the Bluetooth Settings. - Page 141 Bluetooth 3. Tap and hold on the name of the device to which you want to connect, then tap Update Service on the pop-up menu. The Bluetooth Authentication screen appears on Local Device. Enter the Bluetooth passkey (PIN Code) within 20 seconds and tap OK. ■...
- Page 142 Bluetooth If the Security Mode on either Local Device or the remote device is set to Security On, authentication is performed to confirm the remote device when connecting. If either device has already been authenticated or the Security Mode on either Local Device or the remote device is set to Non-secure, the Bluetooth Authentication screen does not appear.
-
Page 143: Using Com Service
■ The computer to which you want to connect must be Bluetooth enabled and have ActiveSync installed. Your Toshiba Pocket PC e800 must also have been synchronized with the PC using a cradle or a cable at least once to establish a “partnership' to the PC. -
Page 144: Using Pan Service
Bluetooth For operations of the modem or cell phone, please refer to the user's guide of the respective device. Any dial-up number can be used for LAP service. Select and enter the desired number. 1. From the service list on the Bluetooth Settings screen, tap and hold on the name of the DUN or LAP service to which you want to connect, then tap Connection Registration on the pop-up menu. -
Page 145: Using Opp Service
Changing the network configuration for PAN service 1. Tap Start, Settings, Connection tab, and then Network Adapter. Configure Network Adaptors screen appears. 2. Tap Bluetooth BNEP from TOSHIBA to configure the network driver. 3. When the configuration screen appears, make the necessary network changes. -
Page 146: Sending A Contact
Bluetooth Sending a contact 1. Tap Start and Contacts, then tap and hold on the contact you want to send. A pop-up menu appears. 2. You can select multiple contacts by dragging them. You can also send a contact by tapping the Tools menu. 3. -
Page 147: Sending A Schedule
Bluetooth Sending a schedule 1. Tap Start and Calendar, then tap and hold on the schedule that you want to send. A pop-up menu appears. 2. You can also send a schedule by tapping the Tools menu. 3. Tap Send by BT on the pop-up menu. The device search screen appears. -
Page 148: Exchanging Business Cards
Bluetooth Exchanging business cards 1. Tap Start, Contact, and then Tools menu. 2. Tap Exchange by BT. The device search screen appears. 3. Select View All Devices and tap Device Search. The device list appears. 4. Select the device to which you want to connect by tapping the device name, then tap Connect. -
Page 149: Using Ftp Service
Bluetooth Using FTP Service This section explains how to use FTP service to transfer files to and from another Toshiba Pocket PC. Starting Bluetooth FTP 1. Tap Start, Programs, Bluetooth, and then Bluetooth FTP. The server selection screen appears. 2. Tap Search. -
Page 150: Sending A File
Bluetooth Sending a file 1. In the Local Device window, tap and hold on the folder or file that you want to send. A pop-up menu appears. Tap on the file to start the associated application. You can also send a file by dragging that file to the remote device window. -
Page 151: The Bluetooth Settings Screen
Tap Tools on the command bar to display the Tools menu. Searching for peripheral devices When you tap Devices Search on the Tools menu, the Toshiba Pocket PC e800 searches for Bluetooth devices in the vicinity while a message is displayed on the screen indicating that the local device is searching for peripheral devices. -
Page 152: View Menu
Bluetooth Updating service Tap Update Service to display the updated service information of the selected device in the service list of the Bluetooth Settings screen. Tap Connection Registration to register a connection. The icons displayed in the device and service lists change to registered connection icons. -
Page 153: Options Menu
Security Mode to Security On. If you want to set the Connectability Mode to Non-connectable and you are operating your Toshiba Pocket PC e800 in an environment in which there are three or more operating Bluetooth devices, you should also set the Discoverability Mode to Non-discoverable. -
Page 154: Function List
Bluetooth Registration History Tap Registration History on the Options menu to display the Auto Connection Registration History screen. Tap on the Category selection box to display the list of category. Each list displays the latest registration which can be a maximum of three items. The selected item is current available connection registration. -
Page 155: Version Information
Bluetooth Version Information Tap About on the Options menu to display the version information of Bluetooth Settings. User’s Manual 10-21... -
Page 156: Chapter 11 Optional Functions
TOSHIBA Pocket PC e800 Chapter 11 Optional Functions Home You can launch built-in or installed applications (programs) by tapping an icon displayed on the Home screen. It can display a list of running programs, and easily activate or stop a specific program. The Home screen... -
Page 157: About The Home Screen
Optional Functions About the Home Screen The default Home screen is the parallel display style with information window display. 1st window. Tab selection box. Tap this to switch between tabs. 2nd window. Information window. The information can be displayed/hidden. The display style can be switched between parallel and tab. - Page 158 Optional Functions Displays the number of unread mail and the sender of the latest unread mail. Tap to launch Inbox. Displays today’s next appointment. Tap to launch Calendar. Display item Name Description Power Tap to display the Power setting screen. Memory Tap to display the Memory setting screen.
-
Page 159: About Running
Optional Functions About Running The Running tab displays the active application names. The icons do not appear. Application Activate/Stop: Tap the application name you want to activate or tap and hold the application name and select Activate in the pop-up menu. Tap to activate the selected application. -
Page 160: Display Icon List
Optional Functions Display Icon List The following list shows the tabs and icons for the initial setup. Tabs Icons Applications Tabs Icons Applications Running Programs File Explorer Main Pocket DataBackup Internet Explorer Windows Media MSN Messenger Player Notes Pocket Word Tasks Pocket Excel Inbox... -
Page 161: Deleting An Icon
Optional Functions Moving Application Icons You can move icons in tabs or between tabs. To create a new tab, see “Tab Settings” later in this chapter. To move icons in tabs: 1. Drag and drop the desired icon to the desired position with the icon in a tapped state. - Page 162 If the Application file is not designated, or if the Application name is not entered, you cannot add a new icon. You cannot launch the icon added from the storage card, if the same card is not inserted in the Toshiba Pocket PC e800. Renaming Icons You can rename icons (applications).
-
Page 163: Tab Settings
Optional Functions Switching Icon Display When icons are displayed in tab display style, their display can be switched from the View menu. Select Large Icon or Small Icon to suit your preference. Large IconSmall Icon Tab Settings On the Tab Settings screen you can add, delete or rename a tab as well as select a bitmap image to display on the screen background. -
Page 164: To Change A Background
Optional Functions 3. Tap Yes on the Delete tab dialog to delete the tab. When finished, the screen returns to Tab Settings screen. 4. Tap OK on the Tab Settings screen to return to the Home screen. You cannot delete the Running tab. To change the name of a tab: 1. -
Page 165: Toshiba Screen Resolution
To change screen display modes 1. On the Home screen, tap Screen Resolution. A reset dialog warning box displays. 2. Tap OK. 3. Your Toshiba Pocket PC e800 is now reset and it will automatically restart. User’s Manual 11-10... -
Page 166: Clearvue
Toshiba Pocket PC e800 data to a storage device. Additionally, if you have backed up your data on a storage device, you can restore that data in your Toshiba Pocket PC e800 as well as delete backup file data from the storage device. -
Page 167: Making A Backup
The data stored in the Flash ROM disk cannot be backed up. Before backing up or restoring data, stop other applications, and connect the AC adapter to the Toshiba Pocket PC e800. If you make a backup to the CF/SD card or Flash ROM Disk using the DataBackup Utility, please DO NOT: remove the CF/SD card, reset the device, and/or turn off the device’s power until the backup is completed. - Page 168 Optional Functions 3. Tap Backup from Functionality, and select the storage destination. Tap to select Backup. Tap to select the storage destination. Tap to select: All: All files stored in the main memory, registry, and database. PIM data: Pocket Outlook data (Contacts, Calendar, and Task).
-
Page 169: Carrying Out The Restore Operation
Toshiba Pocket PC e800. Prior to restoring your data, please consider the following: ■ If the same file name exists in the main memory of your Toshiba Pocket PC e800, this file data is replaced with the backup data from the storage device. -
Page 170: Deleting A Backup File
Toshiba Pocket PC e800. To delete the backup data: 1. Insert the CF Card or the SD Card into your Toshiba Pocket PC e800. 2. To display the Backup screen, tap Start, Programs, then DataBackup. - Page 171 Auto backups will not occur if the preset storage card is not inserted in the card slot at the specified auto backup time. Do not turn your Toshiba Pocket PC e800 off during an auto backup. Doing so might damage the data or your Toshiba Pocket PC e800.
-
Page 172: Setting The World Clock
Optional Functions Setting the World Clock World Clock displays the time and date of multiple cities in a screen. You can select the cities easily, by tapping the map or pull-down list. 1. Tap Start, Programs, and then World Clock. Home daytime nighttime... -
Page 173: Toshiba Voice Recorder (Tvr)
Optional Functions Toshiba Voice Recorder (TVR) The TOSHIBA Voice Recorder (TVR) is a media player for TOSHIBA Pocket PCs. TVR offers a flexible way to record your voice as a .wav file. It can also play the recorded .wav on a PC. - Page 174 1. On the TVR screen, tap the Settings icon ■ You can assign TOSHIBA Voice Recorder to the hardware recording button if the Assign TVR to Record button check box is selected. You can play the .wav files recorded with Notes if Play all WAV files with TVR is selected.
-
Page 175: Using Toshiba Text To Speech For Pocket Pc
Text Speech and Speech Settings. Mail Speech displays unread emails and reads them out. Text Speech picks up text files in Toshiba Pocket PC e800 and reads them out. It also reads out text data on clipboard. Speech Settings arranges the settings of Mail Speech and Text Speech. - Page 176 Optional Functions Mail Speech starts reading the message from the header information of unread email list. As the reading continues, the currently read phrase is highlighted. Account name displays here. Selected email text displays here. 3. Select any of the following: ■...
- Page 177 When there is an attached file, the voice service announces, “with attached file”. It does not announce the “TO” or “CC” of a mail header. While reading an email, DO NOT synchronize your Toshiba Pocket PC e800 with the PC.
- Page 178 Optional Functions 3. Select any of the following: ■ Folder: Select the folder from the pull-down menu. ■ Cancel: Close the file selection screen and return to the Text Speech screen. ■ Type: Only text file (*.txt) is available. ■ File list: Display Name, Folder, Date, Size, Type and Location.
- Page 179 Optional Functions You can input text directly in the text area, using the Input Panel. The maximum size of a text file or clipboard data to be read is about 16,000 characters. Text Speech starts reading from the cursor position. Speech Settings To start Speech Setting, tap Start, Programs, then Speech Settings.
-
Page 180: Using Voice Command
Command for each application: Command available only for the foreground windows. Installing the Voice Command 1. Make sure your Toshiba Pocket PC e800 is connected to your computer and that an ActiveSync connection has been established. 2. Start the Voice Command installation by running the Setup program. - Page 181 4. After installation, the system requires resetting. The Voice Command cannot “read” without the TOSHIBA Text to Speech for Pocket PC installed. Installation of the TOSHIBA Text to Speech for Pocket PC is highly recommended. Once Voice Command is installed on your Toshiba Pocket PC e800, the program button 5 (recording button at initial setting) is “assigned”...
- Page 182 Optional Functions User Command You can define voice commands on Command Settings. There are two kinds of commands: ■ Commands to insert texts ■ Commands to launch applications. To use the commands to insert texts: 1. On the User Commands tab in the Voice Command Settings, define a phrase you like to a command.
- Page 183 Optional Functions Using Voice Command for Each Application For example, you can use voice commands in the Calendar application. 1. With the Calendar open, say “Very next appointment.” The listing mode screen appears, and it starts reading out very next appointment. You can display the screen also by saying, “Move to listing mode.”...
- Page 184 2. Set the recognition level as required. The higher level of recognition that is set, the more sensitive the program is to the nuances of your voice, and it makes it easier for your Toshiba Pocket PC e800 to recognize the command. On the other hand, setting a higher level of recognition may decrease voice recognition within noisy environments.
- Page 185 Optional Functions To define the action for a User Command: 1. Tap User Command tab on the Voice Command Settings screen. To define text for the command: 1. Tap and hold the command insert text xxx, then select Edit. Tap to clear the action that you defined for the command.
-
Page 186: Ati Presentation Pack
Pocket PC. IA Presenter can run as a standalone mobile PowerPoint player using your portable device’s LCD screen. But with IA Presenter and the Toshiba Presentation Pack linked to an LCD projector or a monitor, you can create powerful presentations from your Pocket PC. -
Page 187: Ia Presenter
Optional Functions IA Presenter Getting Started After you invoke IA Presenter, the screen lists all the converted PowerPoint presentations currently in your \My Documents folder. A sample presentation file is included with the installation, so at least one file will be listed when you initially invoke IA Presenter. -
Page 188: Opening A Presentation And Using View Modes
Optional Functions There are two ways to open the “Set ActiveSync Conversion Options” dialog box: 1. Select ATI Presentation Pack from the Start Menu, and then Set IA Presenter ActiveSync Conversion Options from the submenu. The dialog box will open, establishing it as your default PowerPoint filter for your ActiveSync drag-and-drop operations. -
Page 189: Normal View
Optional Functions Normal View Normal view allows you to view the current slide in the upper pane, while still able to navigate slides conveniently using the lower thumbnail pane. You can drag the Splitter Bar that divides the two panes up or down, to adjust the screen distribution above and below the splitter. -
Page 190: Notes Page
Optional Functions Indicator Icons under Thumbnails Under each thumbnail in Slide Sorter view mode, there may be various small icons displayed which indicate the status/attributes of the slide, as follows: The transition icon indicates that a transition effect has been associated with the slide, and tapping the icon will “demo”... -
Page 191: Slide Show
Optional Functions Slide Show The Slide Show command on the View Menu starts a full screen Slide Show on the Pocket PC’s LCD screen. (If you want to project the slide show to VGA output, you must use the VGA Slide Show command.) Before selecting Slide Show or VGA Slide Show, you should select Set Up Show... - Page 192 Optional Functions If Pen mode is active when you select Blank from the Screen submenu, you will be able to draw or write Ink annotation on the projected black screen. (The Screen submenu also lets you undo the most recent Ink stroke, or erase all of the Ink strokes.) VGA Pointer This mode works only when IA Presenter is in VGA Slide Show view.
- Page 193 Optional Functions The “zoom area” will be displayed on top of the already-existing projection of the entire slide on the VGA screen. After the rectangular zoom area exists on your screen, you can drag it to any part of the screen you wish. It can also be converted to any of the other pre-defined sizes by pressing your stylus on the LCD screen to open the pop-up menu again, then selecting a different value from the VGA Zoom Size submenu.
- Page 194 Optional Functions When IA Presenter is in VGA Zoom mode or VGA Pointer mode, the Blank option is not available. Clear Last Pen Erases the last individual Ink stroke. This command can be applied repeatedly until there are no more Ink strokes in the current slide. Clear All Pen Erases all the pen strokes on the current slide.
-
Page 195: Vga Slide Show
Optional Functions VGA Slide Show VGA Slide Show mode operates almost identically to the Slide Show mode, except for the following operational differences: ■ You should use the VGA Output tab in the Tools, then Options... command to set VGA output-related options. You can also elect to have IA Presenter perform dithering for your slide if you project your slide to an external VGA/video device with less color capability (such as only 256 colors available). -
Page 196: Controlling Transition Effects
Optional Functions Controlling Transition Effects Any transition effects that were assigned in your original PowerPoint file will be retained when the IA Presenter Converter converts it to an .iap file on your Pocket PC. However, IA Presenter also furnishes many attractive transition effects that can be assigned to the .iap file. -
Page 197: Ia Screen Mirror
Optional Functions Select the Insert Slides From Files... command from the Tools Menu. A listing of files will appear. Tap the name of the file whose slides you want to merge with the current file, and it will be done immediately. This command can be undone or redone (Edit Menu). - Page 198 Optional Functions A Note about Updates to the ATI Presentation Pack Your copy of the ATI Presentation Pack contains the latest versions of IA Presenter and IA Screen Mirror. For updates, please visit the IA Style web site (www.iastyle.com). User’s Manual 11-43...
-
Page 199: Chapter 12 Additional Information
TOSHIBA Pocket PC e800 Chapter 12 Additional Information Troubleshooting Check the following guide for the possible cause of a problem and how to correct it. Symptom Cause Correction Even if the power The battery power is Charge the battery. button is pressed and exhausted. - Page 200 See Help of ActiveSync. computer. ActiveSync does not The USB driver of your Reselect the USB function when your computer may not be driver. Toshiba Pocket PC compatible. e800 is connected to your computer with a cradle or USB cable. User’s Manual 12-2...
- Page 201 Additional Information Symptom Cause Correction Cannot access the The connecting using a Check whether the Internet. specified cellular connecting using a phone connection specified cellular cable was not correct. phone connection cable is correct. Radio waves of a Carry out connected cellular communications where phone are getting...
-
Page 202: Resetting
Resetting Reset is equivalent to restarting a computer. Reset the Pocket PC e800 when a button or tapping the screen does not respond. When your Toshiba Pocket PC e800 is reset, all data that was not stored during operation will be deleted. -
Page 203: Troubleshooting For Wi-Fi
1 to 11. ■ The host computer Make sure you have setup the partnership for cannot wirelessly your Toshiba Pocket PC e800 and your host connect with my computer. Toshiba Pocket PC ■ Make sure you are within the range of a e800 working network. -
Page 204: Faq For Wi-Fi
Hoc”. To set the operating mode, click Start, Settings, System, Wireless LAN Utility, then Config. B2: How can I connect my Toshiba Pocket PC e800 to the usable Wireless Network? Click Start, Settings, System, Wireless LAN Utility, Scan to view Scan Page where you can find the usable Wireless Network. -
Page 205: More Information
Link Page. When the adapter is disconnected with the Access Point, “Non-associated” will appear in the BSSID field. To view BSSID, from your Toshiba Pocket PC e800, click Start, Set- tings, System, Wireless LAN Utility, then Link. Check Link Quality. Link Quality shows how clearly the adapter can hear the Access Point. - Page 206 ICS function in Local Area Connection Properties? Sharing) (3) Set your Toshiba Pocket PC e800 as 802.11 Ad Hoc Mode and choose the same SSID to join the 802.11 Ad Hoc Network (choose the DHCP to get the IP assigned).
- Page 207 Additional Information (4) Reset your Toshiba Pocket PC e800 to make the TCP/IP settings take effect (5) Make sure the SSID, WEP keys and channel for all devices in the network are set the same. (6) Make sure the channel been set is in the range of 1 to 11.
- Page 208 You are now ready to browse the Internet using Internet Explorer on your Toshiba Pocket PC e800. C3: How do I check my email on my wireless Toshiba Pocket PC e800? (1) Please make sure that you can use the ActiveSync function through USB Interface at first, and make sure you can use the ActiveSync to receive and send email successfully.
- Page 209 Additional Information You need to choose a proper SSID and channel for the first 802.11 Ad Hoc station. For other stations want to join the same SSID group, you could only choose the same SSID as the first station, but the channel will not take effect.
- Page 210 “Fully Auto”, and the data rate will automatically step down from 11 Mbps, 5.5 Mbps, 2 Mbps, to 1 Mbps if you move farther your Toshiba Pocket PC e800 away from the Access Point or other connected mobile device.
-
Page 211: Error Messages For Bluetooth
Unable to retrieve Local Device information due to insufficient memory. Check the amount of available memory. Solution Reset the Toshiba Pocket PC, increase the memory, and then restart Bluetooth Settings. Remote device search failed due to insufficient memory. Check the amount of available memory. - Page 212 Unable to delete remote device. Solution Try deleting the remote device again or reset the Toshiba Pocket The device name that you entered exceeds the maximum byte count of 248 bytes. Enter a different device name.
- Page 213 Solution Register the connection and try connecting again. Unable to delete connection registration information. Solution Reset the Toshiba Pocket PC. An internal processing error has occurred. Solution Reset the Toshiba Pocket PC. An internal processing error has occurred with the Discoverability Mode setting.
- Page 214 Unable to retrieve service information. Solution Display the service list again. Unable to register connection information. Solution Close Bluetooth Settings, turn off the power of the Toshiba Pocket PC, and then turn the power on again, or reset the Toshiba Pocket PC.
- Page 215 Bluetooth Settings has not been started. Cause The Bluetooth Settings program has not been started because a Bluetooth device's power is not on in the Toshiba Pocket PC. Solution Check the wireless switch to on position, and turn on the Blue- tooth power from utility.
- Page 216 Processing interrupted due to an internal error. Cause The processing could not be continued due to an internal error. Solution Reset the Toshiba Pocket PC. Error messages during File Transfer Protocol (FTP) service The FTP server could not be started because the FTP client is operating.
- Page 217 Additional Information The following characters cannot be used in the folder name: \ / ; , : * ? " < > | Cause You entered an invalid character in the new folder name. Solution Rename the folder using correct characters. The folder name could not be created.
-
Page 218: Troubleshooting For Toshiba Ip Phone For Pocket Pc
Local Device was unable to search for peripheral devices. Solution Try the operation again. Bluetooth Settings cannot be started. Cause The Bluetooth may not be enabled in the Toshiba Pocket PC. Solution Perform the steps to start Bluetooth Settings. (Folder name) does not exist. Cause The folder that you tried to locate in Local Device does not exist. -
Page 219: Glossary For Bluetooth
Each Bluetooth SD Card has a unique device address that is listed on the card as BDA:XXX... X. Local Device In Bluetooth communications, this refers to the local Toshiba Pocket PC. It is also called a client. Profile This refers to the specifications (services) used in Bluetooth communications. - Page 220 Additional Information Graphical User Interface (GUI) Bluetooth terms Authentication Status For remote devices that have performed Bluetooth authentication, Pairable is displayed. For unauthenticated devices, Untrusted is displayed. Authentication This is the process of confirming an authentication password to allow a remote Bluetooth device to connect to Local Device. If the authentication passwords on both devices do not match, the connection is refused.
- Page 221 Additional Information Device Name This is the name of a Bluetooth device. It can be a maximum of 248 bytes (after UTF-8 code conversion). Discoverability Mode This setting determines whether Local Device can be discovered by other Bluetooth devices. Discovered This is a device discovered during the search for peripheral devices.
-
Page 222: Specifications
(15 mm) (L x W x H) Operating conditions Temperature: 32°F to 104°F (0°C to 40°C), relative humidity: 30% to 80% when only the Toshiba Pocket e800 is operating. Temperature capable of charging 41°F to 104°F (5°C to 40°C). Battery type... - Page 223 Additional Information Display 4.0” diagonal, TFT Color, LCD screen, 480 pixels x 640 pixels, up to 64K colors Interfaces DC-IN 5V/3A Headphone 3.5 mm, stereo, mini-plug compatible Microphone Integrated with 3.5 mm, stereo, mini-plug SD card slot SD memory card, SD I/O card or Multimedia card The security function of the SD memory card is disabled.
Need help?
Do you have a question about the Pockey PC e800 and is the answer not in the manual?
Questions and answers