
Related Manuals for Motorola STARLINE SERIES


Summary of Contents for Motorola STARLINE SERIES
- Page 1 ® S T A R L I N E S E R I E S M B * / * M i n i B r i d g e r A m p l i f i e r s I n s t a l l a t i o n a n d O p e r a t i o n M a n u a l...
- Page 2 CAUTION RISK OF ELECTRIC SHOCK CAUTION: TO REDUCE THE RISK OF ELECTRIC SHOCK, DO NOT REMOVE COVER (OR BACK). NO USER-SERVICEABLE PARTS INSIDE. REFER SERVICING TO QUALIFIED SERVICE PERSONNEL. Caution These servicing instructions are for use by qualified personnel only. To reduce the risk of electrical shock, do not perform any servicing other than that contained in the Installation and Troubleshooting Instructions unless you are qualified to do so.
-
Page 3: Fcc Compliance
Motorola, Inc. Motorola reserves the right to revise this publication and to make changes in content from time to time without obligation on the part of Motorola to provide notification of such revision or change. Motorola provides this guide without warranty of any kind, either implied or expressed, including, but not limited to, the implied warranties of merchantability and fitness for a particular purpose. -
Page 4: Table Of Contents
Contents Section 1 Introduction Using This Manual....................................1-2 Related Documentation ...................................1-3 Document Conventions ...................................1-3 If You Need Help ....................................1-3 Calling for Repairs....................................1-4 Section 2 Overview Configuration ....................................2-2 Housing ......................................2-3 Gaskets......................................2-5 Port Locations ....................................2-6 Power Supply....................................2-6 Forward Path.....................................2-9 Models SP and DC .................................2-11 Return Path, RA-Kit/H or RA-Kit/L ..............................2-12 Ingress Control Switch ..................................2-12 Options and Accessories ................................2-14... - Page 5 Contents Automatic Drive Unit................................3-15 ADU Pads and Levels ................................3-15 Return Path Alignment .................................. 3-16 Before You Begin .................................. 3-16 Alignment Procedure................................3-17 Powering and Surge Protection ..............................3-18 Section 4 Bench Testing Before You Begin ..................................... 4-1 Test Equipment and Connections..............................4-2 Measuring Forward Gain.................................
- Page 6 Contents Figures Figure 1-1 MB*/* — closed ................................1-2 Figure 2-1 MB*/* — open.................................2-1 Figure 2-2 MB*/* configurator.................................2-2 Figure 2-3 MB-HSG dimensions — top view..........................2-3 Figure 2-4 MB-HSG dimensions — side view ..........................2-3 Figure 2-5 MBP-HSG dimensions ..............................2-4 Figure 2-6 Housing gaskets................................2-5 Figure 2-7 Housing ports ................................2-6 Figure 2-8 MPPS-II block diagram..............................2-7 Figure 2-9 MPPS-II power pack ..............................2-7...
- Page 7 Section 1 Introduction ® ® The Motorola STARLINE series of MiniBridger amplifiers, model MB*/*, accept a single input and provide high operational gain to a single or dual output. The high gain makes the MB*/* series ideally suited for a hybrid fiber-coax system as well as conventional tree-and-branch designs.
-
Page 8: Using This Manual
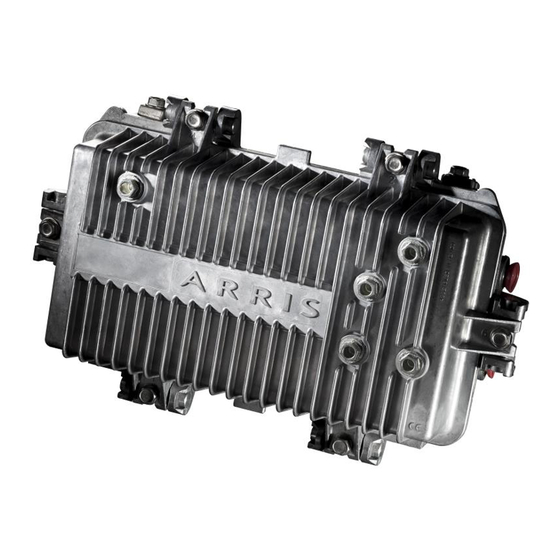
Introduction Figure 1-1 illustrates a closed MB*/*: Figure 1-1 MB*/* — closed Using This Manual The following sections provide information and instructions to install and operate the MB*/*. Section 1 Introduction provides a product description, related documentation, the technical help line, and repair/return information. -
Page 9: Related Documentation
Italic type Denotes a displayed variable, or is used for emphasis If You Need Help If you need assistance while working with the MB*/*, contact the Motorola Technical Response Center (TRC): Inside the U.S.: 1-888-944-HELP (1-888-944-4357) Outside the U.S.: 215-323-0044 Online: http://www.motorola.com/broadband, click HTML/Modem Version, click... -
Page 10: Calling For Repairs
Introduction Calling for Repairs If repair is necessary, call the Motorola Repair Facility at 1-800-642-0442 for a Return for Service Authorization (RSA) number before sending the unit. The RSA number must be prominently displayed on all equipment cartons. The Repair Facility is open from 7:00 AM to 4:00 PM Pacific Time, Monday through Friday. -
Page 11: Overview
Section 2 Overview The MB*/* is a dual-output amplifier while the MB*/S* is a single-output amplifier used in CATV distribution systems. Both models accommodate installation of the optional return amplifier to enable two-way signal flow. All models are high-gain, three-stage hybrid amplifers designed to drive both a limited cascade and a local distribution system. -
Page 12: Configuration
Overview Configuration The MB*/* is fully configured in the factory per customer request. It is recommended that you verify the configuration listed on the outside of the shipping carton with the configuration that you ordered. The shipped configuration is also noted in a label on the side of the electronics chassis and the housing. -
Page 13: Housing
Overview Housing The MB*/* is furnished in an MB-HSG aluminum housing that protects the electronics from weather and dissipates internally generated heat. Figure 2-3 illustrates a top view of the MB-HSG housing and provides its dimensions: Figure 2-3 MB-HSG dimensions — top view 15.4 Figure 2-4 illustrates a side view of the MB-HSG and provides its dimensions: Figure 2-4... -
Page 14: Figure 2-5 Mbp-Hsg Dimensions
Overview Figure 2-5 provides top and side view dimensions of the optional MBP-HSG bypass housing: Figure 2-5 MBP-HSG dimensions 17.7 10.4 Coaxial cable connections to the housing are made using conventional 5/8 24 threads per-inch stinger-type connectors. Five port plugs in the cover enable access to internal test points without opening the housing. -
Page 15: Gaskets
Overview The included clamp and bolt assemblies enable you to mount the standard and bypass housings. For instructions on aerial and pedestal installation refer to Section 5, “Installation”. Gaskets Each housing is equipped with a recessed woven-wire RF gasket and a silicone-rubber weather gasket to provide a seal between the housing base and lid. -
Page 16: Port Locations
Overview Port Locations Five port plugs in the cover enable access to internal test points. The input and output ports provide connection for coaxial cables and are protected by factory-inserted threaded plugs or plastic cap plugs. Discard the plastic cap plugs when you install the cable connectors. Figure 2-7 illustrates the housing port locations: Figure 2-7 Housing ports... -
Page 17: Figure 2-8 Mpps-Ii Block Diagram
Overview Figure 2-8 illustrates a block diagram of the MPPS-II power pack: Figure 2-8 MPPS-II block diagram EMI Filter 60/90 Precision Bridge Isolation Preregulator regulator rectifier transformer Overvoltage power-factor correction Figure 2-9 illustrates the MPPS-II installed in the upper half of the MB-HSG: Figure 2-9 MPPS-II power pack FTEC... -
Page 18: Figure 2-10 60/90 Volt Selector
Overview Figure 2-10 illustrates the location of the voltage selector and the gas discharge tube surge protector on the MPPS-II: Figure 2-10 60/90 volt selector Voltage Gas discharge tube selector or optional FTEC R 54 460132-001 You must remove the MPPS-II cover to access the selector illustrated in Figure 2-10. Section 3, “... -
Page 19: Forward Path
Overview Factory installed 20-amp fuses, illustrated in Figure 2-11, provide power passing to additional amplifiers: Figure 2-11 Power passing fuse locations F in -20dB -20dB STATUS MONITOR OUTPUT PORT 2 JXP 2 -20dB JXP 3/4 BODE FUSE FUSE ALIGN DOTS REF ER TO MANUAL F OR FUS E VALUE S... -
Page 20: Figure 2-12 Mb*/* Dual Output Block Diagram
2-10 Overview Following the Bode board, a JXP pad facility adjusts the RF level into the interstage hybrid amplifier and the MDR-*MB/*/II controls flatness and provides equalization. Because these losses are located interstage, the noise figure is only significantly impacted by the insertion loss of the forward cable equalizer or broadband cable simulator, and the input pad if its value is increased from zero. -
Page 21: Models Sp And Dc
Overview 2-11 Figure 2-13 illustrates the interconnection between these components in the single output MB*/S*: Figure 2-13 MB*/S*single output block diagram +25.0 dB E-GaAs +23.0 dB Silicon -1.0 dB -4.0 dB -6.5 dB -1.0 dB +19 dB Fltn. JXP-B BODE JXP-B Cntrl. -
Page 22: Return Path, Ra-Kit/H Or Ra-Kit/L
2-12 Overview Return Path, RA-Kit/H or RA-Kit/L The circuit board of the MB*/* amplifier accommodates the optional return path. The return path kit, Model RA-Kit/H or RA-Kit/L, includes the return amplifier hybrid (illustrated in Figure 2-15) and jumpers. This equips the MB*/* to pass signals in the return or upstream direction. -
Page 23: Figure 2-14 Ll-Mb-F3 Status Monitor
Overview 2-13 Figure 2-14 illustrates the LL-MB-F3 and the required cable connections to the amplifier module: Figure 2-14 LL-MB-F3 status monitor G- to F-type adapter -20dB -20dB STATUS MONITOR OUTPUT PORT 2 JXP 2 -20dB JXP 3/4 BODE FUSE FUSE ALIGN DOTS REFER TO MANUAL FOR... -
Page 24: Options And Accessories
2-14 Overview Options and Accessories The factory ships the MB*/* as a fully functional unit, but you must configure it appropriately for the field location requirements. You must install the correct forward equalizer or broadband cable simulator and input pad to place the unit in service. Section 3, “ Amplifier Setup” provides information to assist you in this task. -
Page 25: Figure 2-15 Mb*/* Options And Accessories
Overview 2-15 Model Description Function Ingress Control Switch This option enables remote monitoring, isolation, and reduction of ingress on the return path by providing signal attenuation of 6 dB or cutoff of 38 dB typical. The unit is shipped with a jumper in this location. SP or DC/* Output passives These options should be installed in place of the JMP... -
Page 26: Amplifier Setup
Section 3 Amplifier Setup This section provides instructions for fully configuring the MB*/* and describes the proper forward and return path alignment procedures. The following tasks need to be performed for successful amplifier setup: Forward path alignment: Selecting the appropriate cable equalizer or cable simulator Selecting the appropriate input, midstage, and output pads Selecting the appropriate output passives Verify proper flatness control... -
Page 27: Cable Equalizer
Amplifier Setup Secure the electronics chassis in the housing and torque to 18 to 22 in-lbs. to facilitate heat transfer and avoid damage from overheating. Perform a bench alignment. Pre-aligning the MB*/* response on the bench (Section 4, “ Bench Testing” ) for a system signature simplifies field alignment. Field sweep the entire bandwidth of the amplifier to correct frequency response for passive signature and roll-off. -
Page 28: Table 3-1 Starline Forward Equalizers — Sfe-*-*
Amplifier Setup Substituting this information into the above equation provides the following result: 11 dB 26.1 dB 12 dBmV 12 dB = 13.1 dB The slope of the required equalizer is 13.1 dB. Table 3-1 and the graph in Figure 3-1 show that 13.1 dB of slope is caused by approximately 18 dB of cable at 870 MHz. - Page 29 Amplifier Setup Figure 3-1 illustrates a graph of the equalizer slope versus equalizer value information presented in Table 3-1. The amount of cable equals the equalizer value. Figure 3-1 Equalizer slope versus cable Slope versus Cable 550 MHz 650 MHz 750 MHz 870 MHz dB of Equalizer Slope...
-
Page 30: Cable Simulators
Amplifier Setup Cable Simulators STARLINE cable simulators, model SCS-*, are used in place of fixed equalizers in systems where: (1) the amplifiers are located close together, (2) there are large amounts of flat loss from passive components, or (3) it is necessary to compensate for reverse cable tilt. The simulators fit in the same location as the equalizers. -
Page 31: Input, Midstage, And Output Pads
Amplifier Setup The information in Table 3-2 is shown as a graph in Figure 3-2: Figure 3-2 Frequency versus cable slope SCS-1 SCS-2 SCS-3 SCS-4 SCS-5 SCS-6 SCS-7 SCS-8 SCS-9 SCS-10 Frequency (MHz) Input, Midstage, and Output Pads Install model JXP-*B pads to attenuate the signal per system design drawings. Generally, this consists of attenuating excessive input levels. -
Page 32: Output Passives
Amplifier Setup Output Passives Use the furnished JMP jumper to select port 3 or port 4 as the second output port. Install the proper output splitter to obtain signal output at port 3 and port 4. The SP splitter provides equal output at ports 3 and 4. -
Page 33: Flatness Control
Amplifier Setup Flatness Control All amplifiers are pre-aligned for optimal station flatness for the slope value ordered therefore, there is usually no need to adjust the MDR board. However, you can make minor adjustments, if necessary to achieve flatness across the passband. The MDR-*MB/*/II board includes flatness controls and a fixed cable equalizer for 750 MHz or 870 MHz. - Page 34 Amplifier Setup Figure 3-6 MDR-*MB/*/II board To obtain maximum flatness: Adjust C6 and R5 for the flattest response in the mid- to lower-portion of the passband. Adjust C1 for the flattest response in the low- to mid-range of the passband. Adjust C3 and R4 for a peak at approximately 100 MHz to 300 MHz using the following steps: a.
- Page 35 3-10 Amplifier Setup Figures 3-7 and 3-8 illustrate the approximate effects on the frequency response of the MB*/*: Figure 3-7 Effects of flatness controls on the MDR-8MB/*/II board CH 1 S /M log MAG 2 dB/ REF 41.34 dB C2 and R3 C3 and R4 C7 and R2 STOP 870.000 000 MHz...
- Page 36 Amplifier Setup 3-11 Figure 3-8 Effect of flatness controls on the main board: CH1 S log MAG 2dB/ REF 41.35dB C116 CH 1 START 54.000 000 MHz STOP 870.000 000 MHz log MAG 2dB/ REF 41.35dB C118 CH 1 START 54.000 000 MHz STOP 870.000 000 MHz MB*/* Installation and Operation Manual...
-
Page 37: Directional Coupler Test Points
3-12 Amplifier Setup Directional Coupler Test Points Accurate 20 dB directional-coupler test points are available at the input and at the output of the MB*/*. Because these test points are 75-ohm source impedance, they do not require special test probes. After the output hybrid, a second directional coupler provides signal to the optional ADU board. - Page 38 Amplifier Setup 3-13 Table 3-3 Gain reserve versus ambient temperature Temperature Gain Reserve 4 dB Above 110 F (43 C) 5 dB 32 F (0 C) to 110 F (43 C) Below 32 F (0 C) 6 dB Check the amplifier output tilt by measuring the high band- and low band-edge carriers. High = channel 116 (745.25 MHz) or channel 136 (865.25 MHz) Low = channel 2 (55.25 MHz) or channel 3 (61.25 MHz) If the tilt is less than required, install a higher value input equalizer...
-
Page 39: Thermal Drive Unit
3-14 Amplifier Setup Thermal Drive Unit The TDU senses temperature and controls the Bode board. It is assumed that the cable is subjected to the same or similar temperature; therefore, the TDU should not be used for underground installations. To set-up the TDU: Place the jumper on the TDU (Figure 3-9) to the , or position. -
Page 40: Automatic Drive Unit
42 dBmV to 50 dBmV at 550 MHz. Motorola does not recommend operating at levels above 52 dBmV. MB*/* Installation and Operation Manual... -
Page 41: Return Path Alignment
3-16 Amplifier Setup Table 3-4 provides the AGC pad values for other output levels. Recommended pad values are shaded. Table 3-4 MB*/* AGC pad levels Amplifier ADU Control Range (dBmV) MB*/* AGC Pad (10 Minimum Level at Midpoint Level at Maximum Level at to 14 dB tilt) 547.25 MHz... -
Page 42: Alignment Procedure
Amplifier Setup 3-17 Equipment required for return-path alignment includes: Full complement of JXP-*B pads and STARLINE Return Equalizers (SRE-*-*) Reverse signal generator — must produce at least one signal within the return bandpass and have variable output Return sweep or alignment equipment It is recommended that you: Do not use wire jumpers to bypass the SRE-*-* location Perform the return optical link set up before performing amplifier set up... -
Page 43: Powering And Surge Protection
Return levels used for alignment are not necessarily operational system levels. These levels vary from system to system due to differences in equipment, architectures and design philosophies. For an in-depth analysis and discussion of the return path, refer to Motorola reference guide Return Path Level Selection, Setup and Alignment Procedure. -
Page 44: Bench Testing
Section 4 Bench Testing Motorola’s recommended procedure for placing a new MB*/* into service is to fully test it on the bench before it is field installed. There are specific alignment procedures that ensure proper functioning of all components and simplify final installation. If the MB*/* is properly aligned on the bench, only minor adjustments may be required in the field. -
Page 45: Test Equipment And Connections
HP 8711, 8712 or 8713 series, a model 1076 sweep comparator, and a model 1901C display or equivalent. In addition, you need a 60/90 Vac bench power supply, a Motorola model SSP-PIN power combiner, and a variety of jumper cables, adapters, and fittings. -
Page 46: Measuring Forward Gain
Bench Testing Measuring Forward Gain This subsection provides instructions for measuring the full gain and the operational gain and flatness of the MB*/*. To measure the full gain of the amplifier: Determine whether the power-supply jumper (J1) is positioned for operation. -
Page 47: Testing Return Gain And Response
Bench Testing To measure the operational gain and flatness of the amplifier: Perform steps 1 through 6 in Measuring Forward Gain above. Estimate the ambient temperature and find the required gain reserve by referring to Table 3-3. Reduce the gain at the highest frequency by the amount given in the table. Example: The ambient temperature is 70 F. -
Page 48: Example
Bench Testing Measure the gain at the maximum return band frequency (example, 40 MHz for S-split). The amplifier gain is the sum of: the measured gain, the insertion loss of the return cable equalizer at the maximum return band frequency, the insertion loss of the power combiner, any pads installed in either the input or output pad locations, plus the cable simulator loss at the maximum return band frequency. -
Page 49: Installation
Section 5 Installation The field installation procedures presented in the following subsections assume that the amplifier was previously tested and bench aligned. Cable power and RF signal must be available on the system. Although it is preferable to have a full complement of channels available for balancing, you can adjust the MB*/* adequately with a limited number of channels. -
Page 50: Figure 5-2 Torque Sequence
Installation Check the ac voltage setting (jumper J1, Figure 2-10). J1 position Description The voltage must be greater than 38 Vac as read with a true rms voltmeter or 42 Vac when using a conventional, average reading, ac voltmeter. The voltage must be greater than 55 Vac when read with a true rms voltmeter or 61 Vac when using a conventional, average reading, ac voltmeter. -
Page 51: Pedestal Installation
Installation Pedestal Installation Pedestal installation is similar to the aerial installation with the exeception of temperature and mounting procedure. In an aerial installation, the cable and amplifier are subject to the same temperature. In contrast, pedestal installation provides a stable temperature environment for the buried cable while subjecting the elevated amplifier to higher temperatures. -
Page 52: Operating Tips
It is recommended that you contact Motorola’s TRC or your account representative for more specific information regarding use of the midstage and output pads. -
Page 53: Specifications
Specifications are valid over the given bandpass and operating temperature range of 40 F to +140 F ( 40 C to +60 C). Specifications are stated typical unless otherwise noted, and are subject to change. Refer to the Motorola BCS web site or contact your account representative for the latest specifications. -
Page 54: Model Mb87S/Xx
Specifications Model MB87S/XX* Specification Forward Amplifier Passband 52 through 870 MHz Gain Full 45 dB (with SFE-*-*) Operational 40 dB (with SFE-*-* and slope reserves) Flatness 52 through 870 MHz ±0.75 dB maximum Level control, automatic Bode board using ADU/TDU Gain control Fixed pads, JXP- B Performance - reference frequency (MHz) -
Page 55: Model Mb75S/Xg
Specifications Model MB75S/XG* Specification Forward Amplifier Passband 52 through 750 MHz Gain Full 45 dB (with SFE-*-*) Operational 40 dB (with SFE-*-* and slope reserves) Flatness 52 through 750 MHz ±0.75 dB maximum Level control, automatic Bode board using ADU/TDU Gain control Fixed pads, JXP- B Performance - reference frequency (MHz) -
Page 56: Model Mb75S/Xx
Specifications Model MB75S/XX* Specification Forward Amplifier Passband 52 through 750 MHz Gain Full 45 dB (with SFE-*-*) Operational 40 dB (with SFE-*-* and slope reserves) Flatness 52 through 750 MHz ±0.75 dB maximum Level control, automatic Bode board using ADU/TDU Gain control Fixed pads, JXP- B Performance - reference frequency (MHz) -
Page 57: Ra-Kit/H Return Amplifier
Specifications RA-Kit/H Return Amplifier Parameter Specification Passband 5 through 40 MHz Gain, station (minimum) 20 dB (18 dB for M-split) Flatness 0.50 dB Level control Fixed pads, JXP- B, input and output Performance – reference frequency (MHz) At typical output 41 dBmV, flat Channels 4 NTSC... -
Page 58: Torque Specifications
Appendix B Torque Specifications Torque specifications are valid for the MB*/*. Torque Fastener Screw Size Wrench Size In-lbs Ft-lbs Strand clamp/pedestal 5/16-18 1/2 inch 120-144 10-12 13.6-16.3 mounting Housing/lid closure 5/16-18 1/2 inch 12.0 16.3 Test point plugs 5/8-24 1/2 inch 25-40 2.1-3.3 2.8-4.5... -
Page 59: Abbreviations And Acronyms
Abbreviations and Acronyms The abbreviations and acronyms list contains the full spelling of the short forms used in this manual. Automatic Drive Unit carrier-to-noise Composite Second Order Composite Triple Beat Continuous wave Decibel dBmV Decibels referenced to one millivolt FTEC Fast Transfer Electronic Crowbar Ingress Control Switch Megahertz... - Page 60 475486-001 6/02 MGBI...
Need help?
Do you have a question about the STARLINE SERIES and is the answer not in the manual?
Questions and answers