Table of Contents
Advertisement
Advertisement
Table of Contents

Related Manuals for Soundstream SDR-782


Summary of Contents for Soundstream SDR-782
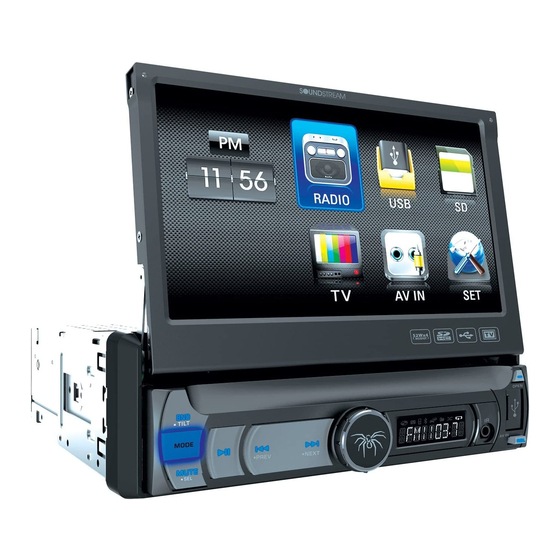
- Page 1 SDR-782/SDR-782T In-Dash 7” Monitor MP3/MP4 Player AM/FM Radio Built-in TV tuner (only for SDR-782T model) Owner’s Manual Take the time to read through this owner’s manual. Familiarity with installation and operation procedures will help you obtain the best Performance from your new device.
-
Page 2: Important Safeguards
Important Safeguards Using the device at temperature below -10℃ may cause the breakage of the device. BEFORE USING PLEASE HEAT UP THE PASSENGER COMPARTMENT TO THE RECOMMENDED TEMPERATURE! Read carefully through this manual to familiarize you with this high-quality sound system. Disconnect the vehicle's negative battery terminal while mounting and connecting the unit. -
Page 3: Table Of Contents
Main Menu ..........................11 ◆Radio Player........................12 ◆USB/SD/MMC Interface ....................12 ◆TV Mode(only for SDR-782T)................... 13 ◆AV-IN Mode(only for SDR-782T) ..................15 ◆AUX-IN Mode(only for SDR-782) ..................15 ◆Setting Control ......................... 15 Other Functions ......................... 17 Anti-theft System........................17 Troubleshooting guide........................ 18... -
Page 4: Accessories
Accessories Package contains the following accessories for installation and operation of the unit. (1) Washer, Spring 1 each Washer, M5 Nut (2) Mounting Strap (3) Bolt 5*20 (4) Screw 5*6 (5) Mounting Collar (6) Release Key (7) Screw 5*20 (8) Rubber Cushion ISO cable Remote Control Warranty card... -
Page 5: Installation/Un-Installation
Installation/Un-installation Note Before starting installation of the unit, make sure the wiring is connected properly. Use only the parts provided with the unit to ensure proper installation. The use of unauthorized parts may cause malfunction. Install the unit where it does not get in the driver’s way and will not injure the passenger in case there is a sudden stop, like an emergency stop. -
Page 6: Wiring Connections
Wiring Connections NOTE: Never connect cable to the system while it is connected to the battery power. Whenever the unit is disconnected from the battery, the preset memory will be erased and the unit will go back to its factory defaults. Note: To watch video the parking wire should be connected to break signal. - Page 7 After connecting, when you start up the reverse gear, the unit will receive the picture from car rear view camera. Note: Only use groundless loudspeakers. Use only loudspeakers of minimal 40Watt, using fewer watts may result in damaging your loudspeakers at higher volumes. Use 4~8 Ω...
-
Page 8: Front Panel
Front Panel Inner Panel 1. BAND/TILT Button In Radio mode, press to change radio band in sequence of: FM1 → FM2 → FM3 → AM1 → AM2. Press and hold for 2 second to adjust the Monitor tilt angle: TILT ANGLE 1 => TILT ANGLE 2 => TILT ANGLE 3 =>... - Page 9 2. MODE Button Press it to select the mode: Radio, USB (if there is a USB device in the unit), CARD (if there is a SD/MMC card in the unit), TV (For SDR-782T) and AV IN. 3. SEL/MUTE Button SEL : Long press it to enter SOUND SETTING menu to adjust the sound settings; EQ => BASS =>...
-
Page 10: Remote Control
covered under warranty. 14. TFT display 15. RESET Button Press it with a thin, sharp object. The device will then be reset to factory default settings. 16. Anti-Theft LED Flash The LED light on the inner panel will twinkle in red when the ACC power is cut off. 17. -
Page 11: Remove Battery
Remove Battery Note: The distance may vary according to the brightness of ambient light. If the remote is not used for an extended period of time, remove the battery to prevent possible damage from battery leakage and corrosion. Do not place any objects between the remote control unit and the sensor on the unit. -
Page 12: Radio Player
◆Radio Player To start Radio, tap RADIO button on main menu screen, or press the MODE button on the front panel or RC repeatedly. Touch it to adjust the volume Touch this button can scan the stations from 1-6, Long Touch it to save the stations with good reception automatically and scan each station for about 5 seconds Touch this button to search stations backward automatically. -
Page 13: Tv Mode(Only For Sdr-782T)
Touch it to turn to the file list Touch it to turn to the menu page Touch it to zoom in the photo: ×1=>×2=>×3=>×4 Touch it to rotate the photo: 90°=>180°=>270° =>360° Touch it to select the photo playback mode: Fade In Fade Out=>Persian Blinds H=>Persian Blinds V=>Slide Up=>... - Page 14 5. Press ENTER on the remote again to confirm, tap BACK button to return to the setup page. 6. Press the icon to be back to main menu. 7. Press the icon to be back to TV main menu. Note: This function is available when TV tuner is connected. TV MENU Auto program (Auto seek mode) System...
-
Page 15: Av-In Mode(Only For Sdr-782T)
2. Press the icon to be back to main menu. ◆AUX-IN Mode(only for SDR-782) To start AUX-IN Mode, tap on AUX-IN button from main menu screen. Connect the external audio signal source to this unit. Select AUX-IN mode in the main menu or by pressing Mode button repeatedly on the front panel. - Page 16 Display Bright: set the LCD screen brightness up or down Contrast: set contrast up or down Saturation: set saturation up or down General Clock hour: select 12-hour or 24-hour clock display mode. Clock set: Press number buttons to input the current time.
-
Page 17: Other Functions
Other Functions Parking When the car is stopped and the parking brake is working, the screen can display the video image, otherwise the screen can't display the video image Back View Camera (only for SDR-782T) This unit is equipped with back view camera output. The camera is used to observe the situation behind the vehicle when you are backing the car. -
Page 18: Troubleshooting Guide
Troubleshooting guide Symptom Cause Solution If the power supply is properly connected General The car ignition is not on. to the car accessory switch the ignition No power The fuse is blown. key to “ACC”. Replace the fuse. Volume is in minimum. Adjust volume to a desired level. -
Page 19: Specification
Specification General Power supply: 12 V DC Current consumption: Max. 10 A Maximum power output: 52W x 4 channels (Max.) Compatible formats: MP3/MP4/WMA/ JPEG/RMVB Dimensions (W x D x H) / 165 x178x 50 mm / 1.8 kg weight: Working temperature -10℃...
Need help?
Do you have a question about the SDR-782 and is the answer not in the manual?
Questions and answers