Table of Contents
Advertisement
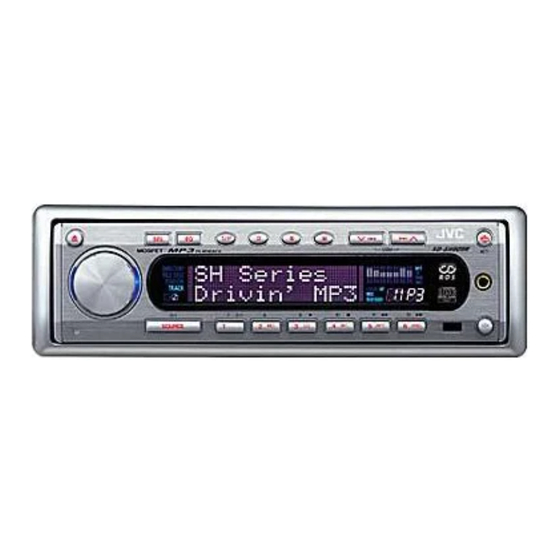
CD RECEIVER
CD-RECEIVER
RECEPTEUR CD
CD-RECEIVER
KD-SH909R/KD-SH707R
For installation and connections, refer to the separate manual.
Für den Einbau und die Anschlüsse siehe das eigenständige Handbuch.
Pour l'installation et les raccordements, se référer au manuel séparé.
Bijzonderheden over de installatie en aansluiting van het apparaat vindt u in de desbetreffende
handleiding.
KD-SH909R
ATT
ANGLE
EQ
CD
DAB
DISC
FM
PRESET
PRESET
R D
AM
KD-SH707R
CH
DISC
AUX
SEL
VOLUME
RM-RK100
INSTRUCTIONS
BEDIENUNGSANLEITUNG
MANUEL D'INSTRUCTIONS
GEBRUIKSAANWIJZING
D
B
M
T/P
MOSFET
T/P
D
B
M
MOSFET
KD-SH909R
ATT
KD-SH707R
ATT
LVT0831-001A
[E/EX]
Advertisement
Table of Contents

Related Manuals for JVC KD-SH909R


Summary of Contents for JVC KD-SH909R
- Page 1 CD RECEIVER CD-RECEIVER RECEPTEUR CD CD-RECEIVER KD-SH909R/KD-SH707R KD-SH909R KD-SH909R MOSFET ANGLE DISC PRESET PRESET KD-SH707R DISC KD-SH707R VOLUME MOSFET RM-RK100 For installation and connections, refer to the separate manual. Für den Einbau und die Anschlüsse siehe das eigenständige Handbuch. Pour l’installation et les raccordements, se référer au manuel séparé.
-
Page 2: How To Reset Your Unit
Position And Reproduction Of Labels Bottom Panel of the main unit CAUTION: Invisible laser ADVARSEL: Usynlig laser- VARNING: Osynlig laser- VARO: Avattaessa radiation when open and stråling ved åbning, når strålning när denna del är suojalukitus ohitettaessa interlock failed or defeated. sikkerhedsafbrydere er ude öppnad och spärren är olet alttiina näkymättö-... -
Page 3: Table Of Contents
Thank you for purchasing a JVC product. Please read all instructions carefully before operation, to ensure your complete understanding and to obtain the best possible performance from the unit. CONTENTS MP3 OPERATIONS ......27 How to reset your unit ....... -
Page 4: How To Use The M (Mode) Button
How to use the M (mode) button: 4/¢ If you press M (mode), the unit goes into functions mode and the number, D (display) buttons work as different function buttons. During functions mode: Time countdown indicator lights up To use these buttons for their original functions (ex. as the number buttons) again after pressing M (mode), wait for 5 seconds without pressing any of these buttons until the functions mode is cleared. -
Page 5: Location Of The Buttons
TRACK LOCAL TP PTY 1 0 (eject) button Display window 2 Control dial u MP3 indicators (only for KD-SH909R) 3 SEL (select) button DIRECTORY, FILE 4 EQ (equalization) button i DISC indicator 5 T/P (traffic/programme type) button o Main display 6 D (display) button ;... -
Page 6: Remote Controller
Each time you press the button, the preset channel number changes, and the selected station (or service) is tuned in. DISC • Only for KD-SH909R: Skips to the first file of the next directory or VOLUME the first file of the previous directory if pressed and held while listening to an MP3 disc. -
Page 7: Preparing The Remote Controller
Preparing the remote controller Place the battery. Slide the battery into the holder with the + side facing upwards so that the battery is fixed in Before using the remote controller: the holder. • Aim the remote controller directly at the remote Lithium coin battery sensor on the main unit. -
Page 8: Basic Operations
21 – 24. To resume the previous volume level, press and To play an MP3 disc (only for KD-SH909R), hold the button again. see pages 27 – 32. • If you turn the control dial clockwise, you can also restore the sound. -
Page 9: Setting The Clock
To turn off the power Set the hour. 1 Select “CLOCK H (hour)” if not shown on Press and hold SOURCE until “SEE YOU” the display. appears on the display. 2 Adjust the hour. • If you turn off the power while listening to a disc, CD play will start from where playback has been stopped previously, next time you turn on the power. -
Page 10: Radio Basic Operations
RADIO BASIC OPERATIONS Listening to the radio Start searching a station. Press ¢ to search You can use either automatic searching or manual stations of higher searching to tune in to a particular station. frequencies. Searching a station automatically: 4 to search Press stations of lower Auto search... - Page 11 • If you release your finger from the button, Searching a station manually: the manual mode will automatically turn off Manual search after 5 seconds. • If you hold down the button, the frequency Select FM or AM (MW/LW). keeps changing until you release the 1 Press SOURCE button.
-
Page 12: Storing Stations In Memory
Local FM stations with the strongest signals are Storing stations in memory searched and stored automatically in the band number you have selected (FM1, FM2 or FM3). You can use one of the following two methods to These stations are preset in the number buttons store broadcasting stations in memory. -
Page 13: Tuning In To A Preset Station
Tuning in to a preset station Tune in to a station (in this example, of 88.3 MHz). You can easily tune in to a preset station. Press ¢ to tune Remember that you must store stations first. If in to stations of higher you have not stored them yet, see “Storing frequencies. -
Page 14: Rds Operations
RDS OPERATIONS What you can do with RDS To use Network-Tracking Reception You can select the different modes of network- tracking reception to continue listening to the RDS (Radio Data System) allows FM stations to same programme in its finest reception. send an additional signal along with their regular When shipped from the factory, “AF”... - Page 15 Using TA Standby Reception Press and hold SEL (select) for more than 2 seconds so that one of the TA Standby Reception allows the unit to switch temporarily to Traffic Announcement (TA) from the PSM items appears on the display. current source (another FM station, CD or other (PSM: see page 37.) connected components).
- Page 16 Using PTY Standby Reception Finish the setting. PTY Standby Reception allows the unit to switch temporarily to your favourite programme (PTY: Programme Type) from the current source (another FM station, CD or other connected components). 7 When the current source is FM, the •...
- Page 17 Searching your favourite programme Select one of the twenty-nine PTY codes. (See page 20.) You can search any one of the PTY codes. In addition, you can store your 6 favourite Selected code name programme types in the number buttons. appears on the display.
-
Page 18: Other Convenient Rds Functions And Adjustments
Other convenient RDS functions To search your favourite programme type and adjustments Press and hold T/P for more than 2 seconds while listening to an FM station. Changing the display mode while listening to an FM station You can change the indication on the display to station name (PS NAME), station frequency or programme type (PTY) while listening to an FM RDS station. -
Page 19: Automatic Clock Adjustment
Automatic selection of the station Automatic clock adjustment when using the number buttons When shipped from the factory, the clock built in this unit is set to be readjusted automatically using Usually when you press the number button, the the CT (Clock Time) data in the RDS signal. preset station is tuned in. - Page 20 PTY codes NEWS: News SOCIAL: Programmes on social activities AFFAIRS: Topical programmes expanding RELIGION: Programmes dealing with any on current news or affairs aspect of belief or faith, or the INFO: Programmes which impart advice nature of existence or ethics on a wide variety of topics PHONE IN: Programmes where people can...
-
Page 21: Cd Operations
CD OPERATIONS When playing an MP3 disc (only for KD-SH909R), The display changes to show the following: refer also to “MP3 OPERATIONS” on pages 27 to 32. Playing a CD CD–in indicator lights up Open the control panel. Total track number of the inserted disc The control panel moves down, and the loading slot appears. -
Page 22: Locating A Track Or Particular Portion On A Cd
Notes: Locating a track or particular • When a disc is in the loading slot, selecting “CD” portion on a CD as the source by pressing SOURCE starts CD play. • When a disc is inserted upside down, the disc To fast-forward or reverse the track automatically ejects. -
Page 23: Playing A Cd Text
Playing a CD Text Selecting CD playback modes To play back tracks at random (Random Play) In a CD Text, some information about the disc (its disc title, performer and track title) is recorded. You can play back all tracks on the disc at You can show these disc information on the random. -
Page 24: Prohibiting Disc Ejection
To play back the current track repeatedly Prohibiting disc ejection (One Track Repeat Play) You can play back the current track repeatedly. You can prohibit disc ejection and can lock a disc in the loading slot. 1 Press M (mode) while playing a disc. -
Page 25: Mp3 Introduction
MP3 INTRODUCTION Precautions when recording MP3 files This chapter is only for KD-SH909R. on a CD-R or CD-RW What is MP3? This unit can only read MP3 files that are recorded in the format that is compliant with MP3 is an abbreviation of Motion Picture Experts ISO 9660 Level 1, Level 2 or Joliet. - Page 26 MP3 directory/file configuration ROOT 15 16 18 19 Note: : Root There is no limit on the number of the hierarchy levels (nested ROOT directories). However, up to 8 hierarchy levels is recommended for stable operations. : Directories : MP3 files MP3 playback/search order (page 29) •...
-
Page 27: Mp3 Operations
MP3 OPERATIONS This chapter is only for KD-SH909R. Playback starts automatically from the first file Refer also to “CD OPERATIONS” on pages 21 to of the first directory once file check is completed. Then, the display changes to show the... - Page 28 To change the display information • When “TAG DISP” is set to “OFF” While playing back an MP3 file, you Directory name can change the file information & shown on the display. Each time you press D (display), the File name display changes to show the following: •...
-
Page 29: Locating A File Or Particular Portion On An Mp3 Disc
Locating a file or particular • When the source symbol animation display is not selected... portion on an MP3 disc Album name/ Album name/ To fast-forward or reverse the file Performer Performer (Directory name*) (Directory name*) & & Press and hold ¢ Track Title Track No./ while playing an MP3 disc,... - Page 30 To skip to the next directory—either on the To go to a particular directory directly same hierarchy level or on a different IMPORTANT: hierarchy level To directly select the directories using the On the control panel: number button(s), it is required that directories 1 Press M (mode) while playing are assigned 2 digit numbers at the beginning of an MP3 disc.
- Page 31 To skip to the next directory on the same To skip to the directories on the lower hierarchy level hierarchy levels (only within the same parent directory) On the remote controller: On the remote controller: Each time you press the button Each time you press the button PRESET consecutively, the next directory...
-
Page 32: Selecting Mp3 Playback Modes
Selecting MP3 playback modes RPT indicator To play back files at random (Random Play) TRACK You can play back all files on the MP3 disc at Ex.: When “REPEAT 1” is selected. random. 1 Press M (mode) while Plays repeatedly Mode playing an MP3 disc. -
Page 33: Sound Adjustments
SOUND ADJUSTMENTS Adjusting the sound Adjust the level. To increase the level. You can adjust the sound characteristics to your preference. To decrease the level. Select the item you want to adjust. Each time you press the button, the adjustable items change as follows: Note: Normally, the control dial works as the volume... -
Page 34: Selecting Preset Sound Modes (Eq)
Notes: Selecting preset sound modes (EQ) • You can adjust each sound mode to your preference, and store it in memory. You can select a preset sound mode suitable to If you want to adjust and store your original sound the music genre. -
Page 35: Storing Your Own Sound Adjustments
Storing your own sound Select the frequency. adjustments • You can select 70 Hz, 150 Hz, 400 Hz, 1 kHz, 2.4 kHz, 6 kHz, and You can adjust the sound modes to your preference 12.5 kHz. and store your own adjustments in memory (USER 1, USER 2 and USER 3). -
Page 36: Other Main Functions
OTHER MAIN FUNCTIONS Changing the general settings Adjust the PSM item selected. (PSM) You can change the items listed on the next page by using the PSM (Preferred Setting Mode) control. Basic Procedure Press and hold SEL (select) for more than 2 seconds so that one of the PSM items appears on the display. - Page 37 IF FILTER Intermediate frequency WIDE AUTO AUTO filter TAG DISP*** Tag display • Press SEL (select) to finish the setting. Not selectable when the DAB tuner is connected. ** Only when the DAB tuner is connected. *** Only for KD-SH909R.
- Page 38 To select the telephone muting To set the clock display – TELEPHONE – CLOCK This mode is used when a cellular phone system You can set the clock to be shown on the display is connected. Depending on the phone system when the unit is turned on.
- Page 39 To adjust the display contrast level To turn the line input switch on or off – CONTRAST – LINE IN You can adjust the display contrast level among You can switch the line input off when no external 01 (dark) to 10 (bright). When shipped from the component is connected to the LINE IN plugs.
- Page 40 – KEY SEL (only for KD-SH909R) You can operate either JVC’s DVD player or VCR An MP3 file can contain file information called through this receiver, by using the number “ID3 Tag” where its album name, performer, track buttons on the control panel.
-
Page 41: Assigning Names To The Sources
Assigning names to the sources Select the character set you want while “ ” is flashing. You can assign names to CDs and the external Each time you press the button, components. the character set changes as After assigning a name, it will appear on the follows: display when you select the source. -
Page 42: Changing The Control Panel Angle
Changing the control panel CAUTION: angle NEVER insert your finger in between the You can change the angle of the control panel to control panel and the four positions. unit, as it may get caught or hurt. Adjust the angle to the position you want. Each time you press the button, the panel angle changes as follows:... -
Page 43: Detaching The Control Panel
Detaching the control panel Attaching the control panel Insert the left side of the control panel You can detach the control panel when leaving into the groove on the panel holder. the car. When detaching or attaching the control panel, be careful not to damage the connectors on the back of the control panel and on the panel holder. -
Page 44: External Component Operations
LINE INPUT (LINE)*** AUX INPUT (AUX)*** Back to the beginning You can connect a JVC DVD player or VCR to the LINE IN plugs. You can operate a JVC DVD player or VCR Without connecting the DAB tuner or CD... - Page 45 To increase the level. Turn on the connected component and start playing the source. To decrease the level. • If connecting a JVC DVD player or VCR, you can perform the following operations: Adjust the sound you want. (See pages 33 – 35.) When connecting a DVD player: : Turns on and off the power.
-
Page 46: Cd Changer Operations
We recommend that you use one of the CH-X series with your unit. If you have another CD automatic changer, Select the CD automatic changer (CD consult your JVC IN-CAR ENTERTAINMENT CHANGER). dealer for connections. • For example, if your CD automatic changer is one of... -
Page 47: Selecting Cd Playback Modes
To fast-forward or reverse the track To show CD Text information This is possible only when connecting a JVC CD Press and hold ¢ automatic changer equipped with CD Text reading while playing a disc, to capability. fast-forward the track. - Page 48 To play back tracks repeatedly (Repeat Play) To play back only intros (Intro scan) You can play back the current track or all tracks You can play back the first 15 seconds of each on the current disc or specified disc in the CD track sequentially.
-
Page 49: Dab Tuner Operations
We recommend that you use DAB (Digital Audio Broadcasting) tuner KT-DB1500 with your unit. one of the services If you have another DAB tuner, consult your JVC IN-CAR ENTERTAINMENT dealer. • Refer also to the Instructions supplied with A typical ensemble has 6 or more programmes your DAB tuner. - Page 50 To change the display information while Select the DAB band (DAB1, DAB2, tuning in to an ensemble or DAB3). Normally service name is shown on the display. Each time you press the If you want to change the display information, button, the DAB band press D (display).
-
Page 51: Storing Dab Services In Memory
Storing DAB services in Select a service of the ensemble you want. memory 1 Press M (mode). You can preset up to 6 DAB services in each DAB band (DAB 1, DAB 2 and DAB 3) manually. Within 5 Seconds Select the DAB tuner. -
Page 52: Tuning In To A Preset Dab Service
What you can do more with DAB Tuning in to a preset DAB service Tracing the same program automatically (Alternative Reception) You can easily tune in to a preset DAB service. Remember that you must store services first. If You can keep listening to the same program. you have not stored them yet, see page 51. -
Page 53: Additional Information
• You can use the following characters to assign names to CDs and external components. (See page 41.) • Only for KD-SH909R: You can display ID3v1 tags using the following letters and symbols (album title, perfomer name, song title, etc.) when you play back an MP3 file with this unit. (See page 25.) -
Page 54: Troubleshooting
TROUBLESHOOTING What appears to be trouble is not always serious. Check the following points before calling a service center. Symptoms Remedies Causes Change the disc. • Sound is sometimes Contents on the disc are not interrupted. compatible with the unit. Stop playback while driving on You are driving on rough rough roads. - Page 55 Symptoms Causes Remedies • “NO DISC” appears on the No disc is in the magazine. Insert a disc. display. • “RESET 8” appears on the This unit is not connected to Connect this unit and the CD display. a CD changer correctly. changer correctly and press the reset button of the CD changer.
-
Page 56: Maintenance
CD format (or in MP3 format only the edges. for KD-SH909R). • Always hold the disc by the edges. Do not (However, they may not be played back depending touch its recording surface. -
Page 57: Specifications
19 W per channel into 4 , 40 Hz to Wow and Flutter: Less than measurable limit 20 000 Hz at no more than 0.8 % total harmonic distortion. [For KD-SH909R] Load Impedance: 4 to 8 allowance) MP3 decoding format: MPEG1/2 Audio Layer 3 Equalizer Control Range: Max. - Page 58 Having TROUBLE with operation? Please reset your unit Refer to page of How to reset your unit Haben Sie PROBLEME mit dem Betrieb? Bitte setzen Sie Ihr Gerät zurück Siehe Seite Zurücksetzen des Geräts Vous avez des PROBLÈMES de fonctionnement? Réinitialisez votre appareil Référez-vous à...
-
Page 59: Problemen Oplossen
JVC IN- d’installation, consulter votre revendeur Einbausatzes brauchen, wenden Sie sich an inbouwpakketten contact op met uw JVC car audio CAR ENTERTAINMENT dealer or a company ihren JVC Autoradiohändler oder ein d’autoradios JVC ou une compagnie dealer of een dealer of een bedrijf dat supplying kits. -
Page 60: Electrical Connections
ENTERTAINMENT dealer. courts possibles telle qu’une barre de cuivre ou une beispielsweise Kupfergeflechtdraht oder verdwijnt, moet u contact opnemen met uw JVC car audio • Maximum input of the speakers should be no more Stahldraht verwenden. Bleibt Störgeräusch tresse. Si le bruit persiste, consulter votre revendeur dealer. - Page 61 ENGLISH DEUTSCH FRANÇAIS NEDERLANDS For some VW/Audi or Opel (Vauxhall) automobile If your car is equipped with the ISO connecter Für manche VW/Audi oder Opel (Vauxhall) Fahrzeuge Wenn Ihr Auto mit ISO-Steckern ausgestattet ist Pour certaine voiture VW/Audi ou Opel (Vauxhall) Si votre voiture est équippée d’un connecteur ISO Voor bepaalde modellen VW/Audi of Opel (Vauxhall) geldt Indien uw auto is uitgerust met de ISO-connector...
- Page 62 CD changer and DAB tuner / CD-Wechsler und DAB-Tuner / Changeur CD et tuner DAB / CD-wisselaar en DAB-tuner You can connect a JVC CD changer and/or a JVC DAB Sie können einen CD-Wechsler und/oder einen DAB-...
Need help?
Do you have a question about the KD-SH909R and is the answer not in the manual?
Questions and answers