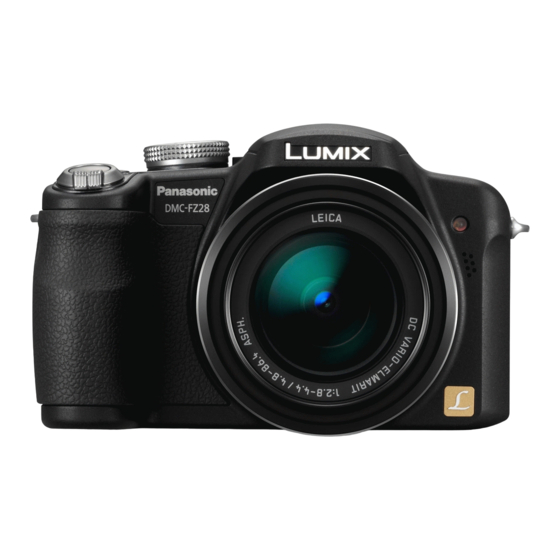
Panasonic LUMIX DMC-FZ28 Operating Instructions Manual
Digital camera model no. dmc-fz28
Hide thumbs
Also See for LUMIX DMC-FZ28:
- Operating instructions manual (215 pages) ,
- Basic operating instructions manual (32 pages) ,
- Instrucciones básicas de funcionamiento (32 pages)

Related Manuals for Panasonic LUMIX DMC-FZ28


Summary of Contents for Panasonic LUMIX DMC-FZ28
-
Page 1: Operating Instructions
Operating Instructions Digital Camera DMC-FZ28 Model No. Before use, please read these instructions completely. Web Site: http://www.panasonic-europe.com VQT1S48... -
Page 2: Information For Your Safety
Before Use Before Use Dear Customer, We would like to take this opportunity to thank you for purchasing this Panasonic Digital Camera. Please read these Operating Instructions carefully and keep them handy for future reference. Information for Your Safety WARNING: TO REDUCE THE RISK OF FIRE, ELECTRIC SHOCK OR PRODUCT DAMAGE, •... -
Page 3: Caution For Ac Mains Lead
Before Use ∫ IMPORTANT Caution for AC mains lead The wires in this mains lead are coloured For your safety, please read the following in accordance with the following code: text carefully. Blue: Neutral, Brown: Live. This appliance is supplied with a moulded As these colours may not correspond with the coloured markings identifying the three pin mains plug for your safety and... - Page 4 Before Use Information for Users on Collection and Disposal of Old Equipment and used Batteries These symbols on the products, packaging, and/or accompanying documents mean that used electrical and electronic products and batteries should not be mixed with general household waste. For proper treatment, recovery and recycling of old products and used batteries, please take them to applicable collection points, in accordance with your national legislation and the Directives 2002/96/EC and 2006/66/...
- Page 5 Before Use ∫ About the battery pack • Do not heat or expose to flame. • Do not leave the battery(ies) in an automobile exposed to direct sunlight for a long period of time with doors and windows closed. ∫ Care of the camera •...
-
Page 6: Table Of Contents
Contents • Confirm the picture in [REC] mode (Review) ........... 42 • Displaying Multiple Screens Before Use (Multi Playback)........ 43 • Using the Playback Zoom....43 • Switching the Information for Your Safety....... 2 [PLAYBACK] mode ......44 Quick Guide ..........9 Deleting Pictures........ - Page 7 • 9 [HIGH SENS.] ......72 • [CATEGORY PLAY] ......99 • [FAVORITE PLAY]......99 • ô [HI-SPEED BURST]....72 Playing Back Motion Pictures/ • [FLASH BURST] ......73 Pictures with Audio ....... 100 • [PANNING]........73 • Motion pictures ....... 100 •...
- Page 8 • Most major credit and debit cards accepted. • All enquiries transactions and distribution facilities are provided directly by Panasonic UK Ltd. • It couldn’t be simpler! • Also available through our Internet is direct shopping for a wide range of finished products, take a browse on our website for further details.
-
Page 9: Before Use
Before Use Before Use Quick Guide This is an overview of how to record and play back pictures with the camera. For each step, be sure to refer to the pages indicated in brackets. Charge the battery. (P17) The battery is not charged when the •... -
Page 10: Accessories
Before Use Accessories Check that all the accessories are included before using the camera. Battery Pack (Indicated as battery in the text) Charge the battery before use. Battery Charger (Indicated as charger in the text) AC Mains Lead USB Connection Cable CGR-S006E DE-A44A AV Cable... -
Page 11: Names Of The Components
Before Use 16 GB: RP-SDV16GE1K 8 GB: RP-SDV08GE1K 4 GB: RP-SDM04GE1K/RP-SDV04GE1K SD Memory Card • 2 GB: RP-SDM02GE1A/RP-SDV02GE1A 1 GB: RP-SDR01GE1A/RP-SDV01GE1A CardBus PC Card Adapter • BN-SDPC3E ¢1 Cameras cannot be stored with the lens hood attached. ¢2 The lens adaptor (DMW-LA3; optional) is necessary to attach a tele conversion lens or close-up lens. - Page 12 Before Use Flash open button (P48) Diopter adjustment dial (P47) Viewfinder (P46, 126) Speaker (P100) [EVF/LCD] button (P46) 10 [AF/AE LOCK] button (P35, 88, 11 Joystick (P25, 39, 59, 60, The joystick is operated in two different ways: it can be moved in the up, down, left and right directions to perform an operation, or it can be pressed to select.
- Page 13 26 [DIGITAL/AV OUT] socket (P115, 117, 121) 27 [DC IN] socket (P115, 117) Always use a genuine Panasonic AC • adaptor (DMW-AC7E; optional). This camera cannot charge the battery • even when the AC adaptor (DMW-AC7E;...
-
Page 14: Attaching The Lens Cap/Strap
Before Use 31 Card/Battery door (P19) 32 Tripod receptacle When you use a tripod, make sure the tripod • is stable when the camera is attached to it. 31 32 Attaching the Lens Cap/Strap ∫ Lens Cap When you turn the camera off, carry the camera or play back the pictures, attach the lens cap •... -
Page 15: Attaching The Lens Hood
Before Use Pass the strap through the hole at the strap eyelet. Pass the strap through the stopper and fasten the strap. A Pull the strap 2 cm or more. Attach the strap to the other side of the camera being •... - Page 16 Before Use Tighten the screw. Do not tighten the screw too much. • ∫ Removing the hood adaptor Grasp the base of the hood adaptor to remove it. • Note You cannot attach the lens hood the opposite way. • When taking pictures with flash with the lens hood attached, the lower portion of the photo may •...
-
Page 17: Preparation
Preparation Preparation Charging the Battery Use the dedicated charger and battery. • The battery is not charged when the camera is shipped. Charge the battery before use. • Charge the battery with the charger indoors. • Charge the battery in a temperature between 10 oC to 35 oC (50 oF to 95 oF). (The battery •... -
Page 18: About The Battery (Charging/Number Of Recordable Pictures)
• ¢ Temperature: 23 oC (73.4 F)/Humidity: 50% when LCD monitor is on. • Using a Panasonic SD Memory Card (32 MB). • Using the supplied battery. • Starting recording 30 seconds after the camera is turned on. (When the optical image stabilizer •... -
Page 19: Inserting And Removing The Card (Optional)/The Battery
Inserting and Removing the Card (optional)/the Battery Check that this unit is turned off. • Close the flash. • We recommend using a Panasonic card. • Slide the card/battery door to open it. Always use genuine Panasonic batteries • (CGR-S006E). -
Page 20: About The Built-In Memory/The Card
Preparation 1:Close the card/battery door. 2:Slide the card/battery door to the end and then close it firmly. If the card/battery door cannot be completely • closed, remove the card, check its direction and then insert it again. Note Remove the battery after use. •... -
Page 21: Setting Date/Time (Clock Set)
4 GB or more capacity. Please confirm the latest information on the following website. • http://panasonic.co.jp/pavc/global/cs (This Site is English only.) Note Do not turn this unit off, remove its battery or card or disconnect the AC adaptor •... -
Page 22: Changing The Clock Setting
Preparation Press [MENU/SET]. Press 2/1 to select the items (year, month, day, hour, minute, display sequence or time display format), and press 3/4 to set. A: Time at the home area B: Time at the travel destination (P80) ‚: Cancel without setting the clock. Select either [24HRS] or [AM/PM] for the time display •... -
Page 23: Setting The Menu
Preparation Setting the Menu The camera comes with menus that allow you to set the settings for taking pictures and playing them back just as you like and menus that enable you to have more fun with the camera and use it more easily. In particular, the [SETUP] menu contains some important settings relating to the camera’s clock and power. -
Page 24: Turn The Camera On
Preparation Turn the camera on. A [MENU/SET] button OFF ON B [REC]/[PLAYBACK] selector switch C Mode dial Slide the [REC]/[PLAYBACK] selector switch to [!]. When selecting the [PLAYBACK] mode menu • settings, set the [REC]/[PLAYBACK] selector switch to [(], and proceed to step Set the mode dial to [ Press [MENU/SET] to display the menu. -
Page 25: Using The Quick Menu
Preparation Press 1. Depending on the item, its setting may not appear or it • may be displayed in a different way. Press 3/4 to select [š]. Press [MENU/SET] to set. Press [MENU/SET] to close the menu. Using the quick menu By using the quick menu, some of the menu settings can be easily found. -
Page 26: About The Setup Menu
Preparation Perform these settings if you need to. About the Setup Menu [CLOCK SET], [ECONOMY] and [AUTO REVIEW] are important items. Check their settings before using them. In the Intelligent auto mode, only [CLOCK SET], [WORLD TIME], [TRAVEL DATE], [BEEP] and •... - Page 27 Preparation Refer to for details about the review. • Refer to for details about the [REC] Mode Menu. • You can adjust the brightness of the monitor or the Viewfinder in [MONITOR/ VIEWFINDER] 7 steps. These menu settings make it easier to see the LCD monitor when you are in bright places or when you are holding the camera high above your head.
- Page 28 Preparation If there are any white saturated areas, we recommend • [ON] [OFF] compensating the exposure towards negative (P55) referring to the histogram (P47) and then taking the picture again. It may result in a better quality picture. There may be white saturated areas if the distance •...
- Page 29 Preparation Set the length of time that the picture is displayed after taking it. [OFF] [1SEC.] [2SEC.] o [AUTO REVIEW] [HOLD]: The pictures are displayed until one any of the buttons is pressed. [ZOOM]: The picture is displayed for 1 second and then enlarged 4k and displayed for 1 more second.
- Page 30 Preparation Select the USB communication system after or before connecting the camera to your PC or your printer with the USB connection cable (supplied). y [SELECT ON CONNECTION]: Select either [PC] or [PictBridge(PTP)] if you connected the x [USB MODE] camera to a PC or a printer supporting PictBridge.
-
Page 31: Slide Show
Preparation Use a battery with sufficient battery power or the AC adaptor (DMW-AC7E; optional) when • formatting. Do not turn the camera off during formatting. If a card has been inserted, only the card is formatted. To format the built-in memory, remove •... -
Page 32: Selecting The [Rec] Mode
Preparation Mode switching Selecting the [REC] Mode When the [REC] mode is selected, the camera can be set to the Intelligent auto mode in which the optimal settings are established in line with the subject to be recorded and the recording conditions, or to the scene mode which enables you to take pictures that match the scene being recorded. - Page 33 Preparation ∫Advanced Aperture-priority AE mode (P59) The shutter speed is automatically determined by the aperture value you set. Shutter-priority AE mode (P59) The aperture value is automatically determined by the shutter speed you set. Manual exposure mode (P60) The exposure is adjusted by the aperture value and the shutter speed which are manually adjusted.
-
Page 34: Taking Pictures Using The Automatic Function Intelligent Auto Mode)
Basic ñ [REC] mode: Basic Taking pictures using the automatic function Intelligent Auto Mode) ñ The camera will set the most appropriate settings to match the subject and the recording conditions so we recommend this mode for beginners or those who want to leave the settings to the camera and take pictures easily. -
Page 35: Scene Detection
Basic Note Be careful not to move the camera when you press the shutter button. • Do not cover the flash or the AF assist lamp with your fingers or other objects. • Do not touch the front of the lens. •... -
Page 36: About The Flash
Basic Set the [AF TRACKING] in the [REC] mode menu to [ON]. • is displayed on the screen.) Bring the subject to the AF tracking frame, and press [ AF/AE LOCK] to lock the subject. AF tracking frame will turn yellow. •... -
Page 37: Taking Pictures With Your Favourite Settings (Programme Ae Mode)
Basic [AF MODE] (P87) š (Set to [ ] when a face cannot be detected) [PRE AF] (P90) [I.EXPOSURE] (P91) [STANDARD] [STABILIZER] (P92) AUTO [AF ASSIST LAMP] (P93) [ON] [FLASH SYNCHRO] (P94) [1ST] The following functions cannot be used. • Flash output adjustment/Auto bracket/Colour bracket/White balance fine adjustment/[AF/ –... -
Page 38: Focusing
Basic Press the halfway pressed shutter button fully to take a picture. The access indication lights (P20) red when pictures • are being recorded on the built-in memory (or the card). ∫ To adjust the colours and take pictures at times when the image appears too red (P85) Focusing Aim the AF area at the subject, and then press the shutter button halfway. -
Page 39: Preventing Jitter (Camera Shake)
Basic Preventing jitter (camera shake) When the jitter alert [ ] appears, use [STABILIZER] (P92), a tripod or the self-timer (P54). Shutter speed will be slower particularly in the following cases. Keep the camera still from the • moment the shutter button is pressed until the picture appears on the screen. We recommend using a tripod. -
Page 40: Taking Pictures With The Zoom
Basic ∫ Example of programme shift (A): Aperture value (B): Shutter speed 1 Programme shift amount 2 Programme shift line chart 3 Programme shift limit 1 / 2 1 / 4 1 / 8 1 / 15 1 / 30 1 / 60 1 / 125 1 / 250 1 / 500 1 / 1000 1 / 2000 Note If the exposure is not adequate when the shutter button is pressed halfway, the aperture value •... - Page 41 Basic ∫ Storing the zoom position (Zoom resume) Refer to for details. • ∫ Types of zooms Feature Optical zoom Extra optical zoom (EZ) Digital zoom 72k [including optical zoom Maximum 18k] ¢1 32.1k magnification 128k [including extra optical zoom 32.1k] The higher the magnification Picture No deterioration...
-
Page 42: Playing Back Pictures ([Normal Play])
Basic ¸ [PLAYBACK] mode: Playing back Pictures ([NORMAL PLAY]) Slide the [REC]/[PLAYBACK] selector switch A to [(]. Normal playback is set automatically in the • following cases. When the mode was switched from the [REC] – to [PLAYBACK]. When the camera was turned on while the –... -
Page 43: Displaying Multiple Screens (Multi Playback)
Basic Displaying Multiple Screens (Multi Playback) Rotate the zoom lever towards [L] (W). 1 screen>12 screens>30 screens>Calendar screen display (P102) A Number of the selected picture and the total number of recorded pictures Rotate the zoom lever towards [Z] (T) to return to the •... -
Page 44: Switching The [Playback] Mode
Basic Switching the [PLAYBACK] mode Press [MENU/SET] during playback. Press 1. Press 3/4 to select the item and then press [MENU/SET]. [NORMAL PLAY] (P42) MENU All the pictures are played back. [SLIDE SHOW] (P97) The pictures are played back in sequence. [CATEGORY PLAY] (P99) The pictures grouped together in categories are played back. -
Page 45: To Delete Multiple Pictures (Up To 50) Or All The Pictures
Basic To delete multiple pictures (up to 50) or all the pictures Press [‚]. Press 3/4 to select [DELETE MULTI] or [DELETE ALL] and then press [MENU/SET]. [DELETE ALL] > step • Press 3/4/2/1 to select the picture, and then press [DISPLAY] to set. (Repeat this step.) ] appears on the selected pictures. -
Page 46: Advanced (Recording Pictures)
Advanced (Recording pictures) Advanced (Recording pictures) About the LCD Monitor/Viewfinder ∫ Switching the LCD monitor/Viewfinder Press [EVF/LCD] to switch the monitor screen. A Viewfinder B [EVF/LCD] button C LCD monitor When the LCD monitor turns on, the Viewfinder turns off •... - Page 47 Advanced (Recording pictures) Note [NIGHT PORTRAIT] (P66), [STARRY SKY] and [FIREWORKS] in scene mode, the guide line • is grey. (P69) ∫ Out-of-frame display Recording information is displayed on the bottom and right edges of the screen. You can therefore concentrate on the subject when taking pictures without being obstructed by information displayed on the screen.
-
Page 48: Taking Pictures Using The Built-In Flash
Advanced (Recording pictures) 2 The picture will become underexposed with more dark area. The pictures with mostly dark area, such as night scenery, will also have a histogram like this. 3 The picture will become overexposed with more bright area. The pictures with mostly white area will also have a histogram like this. - Page 49 Advanced (Recording pictures) Press 1 [‰]. Press 3/4 to select a mode. You can also press 1 [‰] to select. • For information about flash settings that can be selected, refer to • “ ” Available flash settings by recording mode (P50) Press [MENU/SET].
- Page 50 Advanced (Recording pictures) ∫ Available flash settings by recording mode The available flash settings depend on the recording mode. (±: Available, —: Not available, ¥: Initial setting of advanced scene mode and scene mode) ‡ ‰ Œ ‡ ‰ Œ ¢...
- Page 51 Advanced (Recording pictures) ∫ The available flash range to take pictures The available flash range is an approximation. • Available flash range ISO sensitivity Wide Tele 30 cm (0.99 feet) to 8.5 m 1.0 m (3.28 feet) to 5.4 m AUTO ¢...
- Page 52 Advanced (Recording pictures) In advance scene modes (P66) and [SCENE MODE] (P69), the shutter speeds will differ from • those described above. Mode Shutter speed (Sec.) mode 1/8 to 1/2000th • mode • ¢2 mode 1 or 1/4 to 1/2000th •...
-
Page 53: Taking Close-Up Pictures
Advanced (Recording pictures) [REC] mode: Taking Close-up Pictures This mode allows you to take close-up pictures of a subject, e.g. when taking pictures of flowers. You can take pictures of a subject as close as 1 cm (0.04 feet) from the lens by rotating the zoom lever upmost to Wide (1k). -
Page 54: Taking Pictures With The Self-Timer
Advanced (Recording pictures) When a subject is close to the camera, the effective focus range is significantly narrowed. • Therefore, if the distance between the camera and the subject is changed after focusing on the subject, it may become difficult to focus on it again. AF macro mode gives priority to a subject close to the camera, so if the distance between the •... -
Page 55: Compensating The Exposure
Advanced (Recording pictures) The flash output may not be constant when [10S/3PICTURES] is selected. • [10S/3PICTURES] cannot be set when auto bracket or colour bracket is set, or when the scene • mode [FLASH BURST] is set. Self-timer cannot be set to 2 seconds or [10S/3PICTURES] in Intelligent auto mode. •... -
Page 56: Taking Pictures Using Auto Bracket/Colour Bracket
Advanced (Recording pictures) [REC] mode: Taking Pictures using Auto Bracket/ Colour Bracket Auto Bracket In this mode, 3 pictures are automatically recorded in the selected exposure compensation range each time the shutter button is pressed. You can select the picture with the desired exposure from the 3 pictures with different exposures. -
Page 57: Taking Pictures Using Burst Mode
Advanced (Recording pictures) Press [MENU/SET] to close the menu. You can also press the shutter button halfway to finish. • Note When setting exposure bracket, [ ] appears on the screen. • When setting colour bracket, [ ] appears on the screen. •... - Page 58 Advanced (Recording pictures) [OFF] ˜ ò Burst speed (pictures/ ¢ — approx. 2 second) — max. 3 Number of Depends on the recordable remaining capacity of the pictures built-in memory/card. — max. 5 › ¢ The burst speed is constant regardless of the transfer speed of the card. The burst speed values given above apply when the shutter speed is 1/60 or faster and when •...
-
Page 59: Taking Pictures By Specifying The Aperture / Shutter Speed
Advanced (Recording pictures) ±´ [REC] mode: Taking pictures by specifying the aperture / shutter speed ] Aperture-priority AE Set the aperture value to a higher number when you want a sharp focus background. Set the aperture value to a lower number when you want a soft focus background. Set the [REC]/[PLAYBACK] selector switch to [!], and then set the mode dial to [ Tilt the joystick towards 3/4 to set the... -
Page 60: Taking Picture By Setting The Exposure Manually
Advanced (Recording pictures) ² [REC] mode: Taking picture by setting the exposure manually Determine the exposure by manually setting the aperture value and the shutter speed. Set the [REC]/[PLAYBACK] selector switch to [!], and then set the mode dial to [ ²... -
Page 61: Aperture Value And Shutter Speed
Advanced (Recording pictures) Aperture Value and Shutter Speed Aperture-priority AE Available Aperture Value Shutter Speed (Sec) (Per 1/3 EV) F8.0 8 to 1/2000 F7.1 F6.3 F5.6 8 to 1/1600 F5.0 F4.5 F4.0 8 to 1/1300 F3.6 F3.2 F2.8 8 to 1/1000 Shutter-priority AE Available Shutter Speed (Sec) Aperture Value... -
Page 62: Taking Pictures With Manual Focus
Advanced (Recording pictures) [REC] mode: Taking Pictures with Manual Focus Use this function when you want to fix the focus or when the distance between the lens and the subject is determined and you do not want to activate auto focus. Press and hold [AF/MF] until the focus range is displayed. - Page 63 Advanced (Recording pictures) ∫ Changing the zoom area The magnified area can be changed while the screen is expanded using MF Assist. This is convenient when you want to change the focus position to take pictures. 1 Display MF Assist with 3/4 on the joystick.
-
Page 64: Registering Personal Menu Settings (Registering Custom Settings)
Advanced (Recording pictures) [REC] mode: Registering Personal Menu Settings (Registering custom settings) It is possible to register up to 4 sets of current camera settings as custom sets. Set to the mode dial to the desired mode and select the desired menu settings in advance. •... -
Page 65: Taking Pictures In Custom Mode
Advanced (Recording pictures) [REC] mode: Taking pictures in Custom mode You can select one of your own custom settings saved with [CUST. SET MEM.] to suit the picture-taking conditions. Initial setting of the programme AE mode is registered as the custom settings initially. Slide the [REC]/[PLAYBACK] selector switch to [!]. -
Page 66: Taking Expressive Portraits And Landscape Pictures (Advanced Scene Mode)
Advanced (Recording pictures) [REC] mode: Taking expressive portraits and landscape pictures (Advanced scene mode) You can take high-quality pictures of such subjects as people, scenery, sporting events and activities, people in night scenes and flowers in accordance with the surrounding conditions. Slide the [REC]/[PLAYBACK] selector switch to [!]. -
Page 67: [Scenery]
Advanced (Recording pictures) [INDOOR PORTRAIT] Sets the ISO sensitivity setting to the appropriate setting to prevent blurring of photo subject for indoor photography. [CREATIVE PORTRAIT] You can change the amount of background blurring by changing the aperture value (P59). ∫ Technique for Portrait mode To make this mode more effective: 1 Rotate the zoom lever as far as possible to Tele. -
Page 68: [Night Portrait]
Advanced (Recording pictures) [INDOOR SPORTS] Increases the ISO sensitivity and increases the shutter speed to prevent blurring for indoor photography. [CREATIVE SPORTS] The shutter speed (P59) can be changed in the [NORMAL SPORTS] setting. Note This mode is suitable for taking pictures of subjects at distances of 5 m (16.4 feet) or more. •... -
Page 69: Taking Pictures That Match The Scene Being Recorded (Scene Mode)
Advanced (Recording pictures) [FOOD] You can take pictures of food with a natural hue without being affected by the ambient light in restaurants etc. [OBJECTS] You can take clear and vivid pictures of accessories or small objects in a collection. [CREATIVE CLOSE-UP] You can change the degree of blurring of the background by changing the aperture value in the macro settings. -
Page 70: Party]
Advanced (Recording pictures) ∫ About the information If you press [DISPLAY] when selecting a scene mode in step • explanations about each scene mode are displayed. (If you press [DISPLAY] again, the screen returns to the scene mode menu.) Note To change the scene mode, press [MENU/SET] and then press 1, and return to step above. -
Page 71: Í [Pet]
Advanced (Recording pictures) ∫ Birthday/Name setting Press 3/4 to select [AGE] or [NAME] and then press 1. Press 3/4 to select [SET] and then press [MENU/SET]. Enter the birthday or name. Birthday: 2/1: Select the items (year/month/day). 3/4: Setting. [MENU/SET]: Exit. Name: For details on how to enter characters, read the [TITLE EDIT] section on P103. -
Page 72: High Sens.]
Advanced (Recording pictures) 9 [HIGH SENS.] This mode minimises the jitter of the subjects, and enables you to take pictures of these subjects in dimly lit rooms. (Select this for high-sensitivity processing. The sensitivity automatically switches to between [ISO1600] and [ISO6400].) ∫... -
Page 73: [Flash Burst]
Advanced (Recording pictures) The focus, zoom, exposure, white balance, shutter speed and ISO sensitivity are fixed to the • settings for the first picture. The ISO sensitivity is automatically adjusted. Note, however, that the ISO sensitivity is set high • to achieve a high shutter speed. -
Page 74: Starry Sky]
Advanced (Recording pictures) Using prefocus. – Use this mode with burst mode. – (You can then select the best pictures from all the pictures taken.) ∫ Setting the shutter speed Press 4 to select [SHUTTER-PRIORITY] and press [MENU/SET]. It can be set from the quick menu (P25). •... -
Page 75: Fireworks]
Advanced (Recording pictures) 4 [FIREWORKS] This mode allows you to take beautiful pictures of fireworks exploding in the night sky. ∫ Technique for Fireworks mode We recommend performing the following steps to prefocus on the point the pictures will be taken so that you do not miss taking pictures of the fireworks when they are fired. -
Page 76: [Pin Hole]
Advanced (Recording pictures) Note The focus range is 5 m (16.4 feet) to ¶. • Turn the camera off when taking off or landing. • When using the camera, follow all instructions from the cabin crew. • Be careful about the reflection from the window. •... -
Page 77: Motion Picture Mode
Advanced (Recording pictures) [REC] mode: Advanced (Recording pictures) Motion Picture Mode Slide the [REC]/[PLAYBACK] selector switch to [!]. Set the mode dial to [n]. Press the shutter button halfway to focus and then press it fully to start recording. A Audio recording The available recording time B is displayed on the top •... - Page 78 Due to implemented sound quality improvements, motion pictures shot using this unit cannot • be played back on Panasonic digital cameras (LUMIX) sold before August 2008. In motion picture mode, the following functions cannot be used. • [š] and [ ] in [AF MODE] –...
-
Page 79: Useful Functions At Travel Destinations
Advanced (Recording pictures) [REC] mode: Useful Functions at Travel Destinations Recording which Day of the Vacation and the Location of the Vacation For details on the [SETUP] menu settings, refer to P23. If you set the departure date and the location of the vacation in advance, the number of days that have passed since the departure date (which day of the vacation it is) is recorded when you take the picture. -
Page 80: Recording Dates/Times At Overseas Travel Destinations (World Time)
Advanced (Recording pictures) Press 4 to select [LOCATION] and then press 1. Press 4 to select [SET] and then press [MENU/ SET]. Enter the location. For details on how to enter characters, read the [TITLE EDIT] • section on P103. Press [MENU/SET] twice to close the menu. - Page 81 Advanced (Recording pictures) Select [WORLD TIME] from the [SETUP] menu, and then press 1. When first using the camera after purchasing it, the [PLEASE • SET THE HOME AREA] message appears. Press [MENU/ SET], and set the home area on the screen in step Press 4 to select [HOME], and then press [MENU/SET].
-
Page 82: Using The [Rec] Mode Menu
Advanced (Recording pictures) Using the [REC] Mode Menu @ [PICTURE SIZE] For details on [REC] mode menu settings, refer to P23. Set the number of pixels. The higher the numbers of pixels, the finer the detail of the pictures will appear even when they are printed onto large sheets. Applicable modes: ∫... -
Page 83: A [Quality]
Advanced (Recording pictures) A [QUALITY] For details on [REC] mode menu settings, refer to P23. Set the compression rate at which the pictures are to be stored. Applicable modes: [A]: Fine (when giving priority to the picture quality) [›]: Standard (when using the standard picture quality and increasing the number of pictures to be recorded without changing the number of pixels) ¢1 ]: RAW file (When the image is to be edited with a PC in high quality) -
Page 84: [Intelligent Iso]
Advanced (Recording pictures) [INTELLIGENT ISO] For details on [REC] mode menu settings, refer to P23. The camera automatically sets the optimum ISO sensitivity and shutter speed to suit the movement of the subject and brightness of the scene to minimise the jitter of the subject. ³±... -
Page 85: [White Balance]
Advanced (Recording pictures) Note The upper limit of the ISO sensitivity can be set. • The higher the value set for the ISO sensitivity, the more the jitter is reduced but the greater the • amount of picture noise. It will work when the [SENSITIVITY] is set to [AUTO] or [INTELLIGENT ISO] is set to [ON]. •... - Page 86 Advanced (Recording pictures) Select [WHITE BALANCE] and then press 1 Press 1 again if [ ], [ ] or [ ] is selected. • 3/4/2/1 to adjust the white balance and then press Press [MENU/SET]. A (AMBER: ORANGE) B (BLUE: BLUISH) (GREEN: GREENISH) (MAGENTA: REDDISH) Note...
-
Page 87: C [Metering Mode]
Advanced (Recording pictures) C [METERING MODE] For details on [REC] mode menu settings, refer to P23. Type of optical measurement to measure brightness can be changed. Applicable modes: [C]: Multiple This is the method in which the camera measures the most suitable exposure by judging the allocation of brightness on the whole screen automatically. - Page 88 Advanced (Recording pictures) Note The camera is focusing on all the AF areas when multiple AF areas (max. 5 areas) light at the • same time. If you want to determine the focus position to take pictures, switch the AF mode to [ƒ], [Ø] or [Ù].
- Page 89 Advanced (Recording pictures) Note If it fails to lock, AF area will flash in red, and disappear. Try to lock again. • AF Tracking will not operate when the subject is not specified, the subject is lost, or has failed •...
-
Page 90: [Pre Af]
Advanced (Recording pictures) [PRE AF] For details on [REC] mode menu settings, refer to P23. The camera will adjust focus automatically depending on the settings. Applicable modes: [OFF]: ]: Quick AF ] is displayed on the screen. ¢ ]: Continuous AF ] is displayed on the screen. -
Page 91: [I.exposure]
Advanced (Recording pictures) Move the camera to compose the picture and then press the shutter fully. ∫ To cancel the AF/AE lock The setting is cancelled by pressing the [AF/AE LOCK] again. Note The exposure is set, even if the brightness of the subject changes. •... -
Page 92: I [Pict.adj.]
Advanced (Recording pictures) Note When in Intelligent auto mode, only [B/W] or [SEPIA] can be selected. • The Intelligent auto mode is set separately from the other recording modes. • [COLOR EFFECT] becomes disabled when colour bracket is set. • I [PICT.ADJ.] For details on [REC] mode menu settings, refer to P23. -
Page 93: [Min. Shtr Speed]
Advanced (Recording pictures) In digital zoom range. – When taking pictures while following a moving subject. – When the shutter speed becomes slower to take pictures indoors or in dark places. – Be careful of camera jitter when you press the shutter button. •... -
Page 94: [Flash Synchro]
Advanced (Recording pictures) [ON]: When taking pictures in dark places, the AF assist lamp lights while the shutter button is pressed halfway. (Larger AF areas are now displayed.) Note The effective range of the AF assist lamp is 1.5 m (4.92 feet). •... -
Page 95: [Conversion]
Advanced (Recording pictures) [DELETE STILL PICTURES]: To delete all pictures for flip animation. ∫ Creating the flip animation Select [PICTURE CAPTURE] and then press 1. Press the shutter button and capture the images one frame at a time. The picture size is 320 240 pixels. -
Page 96: U [Clock Set]
Advanced (Recording pictures) Note Refer to P123 for details about attaching the lens. • Ensure that [CONVERSION] is set to [OFF] when not using a conversion lens. • Read the operating instructions of the conversion lens for details. • U [CLOCK SET] For details on [REC] mode menu settings, refer to P23. -
Page 97: Advanced (Playback)
Advanced (Playback) ¸ [PLAYBACK] mode: Advanced (Playback) Playing Back Pictures in Sequence (Slide Show) You can play back the pictures you have taken in synchronisation with music, and you can do this in sequence while leaving a fixed interval between each of the pictures. Furthermore, you can play back the pictures grouped together by category or play back only those pictures you have set as favourites as a slide show. - Page 98 Advanced (Playback) Press 3 to select [START] and then press [MENU/ SET]. Press 4 to finish the slide show. Normal playback resumes after the slide show finishes. • slide show ∫ Operations performed during The cursor displayed during playback is the same as 3/4/2/1. The menu screen is restored when [‚] is pressed.
-
Page 99: Selecting Pictures And Playing Them Back ([Category Play]/[Favorite Play])
Advanced (Playback) ¸ [PLAYBACK] mode: Selecting Pictures and Playing them Back ([CATEGORY PLAY]/[FAVORITE PLAY]) [CATEGORY PLAY] This mode allows you to search images by scene mode or other categories (such as [PORTRAIT], [SCENERY] or [NIGHT SCENERY]) and sort the pictures into each of the categories. -
Page 100: Playing Back Motion Pictures/Pictures With Audio
Advanced (Playback) Perform steps 1 and 2 on page 97. Press 3/4 to select [FAVORITE PLAY], and then press [MENU/SET]. Note You can use only [ROTATE], [ROTATE DISP.], [DPOF PRINT], [PROTECT] or [AUDIO DUB.] • in the [PLAYBACK] menu. ¸ [PLAYBACK] mode: Playing Back Motion Pictures/Pictures with Audio Motion pictures... -
Page 101: Creating Still Pictures From A Motion Picture
Advanced (Playback) Note Sound can be heard through the speaker. Refer to [VOLUME] (P26) for information about how • to adjust the volume in the [SETUP] menu. The file format that can be played back with this camera is QuickTime Motion JPEG. •... -
Page 102: Using The [Playback] Mode Menu
Advanced (Playback) Press 3 to select [YES] and then press [MENU/SET]. Picture size The picture size are as following. Item 1 picture 9 pictures 0.3 M 0.3 M [QUALITY] is fixed to [›]. • Note You may not be able to save still pictures from a motion picture taken on other equipment. •... -
Page 103: [Title Edit]
Advanced (Playback) Press [MENU/SET] to display the pictures that were recorded on the selected date. Press [‚] to return to the calendar screen. • Press 3/4/2/1 to select a picture and then press [MENU/SET]. The picture that was selected will appear. •... -
Page 104: [Text Stamp]
Advanced (Playback) Press 3/4/2/1 to select text and then press [MENU/SET] to register. Press [DISPLAY] to switch text between [A] (capitals), [a] (small • case) and [&/1] (special characters and numbers). The cursor at the entry position can be moved to the left with •... - Page 105 Advanced (Playback) Press 3/4 to select [SINGLE] or [MULTI] and then press [MENU/SET]. [SINGLE] [MULTI] Select the picture, and then press [MENU/SET] to set. [‘] appears on screen if the picture is • stamped with text. [MULTI] setting Press [DISPLAY] to set (repeat), Press 2/1 to Press 3/4/2/1 to and then press [MENU/SET] to set.
-
Page 106: Q [Resize]
Advanced (Playback) ¢ Press [‚] to return to the menu screen. ¢The menu screen is automatically restored when [MULTI] is selected. Press [MENU/SET] to close the menu. • Note When you print pictures stamped with text, the date will be printed over the stamped text if you •... -
Page 107: [Trimming]
Advanced (Playback) ¢The menu screen is automatically restored when [MULTI] is selected. Press [MENU/SET] to close the menu. • Note You can set up to 50 pictures at one time in [MULTI]. • The picture quality of the resized picture will deteriorate. •... -
Page 108: [Leveling]
Advanced (Playback) [LEVELING] Minute tilting of the image can be adjusted. Select [LEVELING] on the [PLAYBACK] mode menu. (P23) Press 2/1 to select the picture, and then press [MENU/SET]. Press 2/1 to adjust the tilting, and press [MENU/ SET]. 1: clockwise 2: counterclockwise Up to 2 o can be adjusted. -
Page 109: N [Rotate]/M [Rotate Disp.]
Advanced (Playback) Press 3 to select [YES] and then press [MENU/ SET]. Press [‚] to return to the menu screen. Press [MENU/SET] to close the menu. • Note After converting the aspect ratio, the picture size may become larger than that of the original •... -
Page 110: Ü [Favorite]
Advanced (Playback) Press 4 to select [ON] and then press [MENU/SET]. The pictures are displayed without being rotated when you select • [OFF]. Refer to for information about how to play back pictures. • Press [MENU/SET] to close the menu. Note When you play back pictures on a PC, they cannot be displayed in the rotated direction unless •... -
Page 111: O [Dpof Print]
Advanced (Playback) O [DPOF PRINT] DPOF “Digital Print Order Format” is a system that allows the user to select which pictures to print, how many copies of each picture to print and whether or not to print the recording date on the pictures when using a DPOF compatible photo printer or photo printing store. For details, ask at your photo printing store. -
Page 112: P [Protect]
Advanced (Playback) Depending on the photo printing store or the printer, the date may not be printed even if you set • to print the date. For further information, ask at your photo printing store or refer to the operating instructions for the printer. The date cannot be printed on pictures stamped with text. -
Page 113: B [Audio Dub.]
Advanced (Playback) B [AUDIO DUB.] You can add the audio after taking a picture. Select [AUDIO DUB.] on the [PLAYBACK] mode menu. (P23) Press 2/1 to select the picture and then press [MENU/SET] to start audio recording. The message [OVERWRITE AUDIO DATA?] screen appears •... - Page 114 Only pictures recorded with a Panasonic digital camera (LUMIX) will be copied. • (Even if the pictures were recorded with a Panasonic digital camera, you may not be able to copy them if they were edited with a PC.) DPOF settings on the original picture data will not be copied. Set the DPOF settings again after •...
-
Page 115: Connecting To Other Equipment
Connecting to other equipment Connecting to other equipment Connecting to a PC You can acquire recorded pictures to a PC by connecting the camera and the PC. You can easily print out or mail the pictures you have imported. Use of the •... - Page 116 Connecting to other equipment the screen, and disconnect the camera from the PC. Then set [USB MODE] to [PC] again. Double-click on [Removable Disk] in [My Computer]. When using a Macintosh, the drive is displayed on the desktop. (“LUMIX”, “NO_NAME” •...
-
Page 117: Printing The Pictures
Connecting to other equipment ∫ Connection in the PTP mode (Windows XP, Windows Vista and Mac OS X only) Set [USB MODE] to [PictBridge(PTP)]. Data can now be read only from the card into the PC. When there are 1000 or more pictures on a card, the pictures may not be imported in the PTP •... -
Page 118: Selecting A Single Picture And Printing It
Connecting to other equipment Turn the camera off before connecting or disconnecting the AC adaptor (DMW-AC7E; • optional). Before inserting or removing a card, turn the camera off, and disconnect the USB connection • cable. You cannot switch between the built-in memory and the card while the camera is connected to •... -
Page 119: Print Settings
Connecting to other equipment Press 3 to select [PRINT START] and then press [MENU/SET]. Refer to P119 for the items which can be set before starting to • print the pictures. Press [MENU/SET] to cancel printing. • Disconnect the USB connection cable after printing. •... - Page 120 Connecting to other equipment [A3] 297 mmk420 mm [10k15cm] 100 mmk150 mm [4qk6q] 101.6 mmk152.4 mm [8qk10q] 203.2 mmk254 mm [LETTER] 216 mmk279.4 mm [CARD SIZE] 54 mmk85.6 mm Paper sizes not supported by the printer will not be displayed. •...
-
Page 121: Playing Back Pictures On A Tv Screen
Connecting to other equipment ¸ [PLAYBACK] mode: Playing Back Pictures on a TV Screen Playing back pictures using the AV cable (supplied) Preparations: Set the [TV ASPECT]. (P30) Turn this unit and the TV off. 1 Yellow: to the video input socket 2 White: to the audio input socket A Align the marks, and insert. -
Page 122: Playing Back On The Tv With Component Socket
Connecting to other equipment Note Depending on the TV model, pictures may not be displayed on the full screen. • Motion pictures cannot be played back. To play back motion pictures, connect the camera to • the TV with the AV cable (supplied). You cannot play back pictures on SDHC cards if the TV does not support these cards. -
Page 123: Using The Conversion Lens (Optional)
Connecting to other equipment Do not use any other cables except a genuine Panasonic component cable (DMW-HDC2; • optional). Audio will be output as monaural. • When you play back a picture vertically, it may be blurry. • Image is not displayed on the LCD monitor/Viewfinder when the component cable is •... - Page 124 Connecting to other equipment Zoom magnification Recordable range when when a lens is using a conversion lens attached (Max. Wide Tele number of pixels) ¢ Tele conversion lens 9k-18k 5.5 m (18 feet) to ¶ 22 cm 40 cm (0.72 feet) (1.31 feet) Normal 50 cm...
-
Page 125: Using The Protector/Filter
Connecting to other equipment Using the Protector/Filter The MC protector (DMW-LMC46; optional) is a transparent filter which affects neither the colours nor the amount of light, so it can always be used to protect the camera’s lens. The ND filter (DMW-LND46; optional) reduces the amount of light to approximately 1/8th (equal to adjusting the aperture value 3 increments) without affecting the colour balance. -
Page 126: Screen Display
Others Others Screen Display ∫ In recording Recording in programme AE mode [ ] (Initial setting) Recording mode Flash mode (P48) AF area (P38) Focus (P38) Picture size (P82) Quality (P83) Battery indication (P18) Number of recordable pictures (P145) Built-in memory (P20) : Card (P20) - Page 127 Others ∫ In recording (after settings) 17 AF Macro (P53) : Tele Macro (P53) : AF tracking (P88) : MF (P62) : Flash output adjustment (P51) 18 White balance (P85) White balance fine adjustment (P85) 19 ISO sensitivity (P84) maximum ISO sensitivity level (P84) 20 Colour effect (P91)
-
Page 128: Cautions For Use
Others ∫ In playback Playback mode (P42) Protected picture (P112) Favourites (P110) Stamped with text indication (P104) Picture size (P82) Picture quality setting (P77) Quality (P83) Battery indication (P18) Folder/File number (P116) Built-in memory (P20) Elapsed playback time (P100): 8m30s Picture number/Total pictures 10 Motion picture recording time (P100): 8m30s... - Page 129 Others If the camera is adversely affected by electromagnetic equipment and stops functioning • properly, turn the camera off and remove the battery or disconnect AC adaptor (DMW-AC7E; optional). Then reinsert the battery or reconnect AC adaptor and turn the camera on. Do not use the camera near radio transmitters or high-voltage lines.
- Page 130 Others Always remove the battery after use. If you drop the battery accidentally, check to see if the body of the battery and the terminals are damaged. Inserting a damaged battery in the camera will damage the camera. • Bring charged spare batteries when going out. Be aware that the operating time of the battery becomes shorter in low temperature conditions •...
-
Page 131: Message Display
Recorded data may be damaged or lost if the camera breaks down due to inappropriate • handling. Panasonic will not be liable for any damage suffered due to loss of recorded data. About tripods When you use a tripod, make sure the tripod is stable when this unit is attached to it. - Page 132 Others [NOT ENOUGH SPACE ON BUILT-IN MEMORY]/[NOT ENOUGH MEMORY ON THE CARD] There is no space left on the built-in memory or the card. • When you copy pictures from the built-in memory to the card (batch copy), the pictures are –...
-
Page 133: Functions That Cannot Be Set Or Will
Others [A FOLDER CANNOT BE CREATED] A folder cannot be created because there are no remaining folder numbers that can be used. • (P116) > Format the card after saving necessary data on a PC etc. (P30) If you execute [NO.RESET] in the [SETUP] menu after formatting, the folder number is reset to 100. - Page 134 Others Extra Optical Zoom (P40) in [SCENE MODE] • 9, ô, $ mode • When [QUALITY] is set to [ ] or [ • [DIGITAL ZOOM] (P40) mode • mode • in [SCENE MODE] • :, ;, í, 9, ô, When Intelligent ISO is set •...
- Page 135 Others [SENSITIVITY] (P84) Advanced scene mode • mode • Û $ mode • When Intelligent ISO is set • [ISO LIMIT SET] (P84) Advanced scene mode • mode • Û $ mode • [WHITE BALANCE] (P85) mode • mode • mode •...
- Page 136 Others [AUDIO REC.] (P93) [AUTO BRACKET] • [COLOR BRACKET] • When the burst mode is set • and 5 in [SCENE MODE] • ô, $ mode • When [QUALITY] is set to [ ] or [ • [FLIP ANIM.] • [AF ASSIST LAMP] (P93) mode...
-
Page 137: Troubleshooting
Others [ROTATE DISP.] (P109) Multi playback • [CALENDAR] • Motion pictures • [FLIP ANIM.] • Print with date Pictures stamped with [TEXT STAMP] • [FAVORITE] (P110) When set to [RAW] • [DPOF PRINT] (P111) When set to [RAW] • [AUDIO DUB.] (P113) Motion pictures •... - Page 138 Others The [CHARGE] lamp flashes. Is the temperature of the battery excessively high or low? If it is, it will take longer than usual to • charge the battery or charging may remain incomplete. Are the terminals of the charger or battery dirty? •...
- Page 139 Others Taking pictures using auto bracket/colour bracket is not possible. Is the number of recordable pictures 2 or less? • The recorded picture looks rough. Noise appears on the picture. Is the ISO sensitivity high or the shutter speed slow? •...
- Page 140 Others Lens Recorded image may be warped, or nonexistent colour is surrounding the subject. It is possible that the subject may be warped slightly, or the borders get coloured, depending on • the zoom magnification, due to the characteristics of the lens. Also, the peripherals of the image might look warped because the perspective is enhanced when the wide angle is used.
- Page 141 Others Flash The flash is not activated. Is the flash closed? • > Press [ OPEN] to open the flash. (P48) Flash mode is not available when auto bracket (P56)/colour bracket (P56), or burst have been • set. The flash is activated multiple times. The flash is activated twice when red-eye reduction (P49) has been set.
- Page 142 Others White round spots like soap bubbles appear on the recorded picture. If you take a picture with the flash in a dark place or indoors, white • round spots may appear on the picture caused by the flash reflecting of particles of dust in the air.
- Page 143 Others The picture cannot be printed when the camera is connected to a printer. Pictures cannot be printed using a printer which does not support PictBridge. • > Set to [PictBridge(PTP)] in [USB MODE]. (P30, 117) The ends of the pictures are cut at printing. >...
- Page 144 Others The file numbers are not recorded consecutively. When you perform an operation after taking a certain action, the pictures may be recorded in • folders with different numbers from the ones used prior to the operation. (P116) The file numbers are recorded in ascending order. If the battery was inserted or removed without first turning the camera’s power off, the folder •...
-
Page 145: Recording Time
Others Others Number of Recordable Pictures and Available Recording Time • The number of recordable pictures and the available recording time are an approximation. (These vary depending on the recording conditions and the type of card.) • The number of recordable pictures and the available recording time varies depending on the subjects. - Page 146 Others Aspect ratio (0.3M Picture size (2048k1536) (1600k1200) (640k480) Quality › › › Built-in Memory (Approx. 50 MB) 32 MB 64 MB 128 MB 256 MB 1170 1900 512 MB 2320 3770 1 GB Card 1180 1830 4640 7550 2 GB 1220 2360 1920...
- Page 147 Others Aspect ratio (9M): Picture size (4.5M (2.5M (3648k2432) (3072k2048) (2560k1712) (2048k1360) Quality › › › › Built-in Memory (Approx. 50 MB) 32 MB 64 MB 128 MB 256 MB 512 MB 1 GB Card 1310 2 GB 1220 1700 1360 2560 4 GB...
- Page 148 Others ∫ Available recording time (when recording motion pictures) Aspect ratio Picture quality setting Built-in Memory 1 min 38 s 4 min 20 s (Approx. 50 MB) 32 MB 14 s 17 s 56 s 2 min 35 s 64 MB 12 s 33 s 39 s...
-
Page 149: Specifications
Others Specifications Digital Camera: Information for your safety Power Source: DC 8.4 V Power Consumption: 1.3 W (When recording with LCD Monitor) 1.2 W (When recording with Viewfinder) 0.6 W (When playing back with LCD Monitor) 0.5 W (When playing back with Viewfinder) Camera effective pixels: 10,100,000 pixels Image sensor: 1/2.33q CCD, total pixel number 10,700,000 pixels, Primary... - Page 150 Others Hi-speed burst [SPEED PRIORITY]: 3M (4:3) Burst speed: 11 pictures/second ( [SPEED PRIORITY]: 2.5M (3:2) 12 pictures/second ( [SPEED PRIORITY]: 2M (16:9) 13 pictures/second ( [IMAGE PRIORITY]: 3M (4:3), 2.5M (3:2) or 7 pictures/second ( 2M (16:9) Number of recordable pictures: ([SPEED PRIORITY]) 20 to 60...
- Page 151 10% to 80% Battery Charger (Panasonic DE-A44A): Information for your safety Input: 110 V to 240 V 50/60 Hz, 0.15 A Output: CHARGE 8.4 V 0.43 A Battery Pack (lithium-ion) (Panasonic CGR-S006E): Information for your safety Voltage: 7.2 V VQT1S48...
-
Page 152: Vqt1S48
QuickTime and the QuickTime logo are trademarks or registered trademarks of Apple Inc., used under license therefrom. VQT1S48 Matsushita Electric Industrial Co., Ltd. F0708GA0 (7000 Web Site: http://panasonic.net Pursuant to at the directive 2004/108/EC, article 9(2) Panasonic Testing Centre Panasonic Marketing Europe GmbH Winsbergring 15, 22525 Hamburg, Germany...
Need help?
Do you have a question about the LUMIX DMC-FZ28 and is the answer not in the manual?
Questions and answers