MAXDATA PLATINUM 200 I User Manual
Hide thumbs
Also See for PLATINUM 200 I:
- User manual (37 pages) ,
- User manual (23 pages) ,
- User manual (25 pages)
Table of Contents
Advertisement
Quick Links
Download this manual
See also:
User Manual
Advertisement
Table of Contents

Subscribe to Our Youtube Channel
Related Manuals for MAXDATA PLATINUM 200 I


Summary of Contents for MAXDATA PLATINUM 200 I
- Page 1 MAXDATA PLATINUM 200 I User’s Manual...
- Page 2 Contents Contents...
-
Page 3: Table Of Contents
Product Regulatory Compliance Markings ....................29 Electromagnetic Compatibility Notices ....................30 Europe (CE Declaration of Conformity) ....................30 Installation Precautions .........................30 Installation Requirements ........................31 Prevent Power Supply Overload ......................31 Place Battery Marking ........................31 Use Only for Intended Applications .......................31 MAXDATA PLATINUM 200 I MAXDATA PLATINUM 200 I... -
Page 4: Lift Socket Lever ............................................................................................................................12
Figures 1. Rear connectors ..........................6 2. PLATINUM 200 I Controls .........................6 3. Board Components ...........................8 4. Lift Socket Lever ..........................12 5. Lift the Load Plate and Don’t Touch the Socket Contacts ..............12 6. Remove the Protective Socket Cover .....................13 7. Remove the Processor from the Protective Processor Cover and Do Not Touch ......13 8. -
Page 5: Setting Up The System Server Position
ATTENTION In order to fully separate the server from current, the power cord must be removed from the wall outlet. ATTENTION To ensure stability, the floor stands must be turned outwards. MAXDATA PLATINUM 200 I... -
Page 6: Connecting The System
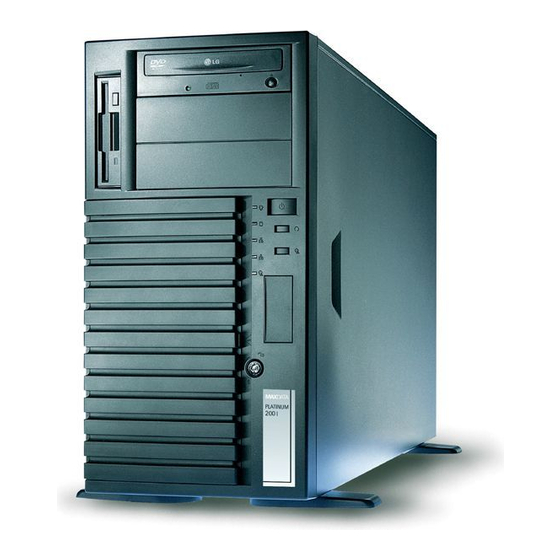
At the front of the case, you can find the necessary controls like power button, reset button and the HDD Leds. Press the power button one time briefly in order to boot the server. Figure 2. PLATINUM 200 I Controls A. Power LED... -
Page 7: Board Features
• Intel Precision Cooling Technology fan speed control that automatically ® adjusts processor fan speeds based on processor temperature and chassis fan speeds based on system temperature • Voltage sensing to detect out of range values MAXDATA PLATINUM 200 I... -
Page 8: Board Components
Board Components Figure 3 shows the approximate location of the major components on board. Figure 3. Board Components Table 2. Board Components Label Description Label Description Conventional PCI Slot 3 Channel B DIMM 0 Socket (black) Rear Fan Connector I/O Controller PCIE Slot 2 (x4 Connector, x1 Bus) 2 ×... -
Page 9: Processor
Serial Presence Detect (SPD) memory only 1.8 V memory Memory configuration listed below: Up to 2.0 GB utilizing 256 MB technology Up to 4.0 GB utilizing 512 MB or 1 GB technology MAXDATA PLATINUM 200 I MAXDATA PLATINUM 200 I... -
Page 10: Hi-Speed Usb 2.0 Support
NOTE System resources (such as PCI and PCI Express) require physical memory address locations that reduce available memory addresses above 3 GB. This may result in less than 4 GB of memory being available to the operating system and applications. Hi-Speed USB 2.0 Support ... -
Page 11: Installing And Replacing Board Components
• Hot components (like processors, voltage regulators, and heat sinks) • Damage to wires that could cause a short circuit Observe all warnings and cautions that instruct you to refer computer servicing to qualified technical personnel. MAXDATA PLATINUM 200 I... -
Page 12: Installing A Processor
Installing a Processor Instructions on how to install the processor to the board are given below. Installing a Processor CAUTION Before installing or removing the processor, make sure that AC power has been removed by unplugging the power cord from the computer; the standby power LED should not be lit Failure to do so could damage the processor and the board. -
Page 13: Remove The Protective Socket Cover
Always replace the processor cover if the processor is removed from the socket (see Figure 7). Figure 7. Remove the Processor from the Protective Processor Cover and Do Not Touch MAXDATA PLATINUM 200 I MAXDATA PLATINUM 200 I... - Page 14 6. Hold the processor with your thumb and index fingers oriented as shown in Figure 8. Make sure fingers align to the socket cutouts (see Figure 8, F). Align notches (see Figure 8, G) with the socket see (Figure 8, H). Lower the processor straight down without tilting or sliding the processor in the socket.
-
Page 15: Installing Memory
256 MB, 400 MHz DIMM 0 512 MB, 400 MHz DIMM 1 Channel B 256 MB, 400 MHz DIMM 0 512 MB, 400 MHz DIMM 1 Figure 11. Dual Configuration Example 2 MAXDATA PLATINUM 200 I MAXDATA PLATINUM 200 I... -
Page 16: Installing Dimms
Three DIMMs Install a matched pair of DIMMs equal in speed and size in DIMM 0 (blue) and DIMM 1 (black) of channel A. Install a DIMM equal in speed and total size of the DIMMs installed in channel A in either DIMM 0 or DIMM 1 of channel B (see Figure 12). -
Page 17: Installing And Removing A Pci Express Card
2. Place the card in the PCI Express connector. 3. Press down on the card until it is completely seated in the connector. 4. Secure the card’s metal bracket to the chassis back panel with a screw. MAXDATA PLATINUM 200 I MAXDATA PLATINUM 200 I... -
Page 18: Configuring The System For Intel ® Matrix Storage Technology For Serial Ata
Configuring the System for Intel Matrix Storage Technology ® for Serial ATA Configuring the BIOS for Intel Matrix Storage Technology ® 1. Assemble your system and attach two SATA hard drives. 2. Enter system BIOS Setup by pressing the <F2> key after the Power-On-Self-Test (POST) memory tests begin. -
Page 19: Setting The Bios Configuration Jumper Block
AC power source (wall outlet or power adapter). 3. Remove the computer cover. 4. Find the configuration jumper block (see Figure 14). 5. Place the jumper on pins 2-3 as shown below. MAXDATA PLATINUM 200 I MAXDATA PLATINUM 200 I... - Page 20 6. Replace the cover, plug in the computer, turn on the computer, and allow it to boot. 7. The computer starts the Setup program. Setup displays the Maintenance menu. 8. Use the arrow keys to select Clear Passwords. Press <Enter> and Setup displays a pop-up screen requesting that you confirm clearing the password.
-
Page 21: Replacing The Battery
WAARSCHUWING Er bestaat ontploffingsgevaar als de batterij wordt vervangen door een onjuist type batterij. Batterijen moeten zoveel mogelijk worden gerecycled. Houd u bij het weggooien van gebruikte batterijen aan de plaatselijke milieuwetgeving. MAXDATA PLATINUM 200 I MAXDATA PLATINUM 200 I... - Page 22 ATENÇÃO Haverá risco de explosão se a bateria for substituída por um tipo de bateria incorreto. As baterias devem ser recicladas nos locais apropriados. A eliminação de baterias usadas deve ser feita de acordo com as regulamentações ambientais da região. UPOZORNÌNÍ...
- Page 23 “+” and “-” on the battery. 6. Install the new battery in the connector, orienting the “+” and “-” correctly. 7. Replace the computer cover. ��������� ��������� Figure 15. Removing the Battery MAXDATA PLATINUM 200 I MAXDATA PLATINUM 200 I...
-
Page 24: Bios
BIOS Using the BIOS Setup Program The BIOS Setup program is accessed by pressing the <F2> key after the Power-On Self-Test (POST) memory test begins and before the operating system boot begins. Error Messages and Indicators The board reports POST errors in two ways: •... - Page 25 NVRAM, CMOS, and passwords have been cleared. The by Jumper system should be powered down and the jumper removed. <CTRL_N> Pressed CMOS is ignored and NVRAM is cleared. User must enter Setup. MAXDATA PLATINUM 200 I MAXDATA PLATINUM 200 I...
-
Page 26: Rack Installation
Rack Installation The PLATINUM 200 I is available with an optional slide rail kit for rack installation. The following instructions apply to servers with this rack option only. Parts List The following is a list of all the parts that are relevant for installation; each part is designated with a letter that is used in the installation guide. -
Page 27: Installation
Be careful to make sure that the distance between the fastening bracket for the external rail (A) and the end bracket (D) is the same as the distance between both bread-board sections of your server cabinet. MAXDATA PLATINUM 200 I MAXDATA PLATINUM 200 I MAXDATA PLATINUM 200 I... - Page 28 4. Attach the rails in the rear of the server cabinet with the silver end brackets (D). First hold the fastening bracket up to the breadboard. Then set the perforated plate with the threa-ded holes (H) behind the breadboard section. Finish by inserting the screws (E) from the front through the breadboard and the fastening bracket to the perforated plates (H) Front: A Rear: D...
-
Page 29: Regulatory And Integration Information
EN 55022 (Class A) – Radiated & Conducted Emissions (European Union) • EN 55024 (Immunity) (European Union) • CE – EMC Directive (89/336/EEC) (European Union) Product Regulatory Compliance Markings This product is marked with the following Product Certification Markings: Table 8. Product Certification Markings CE Mark MAXDATA PLATINUM 200 I... -
Page 30: Electromagnetic Compatibility Notices
Electromagnetic Compatibility Notices Europe (CE Declaration of Conformity) This product has been tested in accordance to, and complies with the Low Voltage Directive (73/23/ EEC) and EMC Directive (89/336/EEC). The product has been marked with the CE Mark to illustrate its compliance. -
Page 31: Installation Requirements
The suitability of this product for other applications or environments, (such as medical, industrial, alarm systems, test equipment, etc.) may require further evaluation. MAXDATA PLATINUM 200 I MAXDATA PLATINUM 200 I...
Need help?
Do you have a question about the PLATINUM 200 I and is the answer not in the manual?
Questions and answers