Panasonic KX-TG5583 Operating Instructions Manual
5.8 ghz expandable digital cordless answering system
Hide thumbs
Also See for KX-TG5583:
- Operating instructions manual (96 pages) ,
- Operating instructions manual (15 pages)
Table of Contents
Advertisement
Quick Links
TG5583.book Page 1 Friday, April 8, 2005 6:33 PM
Operating Instructions
5.8 GHz Expandable Digital Cordless Answering System
KX-TG5583
Model No.
This unit is compatible with Caller ID. To use this feature, you must
subscribe to the appropriate service offered by your service provider.
Charge the battery for 6 hours before initial use.
Please read these Operating Instructions before using the unit and save
for future reference.
For assistance, visit our website: http://www.panasonic.com for
customers in the U.S.A. or Puerto Rico.
Advertisement
Table of Contents

Related Manuals for Panasonic KX-TG5583


Summary of Contents for Panasonic KX-TG5583
-
Page 1: Operating Instructions
Charge the battery for 6 hours before initial use. Please read these Operating Instructions before using the unit and save for future reference. For assistance, visit our website: http://www.panasonic.com for customers in the U.S.A. or Puerto Rico. -
Page 2: Table Of Contents
Using Caller ID service... . . 33 Auto talk ..... 53 For assistance, please visit http://www.panasonic.com/consumersupport... - Page 3 Operation ..... . . 66 Differences between the handsets included with the KX-TG5583, KX- TGA550, KX-TGA551, and KX- TGA552 ..... 66 Adding items/calling someone in the phonebook using the unit’s menu P...
- Page 4 TG5583.book Page 4 Friday, April 8, 2005 6:33 PM Introduction Thank you for purchasing a Panasonic cordless telephone. We recommend keeping a record of the following information for future reference. Serial No. Date of purchase (found on the bottom of the unit) Name and address of dealer Attach your purchase receipt here.
-
Page 5: Introduction
Order number Quantity AC adaptor for base unit PQLV1W Telephone line cord PQJA10075Z Wall mounting adaptor PQKL10068Z2 Battery HHR-P104 Handset cover PQYNTG5432MR Belt clip PQKE10396Z2 Audio cable PQJA10165Z Charger PQLV30030ZM AC adaptor for charger KX-TCA1-2 For assistance, please visit http://www.panasonic.com/consumersupport... -
Page 6: Expanding Your Phone
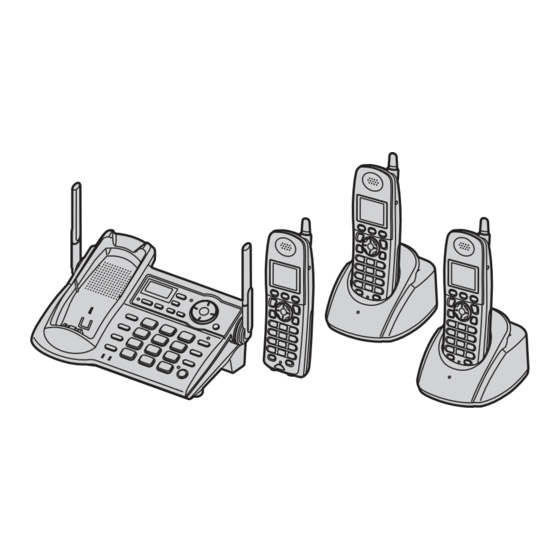
KX-TCA200 supply Expanding your phone The KX-TG5583 includes 3 handsets and one base unit. You can expand the system by adding up to 5 accessory handsets, sold separately. A maximum of 8 handsets can be registered to a base unit. -
Page 7: Available Accessory Handsets
TG5583.book Page 7 Friday, April 8, 2005 6:33 PM Introduction Available accessory handsets 3 accessory handset models are available for the KX-TG5583. Operations and features of 3 different accessory handsets have certain differences as indicated in the table below. Feature... -
Page 8: Important Safety Instructions
Opening or removing covers may expose you to L Use caution when installing or modifying dangerous voltages or other risks. telephone lines. For assistance, please visit http://www.panasonic.com/consumersupport... - Page 9 L Unplug this unit from power outlets if it emits smoke, an abnormal smell or makes an unusual noise. These conditions can cause fire or electric shock. Confirm that smoke has stopped and contact the Panasonic Call Center at 1-800-211-PANA (7262). For assistance, please visit http://www.panasonic.com/consumersupport...
-
Page 10: For Best Performance
It should not be placed in rooms where the temperature is less than 5 °C (41 °F) or greater than 40 °C (104 °F). Damp basements should also be avoided. For assistance, please visit http://www.panasonic.com/consumersupport... -
Page 11: Preparation
L The unit will not work during a power failure. We recommend connecting a standard telephone to the same telephone line or to the same telephone jack using the Panasonic KX-J66 T-adaptor. Emergency power can be supplied to the unit by connecting a Panasonic battery back-up power supply noted on page 6. -
Page 12: Battery Installation
(2). – Noise is heard during conversations. – Caller ID features (page 33) do not function properly. To single-line telephone Close the handset cover. jack (RJ11C) Telephone Noise filter line cord (For DSL users) For assistance, please visit http://www.panasonic.com/consumersupport... -
Page 13: Battery Charge
L To ensure the battery charges properly, clean the charge contacts of the handset, base unit, and charger with a soft, dry cloth once a month. Clean more often if the unit is subject to grease, dust, or high humidity. For assistance, please visit http://www.panasonic.com/consumersupport... -
Page 14: Battery Replacement
TG5583.book Page 14 Friday, April 8, 2005 6:33 PM Preparation Battery performance Battery replacement After your Panasonic battery is fully charged, you can expect the following If battery performance diminishes, make performance: sure you have cleaned the charge Operation Operating time contacts and fully charged the battery. -
Page 15: Screen Saver Mode
Example: Screen saver To cancel screen saver mode To use the handset when it is in screen saver mode, first press {OFF} to turn the display on again. For assistance, please visit http://www.panasonic.com/consumersupport... -
Page 16: Controls And Displays
G {MESSAGE} U MIC (Microphone) H {STOP} V {SP-PHONE} (Speakerphone) I {GREETING REC} (Recording) SP-PHONE indicator J {GREETING CHECK} W {HOLD} K Antenna X {CONF} (Conference) L Speaker Y {INTERCOM} {TRANSFER} INTERCOM indicator M Charge contacts For assistance, please visit http://www.panasonic.com/consumersupport... - Page 17 D {C} (TALK) E Navigator key F {s} (SP-PHONE) G {*} (TONE) H {REDIAL} {PAUSE} I Ringer indicator Message indicator J Receiver K Display L {OFF} M {CLEAR} {MUTE} N {INTERCOM} {HOLD} O Microphone P Charge contacts For assistance, please visit http://www.panasonic.com/consumersupport...
-
Page 18: Displays
Base unit is in You can scroll up and programming mode. down. When customizing the unit: indicates the current setting. When viewing the caller list: indicates that you have called back this caller or viewed this caller information. For assistance, please visit http://www.panasonic.com/consumersupport... - Page 19 The handset display and dialing buttons will light for a few seconds after pressing any of the handset’s controls or lifting the handset off the base unit or charger. They will also light when a call is being received. For assistance, please visit http://www.panasonic.com/consumersupport...
-
Page 20: Setting The Unit Before Use
L You can turn this feature off (page 56). Date and time Time adjustment Enter the current month, day, and year by selecting 2 digits for each. Example: June 15, 2005 Press {0}{6} {1}{5} {0}{5}. Date:06.15.2005 Time:12:00 AM 0-9=Date&Time For assistance, please visit http://www.panasonic.com/consumersupport... -
Page 21: Making/Answering Calls
To redial the last number dialed To use the speakerphone Press {C} or {s}. Lift the handset and press {s}. Press {REDIAL}. L “SP-phone” will be displayed. Dial the phone number. When the other party answers, speak into the microphone. For assistance, please visit http://www.panasonic.com/consumersupport... -
Page 22: Useful Features During A Call
L If a call is kept on hold for more than 6 minutes, an alarm tone will start to sound and the ringer indicator will flash rapidly. After 4 additional minutes on hold, the call will be disconnected. For assistance, please visit http://www.panasonic.com/consumersupport... - Page 23 {PAUSE} is pressed. Press when another extension is on an outside repeatedly to insert longer pauses. call. L “Conference” will be displayed. L A maximum of 4 parties (including the outside party) can join a conversation. For assistance, please visit http://www.panasonic.com/consumersupport...
-
Page 24: Making Calls Using The Base Unit
– If the handset is off the base unit, press {C} or {s} on the handset, then press {SP-PHONE} on the base unit. – If the handset is on the base unit, simply lift the handset. For assistance, please visit http://www.panasonic.com/consumersupport... -
Page 25: Useful Features During A Call
To mute your voice, press {MUTE}. L The SP-PHONE indicator flashes. L To return to the conversation, press {MUTE} or {SP-PHONE}. For assistance, please visit http://www.panasonic.com/consumersupport... -
Page 26: Answering Calls Using The Handset
To activate this feature, see page 53. Temporary ringer off While the handset is ringing for an outside call, you can turn the ringer off temporarily by pressing {OFF}. The handset will ring the next time a call is received. For assistance, please visit http://www.panasonic.com/consumersupport... -
Page 27: Answering Calls Using The Base Unit
There are 3 tones and 4 melodies. Press {^} or {V}. Within 10 seconds, press {<} or {>} repeatedly to select the desired ringer tone. L To stop ringing, press {STOP}. For assistance, please visit http://www.panasonic.com/consumersupport... -
Page 28: Phonebook
{EDIT}, then repeat appropriate character or number. from step 3. Note: Example: L Press and hold {CLEAR} to erase all 555-765-4321 characters or numbers. Press {SAVE}. L To add other items, repeat from step Press {OFF}. For assistance, please visit http://www.panasonic.com/consumersupport... -
Page 29: Calling Someone In The Phonebook
2. will be displayed. Press {OFF}. Press {V} repeatedly to display the desired item. L To exit the phonebook, press {OFF}. L To dial the displayed number, press {C}, {s}, or {CALL}. For assistance, please visit http://www.panasonic.com/consumersupport... -
Page 30: Chain Dial Feature
{*} before pressing show “Phonebook Receiving”, {MENU} in step 1 to change the dialing then “Phonebook Received”. mode temporarily to tone. L To copy another item, repeat from step 5. Press {OFF}. For assistance, please visit http://www.panasonic.com/consumersupport... - Page 31 L When all items have been copied, “Complete” will be displayed. L The destination handset display will show “Phonebook Receiving”, then “Phonebook Received”. L To copy items to another handset, repeat from step 3. Press {OFF}. For assistance, please visit http://www.panasonic.com/consumersupport...
-
Page 32: Speed Dialer
PAUSE button (for PBX/long distance service users) A pause is sometimes required when making calls using a PBX or long distance service. For example, if you need to dial the line access number “9” with a PBX: For assistance, please visit http://www.panasonic.com/consumersupport... -
Page 33: Caller Id Service
L If the ringer volumes of the handset and properly. Consult your PBX supplier. base unit are turned off, caller names will not be announced. The announcement is heard at the ringer volume (page 27, 48). For assistance, please visit http://www.panasonic.com/consumersupport... -
Page 34: Ringer Id And Light-Up Id
Press {SAVE}, then press {OFF}. Press {C} (right soft key). Press {V} or {^} repeatedly to display the desired item. Press {OPTION}. Press {1} to select “Ringer ID”. For assistance, please visit http://www.panasonic.com/consumersupport... -
Page 35: Caller List
L Each handset has its own caller list. If you viewed the caller list or answered a call on one handset, the same information in the other handsets will be displayed as “missed calls”. For assistance, please visit http://www.panasonic.com/consumersupport... -
Page 36: Storing Caller Information Into The Phonebook
Press {V} or {^} repeatedly to display the desired item. L To edit the number, press {EDIT} repeatedly until the number is shown in the desired format (see “Editing a caller’s phone number before calling back” on page 35, step 3). For assistance, please visit http://www.panasonic.com/consumersupport... -
Page 37: Intercom Features
L During an intercom call, the handset Handset 2: user can switch to the speaker by Press {C}, {s}, or {INTERCOM} to pressing {s}. To switch back to the answer. receiver, press {C}. When finished talking, press {OFF}. For assistance, please visit http://www.panasonic.com/consumersupport... -
Page 38: Voice Paging
L If the paged party does not answer the call, press {C} or {s} to return to the call. If not answered within 1 minute, the call will ring at your handset again. If you For assistance, please visit http://www.panasonic.com/consumersupport... -
Page 39: Transferring A Call From The Base Unit
({1} to {8}). To page all handsets, press {0}. To make a voice announcement to all handsets, press {*} (A), then speak into the MIC when the SP-PHONE indicator stops flashing. Press {SP-PHONE}. For assistance, please visit http://www.panasonic.com/consumersupport... -
Page 40: Conference Calls
L If 2 handsets are in a conference call and one handset is using the clarity booster feature, a 3rd handset will not be able to join the conference call. For assistance, please visit http://www.panasonic.com/consumersupport... -
Page 41: Room Monitor
Scroll to N, then press {SELECT}. Scroll to “Set base unit”, then press {SELECT}. Scroll to “Room monitor”, then press {SELECT}. Press {V} or {^} repeatedly to select “On” or “Off”. Press {SAVE}, then press {OFF}. For assistance, please visit http://www.panasonic.com/consumersupport... - Page 42 Note: L The monitored handset displays “Room monitor”. L If the room monitor feature of the destination handset is off or if that handset is on the base unit, a busy tone will be heard. For assistance, please visit http://www.panasonic.com/consumersupport...
-
Page 43: Programmable Settings
– Ring count – Recording time – Remote code – Call screening – Ringer setting Ringer volume – Ringer tone – Customize ring – Ring color – Display setting Wallpaper – Appearance – LCD contrast For assistance, please visit http://www.panasonic.com/consumersupport... - Page 44 *1 If you program these settings using one of the handsets, you will not need to program the same item using another handset. *2 Caller IQ subscribers only. See the included “Caller IQ” leaflet for more information. *3 KX-TGA552 only Note: L For KX-TGA550, see page 70. For assistance, please visit http://www.panasonic.com/consumersupport...
-
Page 45: Programming Via Direct Commands
{3}: 400 ms {4}: 300 ms {5}: 250 ms {6}: 110 ms {7}: 100 ms {8}: 90 ms Set line mode {1}: A {2}: B* {1} {2} {2} HS registration Go to step 5 on page 56. {1} {3} {0} For assistance, please visit http://www.panasonic.com/consumersupport... - Page 46 Time adjustment {1}: Caller ID[auto]* {2}: Manual {2} {2} {6} Ring color {1}: Color 1* {2}: Color 2 {2} {3} {5} {3}: Color 3 {4}: Multicolor Voice enhancer {1}: On {0}: Off* {2} {7} {0} For assistance, please visit http://www.panasonic.com/consumersupport...
- Page 47 {1}: On {2}: 2 times* {0}: Off {*} {2} {0} {1} (Base unit) Room monitor {1}: On {0}: Off* {*} {2} {0} {2} (Base unit) *1 KX-TGA550 does not support this feature. See page 70. *2 KX-TGA552 only For assistance, please visit http://www.panasonic.com/consumersupport...
-
Page 48: Ringer Settings K
L If you subscribe to a distinctive ring service (such as IDENTA-RING), select a tone (Tone 1 to 3). If you select a melody or a song, you will not be able to distinguish lines by their ringers. For assistance, please visit http://www.panasonic.com/consumersupport... -
Page 49: Recording Songs From An Audio Device For Ringer Tones (Customize Ring)
L To re-record, scroll to “Retry”, press audio cable from the handset. {SELECT}, then start from step 7. Scroll to “Save”, then press {SELECT}. Enter the desired name (max. 15 characters, page 28). Press {SAVE}, then press {OFF}. For assistance, please visit http://www.panasonic.com/consumersupport... -
Page 50: Ring Color
(Ringer ID, page 34), the Ringer ID assignment will be canceled, Note: and the handset ringer tone (page 48) L KX-TG5583, KX-TGA550, and KX- will be used instead of that song. TGA551 only: The total recording time is 90 seconds. -
Page 51: Function M
Press {OFF}. The display will indicate that you have missed calls or new messages instead. For assistance, please visit http://www.panasonic.com/consumersupport... -
Page 52: Handset Display Color (Appearance)
Press {V} or {^} repeatedly to select Scroll to “Caller ID edit”, then the desired setting. press {SELECT}. Press {SAVE}, then press {OFF}. Press {V} or {^} repeatedly to select “On” or “Off”. Press {SAVE}, then press {OFF}. For assistance, please visit http://www.panasonic.com/consumersupport... -
Page 53: Handset Key Tone
Scroll to “Set tel line”, then press “2”: The tone will sound 2 times. {SELECT}. “On”: The tone will sound for as long as the line rings. For assistance, please visit http://www.panasonic.com/consumersupport... -
Page 54: Line Mode
Press {V} or {^} repeatedly to select Press {SAVE}, then press {OFF}. the desired setting. L If the ringer volume has been turned off, the base unit will not ring. Press {SAVE}, then press {OFF}. For assistance, please visit http://www.panasonic.com/consumersupport... -
Page 55: Canceling The Handset Registration
Enter “335”, Scroll to “Set base unit”, then press then press {OK}. {SELECT}. Scroll to “Talking CallerID”, then press {SELECT}. Press {V} or {^} repeatedly to select “On” or “Off”. Press {SAVE}, then press {OFF}. For assistance, please visit http://www.panasonic.com/consumersupport... -
Page 56: Registering The Handset
1 minute. Handset: Press {OK} (right soft key), then wait until the handset beeps. L Registration is complete. L The handset’s new extension number (! to )) will be displayed. For assistance, please visit http://www.panasonic.com/consumersupport... -
Page 57: Answering System Features
To stop recording, press {GREETING REC} or {STOP}. Note: L If the greeting message is less than 1 second long, the unit beeps 6 times and announces, “Your greeting was not recorded. Record your greeting again.” For assistance, please visit http://www.panasonic.com/consumersupport... -
Page 58: Erasing Your Greeting Message
{C} or {s}. Note: L To turn the speaker volume off while screening a call, decrease the speaker volume to “0” by pressing {V}. L To turn this feature off, see page 65. For assistance, please visit http://www.panasonic.com/consumersupport... -
Page 59: Listening To Messages
“No new messages. not being used. All message playback”, and will play L The unit will announce “To erase all back all messages. messages, press ERASE again.” Within 10 seconds, press {ERASE} again. For assistance, please visit http://www.panasonic.com/consumersupport... -
Page 60: Listening To Messages Using The Handset
{C}. You can switch back to the speaker by pressing {s}. L When you have no new messages, the unit will announce “No new messages. All message playback”, and will play back all messages. For assistance, please visit http://www.panasonic.com/consumersupport... -
Page 61: Recording A Voice Memo
Press {CALL} during playback. Note: L To edit the number before calling back, press {EDIT} repeatedly to select the desired format (page 35), then press {CALL}, {C}, or {s}. For assistance, please visit http://www.panasonic.com/consumersupport... -
Page 62: Memory Capacity
L You can hang up at any time. message used for “Greeting only” L You can ignore the voice guidance and mode will be announced to callers (page control the unit using remote 58). commands. For assistance, please visit http://www.panasonic.com/consumersupport... - Page 63 Remote command message after the beep. Repeat message (during playback) Skip message (during playback) Play new messages Play all messages Record a greeting message Stop (recording, playback) Turn answering system off For assistance, please visit http://www.panasonic.com/consumersupport...
-
Page 64: Answering System Settings J
– Change the ring count of the Voice Scroll to J, then press {SELECT}. Mail service so that the answering system can answer the call first. To do Scroll to “Ring count”, then press so, consult your telephone company. {SELECT}. For assistance, please visit http://www.panasonic.com/consumersupport... -
Page 65: Caller's Recording Time
Press {SAVE}, then press {OFF}. Note: L The message indicator will not flash for new messages while the handset is in use. L While message alert is on, battery operating time will be shortened (page 14). For assistance, please visit http://www.panasonic.com/consumersupport... -
Page 66: For Kx-Tga550/Kx-Tga552 Users
These accessory handsets feature a joystick. The joystick works the same as the navigator key found on the handset included with your KX-TG5583. Pushing the joystick up, down, left, and right performs the same operation as pressing each of the 4 areas on the navigator key indicated by the arrows (^, V, <, and >). - Page 67 L Up to 5 menu items can be displayed at a time. To select a menu item not shown on the current page, scroll up or down by pushing the joystick up or down, respectively. For assistance, please visit http://www.panasonic.com/consumersupport...
-
Page 68: Adding Items/Calling Someone In The
28. KX-TGA552 only Menu To call someone, continue from step 3 Menu/feature icon of “Calling someone in the phonebook” on page 29. Answering device Ringer setting Display setting Function Initial setting Set date & time For assistance, please visit http://www.panasonic.com/consumersupport... -
Page 69: Picture Id (Kx-Tga552 Only)
L To cancel the Picture ID assignment, select “No data” in step 5, then press {SELECT}. L To erase your original picture, see page 72. If you erase a picture assigned to a caller, the Picture ID assignment will be canceled. For assistance, please visit http://www.panasonic.com/consumersupport... -
Page 70: Guide To Programming
Ringer setting Ringer volume – Ringer tone – Customize ring – Ring color – – Phonebook – Function Voice enhancer – Caller IQ View Info.? – Get new Info.? – Turn CIQ off? – Customer support For assistance, please visit http://www.panasonic.com/consumersupport... - Page 71 *1 If you program these settings using one of the handsets, you will not need to program the same item using another handset. *2 Caller IQ subscribers only. See the included “Caller IQ” leaflet for more information. Note: L For KX-TGA552, see page 43. For assistance, please visit http://www.panasonic.com/consumersupport...
-
Page 72: Memory Status (Kx-Tga552 Only)
Press {YES}. Total 21 files stored L To continue erasing additional data, repeat from step 3. Press {OFF}. Press {OFF}. Note: L Data files are retained even if the handset battery is removed or discharged. For assistance, please visit http://www.panasonic.com/consumersupport... -
Page 73: Wallpaper (Kx-Tga552 Only)
{LIST}. To return to the picture, press {VIEW}. Press {SAVE}, then press {OFF}. Note: L The preset pattern “Wallpaper1” and “Wallpaper2” in this product are used with permission of © 2005 Digital Archive Japan, Inc. For assistance, please visit http://www.panasonic.com/consumersupport... -
Page 74: Handset Lcd Contrast
Press {MENU} (center of joystick). Scroll to N, then press {SELECT}. Scroll to “LCD contrast”, then press {SELECT}. Push the joystick up or down repeatedly to select the desired setting. Press {SAVE}, then press {OFF}. For assistance, please visit http://www.panasonic.com/consumersupport... -
Page 75: Useful Information
Connecting an optional headset to the pocket using the included belt clip. handset allows hands-free phone conversations. Please use only a Panasonic headset. See page 6 for To attach the belt clip compatible headsets and ordering information. To connect an optional headset to the... -
Page 76: Wall Mounting
The base unit can be mounted on a wall phone plate. Connect the AC adaptor. Fasten the AC adaptor cord. Hook To power outlet Tuck the telephone line cord inside the wall mounting adaptor (1). Connect the telephone line cord (2). For assistance, please visit http://www.panasonic.com/consumersupport... - Page 77 L The position of the mounting pins may vary depending on the size of the wall mounting plate installed. Refer to the illustration below. L Raise the antennas. 83 mm 102 mm ") (4") 83 mm (3 ") 102 mm (4") For assistance, please visit http://www.panasonic.com/consumersupport...
- Page 78 Drive the screws (not included) into the wall using the wall mount template (see below). Mount the charger (1). Slide it down (2) and to the right (3) until it is secure. 25.4 mm (1") Screws To power outlet Wall mount template for the charger 25.4 mm (1") For assistance, please visit http://www.panasonic.com/consumersupport...
-
Page 79: Error Messages
Phonebook full stopped. Press {OFF} to exit. Erase items from another handset’s phonebook (page 29). When phonebook memory is available, you can copy all phonebook items (page 31) or individual items one by one (page 30). For assistance, please visit http://www.panasonic.com/consumersupport... - Page 80 Move closer to the base unit, and try again. Please try again L Other units are in use and the system is busy. Try again later. later. L Another user is listening to messages. Try again later. For assistance, please visit http://www.panasonic.com/consumersupport...
-
Page 81: Troubleshooting
L Do not pause for over 1 minute while programming. L Move closer to the base unit. L While another user is listening to messages or the answering system is answering a call, you cannot program. Try again later. For assistance, please visit http://www.panasonic.com/consumersupport... - Page 82 (page 75). headset. L If “SP-phone” is displayed on the handset, press {C} to switch to the headset. I cannot make long L Make sure that you have long distance service. distance calls. For assistance, please visit http://www.panasonic.com/consumersupport...
- Page 83 Press {OFF}. Confirm that the destination handset is in standby mode (i.e., not in use) and try again. The display exits the L The handset automatically exits after 1 minute of phonebook while inactivity. searching. For assistance, please visit http://www.panasonic.com/consumersupport...
- Page 84 L The phone number you dialed might have an incorrect number edited in the edited pattern (for example, the long distance “1” or the caller list. area code is missing). Edit the phone number with another pattern (page 35). For assistance, please visit http://www.panasonic.com/consumersupport...
- Page 85 L If someone is talking on a conference call, you cannot operate the answering system. Try again later. During message L A call is being received. Answer the call and start again playback, the unit rings from the beginning after hanging up. and cancels playback. For assistance, please visit http://www.panasonic.com/consumersupport...
- Page 86 L This product is not designed to make calls in the event of a power failure. We recommend connecting a standard telephone to the same telephone line in the event that emergency calls need to be made during a power failure (page 11). For assistance, please visit http://www.panasonic.com/consumersupport...
-
Page 87: Fcc And Other Information
If this equipment causes harm to the telephone network, the telephone company will notify you in advance that temporary discontinuance of service may be required. But if advance notice isn’t practical, the telephone company will For assistance, please visit http://www.panasonic.com/consumersupport... - Page 88 TV or VCR. If undesired operation. interference is experienced, move the cordless telephone further away from the Privacy of communications may not be TV or VCR. This will often reduce, or ensured when using this phone. eliminate, interference. For assistance, please visit http://www.panasonic.com/consumersupport...
-
Page 89: Openlcr Service For The Caller Iq Feature
PANASONIC CORPORATION OF transmitter. NORTH AMERICA IS IN ANY WAY AFFILIATED WITH, OR Responsible party: RESPONSIBLE FOR THE ACTS OR Panasonic Corporation of North America OMISSIONS OF, OPENLCR.COM, INC. One Panasonic Way, NEITHER PANASONIC Secaucus, New Jersey 07094 Phone number: 1-800-211-PANA (7262) COMMUNICATIONS CO., LTD. -
Page 90: Specifications
Approx. height 173 mm x width 48 mm x depth 33 mm (6 " x 1 " x 1 ") Mass (Weight): Approx. 180 g (0.40 lb.) Power supply: Ni-MH battery (3.6 V, 830 mAh) Security codes: 1,000,000 For assistance, please visit http://www.panasonic.com/consumersupport... -
Page 91: Warranty
Panasonic Services Company Customer Servicenter 4900 George McVay Drive Suite B Door #12 McAllen, TX 78503 For assistance in Puerto Rico call Panasonic Puerto Rico, Inc. (787)-750-4300 or fax (787)-768-2910. For Limited Warranty service for headsets if a headset is included with this product please call Panasonic Call Center at 1-800-211-PANA (7262). - Page 92 Consumer Affairs Department at the addresses listed for the warrantor. PARTS AND SERVICE, WHICH ARE NOT COVERED BY THIS LIMITED WARRANTY, ARE YOUR RESPONSIBILITY. For assistance, please visit http://www.panasonic.com/consumersupport...
-
Page 93: Customer Services
Monday-Friday 9 am-9 pm; Saturday-Sunday 10 am-7 pm, EST. TTY users (hearing or speech impaired users) can call 1-877-833-8855. Accessory Purchases Purchase Parts, Accessories and Instruction Books online for all Panasonic Products by visiting our Web Site at: http://www.pasc.panasonic.com or, send your request by E-mail to: npcparts@us.panasonic.com... -
Page 94: Index
AC adaptor: 11 Base unit: 24 Telephone line cord: 11 Handset: 21 Controls MEMO: 61 Base unit: 16 Memory capacity: 62 Handset: 17 Memory status: 72 Copy phonebook: 30, 31 Message alert: 65 Customer support: 51 For assistance, please visit http://www.panasonic.com/consumersupport... - Page 95 Ringer volume Base unit: 27, 54 Handset: 48 Room monitor: 41 Rotary service, tone dialing: 24, 26 S Safety instructions: 8 Soft keys: 19 Specifications: 90 Speed dialer: 32 SP-phone Base unit: 24 Handset: 21 For assistance, please visit http://www.panasonic.com/consumersupport...
- Page 96 L Send the unit to Panasonic Services Company Customer Servicenter, prepaid and adequately insured. L Do not send your unit to Panasonic Consumer Electronics Company listed below or to executive or regional sales offices. These locations do not repair consumer products.
Need help?
Do you have a question about the KX-TG5583 and is the answer not in the manual?
Questions and answers