Table of Contents
Advertisement
Quick Links
TG2361JX.book 1 ページ 2009年12月17日 木曜日 午前11時55分
The unit is Caller ID compatible. To display the caller's phone number, you must
subscribe to Caller ID service.
PLEASE READ BEFORE USE AND SAVE.
Charge the battery for 6 hours before initial use.
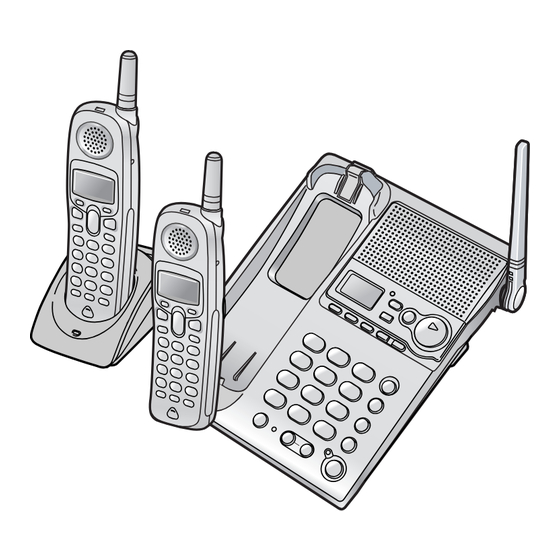
Dual Handsets Digital Cordless Answering System
Operating Instructions
Model No.
Pulse-or-tone dialing capability
KX-TG2361JX
Advertisement
Table of Contents

Related Manuals for Panasonic KX-TG2361JX


Summary of Contents for Panasonic KX-TG2361JX
-
Page 1: Operating Instructions
TG2361JX.book 1 ページ 2009年12月17日 木曜日 午前11時55分 Dual Handsets Digital Cordless Answering System Operating Instructions KX-TG2361JX Model No. Pulse-or-tone dialing capability The unit is Caller ID compatible. To display the caller’s phone number, you must subscribe to Caller ID service. PLEASE READ BEFORE USE AND SAVE. - Page 2 TG2361JX.book 2 ページ 2009年12月17日 木曜日 午前11時55分 Thank you for purchasing your new Panasonic cordless telephone. Caller ID Service, where available, is a telephone company service. After subscribing to Caller ID, this phone will display a caller’s phone number. For your future reference Serial No.
-
Page 3: For Best Performance
TG2361JX.book 3 ページ 2009年12月17日 木曜日 午前11時55分 For Best Performance Battery Charge The handset is powered by a rechargeable Nickel- Metal Hydride (Ni-MH) battery. Charge the battery for 6 hours before initial use (p. 10). Base Unit Location/Noise Calls are transmitted between the base unit and handset using wireless radio waves. -
Page 4: Table Of Contents
TG2361JX.book 4 ページ 2009年12月17日 木曜日 午前11時55分 Contents Erasing Caller Information . 37 Preparation Phone Book ....38 Location of Controls ..6 Storing Names and Numbers . - Page 5 TG2361JX.book 5 ページ 2009年12月17日 木曜日 午前11時55分 Contents Answering System Useful Information Automatic Answering Belt Clip ....67 Operation ....57 Optional Headset .
-
Page 6: Location Of Controls
TG2361JX.book 6 ページ 2009年12月17日 木曜日 午前11時55分 Location of Controls Base unit [STOP] Button (p. 21, 61) NEW MESSAGE [ANSWER ON] Button Indicator (p. 59) and Indicator (p. 57) Display (p. 8) [MEMO] Button (p. 63) [MESSAGE] Button (p. 59) [GREETING REC] (Record) [SKIP] Button (p. -
Page 7: Location Of Controls
TG2361JX.book 7 ページ 2009年12月17日 木曜日 午前11時55分 Location of Controls Handset Back side Ringer/Message Alert Indicator (p. 24, 29) Antenna Speaker Receiver Display Soft Keys (p. 8) [OFF] Button (p. 12, 25) Headset Jack (p. 67) [MENU] Button (p. 12) [C] (TALK) Button (p. 25) [s] (Speakerphone) Button (p. -
Page 8: Base Unit Display
TG2361JX.book 8 ページ 2009年12月17日 木曜日 午前11時55分 Location of Controls Handset soft keys Two soft keys are used to select functions displayed directly above each key. Functions displayed above the Talk 00-00-32 keys will change depending on the state of use. (VE) Mute On this sample display, “... -
Page 9: Installation
(AC 220–240 V, 50/60 Hz) AC Adaptor • Base Unit: USE ONLY WITH Panasonic AC ADAPTOR PQLV1BX. • The AC adaptor must remain connected at all times. (It is normal for the adaptor to feel warm during use.) • If your unit is connected to a PBX which does not support Caller ID, you cannot access Caller ID services. -
Page 10: Installing The Battery In The Handset
TG2361JX.book 10 ページ 2009年12月17日 木曜日 午前11時55分 Installation Installing the Battery in the Handset Insert the battery ( ), and press it down until it snaps into the compartment ( Close the cover. To replace the battery: Press the notch on the cover firmly and slide it as indicated by the arrow. -
Page 11: Battery Replacement
“Recharge battery” is displayed and/or “7” continues to flash, or “Charge for 6h” and “8” are displayed, the battery may need to be replaced. Please replace with a new Panasonic HHR-P104 battery. To replace the battery, see page 10. -
Page 12: Programmable Settings
TG2361JX.book 12 ページ 2009年12月17日 木曜日 午前11時55分 Programmable Settings Programming Guidelines Handset This unit has several programmable functions which can be selected from the function menu on the display (p. 13). The soft keys selects the Back Select functions displayed above each soft key. [OFF] exits programming. -
Page 13: Function Menu Table
TG2361JX.book 13 ページ 2009年12月17日 木曜日 午前11時55分 Programmable Settings Function Menu Table Handset You can use the following functions to customize your unit. See the corresponding pages for function details. • After pressing [MENU], you can also program menu items directly by pressing [0] to [9], [*] and [#] instead of using the soft keys (p. -
Page 14: Date And Time
TG2361JX.book 14 ページ 2009年12月17日 木曜日 午前11時55分 Programmable Settings Date and Time Handset You need to set the date and time; — to display the time and date the calls were received in the Caller List, and — to announce the day and time when each message was recorded, during a message playback. -
Page 15: Dialing Mode
TG2361JX.book 15 ページ 2009年12月17日 木曜日 午前11時55分 Programmable Settings Dialing Mode Handset If you have touch tone service, set the dialing mode to “Tone”. For rotary or pulse service, set to “Pulse”. The factory preset is “Tone”. Press [MENU]. Scroll to “Initial setting” by pressing [d] Initial setting or [B], then press Select. -
Page 16: Line Mode
TG2361JX.book 16 ページ 2009年12月17日 木曜日 午前11時55分 Programmable Settings Line Mode Handset The line mode is preset to “B” and generally should not be adjusted. If “Line in use” on the handset and “ ” on the base unit are not displayed properly, LINE IN USE the line mode selection is incorrect. -
Page 17: Ringer Volume
TG2361JX.book 17 ページ 2009年12月17日 木曜日 午前11時55分 Programmable Settings Ringer Volume You can select the handset or base unit ringer volumes to high, medium, low, or off. The factory preset is HIGH. If the handset and base unit ringer is turned off, the handset or base unit will ring at the low level for intercom calls, and will not ring for outside calls. -
Page 18: Ringer Tone
TG2361JX.book 18 ページ 2009年12月17日 木曜日 午前11時55分 Programmable Settings Base Unit Base unit ringer volume Make sure the base unit is not being used. To set the ringer volume to high (preset), medium, or low, press VOLUME [<] or [>]. [>] • To increase volume, press VOLUME [<] To decrease volume, press VOLUME •... -
Page 19: Base Unit Ringer Tone
TG2361JX.book 19 ページ 2009年12月17日 木曜日 午前11時55分 Programmable Settings Select the desired ringer tone by pressing [d] Ringer tone or [B]. 1:Tone 1 Back Save • The handset will ring and the ringer tone will change. If the ringer volume has been turned off, the handset will not ring (p. -
Page 20: Lcd Contrast
TG2361JX.book 20 ページ 2009年12月17日 木曜日 午前11時55分 Programmable Settings LCD Contrast Handset There are 6 levels of LCD contrast. The factory preset is “level 3”. Press [MENU]. Scroll to “Initial setting” by pressing [d] Initial setting or [B], then press Select. Back Select Scroll to “LCD contrast”... - Page 21 TG2361JX.book 21 ページ 2009年12月17日 木曜日 午前11時55分 Preparing the Answering System To record a greeting message Sample greeting message “Hello, this is (your name and/or number). Sorry, I cannot take your call. Please leave a message after the beep. Thank you.” Press [GREETING REC]. [GREETING REC] •...
-
Page 22: Caller's Recording Time
TG2361JX.book 22 ページ 2009年12月17日 木曜日 午前11時55分 Preparing the Answering System Pre-recorded greeting If you do not record a greeting (p. 20, 21), one of two greetings will be played when a call is received, depending on the caller’s recording time (see below). To review the pre-recorded greeting, press [GREETING CHECK]. -
Page 23: Number Of Rings
TG2361JX.book 23 ページ 2009年12月17日 木曜日 午前11時55分 Preparing the Answering System If you select “Greeting only”, the unit will answer calls with the greeting message, and then hang up. The unit will not record any incoming messages. The base unit will display “ ”... -
Page 24: Recording Mode
TG2361JX.book 24 ページ 2009年12月17日 木曜日 午前11時55分 Preparing the Answering System Recording Mode Handset Two recording modes are available. The factory preset is “Standard recording (16min)”, which provides more recording time (16min) and standard sound quality. “Enhanced recording (8 min)” provides less recording time (8 min) but clearer sound quality. -
Page 25: Making Calls
TG2361JX.book 25 ページ 2009年12月17日 木曜日 午前11時55分 Making Calls Using the Handset Handset Press [C]. • “Talk” is displayed. Display Dial a phone number. Soft Keys • The dialed number is displayed. [OFF] • After a few seconds, the display will show the length of the call. [d], [B] To hang up, press [OFF] or place the handset on the base... -
Page 26: To Redial The Last Number
TG2361JX.book 26 ページ 2009年12月17日 木曜日 午前11時55分 Making Calls To dial after confirming the To redial the last number entered number dialed Enter a phone number. Press [C] or [s], then press 3334444| [REDIAL]. Clear Pause To redial using the redial • If you misdial, press Clear. Enter list (Memory Redial) the correct number. -
Page 27: Voice Enhancer Technology
Ringer/Message Alert indicator will start to flash rapidly. After 4 additional minutes on hold, the call will be disconnected. Voice Enhancer Technology Panasonic’s Voice Enhancer Technology clarifies the voice of the person you are talking to, reproducing a more natural-sounding voice that is easier to hear and understand. -
Page 28: Using The Base Unit
TG2361JX.book 28 ページ 2009年12月17日 木曜日 午前11時55分 Making Calls Using the Base Unit Base Unit Press [SP-PHONE]. • The SP-PHONE indicator lights. Dial a phone number. [HOLD/CONF] [SP-PHONE] When the other party answers, talk and Indicator into the MIC (microphone). [REDIAL] To hang up, press [SP-PHONE]. •... -
Page 29: Answering Calls
TG2361JX.book 29 ページ 2009年12月17日 木曜日 午前11時55分 Answering Calls When a call is received, the unit rings, “Incoming call” is displayed, and the Ringer/Message Alert indicator on the handset and “ ” on the base unit LINE IN USE flash rapidly. If you subscribe to Caller ID, see page 30. Handset Ringer/Message Alert Indicator... -
Page 30: Caller Id Service
TG2361JX.book 30 ページ 2009年12月17日 木曜日 午前11時55分 Caller ID Service This unit is compatible with Caller ID services offered by your telephone company. If you subscribe to Caller ID, caller’s information will be displayed and recorded in the Caller List. How Caller ID information is displayed When a call comes in, the unit will ring and the caller Example information will be received. -
Page 31: Using Talking Caller Id
TG2361JX.book 31 ページ 2009年12月17日 木曜日 午前11時55分 Caller ID Service Using Talking Caller ID To use this feature, you need to subscribe to Caller ID. For further information, please contact your telephone company. To activate this feature, you must turn this feature on (p. 32). When a call is received, the unit will ring and receive Example caller information. -
Page 32: Talk Caller Id
TG2361JX.book 32 ページ 2009年12月17日 木曜日 午前11時55分 Caller ID Service To turn Talking Caller ID on or off You can turn Talking Caller ID on or off for the handset and base unit separately. If this feature is off, the unit will not announce caller names. The factory preset is OFF. -
Page 33: Using The Caller List
TG2361JX.book 33 ページ 2009年12月17日 木曜日 午前11時55分 Using the Caller List The unit can record information up to 50 different callers and store this information in the Caller List. Caller information is sorted by the most recent call to the oldest. When the 51 call is received, the information from the 1 call is deleted. -
Page 34: Calling Back From The Caller List
TG2361JX.book 34 ページ 2009年12月17日 木曜日 午前11時55分 Using the Caller List • If a call has name information, the caller’s name and JACK SMITH phone number are alternately displayed as shown on 3:10P 29JUN. the right in step 2 on page 33. Erase Select 15553334444 3:10P 29JUN. -
Page 35: Editing The Caller's Phone Number
TG2361JX.book 35 ページ 2009年12月17日 木曜日 午前11時55分 Using the Caller List Editing the Caller’s Phone Number Handset You can edit a phone number in the Caller List to call it back or store it in the phone book. Press Rcvd calls, [ ], or [ ] to enter the 2 missed calls Caller List. -
Page 36: Storing Caller Information In The Phone Book
TG2361JX.book 36 ページ 2009年12月17日 木曜日 午前11時55分 Using the Caller List Storing Caller Information in the Phone Book Handset Caller phone numbers that are in the handset Caller List can be stored in each handset’s phone book. Press Rcvd calls, [ ], or [ ] to enter the 2 missed calls Caller List. -
Page 37: Erasing Caller Information
TG2361JX.book 37 ページ 2009年12月17日 木曜日 午前11時55分 Using the Caller List Erasing Caller Information Handset To erase a specific caller Press Rcvd calls, [ ], or [ ] to enter the 2 missed calls Caller List. Rcvd Phone calls book 2 missed calls =Scroll list All erase Scroll to the desired caller by pressing [... -
Page 38: Phone Book
TG2361JX.book 38 ページ 2009年12月17日 木曜日 午前11時55分 Phone Book The handset can store up to 50 names and phone numbers in its phone book. You can make a call by selecting a name or number from the phone book, and copy phone book items from one handset to another (p. 43–44). Storing Names and Numbers Handset Press Phone book. -
Page 39: Selecting Characters To Enter Names
TG2361JX.book 39 ページ 2009年12月17日 木曜日 午前11時55分 Phone Book • To store numbers for calling card access (see “Chain Dial” on page 41), we recommend you add pauses after each item. Storing pauses with numbers will prevent misdialing (p. 52). The delay time necessary will depend on your telephone company. -
Page 40: Dialing From The Phone Book
TG2361JX.book 40 ページ 2009年12月17日 木曜日 午前11時55分 Phone Book Dialing from the Phone Book Handset Press Phone book. Press Search. Phone book 7 items Search Scroll to the desired item. To scroll down, 0-9=Name search press [ ]. To scroll up, press [ =Scroll list Phone book items are sorted in the following order: Alphabet letters (Alphabetical) -
Page 41: Chain Dial
TG2361JX.book 41 ページ 2009年12月17日 木曜日 午前11時55分 Phone Book Index table Keys Index Keys Index Symbols, 1 M, N, O, 6 A, B, C, 2 P, Q, R, S, 7 D, E, F, 3 T, U, V, 8 G, H, I, 4 W, X, Y, Z, 9 J, K, L, 5 0, Space Chain Dial... -
Page 42: Editing An Item In The Phone Book
TG2361JX.book 42 ページ 2009年12月17日 木曜日 午前11時55分 Phone Book Editing an Item in the Phone Book Handset Press Phone book. Press Search. Scroll to the desired item by pressing [ ] or Jane ], then press Edit. 3456789 Erase Edit • To search for the item by initial, see page 40. Edit the name (p. -
Page 43: Copying Items In The Phone Book
TG2361JX.book 43 ページ 2009年12月17日 木曜日 午前11時55分 Phone Book Copying Items in the Phone Book Handset You can copy one or all phone book items between two handsets. The destination handset will save the entries in its phone book. • If an outside call is received during the phone book copy, copying will stop. You will need to re-send the item(s) later. -
Page 44: Copy All Items
TG2361JX.book 44 ページ 2009年12月17日 木曜日 午前11時55分 Phone Book To copy all of the items in your phone book to another handset Make sure the destination handset is not in use. Press [MENU]. Scroll to “Copy phone book” by pressing [d] Copy phone book or [B], then press Select. -
Page 45: Intercom
TG2361JX.book 45 ページ 2009年12月17日 木曜日 午前11時55分 Intercom Intercom calls can be made between the handset and the base unit, and between two handsets. You can page all handsets at once from the base unit, and announce the page to all handsets (Voice Paging, page 47). The handsets have the extension number 1 and 2 which has “[1]”... -
Page 46: Answering Intercom Calls
TG2361JX.book 46 ページ 2009年12月17日 木曜日 午前11時55分 Intercom During an intercom call: • If you have difficulty hearing while using the handset speakerphone and base unit speaker, decrease the speaker volume by pressing VOLUME [ ] on the base unit or [d] on the handset. •... -
Page 47: Voice Paging
TG2361JX.book 47 ページ 2009年12月17日 木曜日 午前11時55分 Intercom Voice Paging Base Unit The base unit user can make a voice announcement that is heard through the speakers of all handsets. Press [LOCATOR/INTERCOM]. • The SP-PHONE indicator lights. To make a voice announcement to all handsets, press [3] ( •... -
Page 48: Transferring A Call
TG2361JX.book 48 ページ 2009年12月17日 木曜日 午前11時55分 Transferring a Call You can transfer an outside call to the base unit or the handset. Handset Base Unit From the to the Handset: (1) During a call, press [HOLD/INTERCOM]. Line on hold. Transfer to • The call is put on hold. Base Handset (2) Press Base. -
Page 49: Quick Call Transfer
TG2361JX.book 49 ページ 2009年12月17日 木曜日 午前11時55分 Transferring a Call Handset Handset From a to another During a call, press [HOLD/INTERCOM], then page another handset by pressing Handset. Wait for the paged party to answer, then you can announce the transfer. • After the paged party answers, “Intercom hold” is displayed. •... -
Page 50: Conference Calls
TG2361JX.book 50 ページ 2009年12月17日 木曜日 午前11時55分 Conference Calls While you are talking with an outside caller, the base unit user or a handset user can join the conversation and establish a conference call. Handset Base Unit During a call, press [HOLD/ During a call, press INTERCOM]. -
Page 51: Special Features
TG2361JX.book 51 ページ 2009年12月17日 木曜日 午前11時55分 Special Features Temporary Tone Dialing Handset Base Unit (For Rotary or Pulse Service Users) Press (TONE) before entering access numbers which require tone dialing. • The dialing mode changes to tone. You can enter numbers to access an answering service, electronic banking service, etc. -
Page 52: Using The Pause Key (For Pbx Line/Long Distance Calls)
TG2361JX.book 52 ページ 2009年12月17日 木曜日 午前11時55分 Special Features Using the PAUSE Key Handset (For PBX Line/Long Distance Calls) We recommend you press Pause or P if a pause is Example 9P15556667777| required for dial with a PBX or to make a long distance call. Ex. -
Page 53: Incoming Call Tone
TG2361JX.book 53 ページ 2009年12月17日 木曜日 午前11時55分 Special Features Incoming Call Tone Handset Base Unit During an intercom call (p. 45), you can be informed of incoming calls by two tones. If this feature is turned on, incoming call tones will be heard for as long as the line is ringing. -
Page 54: Key Tone
TG2361JX.book 54 ページ 2009年12月17日 木曜日 午前11時55分 Special Features Key Tone Handset You can select whether or not the handset keys will sound tones (key tone, confirmation tone, error tone). The factory preset is ON. Press [MENU]. Scroll to “Initial setting” by pressing [d] Initial setting or [B], then press Select. - Page 55 — using the base unit, the base unit beeps 3 times. • Please write down your password. If you forget your password, consult your nearest Panasonic service center. To cancel the Dial Lock Press [MENU]. Scroll to “Dial lock” by pressing [d] or [B], Dial lock then press Select.
-
Page 56: Re-Registering The Handset
TG2361JX.book 56 ページ 2009年12月17日 木曜日 午前11時55分 Special Features Re-registering the Handset Handset & Base Unit If “No link to base. Move closer to base, try again.” is displayed even when using the handset near the base unit, the handset may have lost communication with the base unit. -
Page 57: Operation
TG2361JX.book 57 ページ 2009年12月17日 木曜日 午前11時55分 Automatic Answering Operation When the unit answers a call, a greeting message is played and the caller’s message is recorded. • The total recording time of all messages (greeting, incoming and memo) is about 16 minutes (about 8 minutes in “Enhanced recording” mode, p. 24). If messages are recorded in noisy rooms, the time may be shortened by up to 3 minutes. -
Page 58: Monitoring Incoming Calls
TG2361JX.book 58 ページ 2009年12月17日 木曜日 午前11時55分 Automatic Answering Operation Monitoring Incoming Calls Base Unit While a caller is leaving a message, you can monitor the call through the base unit speaker. • To increase the speaker volume while monitoring, press VOLUME . To >... -
Page 59: Listening To Messages
TG2361JX.book 59 ページ 2009年12月17日 木曜日 午前11時55分 Listening to Messages Voice Day/Time Stamp: During playback, the unit will announce the day and time when each message was recorded (p. 14). Using the Base Unit Base Unit You can see the total number of recorded messages on the base unit display. If the NEW MESSAGE indicator flashes on the base unit, new messages have been recorded. -
Page 60: Using The Handset (Remote Operation)
TG2361JX.book 60 ページ 2009年12月17日 木曜日 午前11時55分 Listening to Messages Using the Handset (Remote Operation) Handset If “New message” is displayed on the handset, new messages have been recorded. • If the Message Alert is turned on (p. 24), the Ringer/Message Alert indicator on the handset will flash slowly when new messages have been recorded and the handset is not in use. -
Page 61: During Playback
TG2361JX.book 61 ページ 2009年12月17日 木曜日 午前11時55分 Listening to Messages For Caller ID service users (p. 30) During playback using the handset, the handset display will show the number of the caller whose message is being played. To call back the displayed number: 1. -
Page 62: Erasing Messages
TG2361JX.book 62 ページ 2009年12月17日 木曜日 午前11時55分 Erasing Messages The unit will announce the remaining recording time after playback if it is less than 3 minutes. New messages cannot be recorded when: —“Memory full” is heard. —“ ” flashes on the base unit. FULL —the ANSWER ON indicator flashes rapidly (when the Answering System is on). -
Page 63: Recording A Memo Message
TG2361JX.book 63 ページ 2009年12月17日 木曜日 午前11時55分 Recording a Memo Message Base Unit You can record a voice memo message of up to 3 minutes in memory. Press [MEMO]. NEW MESSAGE Indicator [STOP] After the long beep, talk clearly 20 cm away from the MIC. [MEMO] •... -
Page 64: Remote Operation From A Touch Tone Phone
TG2361JX.book 64 ページ 2009年12月17日 木曜日 午前11時55分 Remote Operation from a Touch Tone Phone While outside, you can operate the Answering System from any touch tone phone. A synthesized voice menu will guide you through the Answering System (p. 65). • To skip the voice menu and operate the unit directly, see page 66. Summary of remote operation Call your unit from a touch tone phone. -
Page 65: Voice Menu
TG2361JX.book 65 ページ 2009年12月17日 木曜日 午前11時55分 Remote Operation from a Touch Tone Phone Voice Menu The shaded parts are voice prompts. Press [1]. All Message Playback. Press 1 to play back all messages. All recorded messages are Press 2 for other functions. played back. -
Page 66: Direct Remote Operation
TG2361JX.book 66 ページ 2009年12月17日 木曜日 午前11時55分 Remote Operation from a Touch Tone Phone Direct Remote Operation Once you have entered the remote code, you can also control your unit by direct commands instead of using the voice menu. To end remote operation, hang up at anytime. -
Page 67: Belt Clip
To remove the belt clip Optional Headset Connecting an optional headset to the handset allows hands-free phone conversation. Please use only the Panasonic KX-TCA89BX headset. Connecting the optional headset Open the headset jack cover, and insert the headset plug into the headset jack as shown below. -
Page 68: Wall Mounting
TG2361JX.book 68 ページ 2009年12月17日 木曜日 午前11時55分 Wall Mounting This unit can be mounted on a wall. Base unit Push the hook and turn it Install screws using the wall upward. Turn the hook until a template below. Connect the click is heard. telephone line cord. -
Page 69: Charger Unit
TG2361JX.book 69 ページ 2009年12月17日 木曜日 午前11時55分 Wall Mounting Charger unit The charger can be wall mounted. Connect the AC adaptor. Install screws using the wall template (see below). Mount the charger ( ). Slide it down ( ), then slide it down to the right ( ) until it is secured. -
Page 70: Direct Commands
TG2361JX.book 70 ページ 2009年12月17日 木曜日 午前11時55分 Direct Commands Handset After pressing [MENU], you can also program menu items directly by pressing [0] to [9], [*] and [#] instead of using the soft keys. Menu item Command Selection items Page Ringer volume [1] [1] [0] : Off [1] : Low [2] : Medium p. - Page 71 TG2361JX.book 71 ページ 2009年12月17日 木曜日 午前11時55分 Direct Commands Menu item Command Selection items Page Recording time [0] [6] [2] [1] : 1 minute [2] : 2 minutes p. 22 [3] : 3 minutes [0] : Greeting only Remote code [0] [6] [3] Go to Step 5 on page 64.
-
Page 72: If The Following Appears On Your Display
TG2361JX.book 72 ページ 2009年12月17日 木曜日 午前11時55分 If the Following Appears on Your Display... The following will be displayed when the unit needs your attention. Display message Cause & Remedy • The battery needs to be charged. Recharge the Recharge battery battery (p. 10). •... -
Page 73: If The Following Appears On Your Display
TG2361JX.book 73 ページ 2009年12月17日 木曜日 午前11時55分 If the Following Appears on Your Display... Display message Cause & Remedy • When phone book item(s) was(were) sent to another ---Incomplete--- handset, the phone book memory was full and Phone book full copying stopped. Press [OFF] to exit (p. 43, 44). To erase items from another handset phone book, see page 42. -
Page 74: Troubleshooting
TG2361JX.book 74 ページ 2009年12月17日 木曜日 午前11時55分 Troubleshooting If the handset display shows error messages, see “If the Following Appears on Your Display...” (p. 72–73) for the Cause & Remedy. Telephone System Problem Cause & Remedy “No link to base. Move • You are too far from the base unit. Walk closer to the base unit. - Page 75 TG2361JX.book 75 ページ 2009年12月17日 木曜日 午前11時55分 Troubleshooting Problem Cause & Remedy You cannot make an intercom/ • Your handset is in remote operation mode outside call. (p. 60). Exit by pressing [OFF]. • The handset you called is too far from the base unit.
-
Page 76: Answering System
TG2361JX.book 76 ページ 2009年12月17日 木曜日 午前11時55分 Troubleshooting Problem Cause & Remedy The handset and/or base unit • Name pronunciation may vary. does not announce the • The handset and/or base unit will announce displayed caller’s name each letter of abbreviations, such as “Co.” properly. - Page 77 TG2361JX.book 77 ページ 2009年12月17日 木曜日 午前11時55分 Troubleshooting Problem Cause & Remedy You cannot erase messages. • While another user is operating the Answering System or a caller is leaving a message, you cannot erase messages. When you play back messages or • The date and time may be set incorrectly. turn on the Answering System, the Set the date and time again (p.
-
Page 78: Safety Instructions
TG2361JX.book 78 ページ 2009年12月17日 木曜日 午前11時55分 Safety Instructions Take special care to follow the safety suggestions listed below. Safety 1) The unit should be connected to a power supply only of the type described in the operating instructions or as marked on the unit. 2) When left unused for a long period of time, the base unit should be unplugged from the household AC outlet. -
Page 79: Specifications
TG2361JX.book 79 ページ 2009年12月17日 木曜日 午前11時55分 Safety Instructions WARNING: TO PREVENT FIRE OR SHOCK HAZARD, DO NOT EXPOSE THIS PRODUCT TO RAIN OR ANY TYPE OF MOISTURE. If there is any trouble, disconnect the unit from the telephone line and connect a known working phone. - Page 80 TG2361JX.book 80 ページ 2009年12月17日 木曜日 午前11時55分 1-62, 4-chome, Minoshima, Hakata-ku, Fukuoka 812-8531, Japan © Panasonic System Networks Co., Ltd. 2004 PQQX14264YA F0404-1129...
Need help?
Do you have a question about the KX-TG2361JX and is the answer not in the manual?
Questions and answers
I have 2 Panasonic KX- TG2361JXB and I lost one but I still have the handset so can I use this handset with my other Panasonic same model ?