
Related Manuals for AEG Birdy


Summary of Contents for AEG Birdy
- Page 1 Birdy & Birdy Voice Cordless DECT phone featuring caller identification Birdy Voice with built-in digital answering machine Operating Guide...
- Page 2 This device is in conformity with the Directions of the European Union: 91/263/EWG Terminal equipment for telecommunication 73/23/EWG Low voltage directions 89/336/EWG Electromagnetic compatibility Conformity of the phone with the above-mentioned directions is guaranteed by the CE symbol. Box Contents: •...
-
Page 3: Table Of Contents
Table of Contents Safety Prescriptions ..................5 Description ....................6 Installation ....................9 3.1 Power Supply ....................9 3.2 Telephone Line ....................9 3.3 Belt Clip ......................10 3.4 Replacing the Battery ..................10 3.5 Charge Indication ..................10 3.6 Out of Range ....................10 3.7 Switching On/Off the Handset ..............11 3.8 Subscribing a Handset to a Base Set ............11 3.9 Removing a Handset from a Base Set ............12 3.10 Selecting a Base Set ..................13... - Page 4 5.9 Calling the Handsets From the Base Set ............27 5.10 Mute .........................28 5.11 Call Duration Display ..................28 Phone Book ....................29 6.1 Alphanumerical Keypad Operation ............29 6.2 Entries in the Phone Book ................29 6.3 Searching the Phone Book ................30 6.4 Editing Phone Book Entries ................30 6.5 Deleting Phone Book Entries .................31 Call Log (CLIP) ...................32 7.1 Viewing the Call Log ..................32...
-
Page 5: Safety Prescriptions
Safety Prescriptions • Please read this Operating Guide carefully and keep it at hand. Address your questions to an expert. Reparations may only be carried out by an expert, never open the device yourself. • Never touch the jacks with pointed, metal or damp objects. •... -
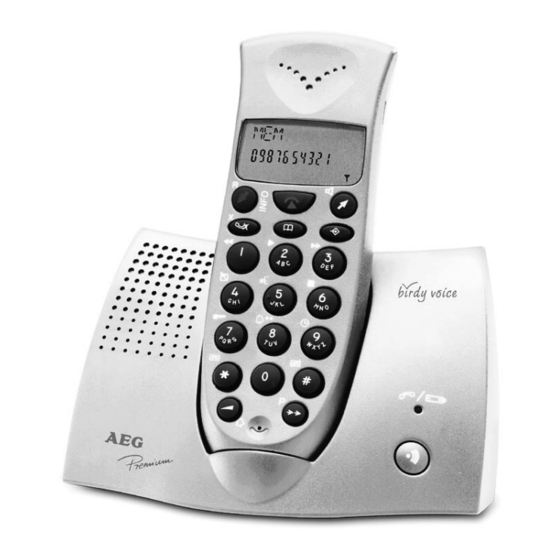
Page 6: Description
Description Handset Birdy Voice Base Set... - Page 7 Birdy & Birdy Voice 21 Base charge contacts 22 Belt clip LCD display Birdy Voice Line key to pick up and hang up the phone Numerical keys in answering mode: Arrow up key to scroll the call log To play back the previous...
- Page 8 LCD Display of Birdy Voice Incoming call counter Date (day/month) of incoming call Information line Time (hours:minutes) of incoming call Number display Birdy & Birdy Voice Mute on Message in the mailbox On: You have got messages Call log Off: You have no messages...
-
Page 9: Installation
Installation Power Supply For maximum battery capacity, charge the battery for the first time at least 20 hours without connecting the telephone line. 1. Insert the power plug (13) in the power jack (18) in the back of the base set. -
Page 10: Belt Clip
Belt Clip 1. Slide the belt clip (22) over the back of the handset up to the notches (Fig. 3). 2. To remove the belt clip (22), lift one end from a notch. Fig. 3 Notches Battery compartment Push to open Replacing the Battery 1. -
Page 11: Switching On/Off The Handset
Subscribing a Handset to a Base Set To a BIRDY base set 5 handsets can be subscribed. You can also subscribe the BIRDY handset to another GAP compatible DECT base set. The RFPI of the base set is the universal code for all GAP compatible DECT base sets. -
Page 12: Removing A Handset From A Base Set
10. The RFPI code of the base set is displayed and the handset emits a tone when it recognises the base. 11. Press the program key (4). 12. PIN is displayed. 13. Enter the 4 digits of the PIN code of this base (default 0000) by pressing the numerical keys. -
Page 13: Selecting A Base Set
15. NOT SUB is displayed if the removed handset is not submitted to another base, or SEARCHING if it is submitted to another base set. 3.10 Selecting a Base Set If the handset is subscribed to several base sets, it can only operate on one at a time. -
Page 14: Settings
Settings Language You can choose between five languages to display the menus: English, French, German, Italian and Swedish. Default setting is German (DEUTSCH). To set the language, proceed as follows: 1. The handset is in standby (no tone). 2. Press the program key (4). -
Page 15: Programming The Pin Code
Programming the PIN Code Some features are only accessible after entering a PIN code. This feature enables you to secure access to your settings or certain features and to pro- hibit operation of handsets which are not subscribed to this base set. The PIN code consists of 4 digits. -
Page 16: Locking/Unlocking The Keypad
4. Press the program key (4). DATE/TIME is displayed 5. Press the program key (4). The display shows YEAR and the year num- ber (for ex. 00 for 2000). 6. Enter the last two figures of the year with the numerical keys (2001 -> 01). 7. -
Page 17: Switching On/Off Key Click
Switching On/Off Key Click The handset emits a tone each time you press a key. You can switch off key click. 1. The handset is in standby (no tone). 2. Press the program key (4). 3. Press the arrow down (11) or arrow up (3) key until KEY SETUP is dis- played. -
Page 18: Setting The Ring Melody Of The Handset
6. Press the program key (4). 7. MELODIES is displayed. 8. Press the arrow down (11) or arrow up (3) key until VOLUME is displayed. 9. Press the program key (4). 10. The set ring volume is displayed. 11. Press a numerical key from 0 to 9 to select the wanted volume. 12. -
Page 19: Setting Of Flash Time (R)
10. Press a numerical key from 1 to 9 to select the wanted melody. 11. Press the program key (4) to confirm the selected melody. b) Setting the Ring Melody of an Internal Call 1. The handset is in standby (no tone). 2. -
Page 20: Pause Key
4.11 Pause Key If you want to insert a pause while you are dialing a number, just press the pause/redial key P (6). A pause takes up the place of a digit in the memory. 4.12 Call Barring This feature is only accessible with the PIN code. It enables you to bar outgo- ing calls of 5 groups of numbers consisting of maximum 5 digits each. -
Page 21: Parameter Reset
(10). 14. Press the program key (4) to confirm. 4.13 Parameter Reset This feature requires the PIN code. Default parameter settings: Birdy & Birdy Voice Birdy Voice Keypad: unlocked Answering on Key click: on Default OGM: OGM 1 Language: German... -
Page 22: Factory Reset
4.14 Factory Reset This feature enables you to reset all settings without entering the PIN code. After a full reset, all phone book memory numbers will be erased, the handset will be removed from all base sets, the parameters will be reset to default and the PIN code will be reset to default 0000. -
Page 23: Phone Operation
Phone Operation Handsfree Calling This feature allows you to call without holding the handset in your hand. You can activate handsfree calling after having pressed the line key (2) and as soon as you hear the dial tone or during a conversation. 1. - Page 24 b) Predialing 1. The handset is in standby (no tone). 2. Dial the number you want to call. NOTE: If you have made a mistake, you can delete the wrong digits with the mute/delete key (10). 3. The number is displayed. 4.
-
Page 25: Answering Calls
e) Dialing a Number From the Phone Book 1. The handset is in standby (no tone). 2. Press the phone book key (5). 3. The first entry in the phone book will be displayed. 4. Press the arrow down (11) or arrow up (3) key until the number you want to call is displayed. -
Page 26: Intercom
Intercom a) Calling Another Handset 1. The handset is in standby (no tone). 2. Press the program key (4). 3. Press the arrow down (11) or arrow up (3) key until INTERCOM is dis- played. 4. Press the program key (4). -
Page 27: Consultation And Brokering (Switch Between Calls)
Consultation and Brokering (Switch Between Calls) You can switch between an external and an internal call. 1. You hold an external communication. 2. Press the program key (4). The external call is on hold. Press the arrow up key (3) until INTERCOM is displayed. 3. -
Page 28: Mute
5.10 Mute This feature enables you to speak with a third person in the same room with- out your calling partner hearing the conversation. 1. You are holding a communication. 2. The line/charge indicator (20) flashes and the contact symbol is displayed. -
Page 29: Phone Book
Phone Book Alphanumerical Keypad Operation Some features need alphanumerical entries. In these cases the keypad switch- es automatically to alphanumerical mode. To make entries in alphanumerical mode, press the corresponding key as often as necessary. Keypad characters: First Second Third Fourth Fifth –... -
Page 30: Searching The Phone Book
11. Enter the number using the alphanumerical keypad (9). 12. Press the program key (4). 13. The handset emits a long tone and the name and number are stored in the phone book memory. Searching the Phone Book 1. The handset is in standby (no tone). 2. -
Page 31: Deleting Phone Book Entries
9. Press the arrow down (11) or arrow up (3) key to select the entry you want to modify. 10. Press the program key (4). 11. Press the mute/delete key (10) to delete character per character and use the alphanumerical keypad to make the modifications. 12. -
Page 32: Call Log (Clip)
Call Log (CLIP) Birdy features identification of the caller as well as presentation of the date and time the call came in (see item 4.4). It compares the incoming telephone number with the entries in the phone book (name matching). If the number also appears in the phone book, number presentation will be replaced by the corresponding name. -
Page 33: Storing A Number From The Call Log Into The Phone Book
Storing a Number From the Call Log Into the Phone Book 1. The handset is in standby (no tone). 2. Press the arrow up key (3) to start viewing the call log with the most recent call that came in. 3. -
Page 34: Answering Machine
Answering Machine Birdy has a built-in digital answering machine (without cassette) with a capac- ity of maximum 14 minutes. It is remote controlled. Each message can last max- imum 2 minutes. Handsfree Operation For all answering machine functions the unit is in Handsfree mode. The loud- speaker of the handset is used for this purpose. -
Page 35: Selecting The Answering Mode
b) Switching Off the Answering Machine 1. Press the program key (4) twice to access answering machine opera- tion mode. 2. Press the hash key #. 3. The phone says ANRUFBEANTWORTER AUS (ANSWERING MACHINE OFF). 4. You hear four beeps, the answering machine is off. 5. -
Page 36: Recording The Outgoing Messages
To play back the default outgoing messages: 1. Press the program key (4) twice to access answering machine opera- tion mode. 2. Press the asterisk key . The cassette icon is displayed. 3. Press numerical key 5 4. Default outgoing message 1 or 2 is played back. Recording the Outgoing Messages You can personalise the outgoing messages (1 and 2) by overwriting the default outgoing messages (1 and 2). -
Page 37: Playing Back Outgoing Messages (1 And 2)
8. The phone will play back the outgoing message 2 you just finished recording. If your message is not satisfactory, you can restart the recording procedure until you are satisfied. Playing Back Outgoing Messages (1 and 2) 1. Press the program key (4) twice to access answering machine opera- tion mode. - Page 38 By remote control in toll saving mode, you can hang up the phone if the answering machine does not answer your call after the 2nd ring. You do not have to make a (paid) connection if you do not have new messages. a) Setting the Automatic Answering Time 1.
-
Page 39: Recording A Personal Message (Memo)
NOTE: If the caller stops speaking for more than 8 seconds or does not speak loud enough, the answering machine will automatically break the communi- cation. 8.10 Recording a Personal Message (Memo) You can leave a personal message on your answering machine. This memo will be counted as a call. -
Page 40: Deleting Messages
8.12 Deleting Messages a) Deleting a Message During Playback 1. Press the program key (4) twice to access answering machine opera- tion mode. 2. Shortly press numerical key 2 3. Select the message you want to delete by pressing numerical key 1 4. -
Page 41: Programming The Pin Code
b) Remote control 1. The machine answers your call and plays back outgoing message 2. 2. Press the asterisk key and slowly enter your security code. 3. Press numerical key 2 4. The phone says SPEICHER VOLL (MEMORY FULL) and plays back the mes- sages. -
Page 42: Day/Time Setting
14. Shortly press numerical key 7 to confirm the third digit of the security code. 15. You will hear a long beep. 16. The phone repeats the newly set security code. NOTE: If, during programming, you do not press any key for 8 seconds, the phone will repeat the old security code and return to standby. -
Page 43: Remote Control
The presentation of date and time of incoming messages is independent of that of the call log. If you do not set the day and time before taking the unit into use, the incom- ing messages will have no time stamp or a wrong one. b) Checking 1. - Page 44 Deleting the Current Message 1. During message playback, enter code 0. 2. The answering machine will delete the present message and continue message playback. Deleting All Messages Played Back • After having played back all messages, enter code 0. Recording a Memo 1.
-
Page 45: Menu Operation
Menu Operation Most telephone features are easily accessible through a Main menu and Submenus. 1. To enter the menu, press the program key (4). 2. To scroll the menu options, press the arrow keys (11) or (3). 3. To select the displayed option and enter the submenu press the program (4). -
Page 46: Troubleshooting
The number you have dialled is barred. You have forgotten your PIN code. • Perform a full reset of the handset. Bad voice quality (Birdy Voice only). • Repeat what you have said speaking more slowly and close to the micro- phone. -
Page 47: Features
11. Features Birdy & Birdy Voice Handset • DECT, GAP • 20 keys • LCD display with 3 lines (10 characters, 12 digits, icons) • Phone book for 20 entries (10 characters + 20 digits) • Redial memory of 5 last numbers dialled (max. 25 digits each) •... - Page 48 Delete all records Base • Page key (base to all handset) • Status indicator • Tone dialing • Dual position charge Birdy Voice Handset • Answering machine control Answering Machine • Handsfree operation • Answer-Record (AR) mode • Answer Only (AO) mode •...
-
Page 49: Specifications
12. Specifications Complies with TBR 6/10/21/22, ETS 300-175, EN60950 Protocol: FSK Type I Outdoor range: up to 300 m GAP compatible Multiple handsets: up to 5 handsets Multiple base sets: up to 4 base sets Caller ID type I FSK Standby time: 4 days Talk time: 6 hours Recharge time: 12 hours... -
Page 50: Menu Structure
Menu Structure Level 1 Level 2 Level 3 Standby mode ANSWERING SET RING (Birdy Voice only) SET CODE SET TIME INTERCOM KEY SETUP KEY LOCK LOCK UNLOCK KEY CLICK CLICK ON CLICK OFF PHONE BOOK SEARCH ADD NEW EDIT DELETE... -
Page 51: Remote Control - Short Manual
Remote Control - Short Manual Dial your phone number. You will hear the outgoing message. After the outgoing message, enter your 3-digit PIN (press each digit for 1 second). The entry will be confirmed by two tones. Enter further commands within 10 seconds.
Need help?
Do you have a question about the Birdy and is the answer not in the manual?
Questions and answers