Table of Contents
Advertisement
Contents
Preparation
Before Initial Use ......................... 2
Important Information .................. 3
Setting up .................................... 4
Cordless Telephone
Using the Telephone ................... 9
Making Calls .............................. 10
Caller ID .................................... 11
Answering Calls......................... 13
Phonebook ................................ 14
Handset Settings ....................... 18
Base Unit Settings ..................... 24
Initial Settings ............................ 26
Multi-unit User Operation........... 28
Intercom .................................... 32
Answering System
Answering System..................... 33
Remote Operation ..................... 40
Useful Information
Before Requesting Help ............ 41
Technical Information ................ 44
Index.......................................... 45
Guarantee ................................. 46
Caller ID Compatible
PLEASE READ BEFORE USE AND SAVE.
Charge the battery for about 7 hours before initial use.
Digital Cordless Answering System
Operating Instructions
Model No.
KX-TCD420E
Advertisement
Table of Contents

Related Manuals for Panasonic KX-TCD420E


Summary of Contents for Panasonic KX-TCD420E
-
Page 1: Table Of Contents
Digital Cordless Answering System Operating Instructions KX-TCD420E Contents Model No. Preparation Before Initial Use ......2 Important Information ....3 Setting up ........4 Cordless Telephone Using the Telephone ....9 Making Calls ......10 Caller ID ........11 Answering Calls......13 Phonebook ........ -
Page 2: Before Initial Use
• It couldn’t be simpler! Dear purchaser, You have acquired a KX-TCD420E, which is a product made in regard with the European Standards for Cordless Telephones (DECT). DECT technology is characterized by high-security protection against interceptions as well as high-quality digital transmission. -
Page 3: Important Information
Important Information Only use the power supply included with Battery Caution the product. Use only specified batteries. Do not connect the AC Adaptor to any AC Only use rechargeable batteries. outlet other than the standard AC220- Do not mix old and new batteries. 240V. -
Page 4: Setting Up
Setting up Connection Do not connect the telephone line cord to the phone socket until the handset is fully charged. Plug in the AC adaptor and the telephone line cord in order (Switch on AC mains outlet.) LI NE Hook Fasten the AC adaptor cord to prevent it from being disconnected. - Page 5 Setting up Battery Charge Battery Life At the time of shipment, the batteries are Battery life is dependent on use and not charged. To charge, place the conditions but in general when using fully handset on the base unit. Please charge charged Ni-MH batteries (700 mAh): the batteries for about 7 hours before Talk time: 10hrs approx.
-
Page 6: Replacing The Batteries
• T o exit the operation, press any time. • Do not use non-rechargeable batteries. If non-rechargeable batteries are fitted and start charging, it may cause the leakage of the battery electrolyte. Please use only Panasonic P03P(Ni-MH) or P03H(Ni-Cd) batteries. -
Page 7: Location Of Controls
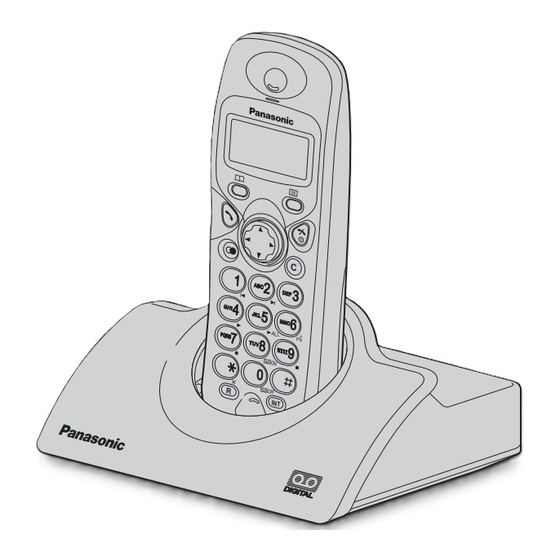
Setting up Location of Controls Handset PHONEBOOK Button TALK Button Receiver Navigator Key Display REDIAL/PAUSE Button RECALL Button MENU/OK Button OFF/POWER Button Charge Contact CLEAR Button Charge Microphone Contact INTERCOM Button Base unit PAGE Button and Indicator L IN E Handset Display Within range of a base unit Call BAR ON (p.21) -
Page 8: Wall Mounting
Setting up Wall Mounting This unit can be mounted on a wall. - Insert screws into the wall. The centre of the screw hole should be 8 cm horizontally apart. - Connect the AC adaptor and the telephone line cord. - Arrange the wires as shown, then mount the unit. -
Page 9: Using The Telephone
Using the Telephone Power On/Off Power on Power off Press for more than Press for more than 1 second. *1 2 seconds. *2 *1 When button is released, the display changes to the standby mode. *2 The display goes blank. Making a Call Pre-dialling Post-dialling... -
Page 10: Making Calls
Making Calls Redialling The last 10 numbers dialled are stored in the redial list automatically. Dialling with the Redial List Dialling the Last Number Dialled Search the desired Press REDIAL. Press Press Press TALK. dialled item. REDIAL.*1 TALK. Editing the Dialled Number in the Redial List The 1st digit of the desired dialled Search/Select the... -
Page 11: Caller Id
Caller ID Caller ID Service Caller ID is a service of your Network provider and will only operate if you have subscribed to this feature. After subscribing to Caller ID, this phone will display the caller information. If your unit is connected to a PBX or a telephone line that does not support this service, you will not be able to use it. -
Page 12: Caller Id List
Caller ID Caller ID List Information up to 50 different callers is stored from the most recent call to the oldest call in the caller list. When the 51st call is received, the oldest caller information is cleared. If you receive a call from the same phone number you stored with a name in the phonebook, the display will show the caller’s name. -
Page 13: Answering Calls
Answering Calls Auto Talk If you set Auto Talk to on, you can answer the phone by lifting the handset off the base unit. Press Search/Select Search/Select Search/Select Search/Select MENU. "ON" or "OFF". "SETTING HS". "OTHER OPT". "AUTO TALK". • To exit the operation, press any time. -
Page 14: Phonebook
Phonebook You can store up to 20 caller information in the phonebook. If you received a call from the same phone number you stored with a name in the phonebook, the display will show the caller’s name. Storing a Caller Information Phone Number Select Press MENU. - Page 15 Phonebook Editing a Caller Information The 1st digit of the desired phone Press Search/Select Select "EDIT". number blinks. PHONEBOOK.*1 desired item. <Phone Number> AND/ Number Edit the phone Press CLEAR.*2 Press OK. Move cursor. number.*3 <Name> AND/ Name Move cursor. Press CLEAR.*2 Edit the name.*4 Press OK.
-
Page 16: The Phonebook
Phonebook Storing the Phone Number into the Phonebook When Pre-dialling Phone Number Name Enter name.*2 Press OK to Press OK twice. store the number. Press OK. • To exit the operation, press any time. *1 If you need correction, press CLEAR. Digit is cleared to the left, then enter numbers. *2 To enter characters, see Character Selection on page 14. -
Page 17: Hot Key
Phonebook Hot Key You can assign the dialling buttons 1 through 9 as hot keys. You can choose 9 phone numbers from the phonebook. Registering a Phone Number as a Hot Key Press Search/Select Search/Select Search/Select PHONEBOOK.*1 desired item. desired dialling "HOT KEY REG". -
Page 18: Handset Settings
Handset Settings : Time Alarm Before programming, please follow steps 1 to 3. You must set the clock before setting the time alarm. Press MENU. Search/Select Search/Select "SETTING HS". "TIME ALARM". Setting Alarm Time Time Search/Select Enter time. Search/Select Press OK. 4-digit "SET TIME". -
Page 19: Ringer Option
Handset Settings : Ringer Option Before programming, please follow steps 1 to 3. Press MENU. Search/Select Search/Select "SETTING HS". "RINGER OPT". Setting the Ringer Volume The choices are 6 levels and off. Search/Select Search/Select desired ringer volume. "RINGER VOL". • If "RINGER OFF"... -
Page 20: Tone Option
Handset Settings : Tone Option You can set the following sounds on or off. Key Tone: Key tone will sound when you press any key, and a confirmation tone and an error tone will be heard during operation. Call Waiting Tone: Call waiting tone will sound when an incoming external call is received during an intercom call. -
Page 21: Call Option
Handset Settings Before programming, please follow steps 1 to 3. Press MENU. Search/Select Search/Select "SETTING HS". "DISPLAY OPT". Selecting the Talk Mode Display Even if you select "PHONE NO", the other party’s phone number will not appear on your display when you receive calls without subscribing to a Caller ID service. Search/Select Search/Select "TALK TIME"(Length of the call) or... -
Page 22: Other Options
The factory preset is 0000. Once you have programmed the handset PIN, you cannot confirm it. We recommend you write down the handset PIN. If you forget it, please consult our Panasonic Customer Care Helpline. U.K. 08700 100 076 R.O.I. 01289 8333 Search/Select Press MENU. -
Page 23: Key Lock
Handset Settings Key Lock You can lock the handset dialling buttons. Only incoming calls are accepted while the key lock is on. The key lock is cancelled if the handset is turned off. When the key lock is on, emergency calls cannot be made until key lock is cancelled. -
Page 24: Base Unit Settings
The factory preset is 0000. Once you have programmed the base unit PIN, you cannot confirm it. We recommend you write down the base unit PIN. If you forget it, please consult our Panasonic Customer Care Helpline. U.K. 08700 100 076 R.O.I. 01289 8333... -
Page 25: Cancelling Call Restricted Number
An earth relay can be installed as an option depending on your PBX requirements. Please consult our Panasonic Customer Care Helpline for installation. On installation, you can then select the time break recall or earth mode to suit your PBX or Network provider. -
Page 26: Initial Settings
Initial Settings : Reset Handset You can reset all of the handset settings to their initial settings. 4-digit Handset PIN Factory preset 0000 Press MENU. Search/Select Search/Select "SETTING HS". "RESET HS". Search/Select "YES" or "NO". • To exit the operation, press any time. -
Page 27: Reset Base Unit Settings
Initial Settings Reset Base Unit Settings If the base unit is reset, the Caller ID list will clear. "INPUT CODE" Press MENU. Search/Select Press 0. "SETTING BS". 4-digit Base Unit PIN Factory preset 0000 Press OK. • To exit the operation, press any time. -
Page 28: Multi-Unit User Operation
Multi-unit User Operation : Handset Registration to a Base Unit Handset Registration The handset supplied with the base unit is already registered. If an optional handset is purchased, it must be registered. Additional KX-A142E handsets are available to purchase separately. Up to 6 handsets can be registered to a single base unit. Using additional handsets allows you to have an intercom call while simultaneously conducting a call to an outside line. -
Page 29: Cancelling A Base Unit
Multi-unit User Operation Cancelling a Base Unit You can cancel any base unit that your handset is registered to. Search/Select Search/Select Press MENU. "SETTING HS". "REGISTRATION". 4-digit Handset PIN Factory preset 0000 Search/Select Search/Select desired base unit "CANCEL BS". number to cancel.*1 Press RIGHT. - Page 30 Multi-unit User Operation Before programming, please follow steps 1 to 4. 4-digit Base Unit "INPUT CODE" Press Search/Select Factory preset 0000 MENU. "SETTING BS". Ringer Mode Selection; Setting the All Handsets Mode Press OK. "All handsets" mode. Setting the Selected Handsets Mode Handset Numbers "Selected handsets"...
-
Page 31: Base Unit Selection
Multi-unit User Operation : Base Unit Selection When Automatic Base Unit Access is selected, if you move outside of the radio range of the current base unit, the handset automatically searches for other registered bases. When a specified base unit is selected, the handset will access that base unit only. Calls (both incoming and outgoing) can be conducted only via the selected base unit, even if the radio cells overlap with neighbouring base units. -
Page 32: Intercom
Intercom Intercom between Handsets You can use your handsets as a 2-way intercom. For example, when Handset 1 calls Handset 2. To hang up, press <Handset 1> on the display) Press INTERCOM. Press desired Handset Number. <Handset 2> Press TALK.*1 •... -
Page 33: Answering System
Answering System Summary of Answering System Before programming, please follow steps 1 to 2. Press INTERCOM. Press To repeat an/a incoming/memo message during playback. (p. 35) Press To skip an/a incoming/memo message during playback. (p. 35) Press To playback new incoming/memo message(s). (p. 35) Press To playback all incoming/memo message(s). -
Page 34: Greeting Messages
Answering System Greeting Messages You can choose to use one of two pre-recorded greeting messages, or you can record your own greeting message. All messages (greeting, incoming & memo) are stored indefinitely on a “Flash memory” IC chip - even if a power failure occurs. Pre-Recorded Greeting Messages You can choose to play either: - A pre-recorded message which allows you to select a caller’s recording time of “1... -
Page 35: Incoming/Memo Messages
Answering System Incoming/Memo Messages Incoming messages and memo messages are stored in chronological order. New messages cannot be recorded when “Memory full” is heard. We recommend you erase unnecessary messages after each playback to leave more time for recording new message(s). -
Page 36: Recording Your Telephone Conversation
Answering System Clearing All Incoming/Memo Messages Press INTERCOM. Selecting the Caller’s Recording Time You can select “1 minute”, “unlimited” or “greeting only” for the caller’s recording time. "INPUT CODE" Press Search/Select MENU. "SETTING BS". 1 minute Unlimited Press OK. Greeting only*1 •... -
Page 37: Recording Quality
Answering System Before programming, please follow steps 1 to 2. "INPUT CODE" Press MENU. Search/Select "SETTING BS". Recording Quality It is possible to select either high quality or normal quality recording of incoming messages. Available recording time will vary as follows: Quality Recording Time Normal :Approx. - Page 38 Answering System Before programming, please follow steps 1 to 2. "INPUT CODE" Press MENU. Search/Select "SETTING BS". Monitor Function On/Off When your greeting message is being played to the caller and the caller’s message is being recorded, you can listen to it through the handset. Press OK.
-
Page 39: Remote Operation
Answering System Remote Operation from a Touch Tone Phone You can operate the answering system from any touch tone phone. Firstly you must store your remote code using the handset near the base unit. The 3-digit remote code prevents unauthorised use of your answering system for listening to recorded messages. -
Page 40: Remote Operation
Remote Operation Voice Menu The words in “ ” mean a voice guidance. Press “All message playback.” “Press 1 to playback At the end of the last message, all messages. “End of final message” and the Press Press 2 for other functions.” remaining recording time are announced. -
Page 41: Before Requesting Help
Before Requesting Help If you experience any problems with the normal use of your apparatus, you should unplug it from the telephone outlet and connect a known working telephone in its place. If the known working telephone still has problems, then please contact the customer service department of your Network provider. - Page 42 • Wrong PIN number entered • If PIN number is lost, (Default 0000). contact the Panasonic Customer Care Helpline. • • Electrical noise in local Move base/handset away area. from sources of electrical...
- Page 43 Before Requesting Help Answering System Problem Possible cause Solution • • The answering system is on, The recording time is set to Select “1 minute” or but incoming messages are “greeting only”. “unlimited (see “Answering not recorded. System”). • • Erase some or all of the Memory is full.
-
Page 44: Technical Information
Connections: The telephone will not work during a power failure. We therefore recommend you use a standard telephone and T Adaptor to connect this Digital Cordless Phone to the line. Your Panasonic Sales Shop can offer you more information about connection possibilities. -
Page 45: Index
Index AC Adaptor .......... 2, 4 Handset Accessories..........2 Display ..........7 Answering Calls ........13 Initial Settings ........26 Answering System Locator..........13 Answering System On/Off....36 Paging..........13 Greeting Messages......34 PIN............ 22 Incoming/Memo Messages ....35 Registration........28 Recording Your Telephone Conversa- Reset .......... -
Page 46: Guarantee
8. The guarantee period applicable to this product shall be 12 months. Please keep these Operating Instructions with your receipt. Panasonic Business Systems U.K. Receipt No. Date of Purchase Model No. KX-TCD420E... - Page 48 Hereby, Panasonic Communications Co., Ltd., declares that this Dect Cordless Telephone is in compliance with the essential requirements and other relevant provisions of Directive 1999/5/EC. A copy of the manufacturer's declaration of conformity to the essential requirements of the R&TTE Directive is available at the following web address: http://doc.panasonic-tc.de...
Need help?
Do you have a question about the KX-TCD420E and is the answer not in the manual?
Questions and answers