Table of Contents
Advertisement
Available languages
Available languages
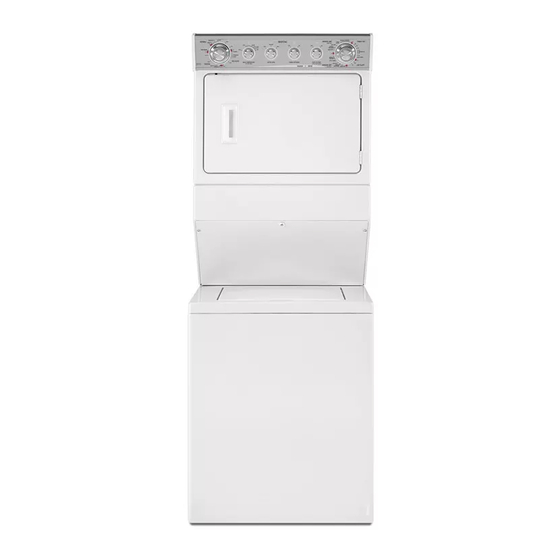
27" (69 CM) GAS WASHER/DRYER
INSTALLATION
INSTRUCTIONS
INSTRUCTIONS
POUR UINSTALLATION
DE LA
St CHEUSE
A GAZ DE 27" (69 CM)
Table
of Contents
WASHER/DRYER
SAFETY ..........................................................
1
iNSTALLATiON REQUIREMENTS
...............................................
4
Tools and Parts .....................................................................
4
LOCATION REQUIREMENTS
......................................................
6
DIMENSIONS/CLEARANCES
.....................................................
7
DRAIN SYSTEM ...........................................................................
8
ELECTRICAL REQUIREMENTS
..................................................
9
GAS SUPPLY REQUIREMENTS
..................................................
9
REMOVE SHiPPiNG
STRAP ......................................................
11
iNSTALL LEVELING LEGS .........................................................
11
VENTING .....................................................................................
12
Venting Requirements ........................................................
12
Plan Vent System ................................................................
13
Install Vent System .............................................................
14
CONNECT
DRAIN HOSE ...........................................................
15
CONNECT
iNLET HOSES ..........................................................
16
MAKE GAS CONNECTION
........................................................
18
CONNECT VENT ........................................................................
18
LEVEL WASHER/DRYER
...........................................................
19
COMPLETE
iNSTALLATiON CHECKLIST
................................
20
LAVEUSE/
Table
des
mati_res
SLeCURITle DE LA LAVEUSF-=/SLeCHEUSE ................................
21
EXIGENCES D'INSTALLATION
.................................................
24
Outillage
et pi_ces .............................................................
24
EXIGENCES D'EMPLACEMENT
..............................................
26
DIMENSIONS/DISTANCES
DE DleGAGEMENT ....................... 27
SYST#ME
DE VIDANGE ............................................................
28
SPECIFICATIONS
leLECTRIQUES ............................................
29
SPECIFICATIONS
DE UALIMENTATION
EN GAZ ................... 29
ENLEVER LA SANGLE D'EXPEDITION
....................................
31
iNSTALLATiON DES PIEDS DE NIVELLEMENT
...................... 31
leVACUATION .............................................................................
32
Exigences
concernant
I'_vacuation .................................
32
Planification
du syst_me
d'6vacuation
............................
33
Installation du conduit
d'_vacuation
................................
34
RACCORDEMENT
DU TUYAU DE VIDANGE ...........................
35
RACCORDEMENT
DES TUYAUX D'ARRIV#E
D'EAU ............. 36
RACCORDEMENT
A LA CANALISATION
DE GAZ .................. 37
RACCORDEMENT
DU CONDUIT
DqeVACUATION ................. 38
leTABLISSEMENT
DE L'APLOMB
DE LA LAVEUSE/SECHEUSE
....................................................
39
LISTE DE VERIFICATION
POUR UACHEVEMENT
DE UINSTALLATION
..................................................................
40
iNSTALLATiON
NOTES
NOTES
CONCERNANT
L'INSTALLATION
Date of purchase:
Date of installation:
Installer:
Model number:
Serial number:
Date d'achat:
Date d'installation:
Installateur:
Num_ro de module:
Num_ro de s_rie:
WASHERDR_R
S_ETY
Your safety and the safety
of others are very important.
We have provided many important safety messages in this manual and on your appliance. Always read and obey all safety
messages.
This is the safety alert symbol.
This symbol alerts you to potential hazards that can kill or hurt you and others.
All safety messages will follow the safety alert symbol and either the word "DANGER" or "WARNING."
These words mean:
You can be kifled or seriously injured if you don't immediately
follow
instructions.
You can be killed or seriously injured if you don't follow
instructions.
All safety messages will tell you what the potential hazard is, tell you how to reduce the chance of injury, and tell you what can
happen if the instructions are not followed.
W10356101A
Advertisement
Table of Contents

Subscribe to Our Youtube Channel
Related Manuals for Maytag MGT3800XW1


Summary of Contents for Maytag MGT3800XW1
- Page 1 27" (69 CM) GAS WASHER/DRYER INSTALLATION INSTRUCTIONS INSTRUCTIONS POUR UINSTALLATION DE LA LAVEUSE/ St CHEUSE A GAZ DE 27" (69 CM) Table of Contents Table mati_res WASHER/DRYER SAFETY ............SLeCURITle DE LA LAVEUSF-=/SLeCHEUSE ........ iNSTALLATiON REQUIREMENTS ..........EXIGENCES D'INSTALLATION ..........Tools and Parts ..............
- Page 2 WASHERD R $._ETY WARNING ofFifo,, - Clothes dryer installation must be performed by a qualified installer. - Install the clothes dryer according to the manufacturer's instructions and local codes. - Do not install a clothes dryer with flexible plastic venting materials or flexible metal (foil type) duct.
- Page 3 WARNING: Gas leaks cannot always be detected by smell. Gas suppliers recommend that you use a gas detector approved by UL or CSA. For more information, contact your gas supplier. If a gas leak is detected, follow the "What to do if you smell gas" instructions. In the State of Massachusetts, the following installation instructions apply: [] Installations and repairs must be performed by a qualified or licensed contractor, plumber, or gasfitter qualified or licensed by the State of Massachusetts.
- Page 4 INSTALLATION REQUIREMENW$ TOOLS PARTS Gather required tools and parts before starting installation. Tools needed: Flat-blade screwdriver #2 Phillips screwdriver Tin snips (new vent installations) Tools needed for gas installations: Level Adjustable or open-end wrench 9/16" (14 mm) 8" or 10" pipe wrench 8"...
- Page 5 Parts needed: (Not supplied with washer/dryer) Alternate parts: (Not supplied with washer/dryer) Your installation may require additional parts. To order, please [] Vent clamps refer to toll-free numbers on back page of your "Use and Care [] Vent elbows and ductwork Guide."...
-
Page 6: Installation Requirements
Recessed area or closet installation 48 in.2 (310 cm2) 3 mn (76 mr Explosion Hazard Keep flammable materials and vapors, such as gasoline, away from dryer. Front Closet Do not install in a garage. View door Failure to do so can result in death, explosion, or fire. Select proper location for your washer to improve performance and minimize noise and possible "washer walk". - Page 7 DXMENSXONS/CLEA_NCES Dimensions Front View Side View Back View 471/2" (1207 271/4"_ 271/4 "_ (692 ram) (692 mm) (279 mm) 71 s/4" /4 ml 713/4" (1822 mm) (182 (822 mm) 351/2" (902 ram) 253/4" (654 ram) 32"_ (813 mrn) 1" (25 mm) (25 ram) (25 mm) Clearances...
-
Page 8: Drain System
SYSTEM Drain system can be installed using a floor drain, wall standpipe, Floor drain system floor standpipe, or laundry tub. Select method you need. Floor drain system requires a Siphon Break Kit (Part Number 285834), 2 Connector Kits (Part Number 285385), and an Floor standpipe drain... - Page 9 ELECTR,[CAL R,EQUIREMENTS GAS SUPPLY R,EQUXREMENTS Electrical Shock Hazard Explosion Hazard Plug into a grounded 3 prong outlet. Use a new CSA International approved gas supply line. Install a shut=off valve. Do not remove ground prong. Securely tighten all gas connections. Do not use an adapter.
- Page 10 GAS SUPPLY R,EQUXREMENTS GAS SUPPLY LINE DRYER GAS CONNECTION [] Must include 1/8" NPT minimum plugged tapping accessible Option for test gauge connection, immediately upstream of the gas Rigid gas supply line: connection to the washer/dryer. See illustration below. [] Connect your washer/dryer to the rigid gas supply line using [] 1/2"...
- Page 11 REMO¥_ SHIPPING ST_P INSTALL LE¥_LING LEGS Excessive Weight Hazard Excessive Weight Hazard Use two or more people to move and install washer/dryer. Use two or more people to move and install washer/dryer. Failure to do so can result in back or other injury. Failure to do so can result in back or other injury, To avoid floor damage, set washer/dryer onto cardboard before...
-
Page 12: Venting
Venting Requirements Exhaust hoods: [] Must be at least 12" (305 ram) from ground or any object that may obstruct exhaust (such as flowers, rocks, bushes, or snow). Recommended Styles: Fire Hazard Use a heavy metal vent. Louvered hood Box hood Do not use a plastic vent. -
Page 13: Plan Vent System
Alternate installations for close clearances Plan Vent System Venting systems come in many varieties. Select the type best Recommended exhaust installations for your installation. Three close-clearance installations are Typical installations vent the washer/dryer from the rear. Other shown. Refer to the manufacturer's instructions. -
Page 14: Install Vent System
NT[NG Special provisions for mobile home installations: Install Vent System The exhaust vent must be securely fastened to a noncombustible portion of the mobile home structure and must not terminate beneath the mobile home. Terminate the exhaust vent outside. , Install exhaust hood Install exhaust... - Page 15 CONNECT DRAIN HOSE Proper connection of the drain hose protects your floors from damage due to water leakage. To keep the drain hose from Place drain hose in standpipe coming off or leaking, it must be installed according to the following instructions: IMPORTANT: To ensure proper installation, this procedure must be followed exactly.
-
Page 16: Connect Inlet Hoses
CONNECT INLET HOSES Washer must be connected to water faucets with new inlet hoses with flat washers (not provided). Do not use old hoses. Clear water lines NOTE: Both hoses must be attached and have water flowing to inlet valves. If you are only connecting to a cold water faucet, you must use a Y-adapter (not included). - Page 17 Move washer/dryer to final location Standpipe If you are working in a closet or recessed area: move the washer/dryer into its final location and remove cardboard from under washer/dryer. Remove the access panel by removing 3 Phillips-head screws and one bumper, located at the top of the access panel.
-
Page 18: Connect Vent
r_KE CONNECTION Connecting gas supply to dryer Open shut=off valve A. Flared male fitting B. Non-flared male fitting ....A. Closed valve B. Open valve Open shut-off valve in supply line; valve is open when handle Remove red cap from flexible gas connector. Remove the is parallel to gas pipe. -
Page 19: Level Washer/Dryer
LEVEL WASHESR_R IMPORTANT: Level washer/dryer properly to reduce excess noise and vibration. Check levelness of washer/dryer Tighten leveling feet ..With washer/dryer in its final location, place a level on top When washer/dryer is level, use a 9/16" or 14 mm open-end edges of washer/dryer. - Page 20 LEVEL WASHES COMPLETE INSTALLATION Check that all parts are now installed. If there is an extra part, go back through the steps to see which step was skipped. Check that you have all of your tools. Dispose of/recycle all packaging materials. Keep the plastic foam for use if the washer/dryer should be transported.
- Page 21 SNCURXTN DE LA LA USE/SNCHEUSE Votre s_curit_ et celle des autres est trbs importante. Nous donnons de nombreux messages de securit6 importants dans ce manuel et sur votre appareil m_nager. Assurez-vous toujours lire tousles messages de securit6 et de vous y conformer. Voici le symbole d'alerte de s6curit&...
- Page 22 SNCURXTN DE LA LA USE/SNCHEUSE AVERTISSEMENT : Pour votre s_curit_, les renseignements darts ce manuel doivent _tre observes pour reduire au minimum les risques d'incendie ou d'explosion ou pour _viter des dommages au produit, des blessures ou un d_c_s. - Ne pas entreposer ou utiliser de I'essence ou d'autres vapeurs ou liquides...
- Page 23 IMPORTANTES INSTRUCTIONS DE SECURITE AVERTiSSEMENT " Pour r6duire les risques d'incendie, de choc 61ectrique ou de blessures Iors de I'utilisation de la laveuseisecheuse, suivre les pr6cautions fondamentales dont les suivantes : [] Lire toutes les instructions avant d'utiliser la [] Dans certaines conditions, de I'hydrogene gazeux peut se laveuse/s6cheuse.
- Page 24 EXIGNNCNS D'IN$ LATION OUTILLAGE ET PIECES Rassembler les outils et pi6ces n6cessaires avant de commencer I'installation. Outillage n_cessaire Cisaille de ferblantier (pour I'installation d'un nouveau conduit) Outils n6cessaires aux installations au gaz : Tournevis & lame plate Tournevis Phillips n° 2 CI6 &...
- Page 25 Pi_ces n6cessaires : (Non fournies avec la laveuse/s6cheuse) Autres pi_ces : (Non fournies avec la laveuse/s6cheuse) II se peut que I'installation n6cessite des pieces suppl6mentaires. [] Brides de conduit Pour commander, consulter les num6ros d'appel sans frais sur [] Coudes d'6vacuation et conduits la page arriere du "Guide d'utilisation et d'entretien".
-
Page 26: Exigences D'emplacement
EXIGENCES D'EMPLACEMENT installation darts un encastrement ou un placard 48 po2 (310 cm 2) 3" (76 mr Risque d'explosion Garder les matibres et les vapeurs inflammables, telle que I'essence, loin de la s_cheuse. Ne pas installer dans un garage. Porte du placard Vue de face Le non=respect de ces instructions peut causer un ddcbs, une explosion ou un incendie. - Page 27 DIMENSIONSDIST CE$ DE DEGAGEMENT Dimensions Vue de face Vue lat_rale Vue arri_re 47112" 27114 (1207 m l 271/4" (692 mm) (692 mm) \ ) <) ,,'" _? C? /" (279 mm) 713/4" (1822 mm) (182 351/2 '' (356 mm) (902 ram) 253/4'' (654 ram) (813 mm)
- Page 28 DE VID, GE SYSTEME Le systeme de vidange de la laveuse peut 6tre install6 & I'aide Syst_me de vidange au plancher d'un conduit d'6vacuation au plancher, un tuyau de rejet Le systeme de vidange au plancher n6cessite un ensemble & 1'6gout au plancher ou mural ou un 6vier de buanderie. de brise-siphon (piece num@o 285834), deux ensembles S61ectionner la m6thode &...
- Page 29 SPECIFICATIONS DE L'ALIMENTATION SPECIFICATIONS ELECTRIQUES EN GAZ Risque de choc _IectrJque Brancher sur une prise b 3 aiv_oies reii_e b la terre. Risque d'explosion Ne pas enlever la broche de liaison b la terre. UtJliser une canalisation neuve d'arrivee de gaz approuvee par CSA International.
- Page 30 SPECIFICATIONS DE L'ALIMENTA TION EN GAZ RACCORDEMENT DE LA SECHEUSE A GAZ CANAMSATION DE GAZ [] La canalisation dolt comprendre un connecteur obtur6 (filetage Option NPT de 1/8" ou plus) accessible pour le raccordement Canalisation rigide d'alimentation en gaz : I'instrument de mesure, imm6diatement en amont de la...
-
Page 31: Installation Des Pieds De Nivellement
ENLE_R $_NGLE D%_EDITION INS%ALLATION DES PIEDS DE NI¥_LLEMENT Risque du poids excessif Utiliser deux ou plus de personnes pour d_placer et Risque du poids excessif installer la laveuse/s_cheuse. Utiliser deux ou plus de personnes pour d6placer Le non-respect de cette instruction peut causer une installer la laveuse/s6cheuse. - Page 32 Exigeaces coaceraaat F6vacuatioa Clapets de d_charge [] Dolt se situer a au moins 12" (305 mm) au-dessus du sol ou de tout objet susceptible d'obstruer 1'6vacuation (par exemple fleurs, roches, arbustes ou neige). Styles recommand_s Risque d'incendie Utiliser un conduit d'_vacuation en rn_tai Iourd.
- Page 33 Autres installations o_ le d6gagement est r6duit Plaaificatioa du syst&me d'6vacuatioa II existe de nombreux systemes d'6vacuation. Choisir le systeme Installations d'_vacuation recommand6es qui convient le mieux a votre installation. Trois installations d6gagement r6duit sont illustr6es. Consulter les instructions Lea installations typiques consistent &...
- Page 34 Installation du conduit d'Svacuation Dispositions sp_ciales pour les rnaisons monies Le systeme d'evacuation dolt _tre solidement fix6 a une section non combustible de la structure de la maison mobile et ne doit passe terminer en dessous de celle-ci. Acheminer le conduit d'evacuation vers I'ext6rieur.
- Page 35 RACCORDEMENT DU T DE VIDANGE Une bonne connexion du tuyau de vidange protege vos planchers contre les dommages imputables a une fuite d'eau. Placer le tuyau de vidange darts Pour 6viter que le tuyau de vidange se d6tache ou fuie, I'installer le tuyau de rejet/i I'_gout...
- Page 36 RACCORDEMENT DES TUYAU_ D',_RI¥_E D'EAU La laveuse doit _tre raccord6e aux robinets a I'aide de tuyaux d'arriv6e d'eau neufs dot6s de rondelles plates (non compris). Purger les canalisations d'eau Ne pas utiliser de tuyaux usag6s. REMARQUE : Les deux tuyaux doivent _tre fix6s et I'eau doit p6n6trer dans les robinets d'arriv6e d'eau.
- Page 37 RACCOADEMENT LA C_ALISATION DE G_ Raccordement de I'alimentation en gaz _ la s6cheuse A. Raccord m&le conique B. Raccord m&le non conique ..... Pour un placard ou un endroit exigu : placer la laveuse/s6cheuse sa position finale et enlever le carton du dessous de la laveuse/ s6cheuse.
- Page 38 RACCORDEMENT DU CONDUIT RACCORDEMENT LA C,_ALISATION DE G_ Connecter le raccord CORRECT iNCORRECT iNCORRECT Connecter le raccord flexible sur I'adaptateur 1/2" NPT. Ne pas appliquer de compos6 d'6tanch6it6 sur cette connexion. Le raccord flexible devrait former automatiquement boucle. On dolt veiller a ne pas d6former, vriller ou 6craser le raccord flexible, eta ne faire aucun changement de direction A I'aide d'une bride de serrage de 4"...
- Page 39 LXSSEMNNT DE UAFLOMB DE LA L USE/SECHEUSE IMPORTANT : L'6tablissement correct de I'aplomb de la laveuse/s6cheuse permet de r6duire les nuisances sonores Setter les pieds de nivellement et de limiter les vibrations. Contr61er I'aNornb de la laveuse/ s_cheuse Contre- 6crou Une fois Faplomb de la laveuse/s6cheuse 6tabli, utiliser une cl6 plate ou une cl6 &...
- Page 40 LISSEMNNT DE UAPLOMB LISTE DE ¥ RIFICATION DE LA L USE/SECHEUSE POUR UACHE MENT DE UINS%ALLATION V6rifier que toutes les pieces sont maintenant install6es. S'il reste une piece, passer en revue les diff6rentes 6tapes pour d6couvrir laquelle aurait 6t6 oubli6e. S'assurer d'avoir tout I'outillage n6cessaire.
Need help?
Do you have a question about the MGT3800XW1 and is the answer not in the manual?
Questions and answers