Advertisement
Quick Links
lati
[
°
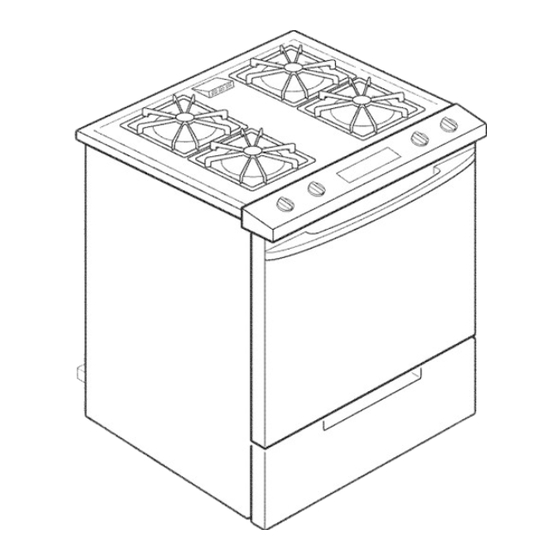
Gas Range
Quick
Reference
Table of Contents:
Pages
[]
Before you start
[]
Product dimensions
[]
Countertop preparatuon
[]
Cabinet dimensions/requkements
[]
Gas supply requirements
[]
E[ectr[ca requirements
[_-[_
Installation steps
[]
If range does not operate
[]
If you need assistance service
[]
Moving the range
If you need assistance:
Check your Use and Care Guide for a toil-free number to
ca[[ or ca[[ the dealer from whom you purchased this
appliance,The dealer is listed in theYe[[ow Pages of your
phone directory under "Appliances
Household
Major
Service and Repair"
Ca[[ when ,/ou:
Have questions about range installation or operation.
Need to obtain the name and number of an authorized
service company.
When you ca[[, you w[[[ need:
The range mode[ number.
The range serial number,
Both numbers are listed on the model/serial rating plate
located on the oven frame behind the storage drawer
panel
Tip Over Hazard
A child or adult can tip the range
and be killed.
Connect anti-tip
bracket to rear
range foot.
Reconnect
the ant{-tip bracket, if
the range is moved.
Failure to follow these instructions
can result in death or serious
burns to children
and adults.
Pa_ No. 9753052 Rev. B
Advertisement

Related Manuals for Whirlpool YGW395LEGB4


Summary of Contents for Whirlpool YGW395LEGB4
- Page 1 lati ° Quick Reference Table of Contents: Pages Before you start Gas Range Product dimensions Countertop preparatuon Cabinet dimensions/requkements Gas supply requirements E[ectr[ca requirements [_-[_ Installation steps If range does not operate If you need assistance service Moving the range If you need assistance: Check your Use and Care Guide for a toil-free number to ca[[ or ca[[ the dealer from whom you purchased this...
-
Page 2: Before You Start
Code, ANSI/NFPA 70 - latest Before you start,,, WARNING: ff the edition __, or CSA Standard C22.1, information in this manual Canadian Electrical Code, Part 1 - latest edition _, and all local codes is not followed exactly, Your safety and the safety of and ordinances. - Page 3 ievei Brackets must be securely mounted shown: fiat-Made screwdriver sub-floor.Thickness of flooring require literature pack 3/8" drive ratchet longer screws to anchor bracket to sub-floor. Longer screws are available from your local 3/8"' and 5/16"' nut driver hardware store, , hand or eHectrb drHi alastic...
- Page 4 IMPORTANT: Some cabinet and building materials are not designed Check location where range witl be instaIIed.The range should be Iocated withstand the heat produced by the oven for baking and self-cieaning. for convenient in the kitchen. Recessed installations must provide Check with your builder or cabinet supplier...
- Page 5 not agree with the type of gas available, check with your dealer. [] The regulator setting must be checked at a minimum of 1 inch water column above the manifold pressure.The inlet pressure to the Provide a gas supply line of regulator should be as follows...
- Page 6 start... With range in Mtchen. Recommended ground method Put on safety glasses and For personal safety, this range is gloves. Remove shipping materials, equipped with a power supply cord tape and protective film from range. having a 3-prong ground plug.To Keep cardboard bottom and shipping...
- Page 7 To install the back cover trim piece: mCheck thatthetypeofgassupply 25" (63.5 cm)___ j+_ll -i is correct for this range. (See Attach back cover trim piece model/serial rating plate located on to the back of cooktop using three oven frame behind storage drawer _Countertop screws supplied panel.)
- Page 8 Plug power supply cord into [] if burners do not light grounded outlet. properly, turn cooktop control knob to the "OFF" position. Check that the power supply cord is plugged in and frontto back. the circuit breaker or fuse has not If the rangeis not level,pull range burner blown.
- Page 9 Look through oven window to check broil burner for proper TIMER OVEN flame.This flame shouH have a CLOCK LIGHT 1/2" (1.3 cm) long inner cone of bluish-green, with an outer mande of dark blue, and should be dean and soft in character. No yellow tips, START BAKE blowing...
-
Page 10: Moving The Range
Slide range back so rear range foot is under anti-tip bracket. 4. Check that range is level. 5. Reconnect the electrical supply. Part No. 9753052 Rev. B @ 2003 Whirlpool Corporation Benton Harbor, Michigan 49022 Printed in U.S.A.
Need help?
Do you have a question about the YGW395LEGB4 and is the answer not in the manual?
Questions and answers