Venmar HRV CONSTRUCTO 2.0ES User Manual
Ventilation systems
Hide thumbs
Also See for HRV CONSTRUCTO 2.0ES:
- User's and installer's manual (18 pages) ,
- Installer manual (20 pages)
Table of Contents
Advertisement
Available languages
Available languages
USER MANUAL
VB0175
HRV CONSTRUCTO 2.0ES*
* T
HESE PRODUCTS EARNED THE
GUIDELINES SET BY
ENERGY STAR
VB0170
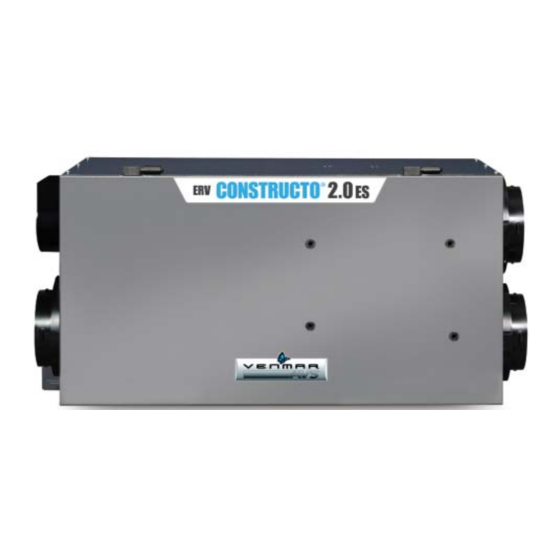
ERV CONSTRUCTO 2.0ES
A
DDRESS OF YOUR INSTALLER
R
ESIDENTIAL USE ONLY
HRV CONSTRUCTO 1.5ES*
ENERGY STAR
N
R
ATURAL
ESOURCES
REQUIREMENTS ONLY WHEN USED IN
®
BY MEETING STRICT ENERGY EFFICIENCY
C
ANADA AND THE
C
.
ANADA
US EPA. T
HEY MEET
20505
REV
. 02
Advertisement
Chapters
Table of Contents

Related Manuals for Venmar HRV CONSTRUCTO 2.0ES


Summary of Contents for Venmar HRV CONSTRUCTO 2.0ES
- Page 1 USER MANUAL ESIDENTIAL USE ONLY VB0175 HRV CONSTRUCTO 2.0ES* HRV CONSTRUCTO 1.5ES* ® ENERGY STAR HESE PRODUCTS EARNED THE BY MEETING STRICT ENERGY EFFICIENCY US EPA. T GUIDELINES SET BY ATURAL ESOURCES ANADA AND THE HEY MEET ENERGY STAR REQUIREMENTS ONLY WHEN USED IN...
- Page 2 EPLACEMENT PARTS AND REPAIRS In order to ensure your ventilation unit remains in good working condition, you must use Venmar Ventilation Inc. genuine replacement parts only. The Venmar Ventilation Inc. genuine replacement parts are specially designed for each unit and are manufactured to comply with all the applicable certification standards and maintain a high standard of safety.
-
Page 3: Table Of Contents
TABLE OF CONTENTS 1. YOUR UNIT AND ITS PURPOSE ........... 4-6 1.1 U ............... 4 NIT DESCRIPTION 1.2 P .. -
Page 4: Your Unit And Its Purpose
1. YOUR UNIT AND ITS PURPOSE 1.1 U NIT DESCRIPTION Filters 2. Blower 3. Recovery core 4. Condensation tray VL0052 1.2 P URPOSE OF THE VENTILATION SYSTEM Your ventilation system is designed to provide fresh air, warmed outdoor air to your home while exhausting stale, humid air from your home. -
Page 5: Recovery
1.3.1 H EAT RECOVERY CORE Units with a heat recovery core (HRV Constructo 1.5ES and HRV Constructo 2.0ES units) are designed specifically to control excess humidity and reduce ventilation costs by recovering the heat energy from the exhausted air, and using that same heat energy to warm the fresh air being supplied. -
Page 6: Specifications
1. YOUR UNIT AND ITS PURPOSE ( ’ CONT 1.5 S PECIFICATIONS HRV C 1.5ES HRV C 2.0ES ERV C 2.0ES ODEL ONSTRUCTO ONSTRUCTO ONSTRUCTO 30¼" 30¼" 34" IDTH 16½" 16½" 16½" EIGHT ∕ " ∕ " ∕ " EPTH (29.5 (29.5 (34.5... -
Page 7: Optional Main Controls
2. CONTROLS ( ’ CONT 2.2 O PTIONAL ONTROLS 2.2.1 D OUCH ACKLIGHT If the backlight is not illuminated, the first button pressed (no matter which button) shall turn on the backlight. The backlight remains illuminated for 10 seconds after the last button pressed. VC0117 PERATING ODES... - Page 8 2. CONTROLS ( ’ CONT 2.2 O ’ PTIONAL ONTROLS CONT 2.2.1 D OUCH (RH) OW TO SET THE RELATIVE HUMIDITY LEVEL Setting the relative humidity level allows to select the maximum desired indoor humidity level (in percentage). This value will be used to start the dehumidistat override (air exchange in high speed). Press and hold OK for 3 sec.
-
Page 9: Ite Ouch Onstructo
2. CONTROLS ( ’ CONT 2.2 O ’ PTIONAL ONTROLS CONT 2.2.1 D OUCH Resetting Maintenance Indicator: Press simultaneously on both arrow buttons, Maintenance indicator will disappear from LCD screen. OWER AILURE After a power failure, the wall control returns to its original operation mode. All settings are kept in memory. 2.2.2 L OUCH ONSTRUCTO... -
Page 10: Optional Auxiliary Controls
2. CONTROLS ( ’ CONT 2.3 O PTIONAL UXILIARY ONTROLS 2.3.1 D EHUMIDISTAT In fall, winter and spring: Adjust the knob to the desired maximum humidity level. NOTE: Do not select a humidity level below 30%. This could lead to excessive dryness in the air causing discomfort for the occupants. -
Page 11: Annual Maintenance ( Fall )
3. MAINTENANCE ( ’ CONT 3.1 E ’ VERY THREE MONTHS CONT 1. Disconnect power supply. 2. Unlatch the door. Lift the panel towards you. Hold it firmly and hit on the right side of the panel. The door will slide to the left. VO0229 3. -
Page 12: Energy Recovery Core
3. MAINTENANCE ( ’ CONT 3.2 A ’ NNUAL MAINTENANCE FALL CONT 3.2.2 E NERGY RECOVERY CORE Repeat steps 1 to 6 from the Section 3.1 and continue with the following steps: CAUTION The energy recovery core cannot be washed with water. 1. - Page 13 GUIDE DE L’UTILISATEUR OUR USAGE RÉSIDENTIEL SEULEMENT VB0175 HRV CONSTRUCTO 2.0ES* HRV CONSTRUCTO 1.5ES* ® ENERGY STAR ’ PRÉSENTS PRODUITS SONT HOMOLOGUÉS PARCE ’ RESPECTENT DES EXIGENCES RIGOUREUSES EN MATIÈRE D EFFICACITÉ ÉNERGÉTIQUE ÉTABLIES É ESSOURCES NATURELLES ANADA ET LA TATS LS RÉPONDENT AUX...
- Page 14 IÈCES DE REMPLACEMENT ET SERVICE Pour assurer le bon fonctionnement de votre appareil de ventilation, vous devez toujours utiliser des pièces d’origine provenant de Venmar Ventilation inc. Les pièces d’origine de Venmar Ventilation inc. sont spécialement conçues pour satisfaire toutes les normes de certification de sécurité...
- Page 15 TABLE DES MATIÈRES 1. VOTRE APPAREIL ET SON RÔLE ......... 4-6 1.1 D ’ .............4 ESCRIPTION DE L APPAREIL 1.2 R ..
-
Page 16: Description De L
1. VOTRE APPAREIL ET SON RÔLE 1.1 D ’ ESCRIPTION DE L APPAREIL Filtres 2. Ventilateur 3. Noyau de récupération 4. Bac à condensation VL0052 1.2 R ÔLE DU SYSTÈME DE VENTILATION Votre système de ventilation est conçu pour éliminer les problèmes de mauvaise qualité d’air en évacuant l’air vicié... -
Page 17: Récupération
Les appareils dotés d’un noyau de récupération de chaleur (HRV Constructo 1.5ES et HRV Constructo 2.0ES) permettent de réduire les frais liés à la ventilation l’hiver. En effet, l’appareil extrait la chaleur contenue dans l’air vicié et humide avant qu’il ne soit évacué, puis réchauffe l’air provenant de l’extérieur. -
Page 18: Spécifications
1. VOTRE APPAREIL ET SON RÔLE ( SUITE 1.5 S PÉCIFICATIONS HRV C 1.5ES HRV C 2.0ES ERV C 2.0ES ODÈLE ONSTRUCTO ONSTRUCTO ONSTRUCTO 30¼ 30¼ ARGEUR 16½ 16½ 16½ AUTEUR ∕ ∕ ∕ ROFONDEUR (29,5 (29,5 (34,5 OIDS 120 V, 60 H 120 V, 60 H 120 V, 60 H LIMENTATION... -
Page 19: Commandes Principales Optionnelles
2. COMMANDES ( SUITE 2.2 C OMMANDES PRINCIPALES OPTIONNELLES 2.2.1 D OUCH ÉTROÉCLAIRAGE Quand le rétroéclairage n’est pas allumé, le premier bouton sur lequel on appuie (peu importe lequel) active celui-ci. Le rétroéclairage demeure allumé pour une durée de 10 secondes après avoir appuyé sur le dernier bouton. VC0117 ODES DE FONCTIONNEMENT Pour modifier le mode de fonctionnement de l’appareil de ventilation, appuyer sur le... - Page 20 2. COMMANDES ( SUITE 2.2 C OMMANDES PRINCIPALES OPTIONNELLES SUITE 2.2.1 D OUCH ’ (HR) OMMENT RÉGLER LE TAUX D HUMIDITÉ RELATIVE Le réglage du taux d’humidité relative permet de choisir le taux maximum d’humidité intérieure (en pourcentage). Cette valeur est utilisée pour démarrer le mode prioritaire du déshumidistat (échange l’air en haute vitesse).
-
Page 21: Ite Ouch Onstructo
2. COMMANDES ( SUITE 2.2 C OMMANDES PRINCIPALES OPTIONNELLES SUITE 2.2.1 D OUCH Réinitialisation de l’indicateur d’entretien : Appuyer simultanément sur les deux boutons de flèche et l’indicateur d’entretien disparaîtra de l’écran. ANNE DE COURANT Après une panne de courant, la commande murale retourne à son mode de fonctionnement original. -
Page 22: Commandes Auxiliaires Optionnelles
2. COMMANDES ( SUITE 2.3 C OMMANDES AUXILIAIRES OPTIONNELLES 2.3.1 D ÉSHUMIDISTAT En automne, en hiver et au printemps : Régler le bouton au nivau d’humidité maximum désiré. NOTE : Ne pas sélectionner un niveau d’humidité en deçà de 30%. Cela pourrait provoquer un assèchement de l’air qui nuirait au confort des occupants. -
Page 23: Entretien Annuel ( Automne )
3. ENTRETIEN ( SUITE 3.1 À TOUS LES TROIS MOIS SUITE 1. Débrancher l’appareil. 2. Pour retirer la porte, désenclencher les loquets. Tirer le panneau vers vous. En le tenant fermement, donner un coup sur le côté droit. La porte glissera vers la gauche. VO0229 3. -
Page 24: Noyau De Récupération D
3. ENTRETIEN ( SUITE 3.2 E NTRETIEN ANNUEL AUTOMNE SUITE 3.2.2 N ’ OYAU DE RÉCUPÉRATION D ÉNERGIE Répéter les étapes 1 à 6 de la section 3.1 et effectuer les étapes suivantes : ATTENTION Le noyau de récupération d’énergie ne peut être lavé à l’eau. 1.
Need help?
Do you have a question about the HRV CONSTRUCTO 2.0ES and is the answer not in the manual?
Questions and answers