Table of Contents
Advertisement
Advertisement
Table of Contents

Subscribe to Our Youtube Channel
Related Manuals for Haier HWM65TLF


Summary of Contents for Haier HWM65TLF
- Page 1 Washing Machine HWM65TLF...
-
Page 2: Important Safety Instructions
IMPORTANT SAFETY INSTRUCTIONS Warning - To reduce the risk of fire, electric shock, or injury when using your appliance, follow basic precautions, including the following: 1. Read all instructions before using the appliance. 2. Use this appliance only for its intended purpose as described in this user and care guide. - Page 3 13. Do not try to remove clothes while the tub is moving. Let it come to a complete stop. 14. The lid must be closed when bowl is spinning. 15. Do not operate your appliance when parts are missing or broken.
-
Page 4: Table Of Contents
Operations...6 Normal Operating Sounds...10 Lint Filter...11 Safety Lid Switch...12 CARE AND CLEANING GUIDE...12 Cleaning and Maintenance...12 Moving & Vacationing...13 Storage of Your Washer...13 TROUBLESHOOTING ...14 INSTALLATION INSTRUCTIONS...16 Tools and Materials Required...16 Unpacking Your Washer...16 Levelling Your Washer...17 Steps for Installation...17 ELECTRICAL REQUIREMENTS...18... -
Page 5: Operating Instructions
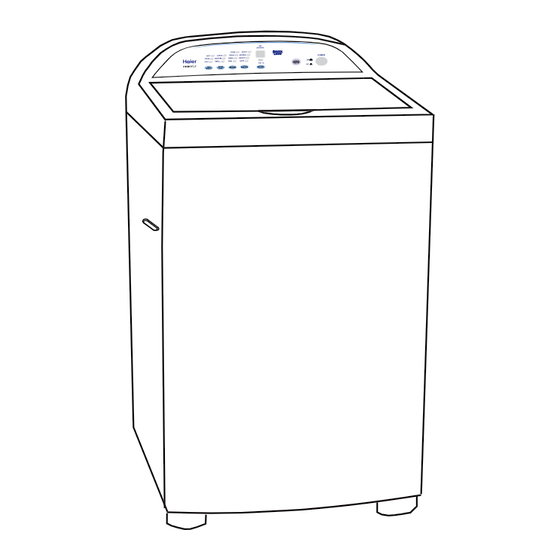
OPERATING INSTRUCTIONS Parts and Features LARGE WARM MEDIUM SMALL COLD TEMP WATER SELECT LEVEL HWM65TLF Top lid Detergent box Inner tub Control panel seat Hight Pulsator Adjustable foot TIME REMAINING SOAK HEAVY WASH NORMAL RINSE GENTLE QUICK SPIN TIME ON... - Page 6 Hot Water inlet valve Cold Water inlet valve Power cord Drain hose bushing Handle Back cover...
-
Page 7: Operations
WARM MEDIUM SMALL COLD TEMP WATER SELECT LEVEL HWM65TLF Power Button:(1) Press the button i n to turn the power ON and press the button out to turn the power OFF. Button in=Power On Button out=power Off Start/Pause Button:(2) Press this button when you want the machine to start running. -
Page 8: Operating Procedure
Operating Procedure 1.Press power on button The washer will now be in the working status in the Normal cycle. If the Start/pause button is not pressed with in 5 minutes after power on the unit it will automatically switch off and return to the stand by mode. - Page 9 6. Delay Start To start the washer at a later lime press the Delay Start button and set the time. When activated the indicator displays 2. Push button once for every 1 hour delay for up to 24 hours.
-
Page 10: Proper Use Of Detergent
W a rning: Never pour fabric softener directly onto clothes because it will stain your clothes or you may get spots on your clothes. Do not stop washer during its first spin or dispenser will automatically release the softener in to the wash load. -
Page 11: Bleach Dispenser
Tumbling sounds: This is normal as the heavy wet clothes in the washer are continuously being lossed around. Air rushing noise: This happens when the washer tub spins at very high spinning speed. Wash and Rinse cycles going on and off will also make clicking sounds. -
Page 12: Lint Filter
Figure 2 Safety Lid Switch If for any reason you open the lid in the middle of the wash cycle, the washer will not spin and will shut off automatically. Once the lid is close, the washer will start back on. -
Page 13: Care And Cleaning Guide
Cleaning and Maintenance Use only damp or sudsy cloth for cleaning control panel. To avoid any kind of damage to cabinet finish, wipe washer cabinet as needed. If you spill liquid/powdered softener bleach or detergent on the cabinet, wipe cabinet immediately because it can damage the finish. -
Page 14: Moving & Vacationing
Storage of Your Washer The washer must be stored at room temperature. If you just got delivery of a washer when outside temperature is below freezing,do not operate until washer has warmed to room temperature. Do not install or operate your washer where room temperature is... -
Page 15: Troubleshooting
The washer pauses in some cycles. This is normal in delicate or hand-wash cycle which has short period of time. You will not hear washer operation for a short period of time . When the soak time is over, it will start automatically. -
Page 16: Washer Is Making Noise
Washer is making noise: Washer may need to be reinstalled. (Check washer installation section) Washer load may need to be re-balanced, as the load may be uneven. Coins, loose change, buttons or other heavy objects could make noise(read Operating Guide-Normal Operating Sounds). -
Page 17: Installation Instructions
Unpacking Your Washer • Remove all packing materials. This Includes the foam base and all adhesive tape holding the washer accessories inside and outside • Open the top lid to remove the styrofoam drum brace. Pull to remove. Before using this washing machine,... -
Page 18: Levelling Your Washer
2. Connect the hot and cold water inlet hoses to the hot and cold water faucet. 3. Connect the other end to the corresponding washer inlet located at the back of machine. Note: You may have to use pliers to tighten the coupling. Do not over tighten because you may cause damage to the valve. -
Page 19: Electrical Requirements
• instructions are not completely understood or if doubt exists as to whether the appliance is properly grounded. Wiring Requirements: The washer must be plugged into at least 10AMP 230-240 VOLT, • 50 HZ GROUNDED OUTLET. Water Supply Hose Drain Hose... -
Page 20: Power Interruptions
Occasionally there may be power interruptions due to thunderstorms or other causes. Remove the power cord from AC outlet when a power outage occurs. When power has been restored re-plug power cord to AC outlet. If outage is for a prolonged period, clean washer before using it again. SPECIFICATIONS...
Need help?
Do you have a question about the HWM65TLF and is the answer not in the manual?
Questions and answers