INSTEON 2242-222 Owner's Manual
Hide thumbs
Also See for 2242-222:
- Owner's manual (23 pages) ,
- Quick start manual (8 pages) ,
- Quick start manual (13 pages)

Related Manuals for INSTEON 2242-222


Summary of Contents for INSTEON 2242-222
- Page 1 ® INSTEON Owner’s Manual 2242-222 (US) 2242-422 (EU) 2242-442 (UK) 2242-522 (AUS/NZ) Page 1 of 26 Rev: 9/27/2013 4:17 PM...
-
Page 2: Table Of Contents
Features and Benefits..............................3 Installation ..................................3 Getting Started ................................4 Option 1: Use Hub with Smartphone/Tablet ........................ 4 Option 2: Use Hub with INSTEON Compatible Software .................... 4 Mount Hub on Wall (optional) ............................5 Account Creation ................................6 Login .................................... 7 Hub Set Up .................................. -
Page 3: About Insteon Hub
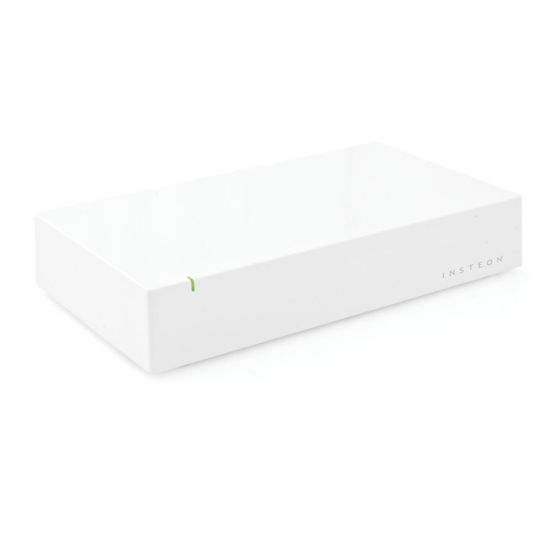
About INSTEON Hub INSTEON Hub makes adding customizable, fully dimmable INSTEON remote control to your lamps as easy as plug and play. It’s home control at its simplest and most convenient. Ethernet Power cable cable Paddle top (on/brighten) Status LED... -
Page 4: Getting Started
Smartphone or tablet running iOS or Android Launch and follow the onscreen instructions Once your INSTEON Hub has been configured and devices added, you may also access and have control of INSTEON devices from any browser by visiting https://connect.insteon.com Option 2: Use Hub with INSTEON Compatible Software Do not use this option if you are using or plan to use the Hub What you’ll need... -
Page 5: Mount Hub On Wall (Optional)
Mount Hub on Wall (optional) Simply screw two screws (we recommend using #6 drywall screws) through the marks in the drawing below (leaving head of screw about ¼” from the wall) and hang Hub on the screws (you can then tear this sheet off). Leave head screw approximately 6.35mm (.25”) gap for proper mounting of Hub... -
Page 6: Account Creation
Screen. You can select between one of the following: 1) Create New Account Select this if you do not already have an INSTEON Hub account 2) I already have an INSTEON Account Select this if you have already created an existing INSTEON Hub account. -
Page 7: Login
For a customer to be able to login their existing account the following is required: Email* – this is the email that the customer used to create the account with the INSTEON Connect Cloud Service. Password* – the password that was used for the initial account creation. -
Page 8: Hub Set Up
Remote Access Setup If you would like to use your INSTEON Hub when you are away from home so that you can monitor and control your devices, you will need to configure Remote Access. This involves a process called port forwarding. A guide to configuring port forwarding can be found under Settings >... -
Page 9: Using Insteon App
Allows you to quickly check status of sensors (motion, open/close, leak, smoke). See “Sensor Status Indicators” to understand the different sensor states. Temperature If you have an INSTEON thermostat, the temperature will be displayed here. Tapping the icon will take you directly to the thermostat control screen. Settings Allows you to edit the page you are on as well as access general settings. -
Page 10: Device And Sensor Status Indicators
Device and Sensor Status Indicators Spinning Getting status Green Device is on White Device is off / sensor is “OK” Sensor is activated Yellow Status is unknown Page 10 of 26 Rev: 9/27/2013 4:17 PM... -
Page 11: Devices
Devices To control a device, click on its icon. If you have more than nine devices, use your finger to swipe to the other pages. Tap All Devices to see every device in your home. Tap a device icon to control that device. Page 11 of 26 Rev: 9/27/2013 4:17 PM... - Page 12 Control pop-up Choose between turning the device on or off. Tap + to enter the full device control screen for dimming and brightening. Tap in the background area to close the popup. Full Device Control Refresh status Current status On/Off control. Double-tapping On or Off for dimmers will instantly turn dimmers fully on or off...
- Page 13 – helpful for Traffic troubleshooting. * Available for most INSTEON devices shipped after March 2013. Features such as On Level and Ramp Rate are available for dimming devices only. Beep on Button Press applies only to devices that have a beeper.
-
Page 14: Thermostat
Example of the On-Level and Ramp Rate adjustments: Thermostat Thermostat Control * Available for INSTEON devices shipped after March 2013 ** Dimmable devices only Use the up and down arrows to adjust your thermostat set points. Page 14 of 26... -
Page 15: Rooms
Enable if thermostat supports Humidity sensor humidity Units Select Fahrenheit or Celsius** ** Not currently supported for INSTEON Venstar Adapter Rooms Add a Room 1) Tap the Rooms button and Add 2) Give the new room a name, then tap Done... -
Page 16: Scenes
8) When finished tap Save to save your new schedule Scenes Scenes are a collection of INSTEON devices that can each turn on, off or dim when activated from either the app, a schedule or by activation from any other controller (motion sensor, keypad, switch, etc.) Note: some older INSTEON devices may require manually tapping of the set button during scene configuration. - Page 17 If you wish to also activate the scene from another INSTEON device (motion sensor, keypad, switch, etc.) tap the blue Responder button. If the button is grayed out (either Responder or Controller), this means the device can only be one or the other.
- Page 18 Accessing Your Scene In the Scene view, tap a scene to access the control screen Scene Control Scene control differs from regular device control since devices within a scene may be set to turn off when the scene is turned on (activated). All devices within the scene will turn off when the off button is tapped.
- Page 19 Scene name Device name Icon Device icon Room Add to rooms Memberships Schedule Set a timer for the scene Displays all memberships of the scene. Tap on a device to edit the state or tap Members the trash can icon to remove from the scene.
-
Page 20: Troubleshooting
Wizard. If you are unable to resolve your issue after reviewing these solutions, please send an email to support@insteon.com or call us at 1-866-243-8022 and be sure to include your INSTEON Hub ID (located on the bottom of the Hub) and your username. -
Page 21: Scene Troubleshooting
If you have already set up the Hub in the app, you must first delete your account prior to factory resetting the Hub. If you have added any INSTEON devices to the app, it is strongly recommended that you factory reset those devices prior to deleting your account and factory resetting the Hub. - Page 22 1) Remove power from INSTEON Hub 2) Press and hold INSTEON Hub set button. Do not let go. 3) While continuing to press and hold the set button, re-apply power to INSTEON Hub INSTEON Hub will begin to emit a long beep...
-
Page 23: Specifications
Commands supported as controller Commands supported as responder Software configurable RF range Up to 50 meters (150 feet) open air Phase bridge detect beacon 2242-222 (US, 915 MHz) 0x2B 2242-422 (Europe, 869.85 MHz) 0x2E INSTEON device subcategory 2242-442 (UK, 869.85 MHz) 0x30 2242-522 (AUS/NZ, 921.0 MHz) -
Page 24: Certification And Warranty
3) Hazardous Substance Directive 2005/95/EC Technical data and copies of the original Declaration of Conformity are available and can be obtained from INSTEON; 16542 Millikan Ave, Irvine, CA, USA. User Information for Consumer Products Covered by EU Directive 2002/96/EC on Waste Electric and Electronic Equipment (WEEE) This document contains important information for users with regards to the proper disposal and recycling of INSTEON products. -
Page 25: Certification (Us)
90% of the equipment can be reused as new material, saving the use of virgin raw materials and energy of producing these. Separate collection and treatment of WEEE will thus decrease CO2 emissions as well. For the above reasons, INSTEON expects end-users to dispose of the material in an environmentally friendly way through separate collection and treatment. - Page 26 You may also have other legal rights that may vary from state to state. Protected under U.S. and foreign patents (see www.insteon.com/patents) © Copyright 2013 INSTEON, 16542 Millikan Ave., Irvine, CA 92606, 866-243-8022, www.insteon.com Page 26 of 26 Rev: 9/27/2013 4:17 PM...
Need help?
Do you have a question about the 2242-222 and is the answer not in the manual?
Questions and answers