Table of Contents
Advertisement
Quick Links
Advertisement
Table of Contents

Related Manuals for INSTEON 2243-222


Summary of Contents for INSTEON 2243-222
- Page 1 Insteon Hub Pro Insteon Hub Pro Owner’s Manual Owner’s Manual...
-
Page 2: Table Of Contents
Approve iCloud Keychain from Another Device Approve iCloud Keychain a Security Code Setup Insteon Hub Insteon+ Overview Dashboard Add an Insteon Device Add a HomeKit Device Add a Room Add a Zone Create a Scene Create a Schedule Add a Guest User... -
Page 3: Getting Started
Getting Started Getting Started Everything you need to quickly get up and running. Everything you need to quickly get up and running. -
Page 4: About Insteon
Insteon+ is a HomeKit aggregator app of managing your home’s lights and devices; designed to work with a wide array of so why not make Insteon+ more fun to use HomeKit-enabled devices. You do not need than your light switches? With brand new... -
Page 5: Insteon Hub Pro
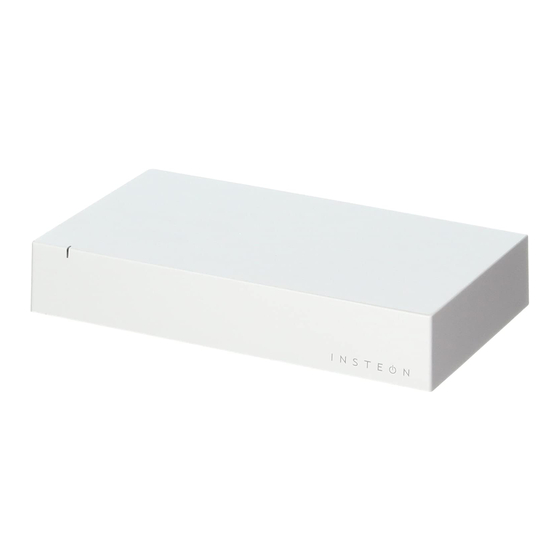
Insteon Hub Pro Device Overview Installation Connect your Hub to the internet and a power outlet using the cables provided. Avoid switched outlets or filtered power strips. Status LED Linking Unlinking Idle USB2 Power Future Use Reset Set Button... -
Page 6: Icloud Keychain
To store your home’s HomeKit configuration securely, Insteon+ requires a properly configured iCloud Keychain. If your device’s iCloud Keychain is disabled or pending verification, Insteon+ will be unable to complete basic tasks like adding a device. On your iPhone, iPad or iPod Tap iCloud. -
Page 7: Enable Icloud Keychain
Enable iCloud Keychain If your iCloud Keychain is Off, Tap the switch to enable iCloud Keychain. tap Keychain. After several moments, you will be prompted to either create a security code, approve with a security code or approve from another iPhone, iPad, iPod touch or Mac that is currently configured with iCloud Keychain. -
Page 8: Create An Icloud Keychain
Create an iCloud Keychain If you have never enabled iCloud Keychain before, you can configure it for the first time by providing a 4-digit security code and a phone number. Tap the switch to enable Create a 4-digit security code. Enter a valid phone number that can iCloud Keychain. -
Page 9: Approve Icloud Keychain From Another Device
Approve iCloud Keychain from Another Device If you have access to another Apple device, you should receive a notification requesting iCloud Keychain approval. Follow the on-screen steps on that device to complete iCloud Keychain approval. -
Page 10: Approve Icloud Keychain A Security Code
Approve iCloud Keychain a Security Code Tap Approve with When prompted, enter your Enter the 4-digit iCloud Security Code Security Code. Apple ID password. that you created when you originally configured iCloud Keychain. Check your phone’s messages After several moments, iCloud for a 6-digit verification code and Keychain should be enabled. -
Page 11: Setup Insteon Hub
Setup Insteon Hub Download Insteon+ from the App Allow Insteon+ access to your Create an account or sign in if you Store on your iPhone or iPod touch. HomeKit accessory data. already have an Insteon account. Navigate to your home by... - Page 12 Finish up by giving your Hub a name screen. It may take several minutes Code found on the bottom of and picking an icon. after connecting Insteon Hub to power Insteon Hub. before it appears. You’re done setting up your...
-
Page 13: Insteon
Insteon+ Insteon+ Use Insteon+ to configure and control your Insteon Hub. Everything from Use Insteon+ to configure and control your Insteon Hub. Everything from adding a device to adding guests is handled through the app. adding a device to adding guests is handled through the app. -
Page 14: Overview
Overview Dashboard A quick overview of your home as well as convenient access to favorite devices and scenes. Search Find anything in your home, quickly and efficiently. Configure Edit the devices, rooms, zones, scenes and schedules in your home. Add new devices, rooms, zones, scenes and schedules to your home. -
Page 15: Dashboard
Dashboard Open Dashboard by tapping the Dashboard gives you a quick Quickly control a device by Dashboard button. overview of your home as well tapping its icon in Favorites. as convenient access to favorite devices and scenes. All of your created scenes live Enable and disable sections, in Dashboard. -
Page 16: Add An Insteon Device
Learn more at insteon.com/hub-homekit-setup Compatible Devices For a list of compatible devices, visit insteon.com/hub-homekit-setup Enter the 6-digit Insteon ID found on Finish up by giving your new your new Insteon device. Insteon device a name, icon and assigning it to a room. -
Page 17: Add A Homekit Device
Add a HomeKit Device Tap the Add button in the Tap Add a Device. Ensure your HomeKit accessory is upper right corner. powered on. Tap your new HomeKit accessory after it appears at the bottom of the screen. Enter the 8-digit Accessory Finish up by giving your new Setup Code that came with your device a name, picking an icon... -
Page 18: Add A Room
Add a Room Tap the Add button in the Tap Add a Room. Give your room a name, pick an upper right corner. icon and chose any unassigned devices that you would like to add. -
Page 19: Add A Zone
Add a Zone By grouping your rooms into zones, you can quickly control devices in multiple rooms using Siri. Only rooms can be placed in a zone but a room can exist in multiple zones. Tap the Add button in the Tap Add a Zone. -
Page 20: Create A Scene
Create a Scene Tap the Add button in the Tap Create a Scene. Give your scene a name and upper right corner. pick an icon. Select the devices that you would Chose Quick Scene or Custom Scene In a Custom Scene, you can tap like to include in your scene. -
Page 21: Create A Schedule
Create a Schedule With a schedule, any scene can be set to run at a specified time, repeating every day, on a specific day of the week or on a specific date of the month. Only scenes can be scheduled. To schedule an individual device, create a scene with that device. - Page 22 Create a Schedule Tap the Add button in the Tap Create a Schedule. Give your schedule a name, upper right corner. pick a time and pick how often the schedule repeats. Weekly schedules will repeat Monthly schedules will repeat every Select the scenes that you would like every week on a specified day.
-
Page 23: Add A Guest User
Tap Add a Guest Enter your guest’s Apple On the guest user’s iPhone, iPad or iPod ID and tap Add User. touch, tap Accept. To control devices, your guest will also need to download Insteon+ or another HomeKit-compatible app from the App Store. -
Page 24: Siri
Siri While connected to power, you can control your home hands-free by saying, “Hey, Siri.” Allow “Hey Siri” from Siri settings. Press and hold the home Ask Siri to control devices, rooms, button on your iPhone, iPad zones or scenes. Siri can control or iPod touch. - Page 25 Siri Individual Devices Close the garage door Is the garage door open? Unlock the front door Is the front door locked? Turn on the lava lamp Set the desk lamp to 50% Set the thermostat to 75º What is the thermostat temperature? Rooms and Zones Turn off the kitchen lights Set the upstairs lights to 25%...
-
Page 26: Remote Access
Apple TV (3rd generation or later) for remote access. Without a properly configured Apple TV, all of your devices will appear in Insteon+ but their function will be disabled. There is no need to configure port forwarding for Insteon Hub Pro or other HomeKit devices. - Page 27 On your iPhone, iPad or iPod Tap iCloud. The iCloud account listed is the touch, navigate to Settings. account Insteon+ is using for your HomeKit configuration. On your Apple TV, navigate to Settings > iCloud. Ensure that you are signed in using the same iCloud account as your iPhone, iPad or iPod touch.
-
Page 28: Delete A Device
Confirm that you want to delete the device. screen, tap Delete Device. This will also remove the device from any rooms, scenes, schedules or triggers in your home and cannot be undone. Removing Insteon Hub Pro will also remove any Insteon devices. -
Page 29: Delete A Room
Delete a Room Tap the Configure button Tap Edit Rooms. Select the room that you want to to open the Configure your delete from the list. Home sheet. At the bottom of the Edit Confirm that you want to delete the screen, tap Delete Room. -
Page 30: Delete A Zone
Delete a Zone Tap the Configure button Tap Edit Zones. Select the zone that you want to to open the Configure your delete from the list. Home sheet. At the bottom of the Edit Confirm that you want to delete the screen, tap Delete Zone. -
Page 31: Delete A Scene
Delete a Scene Tap the Configure button Tap Edit Scenes. Select the scene that you want to to open the Configure your delete from the list. Home sheet. At the bottom of the Edit Confirm that you want to delete the screen, tap Delete Scene. -
Page 32: Delete A Schedule
Delete a Schedule Tap the Configure button Tap Edit Schedules. Select the schedule that you want to open the Configure your to delete from the list. Home sheet. At the bottom of the Edit Confirm that you want to delete screen, tap Delete Schedule. -
Page 33: Remove A Guest User
Remove a Guest User Tap Back until you see a Tap Settings. Tap the home for which you would list of homes. like to share access. Tap the guest you would like Tap Remove Guest. Confirm that you want to to remove. -
Page 34: Update Firmware
Home sheet. At the bottom of the Edit screen, If an update is available, tap Do not disconnect Insteon Hub tap Check for Updates. Update to download and install from the internet or power during new firmware. -
Page 35: Hardware Reset
It will also reset the HomeKit pairing and will any customized properties. It will also reset the HomeKit pairing and will allow Insteon Hub to be added to a different HomeKit house. allow Insteon Hub to be added to a different HomeKit house. -
Page 36: Factory Reset
Continue holding the set button until reconnect Insteon Hub to power. Insteon Hub stops beeping. Release the set button and your Hub will double beep. After three minutes, your Hub will double beep again. LONG Your Insteon Hub has been restored to factory settings. -
Page 37: Appendix
Appendix Appendix Everything else you might need to know about your Insteon product. Everything else you might need to know about your Insteon product. -
Page 38: Specifications
SBP22422 Industry Canada 5202A-22422 Manufacturer Product No.: 2243-222 US 2243-422 EU 2243-442 UK 2243-522 AUS/NZ Patent No.: Protected under US and Foreign Patents (see www.insteon.com/ patents) UPC: 813922012514 US 813922012521 EU 813922012545 UK 813922012552 AUS/NZ Warranty: 2 years, limited Operation... - Page 39 Maximum Controlled Scenes 256 Insteon Scenes, 100 Maximum HomeKit endpoints Maximum Scene Memberships Multi-Link Support Multi-Unlink Support RF Beacon Radio Frequency 915 MHz Radio Frequency Range Up to 250 feet Mechanical Beep on Button Press Dimensions 1.5” H x 7” W x 4” D...
-
Page 40: Troubleshooting
Troubleshooting For detailed troubleshooting information, visit insteon.com/hub-homekit-setup... -
Page 41: Certifications And Warnings
To minimize heat buildup, ensure the area surrounding this product is as clear of clutter as possible. • Each Insteon product is assigned a unique Insteon I.D., which is printed on the product’s label. • Changes or modifications to the hardware not expressly approved by Insteon may void the user’s authority to operate the equipment in a licensed manor. -
Page 42: Declaration Of Conformity
Declaration of Conformity Hereby, Insteon declares that this device is in compliance with the essential requirements and other relevant provisions of the following Directives: 1) Low Voltage Equipment Directive 2006/95/EC 2) Electromagnetic Compatibility Directive 2004/108/EC 3) Hazardous Substance Directive 2005/95/EC Technical data and copies of the original Declaration of Conformity are available and can be obtained from Insteon;... - Page 43 Separate collection and treatment of WEEE will thus decrease CO2 emissions as well. For the above reasons, Insteon expects end-users to dispose of the material in an environmentally friendly way through separate collection and treatment. Electrical and Electronic Equipment is labeled with the following ‘crossed out wheeled bin’...
-
Page 44: Product Warranty
You may also have other legal rights that may vary from state to state. Protected under U.S. and foreign patents (see www.insteon.com/patents) ©2015 Insteon Rev 06.23.15...
Need help?
Do you have a question about the 2243-222 and is the answer not in the manual?
Questions and answers