Lionel The Polar Express Owner's Manual
Lionel g-gauge
Hide thumbs
Also See for The Polar Express:
- Owner's manual (25 pages) ,
- Owner's manual (16 pages) ,
- User manual (4 pages)
Table of Contents
Advertisement
Advertisement
Table of Contents

Subscribe to Our Youtube Channel
Related Manuals for Lionel The Polar Express


Summary of Contents for Lionel The Polar Express
- Page 1 71-1022-250 4/09 Lionel G-gauge Owner's Manual Adult assembly required...
-
Page 2: Fcc Statement
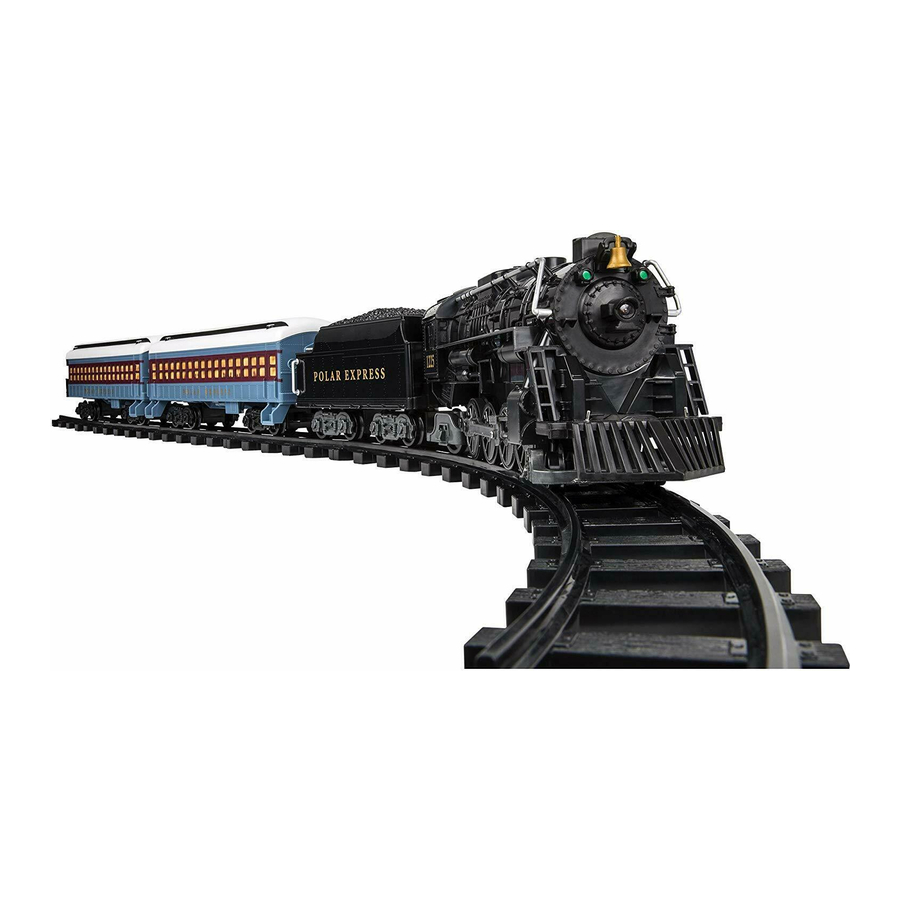
Congratulations! ongratulations on your purchase of The Polar Express Train Set. This set features everything you need to get started – a wireless remote control, a huge loop of easy-to- assemble track, a string of detailed cars, a tender and locomotive. -
Page 3: Table Of Contents
Table of contents Track assembly and layout Joining the track sections Layouts Battery installation and options Installation and options Installing 'AA' batteries into the wireless controller Installing 'C' batteries into the tender Operating your train Connecting the engine and coal tender Power switches on the wireless controller Power activation button on the engine Operating your wireless controller... -
Page 4: Track Assembly And Layout
Track assembly and layout Joining the track sections oin the track sections together by placing them on a flat surface and inserting the plastic tabs of each track section into the corresponding openings of the next section. Press or squeeze the ties together to connect. This may require the help of an adult. Recheck all track connection points upon completing your layout to be sure they are secure. -
Page 5: Layouts
Track assembly and layout Layouts These are three possible layouts you can make with the track provided. See Figure 2. Circle • Connect all curved track Extended Circle • Make 4 ninety degree curve sections by joining 3 curved sections each •... -
Page 6: Battery Installation And Options
Battery installation and options Installing ‘AA’ batteries into the wireless controller Push the tab toward the door and lift to open battery compartment (as shown in Figure 5). Insert two ‘AA’ batteries orientating the +/- as shown in the bottom of the battery compartment. -
Page 7: Installing 'C' Batteries Into The Tender
Battery installation and options Installing ‘C’ batteries into the tender pen the battery compartment by sliding the locking tab forward on the top rear of the tender. Then lift tender lid by curved angled rib and pulling backward. Install 6 ‘C’ size alkaline batteries into the battery compartment. -
Page 8: Operating Your Train
Operating your train Connecting the engine and coal tender lace the engine on the track first. Be sure that all wheels are within the track rails. Next insert the power plug into the receptacle in the center back of the engine platform. See Figure 5. -
Page 9: Power Switches On The Wireless Controller
Operating your train Power switches on the wireless controller urn the power switch on the side of the wireless remote to the up or ON position. The red light at the top of the speed dial will illuminate to tell you the controller is on. Turn the power switch on the Wireless Controller to the down position or OFF when not in use. -
Page 10: Power Activation Button On The Engine
Operating your train Power activation button on the engine ress the grey Power Activation button located on top of the boiler just in front of the cab area of the engine. The light in the front of the engine and stationary sounds will come on to indicate the train is operational. -
Page 11: Operating Your Wireless Controller
Bell Pressing the BELL button activates the engines bell sound. Center Button Pressing the UNMARKED center button activates the following conductor announcement “All Aboard! This is the Polar Express!" Whistle Pressing the WHISTLE button activates the engines whistle. FORWARD STOP... -
Page 12: Maintenance And Operations
Maintenance and operations Disappearing hobo feature on Observation car. o make the Hobo disappear just press the snow directly behind the Hobo and continue turning the platform until it snaps into place. To make the Hobe reappear just press the snow on the panel just in front of the footsteps and continue to rotate platform until it snaps into place. -
Page 13: Using 9.6 Volt Rechargeable Batteries (Not Included)
Maintenance and operations Using 9.6 Volt rechargeable batteries (not included) pen the battery compartment by sliding the locking tab forward on the top rear of the tender. Then lift tender lid by curved angled rib and pulling backward. Refer to Figure 4 on page 7. When using a 9.6 Volt rechargeable battery (not included), it is necessary to slide the 'C' battery dividing wall out of the way to insert the connecting battery power plug into its recepticle. -
Page 14: Battery Warning
IMPORTANT : BATTERY INFORMATION Please retain this information for future reference. Batteries should be replaced by an adult. CAUTION: • Non-rechargeable batteries are not to be recharged. • Rechargeable batteries are to removed from the product before being charged (if designed to be removable). •... -
Page 15: Troubleshooting
Maintenance and operations Troubleshooting Train will not run and engine light is not on. 1. Check if engine automatically timed out and shut off by pressing the engines Power Activation button (see page 10). 2. Check that the wire connecting the engine and coal tender is securely in its socket (see page 8). -
Page 16: Limited Warranty/Lionel Service
Lionel Limited Warranty Policy & Service his Lionel product, including all mechanical and electrical components, moving parts, motors and structural compo- nents, with the exception of LIGHT BULBS & LED’s are warranted to the original owner-purchaser for a period of one year from the original date of purchase against original defects in materials or workmanship when purchased through a Lionel Authorized Retailer*.
Need help?
Do you have a question about the The Polar Express and is the answer not in the manual?
Questions and answers