Life Fitness Base X3 Basic User Manual
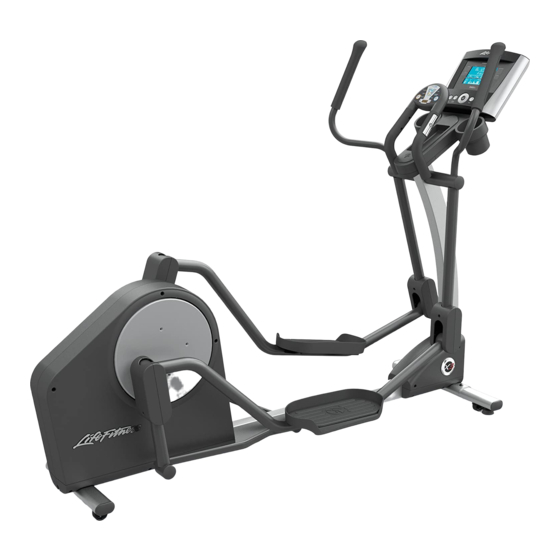
Total-body elliptical cross-trainer
Hide thumbs
Also See for Base X3:
- Assembly & operation manual (67 pages) ,
- Owner's manual (27 pages) ,
- Assembly & parts list (14 pages)

Related Manuals for Life Fitness Base X3


Summary of Contents for Life Fitness Base X3
- Page 1 X 3 T O T A L - B O D Y E L L I P T I C A L C R O S S - T R A I N E R B A S E U S E R M A N U A L...
- Page 2 ORPORATE EADQUARTERS 5100 North River Road Schiller Park, Illinois 60176 • U.S.A. www.lifefitness.com NTERNATIONAL FFICES LIFE FITNESS ASIA PACIFIC LTD LIFE FITNESS IBERIA LIFE FITNESS UK LTD Room 2610, Miramar Tower C/Frederic Mompou 5,1º 1º Queen Adelaide 132 Nathan Road...
-
Page 3: Introduction
AFETY AUTION Thank you for purchasing a Life Fitness Total-Body Elliptical Cross-Trainer. Before using this product, please read this user manual in its entirety to ensure that you have the knowledge to safely and properly operate all of the features of your Cross-Trainer. We hope you achieve the product experience that you expect, but if you do have any service issues, please go to the How to Obtain Product Service section which will provide information on obtaining product service. - Page 4 See Section 7, Specifications, in this manual for product-specific features. Statement of Purpose: The Life Fitness Total-Body Elliptical Cross-Trainer is an exercise machine that combines low- impact elliptical pedaling, where resistance is independent of speed, with push/pull arm motion to provide an efficient, effective total body workout.
-
Page 5: Table Of Contents
ABLE OF ONTENTS 1. Introduction ................2 Welcome/Safety/Caution . - Page 6 Not Authorized // Effect Of U.S. State Laws // Warranty Periods © 2008 Life Fitness, a division of Brunswick Corporation. All rights reserved. Life Fitness is a registered trademark of Brunswick Corporation. Any use of these trademark, without the express written consent of Life Fitness is forbidden.
-
Page 7: Important Safety Instructions
Use caution when mounting or dismounting the Total-Body Elliptical Cross-Trainer. While exercising, always hold onto the user arms or stationary handlebar. • Never operate a Life Fitness product if it has been dropped, damaged, or even partially immersed in water. Contact Life Fitness Customer Support Services. •... - Page 8 Keep hands and feet away from all moving parts. • To ensure proper functioning of this product, do not install attachments or accessories that are not provided or rec- ommended by Life Fitness. • Use this product in a well-ventilated area.
- Page 9 • Close supervision is necessary when this appliance is used by, on, or near children, invalids, or disabled persons. • Use this appliance only for its intended use as described in this manual. Do not use attachments not recommended by the manufacturer. •...
-
Page 10: Assembly Instructions
SSEMBLY NSTRUCTIONS Parts List: M3.5 X 8 mm Black Zinc M5 X 8mm Black M10 X 15mm Silver Hex Head Bolt (Qty. 4) Phillips Head Screw (Qty. 6) Phillips Head Screw (Qty. 4) M5 X 12mm Black Phillips Head Screw (Qty. 4) M10 X 20mm Clear Zinc Hex Head Bolt (Qty. - Page 11 Flat W asher 10mm ID (Qty. 2) Large Flat Washer (Qty. 2) Plastic End Cap (Qty. 2) Wave W asher (Qty. 2) M10 X 74mm Black Hex Head Bolt (Qty. 2)
- Page 12 Tools Needed: 17mm Socket Wrench, Phillips Screwdriver, Rubber Mallet Step 1 Packaging Parts: None Remove all packaging and place main components to the side of the box. Break box down in each of the four corners. Step 2 Assemble the Stabilizer Parts: Hardware Bag #1 (2, M10 X 15mm Silver Hex Head Bolts) Tools: 17mm Socket Wrench...
- Page 13 Step 3 Assemble the Console Upright Parts: Hardware Bag #2 (3, M10 X 70mm Silver Hex Head Bolts) (1, M10 X 20mm Clear Zinc Hex Head Bolt) Tools: 17mm Socket Wrench The console upright tube (D) is pre-assembled with one bolt so that you can simply lift the upright into place by pivoting upward.
- Page 14 Step 5 Assemble the Rocker Arms Parts: Hardware Bag #3 (2, Wave Washers, 2 Large Flat Washers) (2, Flat Washers) (2, M10 x 20mm Clear Zinc Hex Head Bolts) (2 Plastic End Caps) Tools: 17mm Socket Wrench, Phillips Screwdriver, Rubber Mallet Slide one large Flat Washer (I) and one Wave Washer (J) onto the user right pivot shaft (K).
- Page 15 Step 6 Assemble Moving Arms to Pedal Arms; Pedal / Moving Arm Joint Pivot Covers Parts: Hardware Bag #4 (2, M10 X 74mm Black Hex Head Bolts) (2, M10 Hex Nuts) (4, M5 X 8mm Black Phillips Screws) Tools: 17mm Socket Wrench, Phillips Screwdriver Lift the front end of the user left pedal lever (Q) to meet the left rocker arm clevis (R).
- Page 16 Step 7 Assemble Front Base Shroud; Console Bracket to the Upright Parts: Hardware Bag #5 (8, M5 X 12mm Black Phillips Head Screws) (2, M10 X 15mm Silver Hex Head Bolts) Tools: Phillips Screwdriver, 17mm Socket Wrench Position the left side base shroud (W) over the metal bracket (X) and screw in with four M5 X 12mm Black Phillips Head Screws (Y).
- Page 17 Step 8 Connect all Console Wiring; Console to Console Bracket; Back Plastic Shell Parts: Hardware Bag #6 (4, M5 X12mm Black Phillips Screws) (6, M3.5 X 8mm Black Zinc Screws) Tools: Phillips Screwdriver Position the console (B1) close to the console bracket (C1) and follow the below instructions to connect all wiring.
-
Page 18: Initial Setup
NITIAL ETUP Read the entire User Manual before setting up the Total-Body Elliptical Cross-Trainer. HERE TO LACE THE OTAL LLIPTICAL ROSS RAINER After following all safety instructions move the Total-Body Elliptical Cross-Trainer to the place where it will be used. See specifications for full dimensions if needed. The Total- Body Elliptical Cross-Trainer is equipped with front and rear wheels so that it is simple to push or pull the Total-Body Elliptical Cross-Trainer to its final destination. - Page 19 ROSS RAINER Your Life Fitness Total-Body Elliptical Cross-Trainer may come with either a U.S. power supply or one of several international power supplies. Insert the appropri- ate power adapter jack into the connector (B) on the back of the Total-Body Elliptical Cross-Trainer.
-
Page 20: Main Features
EATURES ONTACT EART The X3 includes hand pulse sensors on the stationary handlebar that are a built-in heart rate monitoring system. During a workout grasp the hand pulse sensors to monitor your heart rate. If your console comes equipped with a heart rate chest strap we recommend using it during workouts and using the hand pulse sensors to only occasionally monitor your heart rate when not using the chest strap. - Page 21 CCESSORIES The X3 comes standard with two water bottle holders (C) and an accessory tray (D). USHIONED EDAL NSERT The X3 comes equipped with a cushioned pedal insert (E) for increased comfort during workouts.
-
Page 22: Coachzone
OACH ™ OACH ONE ™ VERVIEW The CoachZone is designed to provide extra workout variety and motivation through additional instruction and feedback. The ArmToner and GluteToner workout enhancements help users target specific muscle groups and break the workout into manageable increments. The appropriate muscle groups that you should be using will illuminate when you perform specific movements. -
Page 24: Coach Zone Descriptions
™ OACH ESCRIPTIONS This section lists and describes the functions for the keys and LEDs on the CoachZone. A. WORKOUT ENHANCEMENT SELECTON KEYS: Select the ArmToner or GluteToner to concentrate on specific upper body or lower body muscles. B. SELECTION INDICATOR LEDs: A light next to the selected workout enhancement will illuminate. -
Page 25: Armtoner
™ ONER The ArmToner selection utilizes a pre-programmed series of prompts and intervals focused on upper-body muscles. CTIVATE ONER Press the ArmToner key during any workout to activate the selection. AUSE ONER Press the ArmToner key once while using the ArmToner selection. PAU will display on the CoachZone Timer. Press the ArmToner key again to resume. - Page 26 ArmToner Coach and Muscle Indicator Chart ™ Coach Indicator Muscle Indicator Push Chest; Tricep Pull Bicep Use Fixed Handles Upper body gets a rest Note: Upper body motions will always work in conjunction with lower body movements.
-
Page 27: Glutetoner
™ LUTE ONER The GluteToner selection utilizes a pre-programmed series of prompts and intervals focused on lower body muscles and glutes. CTIVATE LUTE ONER Press the GluteToner key during any workout to activate the selection. AUSE LUTE ONER Press the GluteToner key once while using the GluteToner selection. PAU will display on the CoachZone Timer. Press the GluteToner key again to resume. - Page 28 GluteToner Coach and Muscle Indicator Chart ™ Coach Indicator Muscle Indicator Forward Hamstring; Glute Reverse Quad; Calf Squat Glute; Quad; Hamstring Note: The squat motion should only be done while pedaling in reverse and holding the fixed or stationary handles.
-
Page 29: Timer
IMER The amber LED timer breaks workouts into manageable increments by displaying a count down of the time remaining on specific movements. When the timer reaches zero, the Coach LEDs will change. Slow your movement to a complete stop, and begin the next interval. &... -
Page 30: Coach Zone Settings
™ OACH ETTINGS The CoachZone allows the user to change certain settings. UDIO DJUSTMENT NSTRUCTIONS A beeping sound occurs whenever the timer reaches zero or a new program is selected. The user can turn off the beep- ing sound by pressing and holding the GluteToner key for seven seconds. A beep will sound to confirm the change in settings. -
Page 31: Service & Product Maintenance
& P ERVICE RODUCT AINTENANCE ROUBLESHOOTING OWER Check to see that the power cord is fully plugged into the back of the Total-Body Elliptical Cross-Trainer and into the wall. Make sure the power cord is fully seated into the back of the Total-Body Elliptical Cross-Trainer. ULSE ENSORS ORKING OR... -
Page 32: Change At The Beginning Levels
OTAL OOSE Remove the moving arm pivot covers and check to make certain the bolt holding the total body arms in place is fully tightened. If the total body arms still feel loose, you may need to disassemble the total body arms and make sure all of the proper hardware from the assembly instructions was used. -
Page 33: Preventative Maintenance Tips
REVENTATIVE AINTENANCE The safety of the Total-Body Elliptical Cross-Trainer can be maintained only if the equipment is examined regularly for damage or wear. If maintenance is required, keep the equipment out of use until defective parts are repaired or replaced. Pay special attention to parts that are subject to wear outlined in the Preventative Maintenance Schedule. The following preventative maintenance tips will keep the Total-Body Elliptical Cross-Trainer operating at peak perform- ance. -
Page 34: How To Obtain Product Service
Telephone: (+55) 11.7295.2217 FAX: (+43) 1615.7198.20 FAX: (+55) 11.7295.2218 Life Fitness Atlantic BV Life Fitness Benelux Life Fitness Asia Pacific Ltd Life Fitness Japan Telephone: +31 (0) 180 64 66 66 Telephone: (+852) 2891.6677 Telephone: (+81) 3.3359.4306 FAX: +31 (0) 180 64 66 99 FAX: (+852) 2575.6001... -
Page 35: Specifications
PECIFICATIONS Designed Use: Home Max User Weight: 350 lbs / 159 kilograms Resistance System: Eddy Current Stride Length: 20 inches CoachZone ™ : Contact Heart Rate: Cushioned Pedal Insert: Accessories: 2 water bottle holders and 1 accessory tray Power Supply: 120 Volt (U.S.), 220 Volt (Europe), 240+ Volt (Australia) ASSEMBLED / WORKING DIMENSIONS Length... -
Page 36: Warranty Information
WHO PAYS SHIPPING & INSURANCE FOR SERVICE: If the Product or any warranted part must be returned to a service facility for repairs, Life Fitness will pay all shipping and insurance charges during the warranty period (within the United States only). The purchaser is responsible for shipping and insurance charges after the warranty has expired. - Page 37 Product as specified in the Manual; notify Customer Service of any defect within 10 days after discov- ery of the defect; if instructed, return any defective part for replacement or, if necessary, the entire Product for repair. Life Fitness reserves the right to decide whether or not a product is to be returned for repair.
- Page 38 CHANGES IN WARRANTY NOT AUTHORIZED: No one is authorized to change, modify or extend the terms of this limited warranty. EFFECT OF U.S. STATE LAWS: This warranty gives you specific legal rights and you may have other rights which vary from state to state. WARRANTY PERIODS:MODEL LIFETIME...
- Page 39 Life Fitness offers a full line of premier fitness equipment for the home. T O T A L - B O D Y E L L I P T I C A L C R O S S - T R A I N E R S | T R E A D M I L L S | L I F E C Y C L E E X E R C I S E B I K E S | G Y M S Y S T E M S ®...
Need help?
Do you have a question about the Base X3 and is the answer not in the manual?
Questions and answers