Life Fitness X1 Total Body Elliptical Cross-Trainer Manual
- Base user manual (27 pages) ,
- Owner's manual (23 pages) ,
- Assembly instructions (2 pages)
Advertisement
- 1 IMPORTANT SAFETY INSTRUCTIONS
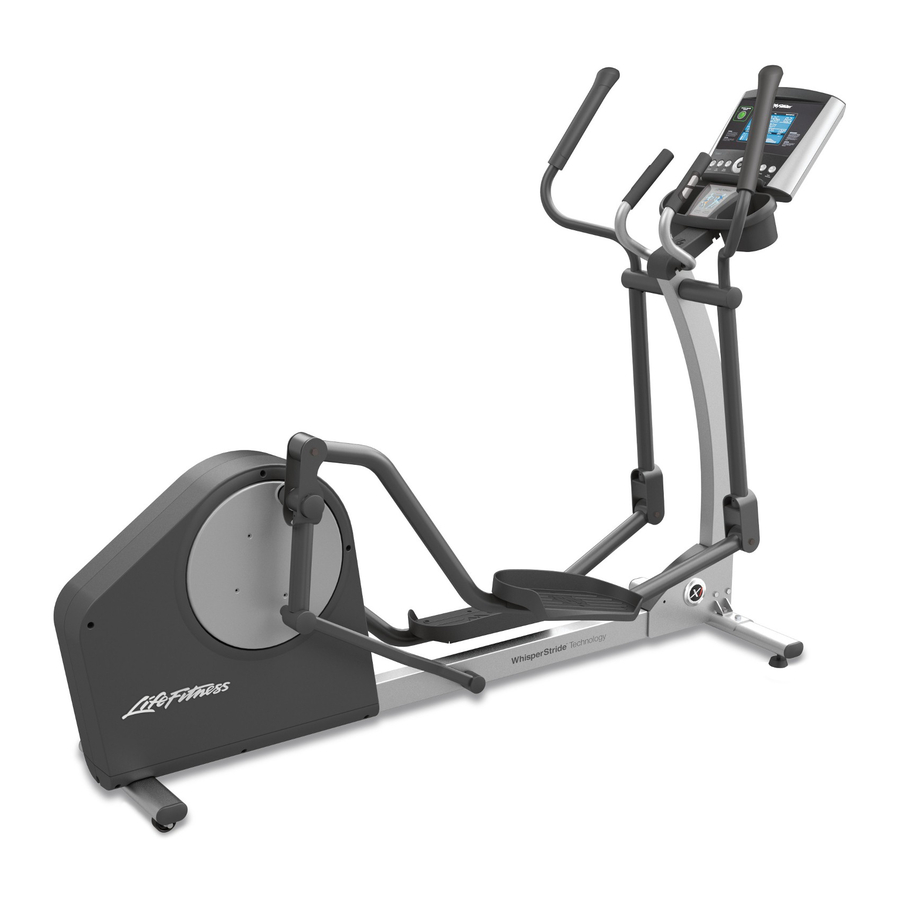
- 2 X1 TOTAL-BODY ELLIPTICAL CROSS-TRAINER OVERVIEW
-
3
ASSEMBLY
- 3.1 TOOLS & HARDWARE
- 3.2 PACKAGING
- 3.3 ASSEMBLE THE STABILIZER
- 3.4 ASSEMBLE THE CONSOLE UPRIGHT
- 3.5 CONNECT BASE WIRING
- 3.6 ASSEMBLE THE ROCKER ARMS
- 3.7 ASSEMBLE MOVING ARMS TO PEDAL ARMS
- 3.8 ASSEMBLE FRONT BASE COVER; CONSOLE BRACKET TO THE UPRIGHT
- 3.9 CONNECT ALL CONSOLE WIRING; CONSOLE TO CONSOLE BRACKET BACK PLASTIC SHELL
- 3.10 PLUG IN THE UNIT
- 4 INITIAL SETUP
- 5 TROUBLESHOOTING
- 6 SERVICE & PRODUCT MAINTENANCE
- 7 SPECIFICATIONS
- 8 Documents / Resources
Statement of Purpose: The Life Fitness Total-Body Elliptical Cross-Trainer is an exercise machine that combines low-impact elliptical pedaling, where resistance is independent of speed, with push/pull arm motion to provide an efficient, effective total body workout.

Health-related injuries may result from incorrect or excessive use of exercise equipment. The manufacturer STRONGLY recommends seeing a physician for a complete medical exam before undertaking an exercise program, particularly if the user has a family history of high blood pressure or heart disease; or is over the age of 45; or smokes, has high cholesterol, is obese, or has not exercised regularly in the past year. The manufacturer also recommends consulting a fitness professional on the correct use of this product.
If, at any time while exercising, the user experiences faintness, dizziness, pain, or shortness of breath, he or she must stop immediately.

IMPORTANT SAFETY INSTRUCTIONS

Read all instructions before using the Total-Body Elliptical Cross-Trainer. Save these Instructions.
Heart rate monitoring systems may be inaccurate. Over exercising may result in serious injury or death.
Any adjustment devices that could interfere with the user's movement should not be left projecting.

To reduce the risk of electrical shock, always unplug this Life Fitness product before cleaning or attempting any maintenance activity.
 SAFETY WARNING: The safety of the product can be maintained only if it is examined regularly for damage and wear. See Preventive Maintenance section for details.
The heart rate hand pulse sensors provide an approximate heart rate value. The sensors are not medical devices and should not be used in any type of medical application.
- Before using this product, it is essential to read this ENTIRE operation manual and ALL instructions. The Total-Body Elliptical Cross-Trainer is intended for use solely in the manner described in this manual.
- Always follow the console instructions for proper operation.
- This appliance is not intended for use by persons (including children) with reduced physical, sensory or mental capabilities, or lack of experience and knowledge, unless they have been given supervision or instruction concerning use of the appliance by a person responsible for their safety.
- Children should be supervised to ensure that they do not play with the appliance.
- Never insert objects into any openings in this product. If an object should drop inside, turn off the power, unplug the power cord from the outlet and carefully retrieve it. If the item cannot be reached, contact Life Fitness Customer Support Services.
- Never place liquids of any type directly on the unit, except in an accessory tray. Containers with lids are recommended.
- Do not use the Total-Body Elliptical Cross-Trainer outdoors, near swimming pools or in areas of high humidity.
- Keep all loose clothing, shoelaces, and towels away from the Total-Body Elliptical Cross-Trainer pedals.
- Keep the area around the Total-Body Elliptical Cross-Trainer clear of any obstructions, including walls and furniture.
- Use caution when mounting or dismounting the Total-Body Elliptical Cross-Trainer. While exercising, always hold onto the user arms or stationary handlebar.
- Never operate a Life Fitness product if it has been dropped, damaged, or even partially immersed in water. Contact Life Fitness Customer Support Services.
- Keep the power cord away from heated surfaces. Do not pull the equipment by the power cord or use the power cord as a handle.
- Do not run the power cord on the floor under or along side of the Total-Body Elliptical Cross-Trainer.
- Wear shoes with rubber or high-traction soles. Do not use shoes with heels, leather soles, cleats or spikes. Do not use the Total-Body Elliptical Cross-Trainer in bare feet.
- Do not tip the Total-Body Elliptical Cross-Trainer on its side during operation.
- Keep hands and feet away from all moving parts.
- To ensure proper functioning of this product, do not install attachments or accessories that are not provided or recommended by Life Fitness.
- Use this product in a well-ventilated area.
- Use this product on a solid, level surface.
- Make sure that all components are fastened securely.
- An appliance should never be left unattended when plugged in. Unplug from outlet when not in use, and before putting on or taking off parts.
- Do not operate under blanket or pillow. Excessive heating can occur and cause fire, electric shock, or injury to persons.
- Never operate this appliance if it has a damaged cord or plug, if it is not working properly, if it has been dropped or damaged, or dropped into water. Contact Life Fitness Customer Support Services.
- Never operate the appliance with the air openings blocked. Keep the air openings free of lint, hair, and the like.
- To disconnect, turn all controls to the off position, then remove plug from outlet.
- Allow LCD consoles to "normalize" with respect to temperature for one hour before plugging the unit in and/or using.
SAVE THESE INSTRUCTIONS FOR HOUSEHOLD USE.
X1 TOTAL-BODY ELLIPTICAL CROSS-TRAINER OVERVIEW

ASSEMBLY
TOOLS & HARDWARE
Identify the following components after unpacking your cross-trainer:

Tools Needed for Assembly:
- Phillips Head Screwdriver
- 17mm Socket Wrench
- 17mm Open End Wrench
PACKAGING
Parts: None
Remove all packaging and place main components to the side of the box. Break box down in each of the four corners.
ASSEMBLE THE STABILIZER
Parts: Hardware Bag #1 (2, M10 X 15mm Silver Hex Head Bolts)
Tools: 17mm Socket Wrench
Assemble the stabilizer tube (foot) (A) to the bottom base bracket (B) of the product using two M10 X 15mm Silver Hex Head Bolts (C).

ASSEMBLE THE CONSOLE UPRIGHT
Parts: Hardware Bag #2 (3, M10 X 70mm Long Silver Hex Head Bolts)
(1, M10 X 20mm Clear Zinc Hex Head Bolt)
Tools: 17mm Socket Wrench
The console upright tube (D) is pre-assembled with one bolt so that you can simply lift the upright into place by pivoting upward. Hold the upright in place and install three M10 X 70mm Long Silver Hex Head Bolts (E) into the side of the main bracket (F). Install one M10 X 20mm Clear Zinc Hex Head Bolt (G) into the front of the bracket.

Do not pinch wires when assembling the upright.
CONNECT BASE WIRING
Parts: None
Connect the two plugs (H) at the base of the upright.

ASSEMBLE THE ROCKER ARMS
Parts: Hardware Bag #3 (2, Wave Washers, 2 Large Flat Washers)
(2, Flat Washers)
(2, M10 X 20mm Hex Head Bolts)
(2, Plastic End Caps)
Tools: 17mm Socket Wrench, Phillips Screwdriver, Rubber Mallet

Slide one large Flat Washer (I) and one Wave Washer (J) onto the user right pivot shaft (K). Slide the washers fully over the pivot shaft until seated against the pre-installed stop ring (L).
Locate the user right rocker arm assembly (M) marked with an "R". With the top handgrip facing the front of the unit, slide the right rocker arm assembly onto the user right pivot shaft until seated against the washers.
Secure the rocker arm assembly to the pivot shaft using one Flat Washer (N) and one M10 X 20mm Hex Head Bolt (O). Tighten the bolt securely. Repeat the procedure for the left rocker arm assembly.
Use a rubber mallet to tap the round end of the Plastic End Caps (P) into the side of the rocker arms.
ASSEMBLE MOVING ARMS TO PEDAL ARMS
Parts: Hardware Bag #4 (2, M10 X 74mm Black Hex Head Bolts)
(2, M10 Hex Nuts)
Tools: 17mm Socket Wrench, Phillips Screwdriver
Lift the front end of the user left pedal lever (Q) to meet the left rocker arm clevis (R). Secure the pedal lever to the rocker arm clevis using one M10 X 74mm Black Hex Head Bolts (S) and one M10 Hex Nut (T). Tighten the bolt and nut securely. Repeat the procedure for the right pedal lever and rocker arm clevis.

ASSEMBLE FRONT BASE COVER; CONSOLE BRACKET TO THE UPRIGHT
Parts: Hardware Bag #5 (2, M10 X 15mm Silver Hex Head Bolts)
Tools: Phillips Screwdriver, 17mm Socket Wrench
Position the front base cover (U) over the main bracket (V). Align the four tabs on the front base cover with the four hole on the main bracket. Snap into place.

Slide the console bracket (W) into the upright. Use two M10 X 15mm Silver Hex Head Bolts (X) to attach the console bracket to the upright (Y).

Note: Avoid pinching the console wires.
CONNECT ALL CONSOLE WIRING; CONSOLE TO CONSOLE BRACKET BACK PLASTIC SHELL
Parts: Hardware Bag #6 (4, M5 X 12mm Silver Phillips Screws)
Tools: Phillips Screwdriver 15P
Position the console (Z) close to the console bracket (W) and follow the below instructions to connect all wiring.

Plug cables into the back of the display console:

- Plug the 15-pin connector at the end of the upper wire harness into the 15-pin connector (15P) in the back of the display console. Make sure the connector snaps into place.
- Plug the 4-pin connector at the end of the contact heart rate sensor cable to the 4-pin cable (4P) located in the console.
- Plug the ground cable (green wire, single spade) from the product base to any of the three metal ground terminals (G) in the Go Console, or into the connector (G) leading from the back of the Track Console.
- Push excess cables into the opening of the upright tube assembly.
Line up the four holes in the console bracket with the four holes in the back of the display console. Attach the display console using four M5 X 12mm Silver Phillips Screws (A). Be careful not to pinch cables between the console and the console bracket. Be sure to get each screw started before fully tightening.
Note: To avoid stripping, do not overtighten the screws.
PLUG IN THE UNIT
Parts: Electric Transformer
Plug the black cord into the back of the machine and into a household electrical outlet.
INITIAL SETUP
Read the entire User Manual before setting up the Total-Body Elliptical Cross-Trainer.
Note: This Total Body Elliptical Cross-Trainer is speed independent. Resistance can be adjusted by means other than speed.
WHERE TO PLACE THE TOTAL-BODY ELLIPTICAL CROSS-TRAINER
After following all safety instructions move the Total-Body Elliptical Cross-Trainer to the place where it will be used. Allow a minimum clearance of 12 inches (30.5 cm) around the product. See specifications for full dimensions if needed. The Total-Body Elliptical Cross-Trainer is equipped with rear wheels so that it is simple to push or pull the Total- Body Elliptical Cross-Trainer to its final destination. Simply lift the front of the Total-Body Elliptical Cross-Trainer to move. Once the Total-Body Elliptical Cross-Trainer is properly positioned, allow enough space in the front of the Total-Body Elliptical Cross-Trainer for the movement of the pedal levers. Also be sure to allow space on the side so that it is easy to mount the Total-Body Elliptical Total-Body Elliptical Cross-Trainer from the side.

Make certain you have plenty of room for the swing of the moving arms.
Place the Total-Body Elliptical Cross-Trainer in a dry place. Do not place in highly humid areas, like near swimming pools, as rust and corrosion may occur.
HOW TO STABILIZE THE TOTAL-BODY ELLIPTICAL CROSS-TRAINER
Once the cross trainer is positioned in the room adjust the levelers on the front stabilizer. The levelers will keep the Total-Body Elliptical Cross-Trainer fixed to the floor while using it.
Do not use the Total-Body Elliptical Cross-Trainer without the levelers touching the floor.
After placing the Total-Body Elliptical Cross-Trainer where it will be used, check the stability. If there is even a slight rocking motion, or the unit is not stable, the levelers will need to be adjusted. Determine which leveler is not resting firmly on the floor. To adjust the levelers downward twist the rubber portion of the leg counterclockwise. To adjust the levelers upward twist the rubber portion of the leg clockwise. Be sure there is a minimum of 5 mm (0.20 in.) of thread showing between the leveler and the leveler locking nut.
Note: After the Cross-Trainer is level, be sure to tighten the nut on the leveler against the stabilizer tube. If this is not tightened, noise will occur.
POWERING UP THE TOTAL-BODY ELLIPTICAL CROSS-TRAINER
Your Life Fitness Total-Body Elliptical Cross-Trainer may come with either a U.S. power supply or one of several international power supplies. Insert the appropriate power adapter jack into the connector (A) on the back of the Total-Body Elliptical Cross-Trainer. Then insert the plug into the wall outlet. Make sure the cord is placed so it doesn't bind and will not be walked on. Then check that the console lights up. If not, recheck the plug and the wall connections and make sure the wall outlet has power.

MOUNTING THE MACHINE
When mounting the machine it is recommended that the pedal closest to you is in its lowest position. This can be done by pushing the arms to rotate the pedal until it is centered to the side of you at its lowest position. If you are standing to the left side of the machine, when facing the console, place your left foot on the pedal closest to you and then swing your right leg over to the right pedal. Use the stationary handlebar to stabilize yourself.
DISMOUNTING THE MACHINE
Bring the machine to a stop. It is recommended to put the pedal in it's lowest position on the side of the unit you will be dismounting. If dismounting the machine on the left side, when facing the console, step off with the right leg first followed by the left leg. Use the stationary handlebar for stabilization.
CONTACT HEART RATE
The X1 includes hand pulse sensors on the stationary handlebar that are a built-in heart rate monitoring system. During a workout grasp the hand pulse sensors to monitor your heart rate. We recommend using the heart rate chest strap provided with your console during workouts and using the hand pulse sensors to only occasionally monitor your heart rate when not using the chest strap. In addition, to utilize heart rate controlled workouts the chest strap must be used. For the most accurate reading, use a comfortable grip. The console will show a heart rate reading after 15 to 20 seconds.
Hand pulse sensors can work differently with different body types. With some individuals it can be very difficult to extract a heart rate reading. Follow the tips below to improve the heart rate reading:
- Remove your hands from the heart rate sensors and wait for the heart rate display to clear. Grasp sensors again.
- Make sure hands are fully contacting the sensors.
- Dry hands periodically during use.
- Limit movement.
- Clean hand pulse sensors.
Note: The heart rate hand pulse sensors provide an approximate heart rate value. The sensors are not medical devices and should not be used in any type of medical application.
TROUBLESHOOTING
| Problem | Cause / Solution |
| No power. | Check to see that the power cord is fully plugged into the back of the Total-Body Elliptical Cross-Trainer and into the wall. Make sure the power cord is fully seated into the back of the Total-Body Elliptical Cross-Trainer. |
| You may be in "Energy Saver Mode". Press the "Energy Saver" button to see if the console turns on. | |
| Verify that all customer assembly connections are working properly. Unplug and re-plug each connection to verify. Look to see if any cables were pinched during assembly. | |
| Total Body Arms feel loose. | Remove the moving arm pivot covers and check to make certain the bolt holding the total body arm in place is fully tightened. If the total body arms still feel loose, you may want to disassemble the total body arms and make sure all of the proper hardware from the assembly instructions was used. |
| Noise is coming from pedals. | Some noise from the pedals is normal. It will vary depending on the weight of the user. Check assembly hardware beneath pedal to make certain it is tight. |
| Hear noise as speed increases. | It is normal for any mechanical device to become louder as speed increases. |
| Start-Up resistance seems very difficult. | Your product may be in 'Safety Mode'. Refer to the console manual on how to turn off this setting |
| Turn the unit off and then on again. | |
| Can't feel a resistance change at the beginning levels. | The resistance curve of the Total-Body Elliptical Cross-Trainer is designed so that you can feel a greater difference in resistance at higher levels. |
| Wireless heart rate is not working. | Potential reasons for the wireless heart rate not to work properly include:
|
| Creaking sound is coming from the stabilizers. | It is very important that the nut on the leveler is tightened against the stabilizer tube after the product is leveled. Ensure that this nut is tight. |
| "OFF" is displayed in the LEVEL window on the console. | Turn the unit off and then on again. |
| If power cycling the product did not work, there is a problem with the resistance system. Contact customer service for assistance. | |
| The contact heart rate sensors are not reading my heart rate correctly | Be sure to grasp the sensors firmly and keep hands still. If heart rate seems substantially higher or lower than expected, remove hands from sensors until heart rate disappears. |
| Tips for contact heart rate:
Note: The heart rate hand pulse sensors provide an approximate heart rate value. The sensors are not medical devices and should not be used in any type of medical application. | |
| iPod is not recognized. Note: Applies to Track Console only | This is displayed if your version of the iPod Player is not supported by the cross-trainer. It may also be displayed if the connector on the cross-trainer or iPod is damaged. |
| iPod is not charging while in Energy Saver mode. Note: Applies to Track Console only | Your iPod will not charge if the cross-trainer enters Energy Saver mode. This is normal. |
| "Low Battery" message is displayed on the console. Note: Applies to Track Console only. | The console has an internal battery that keeps the real time clock functioning if the cross-trainer is unplugged. This real time clock is only needed if you use the Life Fitness "Virtual Trainer" website. You do not need to replace the battery if you do not use the website. Contact Customer Service for guidance on how to change the battery. The battery is a CR1632 (3V). |
| When I try to save a workout on the USB stick I receive the following message: UNABLE TO SAVE SEE MANUAL. Note: Applies to Track Console only. | The console may not have recognized the USB stick. Try unplugging the USB stick and plugging it back in. The USB stick may be full. The USB stick may not be compatible with the product. Try using a different USB stick. |
SERVICE & PRODUCT MAINTENANCE
PREVENTATIVE MAINTENANCE TIPS
The Life Fitness Total Body Elliptical Cross-Trainer is backed by the engineering excellence and reliability of Life Fitness and is one of the most rugged and trouble-free pieces of exercise equipment on the market today.
Note: Safety of the equipment can be maintained only if the equipment is examined regularly for damage or wear. Keep the equipment out of use until the defective parts are required or replaced. Pay special attention to parts that are subject to wear, as outlined below.
The following preventative maintenance tips will keep the Life Fitness Total Body Elliptical Cross-Trainer operating at Peak performance:
 Turn the cross-trainer off and unplug prior to performing any maintenance. | |
| Weekly | Inspect the power cord. If the cord is damaged call technical support. Make sure the cord is positioned in a location where it will not be damaged. |
| Monthly | Clean the top surface of the pedals. |
| Clean the display console and all exterior surfaces with mild soap, water and a soft cotton cloth or a Life Fitness approved cleaner. Note: Do not use paper towels, ammonia or acid based cleaners on the product. At no time should cleaner be applied directly to any part of the equipment; spray the cleaner on a soft cloth and then wipe the unit. | |
| Inspect the exterior parts for wear and check that user assembly bolts are still tight. | |
Note: Long fingernails may damage or scratch the surface of the console. Use the pad of the finger to press the keys.
LIFE FITNESS APPROVED CLEANERS
Two preferred cleaners have been approved by Life Fitness reliability experts: PureGreen 24 and Gym Wipes. Both cleaners will safely and effectively remove dirt, grime and sweat from equipment. PureGreen 24 and the Antibacterial Force formula of Gym Wipes are both disinfectants that are effective against MRSA and H1N1.
PureGreen 24 is available in a convenient spray. Apply the spray to a microfiber cloth and wipe down the equipment. Use PureGreen 24 on the equipment for at least 2 minutes for general disinfection purposes and at least 10 minutes for fungus and viral control.
Gym Wipes are large, durable pre-moistened wipes to use on the equipment before and after workouts. Use Gym Wipes on the equipment for at least 2 minutes for general disinfection purposes.
Contact Life Fitness Customer Support Services to order these cleaners.
Call 1-800-351-3737 or email: customersupport@lifefitness.com.
LIFE FITNESS COMPATIBLE CLEANERS
Mild soap and water or a mild non-abrasive household cleaner can also be used to clean the display and all exterior surfaces. Use a soft cotton cloth only. Apply the cleaner to the cotton cloth before cleaning. DO NOT use ammonia or acid based cleaners. DO NOT use abrasive cleaners. DO NOT use paper towels. DO NOT apply cleaners directly to the equipment surfaces.
HOW TO OBTAIN PRODUCT SERVICE
- Please contact your dealer or Life Fitness Customer Service at 1-800-351-3737.
- Verify the symptom and review the operating instructions and troubleshooting matrix.
- Locate and document the serial number of the unit. The serial number plate is located on the main frame in front of the rear shrouds. Please also have proof of purchase information available.
SPECIFICATIONS
LIFE FITNESS X1 CROSS-TRAINER SPECIFICATIONS
Designed Use: Home
Max User Weight: 350 lbs / 159 kilograms
Max Step-Up Height: 6.5 inches / 16.5 centimeters
Resistance System: Eddy Current
Stride Length: 20 inches
Power Supply: 120 Volt (U.S.), 220 Volt (Europe), 240+ Volt (Australia)
ASSEMBLED/WORKING DIMENSIONS:
Length 81 inches / 206 centimeters
Width 30 inches / 76 centimeters
Height 59 inches / 150 centimeters
Weight 215 pounds / 98 kilograms
SHIPPING DIMENSIONS:
Length 81 inches / 206 centimeters
Width 21 inches / 51 centimeters
Height 32 inches / 81 centimeters
Weight 242 pounds / 110 kilograms
© 2011 Life Fitness, a division of Brunswick Corporation. All rights reserved.

Documents / ResourcesDownload manual
Here you can download full pdf version of manual, it may contain additional safety instructions, warranty information, FCC rules, etc.
Download Life Fitness X1 Total Body Elliptical Cross-Trainer Manual
Advertisement


Need help?
Do you have a question about the X1 and is the answer not in the manual?
Questions and answers