
Related Manuals for Briggs & Stratton 71057


Summary of Contents for Briggs & Stratton 71057
- Page 1 Deal 2 00Arn -S Jit 4 00Arn Automatic Tra r Switch rvJceDisconnectand ..PowerControl duJ_ QuestioHS? _ moment a way! Switch Heipiine 800o743-4115 Monday ° Friday8:00 AM o 5:00 PM CentraJ StandardTime...
- Page 2 Thank you for your purchase of this Briggs& StrattonPowerProducts@ automatic transferswitch.This productis designed for usewith specifichomestandbygenerators and maynotfunctionwith generators or remotemodulesproducedby othermanufacturers. Seeka qualifiedelectricalprofessional to determine applicability of this equipment t o equipment m anufactured by others.Whenoperated and maintained according to the instructionsin this manual, y our systemwill providemanyyearsof dependable service. This manual c ontainssafetyinformationto makeyouawareof the hazards and risksassociated with this systemand howto avoidthem.
- Page 3 Tabieof Contents Oontreis ........... Operatien .......... TransferSwitch Wiring Diagram ......TransferSwiteh Schematic Diagram ..............Predad Spedieatieas ..Espa_ol Frangais...
-
Page 4: Important Safety Instructions
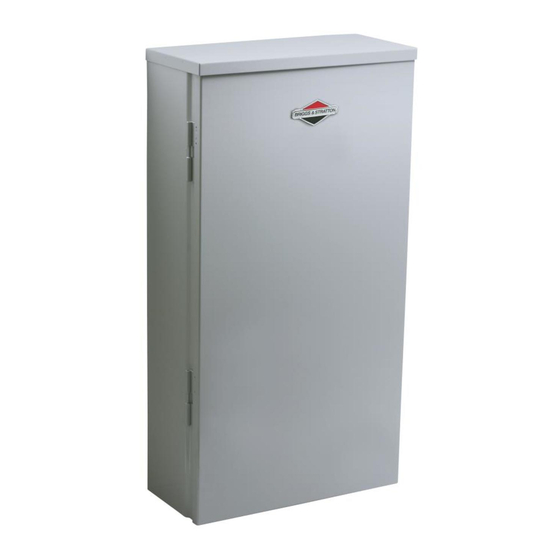
SaveTheseinstructions ImportantSafetyInstructions WARNINGShockHazard. I nstallinglow andhigh voltage wire in sameconduitcouldresult in death,seriousinjury SAVE THESE iNSTRUCTiONS° Thismanual c ontainshnportant and/orpropertydamage. instructionsthat shouldbefollowedduring installationof theequipment. , Donot run low andhigh voltage wire in the sameconduitunless the insulationratingon ALLwiring is ratedfor 600V.SeeNEC Safety' S ymbnlsand Meanings for moreinformation. - Page 5 EquipmentDescription Thetransferswitch is designed to transfersdectedloadsfound We sincerdy appreciate your p atronage and have m ade significant effort toprovide forasafe, streamlined and cost-effective in normalresidential i nstallations to standbypowerin the event installation. Because each i nstallation isunique, itisimpossible of a primarypoweroutage.Theloadis connected eitherto utility toknow ofand advise the trade o fallconceivable procedures power(normal)or standbypower(generator).
- Page 6 A typicalautomatic transferswitch installationis depictedbelow,it MountingGuiddines is bestif thetransferswitch is mountednearthe utility meter,either Thetransferswitch systemdrcu%, is enclosed in a NEIdA Type3R insideor outside.Discusslayoutsuggestions/changes with the enclosure suitable for indoor/outdoor use_ Guiddinesfor mounting ownerbeforebeginning thesysteminstallationprocess. theenclosureinclude: NOtiCE Beforedrilling conduitentry holes,or anyother holes, •...
- Page 7 NOTICE Connect t he neutralsfrom bothmaindistributionpanels PowerWiring Interconnedions (81 and 82) to thetransferswitchneutral t erminal (H1andH2). NOTICEimproperinstallationcouldcausedamage to the circuit 10. Connect t wo maindistributionpanelgrounds(T1andT2)to boardsandshortentheir fife.Instalfingcircuitboardsin five transferswitch"GND"terminal(U1ar [12). circuitswill damage the boardandis not covered by warranty. ALWAYS disconnect A LL sourcesof powerprior to servicing. Assuregroundingelectrode conductoris connected and •...
- Page 8 13. Connectconductor f rom transferswitch neutral t erminal (H1 Supervisory ControtWiring or H2)to generatorNEUTRAL terminal (L). Observe generator An air conditioner can be used with the supervisory contacts control pand bbefingfor terminalidentification. on either terminals A-A or B-B. Terminals A-A can only be 14.
- Page 9 InterconnedionDiagram Theiflustrationon thefoflowingpagesshowsa completed transfer switchinstallation. E achinstallationlayoutmayvary. illustrationcalloutsare: FromUtilityto FirstServicePanel FromUtilityto SecondServicePanel Current T ransformer Current T ransformer Dipswitches TiR and GNDto Generator CTTerminals TransferSwitchContactors UTiLiTY240VAC to Generator TransferSwitchNeutralTerminal TransferSwitchNeutralTerminal Generator Generator G roundTerminal Generator N eutralTerminal Generator C ircuitBreaker Tenpin Connector Two pin Connector MainDistributionPanel1...
- Page 10 @Hg_ k_JPI N.o. _JpJ T/R :_) b: :ND © {_i}ii{!i!iiiii_;, BRIGGSandSTRATTON,COM...
- Page 11 ®...
- Page 12 System Setup NOTICEUseextremecautionwhensettingdipswitches or damage to control boardwill result. You mustperformthe foUowingbeforeoperatingthe system: • Usea pencilor small pieceof plasticto setthe dipswitch. • if generator i s instaUed in an arearegularlysubjected to • NEVER usea screwdriver o r anytype of metalobjectto set temperatures bdow 40°F(4°0), sdect a 50 second warm up dipswitches.
- Page 13 Thesystemwill now be in automaticoperationmode. Testingthe AutematicTransferSwitch Whenthe generator i s providingpowerto thetransferswitch,the Turnbothof the utifityservicedisconnect c ircuitbreakers feeding thetransferswitch contactors to the OFF position_ Thesystem's transferswitch controlboardis constantlymonitoringgenerator automatic sequence describedbelowwill initiate_ To returnto utility power,if theair conditioneris calledto run,andthereis sufficient power,turn the utifity servicedisconnect c ircuitbreakers to the generatorpoweravailable, t he controllerwill dose contacts"A-A"...
- Page 14 UTILITY SUPPLY UTILITY SUPPLY _-_H_IIATOR $UPPLY 24OVAL 2450VAC 24)OVAL ..MAIH BREAI(EIG ......... © ........PAN]EL - HEUTRAL ---4 )='IGOM UTILITY SUPPLY ---q...
-
Page 15: Transfer S Witch Schematic D Iagram
Transfer S witch Schematic D iagram _'BOM UTILITY 5I.}PPLY GN_UN_ B/lAIN B_EAI({178_ PAI_iI_L - 2 5Y5'i',_I_1 @£OL_{N'[ _... -
Page 16: Automatic Transfer
Cause Correction l_Generator b reakeropen_ l_Resetgeneratorcircuit breaker_ Automatictransferswitch doesnot 2.Generator vdtage not acceptaUe. 2.Referto generatormanual transferto generator 3.Generator disconnect c ircuitbreakeropenin 3.Reset g eneratordisconnect c ircuitbreaker transferswitch, in transferswitch. 1.Utilitydisconnect c ircuit breakers openin 1.Resetutilitydisconnect c ircuit breakerin Automatictransferswitch doesnot transferswitch, transferswitch. - Page 17 ..o. _o_o.to loio_! Liamada: L{n_a D irecta degeBerad{}r dehogar 800-743-4115lVl-F 8°5CT...
- Page 18 Gracias por compraresteconectador a utom_tico de Briggs& StrattonPowerProducts@. E steproductoest_dise_adoparautilizarsecon generadores de reserva dom6sticos especificos y puedeno funcionarcon generadores o mOdulos remotosproducidos por otros fabricantes. Recurra a un electricistaprofesional c ualificadoparadeterminar si esteequipose puedeutilizarcon equipofabricadopor terceros.Si se utilizay mantiene de acuerdocon lasinstrucciones de estemanual,su sistemale proporcionar_ muchosa_osde funcionamiento fiable. Estemanual c ontieneinformaciOn d e seguridadparaqueustedconozcalos peligrosy riesgospropiosde estesistemay c0mo evitarlos.
- Page 19 Tablade centenide JnstaJacJ6n .......... ResponsaWfidades deIpropbtafio........Orbntaci6nal propbtafio ..........ResponsaWfidades deIdistribuidor/ tecnicoinstabdor ...... Descripci6n del equipo ..........InspecciOn en el momentode la entrega ........Directricesde montaje ..........InterconexiOn d e los cablesde alimentaciOn ....... Terminales de controlde supervision........ConfiguraciOn d el sistema ..........Pruebadel conectador a utom_tico........
- Page 20 Guardeestas instrucciones Jnstrucciones importantes deseguridad ADVERTENCIA P eligrode descarga. L a instalaci6n de un cablede bajay altatensionen el mismoconductopodria GUARDE ESTAS INSTRUCCIONES ° Estemanual c ontiene provocarda_osmateriales, l esiones graveso inclusola instrucciones importantes quese debenseguirdurantela muerte. instalaci6n y el mantenimiento del equipo. •...
- Page 21 Descripci6n dei equipe El conectador e st_dise_adoparatransferirlas cargasseleccionadas de una instalaci6n residencial n ormalal suministrode reserva en casode una interrupci6n de alimentaci6n primaria.La cargase conectaal suministrode alimentaci6n de la red p_blica(norm@ o al suministrodom6stico de reserva (genera@r). E lconectador m6todo oprocedimiento. monitorizalastensionesde la red p_blicay del generador y conecta Par t anto, lainstalaci6n del s istema s61e _uede setllevada a...
- Page 22 interioro en el exterior.El m6duloremotosepuedeubicaren Directricesde montaje cualquierlugar entreel panelde distribuciOn principal y la carga Loscircuitosdel sistemadel conectador s e encuentran en unacaja conectada, ya seadentroo fuera.El moduloremotodebeestar tipo 3R seg_nNEIVlA, que esadecuada parausoen interiores y a la accesiNe paraque sele de servicio.Consultelas sugerencias o los intemperie.
- Page 23 Interconexi6n de toscabJes deatimenta;i6n AV/$O Conecte l osneutrales de losdospaneles dedistribuci@ principal ($1y $2) a laterminal delinterruptor detransferencia neutral (H1y H2). Todoslos canes @benser dd calibreadecuado y estarbiensujetos 10. Conecte la conexi6n a tierradel panel(T1and T2) de y protegidos por el conducto. T odoel cableado deberealizarse de distribuci@principal a l terminal"GND"(conexi@a tierra)del acuerdoconla totalidadde los c6digos,est_ndares y regulaciones conectador ( U1 or U2).
- Page 24 13 Conecte el conductordelterminal(H1or N2) neutrodel Cableado de control de supervision conectador a l terminalNEUTRAL ( neutro)del genera@r. Se puede utilizar un sistema de aire acondicionado con los Observe bs etiquetas dd pandde contrd dd generador para contactos de supervision en cualquiera de los terminales A-A identificarlosterminabs.
- Page 25 Terminalesde ;ontrot de supewisi6n La ilustraci@de la sigubnte p@inamuestraunainstabci@ compbtadd conectador. E Idise_orealvaria.La informationque aparece en bs iiustraciones es b sigubnte: Des@b red p_bfica A2 - Des@b red p_bfica Transformadores de corrbnte B2 ° Transformadores d ecorrbnte C ° Interruptores D °...
- Page 26 [_) lore N . c. __3PIT/R L_) b: :ND © {_i}ii{!i!iiiii_;, :_0©7@ 7VN:H_:i BRIGGSandSTRATTON,COM...
- Page 27 © Espa_ol...
- Page 28 Configuraci6n de1sistema AVISOExtremebs precauciones a l configurarinterruptores o b tarjetadecontrol podrh da_arse. Llevea cabolos sigubntespasosantesde porterenfur_cior_amiento • Utificeun I@izo unapiezapeque_a de plAsticoparaconfigurar eIsistema: el interruptor. • Si eI generador seinstab en unazonaregubrmente sujeta • NUNCA utiliceun destornillador n i ning_notto tipo de objeto a temperaturas debajode los40 °F (4 °C), sebccioneun met_licoparaconfigurarlosinterruptores.
- Page 29 Prueha del conedadorautom_tico ,_ ADVERTENCIA Peligrode descarga el6ctrica.Elequipo contbnealto voltajequepodriaprovocarda_os materiales, l esiones graves yio la muerte. Laspruebas deberealizarlas _ nicamente personal c alificado. NOutificeesteequipocon imprudencb ni descuide su mantenimbnto. Coloque el disyuntorde desconexi6n d eservido de la red p_bfica quealimenta al contactor del conectador e n la posici6n"OFF".
- Page 30 ControJes Puertade ta caja Paraabrir la puertadel conectador, q uitelos dostorniNosde apriete A excepci6n de la palanca de cancelaci6n manual, n o hayning_n (A) manual e xteriores y levantela puertacuidadosamente para controldel operarioporqueesteesun conectador a utom_tico. quitarla. Onicamente los profesionales c on Ncencia debenutiNzar l a Paracerrary asegurarla puerta, e mp_jelay ci6rrelahaciala caja.
- Page 31 Resoluci6nde probJemas Probierna _otivo EJ ¢onectador autom_tico no 1, Eldisyuntordel generador e st_abierto, 1. Reinicialice eldisyuntordelgenerador, transfier_ Ja¢onexi6n ai generador 2, Latensi6ndel generadorno esaceptable, 2. Consulte el manualdelgenerador, 3, Eidisyuntorde desconexi6n del generador e st_ 3. Reinicialice eldisyuntorde desconexi6n del abiertoen ei conectador, generadorenel conectador, Elconedador autom_tico no...
- Page 32 lnterruptordetrar)sferer)¢ia autom_tJ¢a Espe¢JfJ¢a¢Jones deI producto ModeIo871857 Corrbntede cargamaximanominalpor contactor. a 25°C(77°F) * ..............200 A Tensi@nominal c .a..............250 V Polos por contactor ................ Frecuencb ................60 Hz Valor n ominal deb corrbnte conexi0n a tbrra ....... 25,000A eficaces, s im6tdca Rangooperativonormal....
- Page 33 avecAC ave;,desqee_tions? Vou$ n'avez toinpour trouverde t'aide! Appetez: Lig irecte de g_n_ratficetamaison 800-743-4115lVl-F 8°5CT...
-
Page 34: Commutateur De Transfert
Nousvous remercions d'avoirachet6cecommutateur d e transfertautomatique de Briggs& StrattonPowerProducts®.Ceproduitest congupour etreutiliseavecdesgeneratrices de secoursresidentielles s pecifiques et risquede ne pasfonctionneravecdesgeneratrices ou desmodules_ distancefabriquespar d'autressocietes. A yezrecours_ un professionnel en electricitequalifiepour determiner I'applicabilite de ce materiel _ du materiel f abriquepar d'autressocietes, s i vousrespectez les directives d'utilisationet d'entretiende cemanuel, v ous pourrezvoustier _ votre systemedurantde nombreuses annees. - Page 35 Tabtedes mati res Directives@ s@urit6 importantes ......installation .......... ResponsaUfites d u propdetaire ......... Conseiis au propdetaire ..........ResponsaWfites du detaiflant/de Fentrepreneur char@de Hnstaflation..Description de I'equipement ........... Verification de la fivraison..........Directives d'assembbge..........Interconnexions du c_bbged'afimentation ........ Bornesdecommande de survdflance ........
-
Page 36: Conservez C Esdirectives
Conservez c esdirectives Directivesde s6curit6 importantes AVERTISSEI_ENT Risquede chocselectriques. L 'installation de c_bleshautetensionet basse tensiondansle meme CONSERVEZ CESDiRECTiVES - Cemanuelrenferme d'importantes conduitpourraitentra_ner la mort, desblessures graves directives qu'il faut suivredurantI%stallation et I'entretien de ou desdommages materiels. Nepassez pasde c_bleshautetensionet basse tensiondans le memeconduit_ moinsquela valeurnominale d'isolation Symhetes de s_curit6 et leur signification deTOUSlesc_blessoit de 600V. - Page 37 • 'v'erifiez lescodesfederaux t_rovinciaux e t Iocauxetaupres desautoritescompetentes suvousavezdesquestions concernant H nstallation. Nous s ommes sincerement reconnaissants que vous f assiez partie d enotre c lientele etnous a vons deploye tous losefforts S'ass.urer gue la generatrice n'est passurchargee par descharges selec_ionnees.
-
Page 38: Directivesd'assemblage
est recommand_ d'installer l e commutateur detransfertprosdu Directivesd'assemblage compteur d eI'alimentation d eservice, s oit _ I'int_rieur o u _ I'ext_rieur. Lescircuitsdu systemede commutateur d etransfertsetrouvent Le module_ distancepeutetreinstaflen'importeo_ entrele dansun bo_tier d etype NEMA 3R adapteauxinstallations panneau dedistributionprincipal o u sachargeconnectee, soit interieures ou exterieures. - Page 39 8, Raccordez lesfib d'alimentation du panneau de distribution Inter;onnexions du ;_blaged'atimentation principaldu premierpanneau (R1)de distributionaux bornes AVIS Uneinstallationinad6quate peutcauserdesdommages aux _< LOADCONNECTION (Vl)>_du commutateur d etransfert, cartesde circuit et r@uirebur dur@de vie utib. L1nstalbtionde 9, Raccordez lesfib d'alimentation du panneau de distribution cartesde circuit impdm6dansdescircuitsafiment6s causera des principaldu secondpanneau (R2)de distributionauxbornes dommages _ b carteet qui n'estpascouvertspar b garantb.
- Page 40 13. Branchez le conducteur _ partirde b borneneutre(N1or 6_blage de centrSJe N2)du commutateur d etransfertA la borne NEUTRAL d e la Un climatiseur peut atre utilis6 avec des contacts de g6n6ratrice. ConsuRez b s 6tiquettes du panneau decontr6b supervision sur les bornes A-A ou B-B. Les bornes A-A de la @n@atrice a u sujet de Hdentification desbornes.
- Page 41 Bornesde;ommande @ surveittan;e Pour@iter unfonctionnement i nd6sirable, n ousrecommandons que lescharges soient@r@sseulement a vecdesmodules distancede climatiseuribasse t ensionou de 50 A. N'utilisezpasles bornesde commande de surveillance du tableaude commande du commutateur d etransfert (le cas@h@nt). L'illustrationde la pagesuivantemontreI'installationcompleted'un commutateur d etransfert.La dispositionr@llede votre systeme seradiff@ente.
- Page 42 [_) IoiN. c. 0_1E _Jpl N.o. _,11PI T/: {_1 bl _ND © {_i}i7{:i!iii), _o7_ :_ ¸¸1ii¸i¸7 : t@lll!i t_ltglVtl M188::7@ >@©7@ 7VNIH_I _J_gHV_A BRIGGSandSTRATTON.COM...
- Page 43 Frangais...
- Page 44 Configuration du syst_me iiV/$ Faitespreuved'unegrandeattentionIorsdu r@lagedes commutateurs DiP cardesdommages au modulede commande Vousdevezproc@eraux6tapes suivantes avantd'utiliser pourraienten r6sulter. b systeme: • Utilisezun crayonou unepetitepieceen plastique pour r@ler • Si b @n6ratrice est instafl@dansunezoner@ufierement lescommutateurs DIP. soumise_ destemperatures inf6rbures_ 40 °F (4 °C), •...
- Page 45 Mise _ t'essai du cemmutateur de transfert autematique 0utre un levierd'arretmanuel, i l n'ya pasde commande R@lezle disjoncteurde I'alimentation de servicealimentantle manudb car le commutateur d e transfertest automatique. L a commutateur d etransfertsur ,<OFF>>. La@quence automatique commande manudb de prioritene peutetreeffectu@quepar du systeme decriteci-dessous commencer&...
- Page 46 Porte le holier $i veus t61£phenezpourobtenir de t'aide Ayezen mainles numeros de mo@leet de s6rieinscrits sur Pourouvrir le commutateur d e transfert,retirezlesdeuxvis £ 1'6tiquette d 'identification du commutateur d etransfertou du oreilleset soulevez (A) d61icatement la porte. module£ distancesi vousdevezcommuniquer a vecun centrede servicelocalpour un entretien ou uner@aration.
- Page 47 D6pannage Solution CaUSe Le¢ommutateur detransfett 1. Ledisjoncteurde ia g6n6ratrice est ouvert. 1. R_armez ie disjoncteur de ia g_n_ratrice. automatique n etranslate pas 2. Latensionde la g6n6ratrice n'estpasad6quate. 2. Reportez-vous a u manuelde lag6nSratrice. la g_n_ratrice 3. Ledisjoncteurde la g6n6ratrice est ouvertsur le commutateur de transfert.
-
Page 48: Caract6Ristiques Duproduit
Commutateurde transfert automatique Caract6ristiques duproduit Mod61e 071057 Oharge nominalema×imumparcontacteur b 25°0 (77°F) * ............200Amperes TensionnominaleO.A ............250 Volts P61es par contacteur ............... Frequence ................60 Hz Intensitede defailhnce nominale....... 25,000AmperesSymetriques RMS Plaged'u%sationnormale ..... - 28.8°0(°20°F)to40°0 (104°F) Poids ................
Need help?
Do you have a question about the 71057 and is the answer not in the manual?
Questions and answers