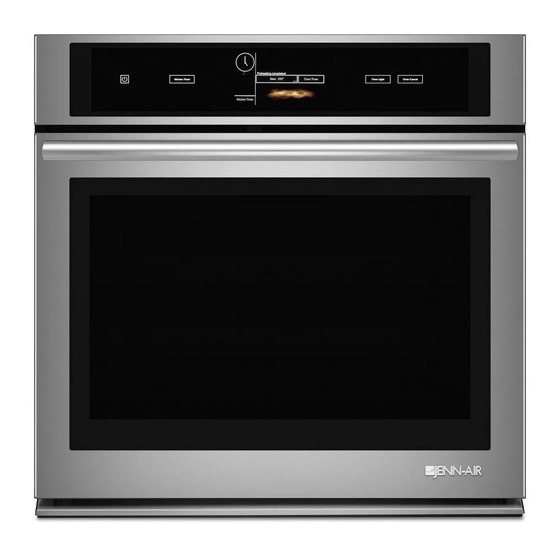
Jenn-Air JJW3430 Installation Instructions Manual
27" (68.6 cm) and 30" (76.2 cm) electric built-in convection microwave oven
Hide thumbs
Also See for JJW3430:
- Use & care manual (288 pages) ,
- Installation instructions manual (16 pages) ,
- Use & care manual (64 pages)
Table of Contents
Advertisement
Available languages
Available languages
Quick Links
INSTALLATIONINSTRUCTIONS
27" (68.6 CM) AND 30" (76.2 CM) ELECTRICBUILT-IN
CONVECTION MICROWAVE OVEN
. INSTRUCTIONSD'INSTALLATION
FOURA MICRO-ONDES ENCASTREELECTRIQUE
A CONVECTION DE 27" (68,6 CM) ET30" (76,2 CM)
Table of Contents/Table des mati_res
BUILT-IN MICROWAVE OVEN SAFETY ....................................... 1
INSTALLATION REQUIREMENTS
................................................
2
Tools and Parts ............................................................................
2
Location Requirements ................................................................
2
Electrical Requirements ...............................................................
3
INSTALLATION INSTRUCTIONS ..................................................
4
Prepare Built-In Microwave Oven ................................................
4
Make Electrical Connection .........................................................
4
Install Microwave Oven ................................................................
5
Complete Installation ...................................................................
6
SECURITE DU FOUR .&,MICRO-ONDES
ENCASTRE ................ 7
EXIGENCES D'INSTALLATION .....................................................
8
Outillage et pieces ........................................................................
8
Exigences d'emplacement ...........................................................
8
Specifications
electriques ............................................................
9
INSTRUCTIONS
D'INSTALLATION .............................................
10
Preparation du four a micro-ondes encastre ............................. 10
Raccordement
electrique ...........................................................
10
Installation du four a micro-ondes ............................................. 11
Achever I'installation ..................................................................
12
BUILT-IN MICROWAVE OVEN SAFETY
Your safety and the safety of others are very important.
We have provided many important safety messages in this manual and on your appliance. Always read and obey all safety
messages.
This is the safety alert symbol.
This symbol alerts you to potential hazards that can kill or hurt you and others.
All safety messages will follow the safety alert symbol and either the word "DANGER" or "WARNING."
These words mean:
You can be killed or seriously injured if you don't immediately
follow
instructions.
You can be killed or seriously injured if you don't follow
instructions.
All safety messages will tell you what the potential hazard is, tell you how to reduce the chance of injury, and tell you what can
happen if the instructions are not followed.
Model/ModUle
JMC2430
W10221385B
Advertisement
Table of Contents

Summary of Contents for Jenn-Air JJW3430
- Page 1 INSTALLATIONINSTRUCTIONS 27" (68.6 CM) AND 30" (76.2 CM) ELECTRICBUILT-IN CONVECTION MICROWAVE OVEN . INSTRUCTIONSD'INSTALLATION FOURA MICRO-ONDES ENCASTREELECTRIQUE A CONVECTION DE 27" (68,6 CM) ET30" (76,2 CM) Table of Contents/Table des mati_res BUILT-IN MICROWAVE OVEN SAFETY ........1 SECURITE DU FOUR .&,MICRO-ONDES ENCASTRE ....
-
Page 2: Installation Requirements
INSTALLATION REQUIREMENTS • If you are installing the junction box on rear wall behind the microwave oven, the junction box must be recessed and located in the upper or lower right or left corner of the Gather the required tools and parts before starting installation. cabinet;... - Page 3 2.5 cm) A. Upper cabinet B. Lower single oven* 30" (76.2 cm) models 27" (68.6 cm) models *Approved models: JJW3430, JJW2430, JJW2427, JJW2330, A. 30" (76.2 cm) min. cabinet A. 27" (68.6 cm) min. cabinet width width JJW2327 B. 19¼" (48.9 cm) from bottom of B.
-
Page 4: Installation Instructions
Electrical Connection • A time-delay fuse or circuit breaker is recommended. To properly install your microwave oven, you must determine the • Flexible cable from the microwave oven should be connected type of electrical connection you will be using and follow the directly to the junction box. - Page 5 Remove junction box cover if it is present. Fasten the bottom trim using 2 screws provided. Do not overtighten the screws. Install a UL listed or CSA approved conduit connector to the junction box..J. .J-J-_ A. UL listed or CSA approved conduit connector "\\ 5.
- Page 6 Comp 1. Check t hatallparts arenow installed. Ifthere isanextra part, 5. Touch START to resume a preset cycle. The microwave oven goback through t hesteps toseewhich step wasskipped. should begin cooking, and the microwave oven interior light should be on. 2.
- Page 7 SI CURITI DU FOURA MICRO-ONDES ENCASTRI Votre securite et celle des autres est tres importante. Nous donnons de nombreux messages de s_curit_ importants dans ce manuel et sur votre appareil m_nager. Assurez-vous toujours lire tous les messages de s_curit_ et de vous y conformer. Ce symbole d'alerte de s_curit_ vous signale les dangers potentiels de d_c_s et de blessures graves &...
-
Page 8: Exigences D'installation
EXIGENCESD'INSTALLATION Dans le cas de I'installation du boitier de connexion sur le mur a I'arriere du four a micro-ondes, le boitier de connexion csg®® doit _tre encastre et place dans I'angle inferieur ou superieur Rassembler les outils et pieces necessaires avant de commencer du placard, &... -
Page 9: Dimensions Duplacard
ModUles de 30" (76,2 cm) B. Four inf_rieur simple* A. 27" (68,6 cm) min. de largeur de A. 30" (76,2 cm) min. de largeur de *Modeles approuves • JJW3430, JJW2430, JJW2427, JJW2330, placard placard JJW2327 B. 19¼" (48,9 cm) entre le bas de la B. -
Page 10: Instructions D'installation
On recommande d'utiliser un fusible ou un disjoncteur Raccordement _lectrique temporis& Pour installer le four a micro-ondes correctement, il faut etablir le type de raccords electriques que I'on utilisera et suivre les Le c&ble flexible du four a micro-ondes doit _tre connecte instructions indiqu6es ici. - Page 11 Installer un connecteur de conduit (homologation UL ou CSA) Fixer la garniture inferieure & I'aide des 2 vis fournies. Ne pas sur le boitier de connexion. serrer excessivement les vis..J-J ..A. Connecteur de conduit (homologation UL ou CSA) 5.
- Page 12 1. Verifier que toutes les pieces sont maintenant installees. S'il Appuyer sur START (mise en marche) pour poursuivre le reste une piece, passer en revue les differentes etapes pour programme pr6regl6. Le four & micro-ondes doit commencer decouvrir laquelle aurait et6 oubliee. la cuisson et la lampe interieure du four a micro-ondes doit _tre allumee.
- Page 13 W10221385B 8/09 © 2009 Whirlpool Corporation. All rights reserved. Printed in U.S.A. Tous droits reserves. Imprime aux E.-U.


Need help?
Do you have a question about the JJW3430 and is the answer not in the manual?
Questions and answers