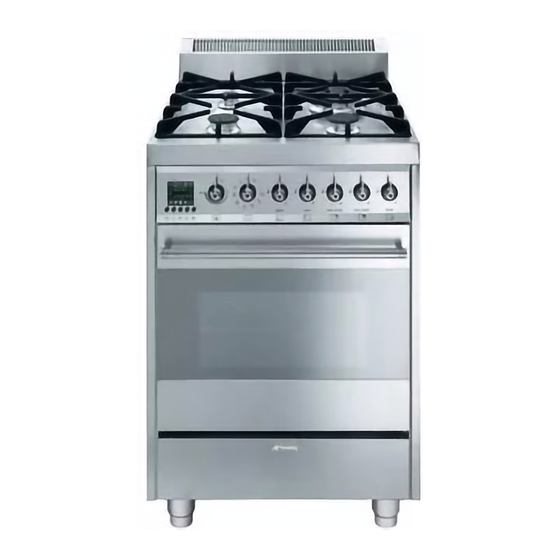
Smeg CE6GPXU Owner's Manual
Owners manual
Hide thumbs
Also See for CE6GPXU:
- Instructions for installation and use manual (30 pages) ,
- Function manual (4 pages) ,
- Instruction manual (14 pages)
Table of Contents
Advertisement
Quick Links
1. IMPORTANT SAFETY INSTRUCTIONS ................................................................................. 4
2. BEFORE USING YOUR RANGE FOR THE FIRST TIME ....................................................... 6
3. GETTING TO KNOW YOUR RANGE ................................................................................... 10
4. AVAILABLE ACCESSORIES ................................................................................................ 10
5. DESCRIPTION OF CONTROLS ........................................................................................... 11
6. USING THE OVEN ................................................................................................................ 13
7. USE OF THE COOKTOP ...................................................................................................... 18
8. FUNCTIONS GUIDE ............................................................................................................. 21
9. COOKING SUGGESTIONS AND TIPS ................................................................................. 23
10. CLEANING AND MAINTENANCE ....................................................................................... 27
11. EXTRAORDINARY MAINTENANCE ................................................................................... 31
WARNING:
precisely, a fire or explosion may result causing property damage, personal
injury or loss of life.
- Do not store or use gasoline or other flammable vapors and liquids near this
or any other appliance.
• Do not try to light any appliance.
• Do not touch any electrical switch.
• Do not use any phone in your building.
• Immediately call your gas supplier from a neighbor's phone. Follow the gas
supplier's instructions.
• lf you cannot reach your gas supplier, call the Fire Department.
- Installation and service must be performed by a qualified installer, service
agency or the gas supplier.
NOTE: THIS APPLIANCE MUST BE INSTALLED SOLELY AND EXCLUSIVELY BY A QUALIFIED
TECHNICIAN. ANY TECHNICAL PROCEDURES MUST BE CARRIED OUT BY AN AUTHORIZED
TECHNICIAN.
USER INSTRUCTIONS: these instructions contain user advice, a description of the controls and the
correct procedures for cleaning and maintenance of the appliance.
Table of Contents
If the instructions contained in this manual are not followed
WHAT TO DO IF YOU SMELL GAS
3
Advertisement
Table of Contents

Related Manuals for Smeg CE6GPXU


Summary of Contents for Smeg CE6GPXU
-
Page 1: Table Of Contents
Table of Contents 1. IMPORTANT SAFETY INSTRUCTIONS ................. 4 2. BEFORE USING YOUR RANGE FOR THE FIRST TIME ............6 3. GETTING TO KNOW YOUR RANGE ................... 10 4. AVAILABLE ACCESSORIES ....................10 5. DESCRIPTION OF CONTROLS ................... 11 6. USING THE OVEN ........................ 13 7. -
Page 2: Important Safety Instructions
Important Safety Instruction 1. IMPORTANT SAFETY INSTRUCTIONS READ AND SAVE THESE INSTRUCTIONS – Your safety and the safety of others are very important. We have provided many important safety messages throughout this manual and on the appliance. Read all the instructions before using the appliance and always obey all safety messages. RECOGNIZE SAFETY INFORMATION This is the safety alert symbol. - Page 3 Important Safety Instruction WHAT TO DO IF YOU SMELL GAS • Do not attempt to turn on or light any appliance. • Do not touch any electrical switch. • Do not use any phone in your building. • Immediately call your gas supplier from a neighbor's phone. Follow the gas supplier's instructions. •...
-
Page 4: Before Using Your Range For The First Time
Important Safety Instruction 3. BEFORE USING YOUR RANGE FOR THE FIRST TIME WARNING RANGE TIPPING HAZARD All ranges can tip Bodily injury can result Install the anti-tip device shipped with the range See installation instructions FAILURE TO FOLLOW THESE INSTRUCTIONS CAN RESULT IN LOSS OF LIFE OR SERIOUS BURNS TO CHILDREN AND ADULTS. - Page 5 Important Safety Instruction Never allow garments, potholders or other flammable materials to come into direct or indirect contact with burners until they have completely cooled. Use heat-resistant pot holders when placing items in the oven, shifting them, or removing them from the oven.
- Page 6 Important Safety Instruction To prevent burns, allow heating elements to cool before cleaning by hand. Clean only parts listed in this manual. During the self cleaning function the oven will become very hot. Prevent children from coming into contact with the oven. Remove all accessories from the oven before the self-cleaning cycle is engaged.
- Page 7 Important Safety Instruction NOTE: The California Safe Drinking Water and Toxic Enforcement Act requires the Governor of California to publish a list of substances known to the State of California to cause cancer, birth defects or other reproductive harm, and requires businesses to warn customers of potential exposure to such substances.
-
Page 8: Getting To Know Your Range
User instructions 4. GETTING TO KNOW YOUR RANGE RANGETOP CONTROL PANEL OVEN STORAGE COMPARTMENT 5. AVAILABLE ACCESSORIES Oven rack: for cooking food in pans, cakes, roasts or foods requiring light broiling. Pan rack: fits on top of the oven pan for food that could drip. Oven pan: catches the grease that may drip from foods cooked on the pan rack. -
Page 9: Description Of Controls
User instructions 6. DESCRIPTION OF THE RANGE CONTROLS All the range selectors and controls are located on the front panel. FRONT CONTROL PANEL Electronic Oven Rear left Rear right programmer function burner inner burner selector knob control knob control knob Oven Front left Front right... - Page 10 User instructions OVEN THERMOSTAT CONTROL KNOB (PT1) This knob is used to set the desired temperature in the oven. By turning the knob clockwise the display shows the temperature setting; the oven temperature range is between 120°F and 500°F depending on the oven function.
-
Page 11: Using The Oven
User instructions 7. USING THE OVEN 7.1 Warnings and instructions for use BURN HAZARD Keep the oven door closed when the appliance is in use. To prevent burns caused by steam escaping from the WARNING oven, open the door in two stages: partially open (approximately 5 cm or 2 inches) for 4- 5 seconds, long enough to permit the steam to escape, and then fully open. -
Page 12: Storage Compartment
User instructions 7.3 Storage compartment The storage drawer is located at the bottom of the range, underneath the oven. To open, pull the top of the drawer. NOTE: Never store flammable materials, such as rags, paper or similar items. The compartment is intended only for the storage of metal accessories for the range. -
Page 13: Selecting A Function
User instructions 7.6 Selecting a function An oven function can be selected by simply turning the PT2 right or left to the desired function. After selecting the oven function, use the PT1 knob to select the desired temperature. Conventional oven cooking is preceded by a preheating, which allows the oven to heat up to the desired oven temperature more quickly. - Page 14 User instructions If you wish to lengthen the cooking time, press button again. The oven will restart normal operation at the previously selected oven function. To turn off the oven, turn the PT2 knob to the 0 position. During semi-automatic timed cooking, the temperature setting and the oven function can be modified without changing the selected cooking time.
-
Page 15: Secondary Menu
User instructions 7.8 Secondary menu This appliance also has a concealed "secondary menu" allowing the user to: • Enable or disable the child lockout feature • Enable or disable the Showroom feature (which disables all the heating elements so that only the control panel works). -
Page 16: Use Of The Cooktop
User instructions 8. USING THE RANGETOP FIRE HAZARD Do not allow the burner flame to extend beyond the edge of the pan. WARNING Turn off all controls when not using the appliance. NOTE: Check that the burner rings, burner caps and grates are correctly positioned. Before lighting the rangetop burners check that the burner rings are correctly in place with their respective burner caps, making sure that the slots A in the burner ring are aligned with the spark electrodes and thermocouples. - Page 17 User instructions NOTE: If the flame goes out accidentally, the safety device will engage after about 20 seconds, shutting off the gas flow, even if the burner gas valve is open. REMEMBER: When the rangetop is in use, the entire range surface may become hot. 8.1.1 Power failure In the event of a prolonged power outage, you can manually light the surface burners.
- Page 18 User instructions 8.4 Cookware NOTE: Do not leave empty cookware on a hot surface or burner. Ideally, cookware should have a flat bottom, straight sides, a tight-fitting lid and medium-to-heavy thickness. Rough cookware finishes may scratch the rangetop. Aluminum and copper may be used in cookware as a core material or bottom.
-
Page 19: Functions Guide
User instructions 9. OVEN FUNCTIONS GUIDE ECO function Using the broiler and the bottom heating element together with the convection fan is particularly suitable for cooking small quantities of food, as it consumes less energy. Top and bottom heat: With the heat coming from the top and bottom at the same time, this option is particularly suitable for certain types of food. - Page 20 User instructions European convection with top and bottom heat: The combination of European convection with conventional static cooking allows several foods to be arranged simultaneously on different rack positions inside the oven and to cook very quickly and efficiently. Perfect for large volumes of food that need intense cooking. Defrost (default): Defrosting is aided when the convection fan is running and the top heating element is on, ensuring uniform distribution of low-...
-
Page 21: Cooking Suggestions And Tips
User instructions 10.COOKING SUGGESTIONS AND TIPS 10.1 Tips on using the oven accessories: Use only original SMEG oven pans. When the pan is in the oven, the handle must be facing the oven door. Push the pan right inside the oven. - Page 22 User instructions 10.3 Tips for cooking meat: Cooking times, especially for meat, can vary according to the thickness and quality of the food and to consumer preference. To save energy when roasting, we recommend placing the food in the oven while it is cold. We recommend using a meat thermometer when roasting meat.
- Page 23 User instructions 10.6 Recommended cooking chart OVEN FUNCTION RACK TEMP. °F TIME IN POSITIO MINUTES N FROM BOTTOM FIRST COURSES LASAGNA Top and bottom heat 395 - 410 50 - 60 OVEN-BAKED PASTA Top and bottom heat 395 - 410 MEAT Convection with top and ROAST VEAL...
- Page 24 User instructions FISH SALMON TROUT European convection 270 - 290 35 - 40 Convection with top and PIZZA 450 - 500 8 - 10 bottom heat BREAD European convection 340 - 360 25 - 30 European convection with MUFFINS 320 - 340 15 - 20 top and bottom heat DESSERTS...
-
Page 25: Cleaning And Maintenance
User instructions 11.CLEANING AND MAINTENANCE ELECTRICAL SHOCK HAZARD Before servicing the range, disconnect the appliance from the power supply. WARNING BURN HAZARD The oven can produce high temperatures that can cause burns. To prevent burns, allow the heating elements to cool before cleaning. Only clean the parts listed in this manual. - Page 26 User instructions 11.2.2Burner caps, burner rings and grates The burner caps and burner rings can be removed for easier cleaning. Wash them in hot water, ensuring that all deposits are removed, and put them aside for complete drying. NOTE: Replace the burner caps on the burner rings, making sure that the slots A are perfectly aligned with the projections on the burners.
- Page 27 User instructions 11.5 Self-cleaning cycle: automatic oven cleaning Self cleaning employs an automatic pyrolytic cleaning process which causes dirt to dissolve. Using the self-clean cycle, the inside of the oven can be effortlessly cleaned. When using the self-clean cycle for the first time, unpleasant odors may occur due to the normal evaporation of the oil y residue of manufacture.
- Page 28 User instructions 11.7 Programming the self-cleaning cycle 1 Use PT2 to select the self-cleaning function. 2 To start the self-cleaning cycle, press the button to set cycle duration. 3 Press the button to advance or decrease the cleaning time from a minimum of 1 hour 30 minutes to a maximum of 3 hours. 4 The word “CLEA”...
-
Page 29: Extraordinary Maintenance
User instructions 12.SPECIAL MAINTENANCE The oven may require special maintenance or replacement of parts subject to wear such as gaskets, bulbs, etc. The following instructions describe how to perform these minor maintenance operations. ELECTRICAL SHOCK HAZARD WARNING Before beginning maintenance operations, disconnect the appliance from the power supply.
Need help?
Do you have a question about the CE6GPXU and is the answer not in the manual?
Questions and answers