Table of Contents
Advertisement
Advertisement
Table of Contents

Related Manuals for JOBO PDC008 black


Summary of Contents for JOBO PDC008 black
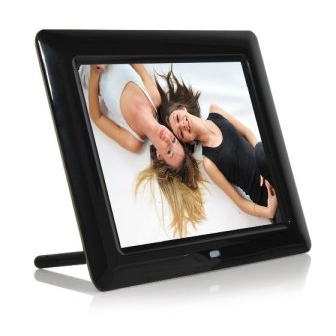
- Page 1 User Manual Version 1.0 Photo Display PDC008 black / white...
-
Page 2: Table Of Contents
Content Safety Instructions ....................3 Features ........................5 Installation ......................5 Fold out the display stand..................5 Insert SD/MMC card or USB flash drive ..............6 Connect the power adapter..................6 Definition of Control keys ..................7 Thumbnail view .....................7 Control buttons in Full Screen View ................8 Control Buttons in Slideshow Mode................8 Enter Photo Options in PAUSE mode .................9 Calendar .......................9... -
Page 3: Safety Instructions
Safety Instructions Caution with Power Cord Always pull the power cord out holding the plug. Never pull on the cord itself, and never pull out the power cord with wet hands as this may cause a short-circuit or electric shock. Do not place furniture, etc. - Page 4 The device is not set up on a thick carpet or bed; Direct heat sources (e.g. heating) do not affect the device; The device is not exposed to direct sunlight; Contact with sprayed and dripping water is avoided (place no objects filled with liquids, such as vases, on, above or near the device);...
-
Page 5: Features
To avoid the risk of electric shock, the case may only be opened by qualified service technicians. Only use a soft, dry and fluff-free cloth or brush. Do not use any detergents, alcohol, benzene, furniture cleaner or any similar products. ... -
Page 6: Insert Sd/Mmc Card Or Usb Flash Drive
Landscape format: Portrait format: Insert SD/MMC card or USB flash drive Take out the SD / MMC card from your digital camera; insert it into the SD / MMC card slot at the right side of photo frame following the correct direction. Connect the power adapter Connect the power adaptor to the AC power (110v-240v), the photo frame will start with the slideshow of your digital photos stored on the memory card. -
Page 7: Definition Of Control Keys
Definition of Control keys Function of control keys Play/Pause Play/Pause or confirm button Move Up Down Move down Left Move left Right Move right 6. Exit: Exit current menu 7. Menu: Return to previous menu REMOTE CONTROL 1. Setup: Enter Setup menu 2. -
Page 8: Control Buttons In Full Screen View
In the PHOTO mode, press the PLAY/PAUSE key to choose either the USB-disk or memory card. Then press PLAY/PAUSE key to confirm. Nine images will be shown on the screen for easy image selection. Thumbnail view Arrows: Use the four button of the control panel to select an image PLAY/PAUSE: Press the PLAY/PAUSE button of the control panel to view the selected image at full screen size. -
Page 9: Enter Photo Options In Pause Mode
displayed in a small window on the screen which will disappear automatically a couple seconds later. Enter Photo Options in PAUSE mode To enter the photo options menu you have to be in “PAUSE” mode not in slideshow mode. After pressing the MENU button there will be 5 icons displayed in the right hand corner of the display. -
Page 10: Setup Menu
Setup Menu Viewing options 1. Original The image is displayed in the aspect ratio of 4:3. 2. ZOOM Mode In ZOOM mode all images are displayed in the original aspect ratio but they are zoomed in. Transitions Effects You can choose form 17 different transitions effects for your individual slideshow: ... -
Page 11: On Screen Menu Language
On Screen Menu Language In this option you can select the on screen menu language. You can choose between: (1) English (2) French (3) Spanish (4) Italian (5) Dutch (6) German (7) Russian (8) Portuguese Date & Time Settings Date Settings Press PLAY/PAUSE to enter the date setting. -
Page 12: Package Content
If you want to make any claims under the warranty you are asked to contact the Technical Service of JOBO AG. You will be expected to quote the serial number of the JOBO product and may also have to submit proof of purchase to show that the warranty period has not yet elapsed. -
Page 13: Service
Service If you have any questions on or need help with our products please do not hesitate to get in touch with our Technical Service. JOBO AG Service Department Kölner Straße 58 D-51645 Gummersbach E-Mail: support@jobo.com Website: www.jobo.com Subject to technical modification!
Need help?
Do you have a question about the PDC008 black and is the answer not in the manual?
Questions and answers