Table of Contents

Related Manuals for Weslo PURSUIT S 2.8


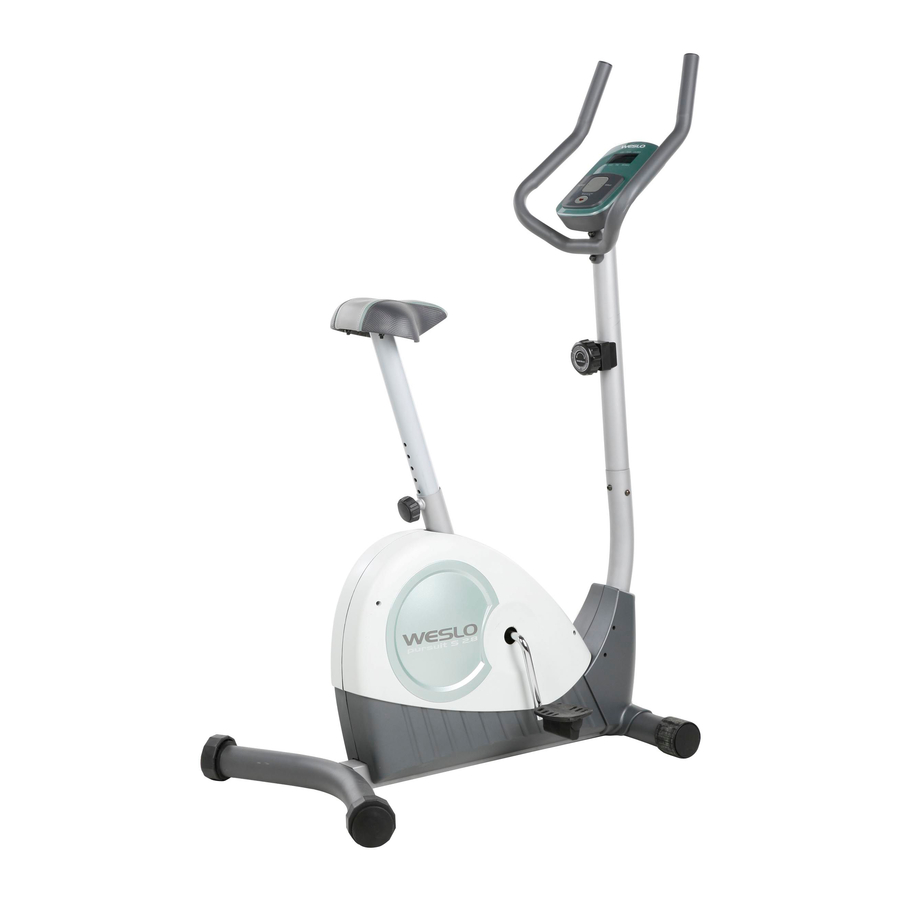
Summary of Contents for Weslo PURSUIT S 2.8
- Page 1 ® Model No. 83t .2t800.0 BIKE EXERCISER Serial No. User's Manual Write the serial number in the space above for reference. Serial Number Decal • Assembly • Operation • Maintenance • Part List and Drawing Sears, Roebuck and Co., Hoffman Estates, IL 60179...
- Page 2 TABLE OF CONTENTS WARNING DECAL PLACEMENT .............. IMPORTANT PRECAUTIONS ..............BEFORE YOU BEGIN ..............ASSEMBLY ................HOW TO USE THE EXERCISE CYCLE ............MAINTENANCE AND TROUBLESHOOTING ........... EXERCISE GUIDELINES ..............PART LIST ................EXPLODED DRAWING ..............ORDERING REPLACEMENT PARTS ..........Back Cover 90 DAY FULL WARRANTY ............
- Page 3 IMPORTANT PRECAUTIONS...
- Page 4 BEFORE YOU BEGIN Congratulations for selecting the new WESLO ® after reading this manual, please see the back cover PURSUIT S 2.8 exercise cycle. Cycling is one of the of this manual. To help us assist you, note the product...
- Page 5 ASSEMBLY Assembly requires two persons. Place all parts of the exercise cycle in a cleared area and remove the pack- ing materials. Do not dispose of the packing materials until assembly is completed. In addition to the included tools, assembly requires a Phillips screwdriver _, two adjustable wrenches Co_, and pliers _.
- Page 6 Insert the Rear Stabilizer (6) into the Frame (1). Attach the Rear Stabilizer with four M8 x 60mm Button Screws (30). Orient the Front Stabilizer (2) with the large holes facing the Frame (1). Attach the Front Stabilizer to the Frame with two M8 x 73mm Button Screws (33).
- Page 7 Turn the Seat Knob (9) counterclockwise remove it from the Frame (1). Next, insert the Seat Post (5) into the Frame. Adjust the Seat Post to the desired height and insert the Seat Knob through the indicated hole in the Frame into one of the adjustment holes in the Seat Post.
- Page 8 Attach the Handlebar (49) to the Upright (13) with two M8 x 65mm Button Bolts (50), two M8 Split Washers (42), and two M8 Locknuts (10). 7. The Console (16) requires four AA batteries (not included); alkaline batteries are recommended. Screw---- 1 Battery IMPORTANT: If the Console has been...
- Page 9 Identify the Left Pedal (24), which is marked with a "Left" sticker. Using an adjustable wrench, firmly tighten the Left Pedal counter- clockwise into the left arm of the Crank (21). Tighten the Right Pedal (not shown) clockwise into the right arm of the Crank. IMPORTANT: Tighten both Pedals as firmly as possible.
- Page 10 HOW TO USE THE EXERCISE CYCLE HOW TO ADJUST THE SEAT POST HOW TO ADJUST THE PEDALING RESISTANCE For effective exer- To increase the resistance of the cise, the seat Seatd should be at the pedals, turn the resistance knob proper height.
- Page 11 FEATURES OF THE CONSOLE HOW TO USE THE CONSOLE Turn on the console. SCAN PULSE CALORIES To turn on the console, press the On/Reset button or begin pedaling. The display will light for a moment; the console will then be ready for use. SPEED ThME DISTANCE...
- Page 12 To reset the display, press the On/Reset button. When you turn Indicators on the power, the scan mode will To pause the console, stop pedaling. If the time is be selected auto- displayed, it will flash. To continue your workout, matically.
- Page 13 MAINTENANCE AND TROUBLESHOOTING Inspect and tighten all parts of the exercise cycle reg- aligned with the Reed Switch. Loosen, but do not ularly. Replace any worn parts immediately. remove, the M5 x 15ram Screw (47). Then, slide the Reed Switch slightly closer to or away from the To clean the exercise cycle, use a damp cloth and a Magnet, and tighten the Screw.
- Page 14 EXERCISE GUIDELINES Burning Fat--To burn fat effectively, you must exer- cise at a low intensity level for a sustained period of time. During the first few minutes of exercise, your body uses carbohydrate calories for energy. Only after the first few minutes of exercise does your body begin to use stored fat calories for energy.
- Page 15 SUGGESTED STRETCHES The correct form for several basic stretches is shown at the right. Move slowly as you stretch--never bounce. 1. Toe Touch Stretch Stand with your knees bent slightly and slowly bend forward from your hips. Allow your back and shoulders to relax as you reach down toward your toes as far as possible.
- Page 16 NOTES...
- Page 17 NOTES...
- Page 18 PART LIST-- Model No. 831.21800.0 RO7OSA Key No. Qty. Description Key No. Qty. Description Frame 3/8" Nut Front Stabilizer U-bracket M8 Nut Lower Cable Front Stabilizer Cap M8 x 60ram Button Screw Seat Post Eyebolt Rear Stabilizer M6 Locknut Handlebar Cap M8 x 73ram Button Screw Rear Stabilizer Cap M8 x 15mm Button Screw...
- Page 19 EXPLODED DRAWING-- Model No. 831.21800.0 ROTOSA _,_._ >50 >34 "_ 32...
- Page 20 Your Home For repair--in your home--of all major brand appliances, lawn and garden equipment, or heating and cooling systems, no matter made it, no matter who sold For the replacement parts, accessories, and user's manuals that you need to do-it-yourself. For Sears professional installation of home appliances...
Need help?
Do you have a question about the PURSUIT S 2.8 and is the answer not in the manual?
Questions and answers