HAI Omni Pro II Owner's Manual
Omni pro ii automation control & security system
Hide thumbs
Also See for Omni Pro II:
- Installation manual (72 pages) ,
- Quick reference (2 pages) ,
- Installation manual (88 pages)
Table of Contents
Advertisement
Quick Links
Download this manual
See also:
Installation Manual
Advertisement
Table of Contents

Subscribe to Our Youtube Channel
Related Manuals for HAI Omni Pro II


Summary of Contents for HAI Omni Pro II
- Page 1 HOME AUTOMATION, INC Control & Security System Owner's Manual Includes the SIA CP-01 Control Panel Standard Features for False Alarm Reduction Document Number 20R00-2 Rev. 2.16 December, 2007...
- Page 2 Copyright © 2001-2007 Home Automation, Inc. All Rights Reserved...
-
Page 3: Table Of Contents
Contents INTRODUCTION............................1 Underwriter's Laboratories (UL) Listing ............................1 OVERALL DESCRIPTION .......................... 2 Console Operation ...................................2 Normal Top-Level Display ................................3 Display Menus ....................................3 Main Menu....................................4 Enable or Disable Console Beeper Locally at the Console......................4 Error Beeps ....................................4 Trouble Beeps.....................................4 Confirmation Beep..................................5 Cancel ......................................5 Time Out.....................................5 Areas ........................................5... - Page 4 Testing Your System..................................16 CONTROL ..............................17 Control Commands ..................................17 About UPB.....................................17 HAI Lighting Control (HLC) Format.............................18 About Rooms ....................................18 About Room Controllers................................18 Room Controller LED Indicators..............................18 About House Controllers ................................19 About Vizia RF Z-Wave ................................19 Vizia RF Z-Wave Format .................................19 About CentraLite ...................................20...
- Page 5 Programmable Energy Saver Modules (PESMs) ...........................35 Freeze Alarms ...................................37 Indoor and Outdoor Temperature .............................37 Outdoor Temperature................................38 Temperature Control of Appliances............................38 Temperature Alarms ..................................38 Humidity ......................................38 Status......................................39 Configuring HLC Devices ................................39 Configuring HLC Devices using an Omni Console......................39 Configuring HLC Devices using an OmniTouch Touchscreen ....................40 Setup Mode for HLC Devices..............................40 Event Log.......................................43 Show Events .....................................43...
- Page 6 Voice Dialer ....................................53 How the OmniPro II Voice Dialer Works..........................53 What the OmniPro II Voice Dialer Does ..........................53 What You Hear - If Your OmniPro II Calls You........................54 Entering the Code ..................................54 PC Access ......................................54 Built-In Ethernet Port..................................55 Controller IP Address, Port Number, and Encryption Key ......................55 OmniPro II Ethernet Connections..............................55 Connecting to Network via PC Access ............................55 Dynamic DNS....................................56...
- Page 7 Edit Program Condition .................................73 Program Control Conditions ..............................73 Program Security Mode Conditions............................73 Program Zone Conditions.................................73 Program Time Clock Conditions ..............................74 Program Other Conditions ................................74 Set Up Dial ....................................75 Telephone Access ..................................75 Answer Outside Call.................................75 Remote Commands...................................75 Rings Before Answer................................75 Dial Type ....................................75 My Phone Number..................................75 Dial Out Number 1 ...................................76 Dial Out Numbers 2-8................................76...
- Page 8 UNDERWRITER'S LABORATORIES REQUIREMENTS ..............89 FIRE ESCAPE PLANNING................................89 FEDERAL COMMUNICATION COMMISSION NOTICE: ..............90 CANADIAN INDUSTRY CANADA NOTICE..................91 APPENDIX A - DIAL OUT PLANNER..................... 92 INSTRUCTIONS TO CALLED PARTY............................93 APPENDIX B - TEXT DESCRIPTION CHARACTER CODES............94 APPENDIX C - VOICE DESCRIPTION CODES ..................95 NOTES ON CUSTOM PHRASES..............................98...
-
Page 9: Introduction
INTRODUCTION Thank you for purchasing your new OmniPro II automation system. You are about to enjoy a new feeling of security, comfort, convenience, and control. OmniPro II coordinates lighting, heating and air, security, scenes, and messages based on your lifestyle and schedule. -
Page 10: Overall Description
OVERALL DESCRIPTION Console Operation The console is designed with everything that is necessary for you to program and operate your OmniPro II control and security system. Because we feel that it is very important for you to feel comfortable with the operation of your OmniPro II, we recommend that you start by becoming familiar with your console. -
Page 11: Normal Top-Level Display
6- UP ARROW The Up Arrow key is used to scroll through menus and lists. The Up Arrow is used to scroll back through a list (for example, if you have already used the down arrow to scroll to an item, the Up Arrow will bring you back to a previous item). 7- CONSOLE LED The Console LED is used to indicate whether the security system is currently armed or disarmed. -
Page 12: Main Menu
When using the arrow keys to scroll through lists of areas, buttons, codes, temperature zones, units, or zones, only the named items are displayed. If no text description has been given to an item, it will be skipped over when scrolling through that list. You can still enter any item number to access it directly, and then scroll up and down among the named items. -
Page 13: Confirmation Beep
OmniPro II Maintenance Your OmniPro II controller and the consoles are designed to require very little maintenance. For smoke detectors, motion detectors, and other components not manufactured by HAI and follow maintenance procedures outlined by the manufacturer. Consoles can be cleaned using a mild detergent and a soft cloth. -
Page 14: Security System Operation
SECURITY SYSTEM OPERATION Disarming the Security System and Silencing Alarms Before going any further, you should know how to disarm your security system in the event that the alarm sounds. Turning the system OFF disarms the burglar alarm, resets emergency alarms, and silences all sirens and sounders. Press the OFF key. -
Page 15: Using Shortcut Keys
2 = NIGHT The NIGHT mode is used when you are asleep and everyone in your household is at home. In the Night mode, your doors, windows, and non-sleeping area (i.e. downstairs) motion detectors are armed. In the Night mode, there is no entry delay. The alarm system sounder will be activated immediately if any door, window, or non-sleeping area (motion detector) is tripped. -
Page 16: What Happens When You Arm The Security System
What Happens When You Arm the Security System To arm the system into one of the 6 security modes, from the security menu, choose the security mode and press the appropriate key (1 - 6), and then enter your user code number on the console keypad or use one of the Shortcut Keys as described. The console will beep once and the console LED will be set to red The controller will cycle power to reset smoke detectors The top line will display the security mode. -
Page 17: Bypassing Zones
Bypassing Zones 8 = BYPASS You can Bypass a zone that you do not want protected while the system is armed. Bypassing is also the only way that a tamper or panic zone can be disarmed. For example, if there is a liquor closet or gun case on a tamper zone, then you must bypass that zone to gain access to it. -
Page 18: What To Do When You Come Home
What To Do When You Come Home If you enter your home while the system is armed in the Day, Night Delay, Away, or Vacation mode using an entry door: • The console beeper comes on and beeps 4 times per second. •... -
Page 19: Fire Alarm Activated
Fire Alarm Activated When the fire alarm is activated by the smoke/fire detector(s), the alarm responds exactly as described under Burglar Alarm Activated, except: • The console display reads, "FIRE ALARM! ZONE NAME TRIPPED". • The sounder will activate in a 3 pulse temporal pattern to distinguish the fire alarm from the burglar alarm. The fire alarm takes priority over the burglar alarm, however, if a gas alarm is already active, it will not override the gas alarm. -
Page 20: Police Emergency
Police Emergency When the 1 key and the 3 key is pressed simultaneously, the Police Emergency alarm is activated. This alarm operates exactly the same as described for Burglar Alarm Activated except: • The console display indicates: "BURGLARY! - POLICE EMERG TRIPPED". •... -
Page 21: Trouble Indications
Trouble Indications The OmniPro II constantly monitors the alarm zones and several internal matters and will alert you if it detects trouble. The particular trouble is indicated on the bottom line of the display and a trouble signal is given by beeping the console beeper continuously, 2 beeps per second. -
Page 22: Manager Code
Manager Code The Manager codes can arm/disarm the security system in assigned areas, during assigned times. The Manager code can access functions that are code protected in High Security mode. Managers may also access the system from an outside telephone line. User Code User codes can only be used to arm and disarm the security system in assigned areas when the time assigned to that code is valid. - Page 23 If the ' 0 ' (ALL) key had been selected, the display will show: DISARM ALL AREAS ENTER CODE: #=AREA As the four-digit code is entered, "X" characters are echoed after the "ENTER CODE:" prompt. If the Master code or a valid code is entered, the console will beep one time and Area 2 will be disarmed. Even if Auto Bypass is enabled, the system will not arm another area if any zones in that area are not ready.
-
Page 24: Testing Your System
Testing Your System HAI recommends testing your system on a weekly basis to ensure that you are fully protected. Notify your Central Station that you intend to test the system. To test the siren, press the 1 and 3 keys simultaneously. -
Page 25: Control
X-10 compatible modules (X-10, X-10 Pro, Leviton, PCS, ACT, Lightolier, etc.) for lights and small appliances. • HAI Communicating Thermostats for controlling Heating, Ventilation, and Air Conditioning Systems. • Programmable Energy Saver Modules (PESM) for central heating and air conditioning systems. -
Page 26: Hai Lighting Control (Hlc) Format
9-16, Room 3 = Units 17-24, etc.). Each room can consist of a maximum of 8 HLC devices, configured as follows: Up to 7 HAI UPB™ Wall Switches, Dimmers, and/or Modules (for controlling up to 7 lighting loads in a room or area) -
Page 27: About House Controllers
When all of the lighting loads in a room are turned off, the “Off” indicator is illuminated. If any of the lighting loads in a room are turned on at an HAI UPB™ Wall Switch or Dimmer, the “On” indicator will illuminate and the “Off”... -
Page 28: About Centralite
The first unit number in each room (i.e. 1, 9, 17, 25, etc.) is reserved for controlling the room. The name for this unit should reflect the room name (e.g. Kitchen, Great Room, Theater, etc.). Vizia RF or Z-Wave lighting devices cannot be associated with these unit numbers. -
Page 29: About Alc
Compose, UPB (open UPB format where you can use the programming capability in the OmniPro II controller to communicate with the UPB network), Lutron RadioRA, CentraLite, or HAI Lighting Control (HLC). Different lighting devices can not share the same House Code. However, different lighting devices can coexist on an OmniPro II system as long as they are on separate House Codes. -
Page 30: Unit Numbers
Unit Numbers OmniPro II systems have 511 total Unit Numbers. They consist of HLC, UPB, Z-Wave, CentraLite, RadioRA, ALC, Compose, and X-10 module unit numbers, hardwire voltage output unit numbers, and internal flag unit numbers as follows: OmniPro II Module / Output Unit Numbers Unit Numbers HLC or Z-Wave Room 1 and 2, UPB Unit ID 1-16, Z-Wave Node ID 1-16, CentraLite loads 1-16, 1 - 16... -
Page 31: Scrolling Through Names
Scrolling Through Names The OmniPro II stores names for Units, Zones, Buttons, Codes, Temperatures, and Messages so that you don't have to remember that "UNIT 5" is the "DEN LIGHT" and "ZONE 1" is the "FRONT DOOR". In general, any time you enter a unit, zone, button, code, temperature, or message number, you can press the down arrow key to display its name, then use the up and down arrow keys to scroll through the list of other names. -
Page 32: Controlling Individual Lighting Loads In An Hlc Room Or Upb Units
Each lighting scene can also be set or easily changed using the pushbuttons on the HAI UPB™ 6-Button Room Controller, as follows: Step Operation Press the desired pushbutton on the HAI UPB™ 6-Button Room Controller to activate the current scene (preset lighting level) in each of the HLC devices. -
Page 33: Controlling Individual Lighting Loads In An Vizia Rf Z-Wave Room
Press 0 (OFF) to turn the selected room off (all lighting loads in the room are turned off). Press 1 (ON) to turn the selected room on (all lighting loads in the room are turned on). Press 2 (A) to set all of the lighting loads in the selected room to their preset levels for Scene A. Press 3 (B) to set all of the lighting loads in the selected room to their preset levels for Scene B. -
Page 34: Controlling Radiora Units
Controlling RadioRA Units Entry Lights ↓ 0=OFF 1=ON 2=DIM 3=BRT Entry Lights ↑ 4=LVL 5=RMP 9=TIM #=STA Press 0 (OFF) to turn the selected unit off Press 1 (ON) to turn the selected unit on. 2 (DIM) does not affect RadioRA units. 3 (BRT) does not affect RadioRA units. -
Page 35: Ramp Command (Alc)
Ramp Command (ALC) When ALC Switch Modules are being used, it is possible to ramp the lighting level of an ALC Dimmer Switch to a new level at a selectable ramp rate. Only ALC Dimmer Switches respond to the Ramp command. Press the 5 (RAMP) key to select the ramp command. -
Page 36: Timed Commands
Timed Commands The timed commands allow a units to be turned on or off for a specified period of time. The unit may be turned On for 1-99 (minutes or seconds), or 1-18 hours, then Off; or turned Off for 1-99 (minutes or seconds) or 1-18 hours, then On. Lighting units (1-256) may also be dimmed or brightened for a specified period of time. -
Page 37: Controlling Outputs
Controlling Outputs The OmniPro II has eight outputs that can be used to switch relays. Outputs 1-8 are controlled as Unit Numbers 385-392, respectively. If the Interior Horn is configured as a "General Purpose" output, Unit Number 393 is used to control the output. If the Exterior Horn is configured as a "General Purpose"... -
Page 38: Leviton Scene Control
Leviton Scene Control OmniPro II supports Leviton Scene Control (a feature found in certain Leviton Switches). There are 256 Scenes that can be set and executed. The Leviton Switches are divided into "lighting groups" of four units each. Each of these lighting groups can be set to four different Scenes. -
Page 39: Scene Off Command
Scene Off Command Once the Scenes have been sent, press the 0 (OFF) key to command the four units in that Scene to turn off. Notes: 1. When sending Scene Commands, the controller must be configured to allow Extended Code transmissions on each House Code affected by a Scene. -
Page 40: Executing Phantom Buttons
Executing Phantom Buttons OmniPro II can turn on and turn off each of the 17 possible Phantom Buttons. Phantom Buttons must be pre-programmed into the RS-232 interface or Chronos. Phantom Button 16 is always assigned to “All On” (if the Phantom button is turned on or off) and Phantom Button 17 is always assigned to “All Off”... -
Page 41: Buttons
The HAI Communicating Thermostats are digital heating and cooling thermostats that can be controlled be the user and by remote control. There are models for conventional single stage (gas or electric), heat pumps, and multi stage heating and cooling systems. -
Page 42: Hai Rc-Series Thermostats
Press the ' # ' key when the desired temperature zone is shown. Press the ' 0 ' key to select all HAI Thermostats. This is a simple way to broadcast the new Heat or Cool setting or change the system mode, fan mode, or hold mode of all HAI thermostats in your system. -
Page 43: Programmable Energy Saver Modules (Pesms)
Programmable Energy Saver Modules (PESMs) The PESM is used when you are have any thermostat, other than a HAI Communicating Thermostat, and would like to control your heating and cooling system with the OmniPro II system. The PESM is a temperature sensor and control relay in a small enclosure that mounts near your central heating, ventilation, and air conditioning (HVAC) system thermostat. - Page 44 The following control actions are allowed on PESMs: • Turn Energy Saver On and Off • Turn Energy Saver On and Off for a specified time • Set heating setpoint • Set cooling setpoint You can turn the energy saver on, off, use a timed on/off, and change the Heat and Cool temperatures from the console or by telephone.
-
Page 45: Freeze Alarms
Downstairs ↓ 0=OFF 1=ON 2=HEAT Downstairs ↑ 3=COOL 9=TIME #=STAT ENTER TIME MINUTES (1-99) #=H/M/S Downstairs FOR 15M ↓ 0=OFF 1=ON The current status of a temperature zone may be displayed by selecting ' # ' (STAT) key from the main temperature menu. The status display differs depending on the temperature zone type. -
Page 46: Outdoor Temperature
When a temperature sensor is selected from the list of temperature devices, you may set a “Low” and “High” setpoint for activating programs or alarms. Enter the desired temperature then press the ' # ' key. Upstairs 2=LOW 3=HIGH #=STAT For negative temperatures (-1 to -40 ), press the ' # ' key prior to entering the temperature to make the number negative. -
Page 47: Status
When configuring HLC devices using an Omni console or OmniTouch touchscreen, each device (unit number) must first be assigned a name in the OmniPro II controller. HAI recommends that you first configure your OmniPro II controller (naming all of the HLC units) using the HAI PC Access Software, and then download the information to the OmniPro II controller. -
Page 48: Configuring Hlc Devices Using An Omnitouch Touchscreen
Operation Tap the rocker switch quickly 5 times. The HAI UPB™ Wall Switch or Dimmer will flash the lighting load one time and blink its LED blue to indicate that it is in Setup Mode. Note: The switch will automatically exit Setup mode after 5 minutes. To manually exit Setup mode, tap the switch quickly 2 times. - Page 49 2 = ZONE The Zone Status menu allows you to view and scroll through the status of each zone input. To enter the Zone menu, from the Status menu, press the 2 (ZONE) key on the console keypad. The system will display: Front Door SECURE ↓...
- Page 50 The next series of displays shows the current analog reading for each security zone input. The displays show the readings for zones 1-176. 1=147 2=148 3=147 4=146 5=146 6=147 THROUGH 175=148 176=147 ↑ Normal readings for zones are between 137 - 157 when secure. If Zones 1-4 are configured as Fire or Gas zone, normal readings are between 26 - 43 when secure.
-
Page 51: Event Log
Event Log The Event Log records the 250 most recent significant security system Events (happenings) and trouble conditions in the system. When a new event occurs, the oldest one is lost. The following Events, along with the time and date of their occurrence are recorded in the Event Log when they occur: •... -
Page 52: Messages
↑ Record Memo Message Note: To Record the memo message using this key, the HAI Two-Way Audio Module (with a microphone) must be installed. To record a new voice memo message, press the 2 (RECORD) key. OmniPro II will say, "Record Message". At the beep, record your eight-second message. OmniPro II will beep a second time at the end of the eight seconds, which signifies the end of the record process. -
Page 53: Show Message
Say Message Note: To Say a message, the HAI Two-Way Audio Module (with a speaker) must be installed. The 4 (SAY) key allows the controller to say the selected voice message over a speaker. This voice message can be an audible reminder of special events and occasions. -
Page 54: Send Message (Pro-Link)
Send Message (Pro-Link) The 6 (SEND) key allows you to send any of the text messages through the Pro-Link serial port. You are first prompted to specify the desired serial port. SERIAL PORT: The built-in serial ports (J1-J5) on the controller are assigned to Serial Port 1 - Serial Port 5, respectively. Serial port 6 is a Serial Interface Module connected to the Expansion port on the controller. -
Page 55: Telephone Control
TELEPHONE CONTROL Telephone Interface Your OmniPro II is equipped with a built-in telephone response feature that allows you to control and access the status of your system from any Touch-Tone phone. The OmniPro II actually talks to you using a digital recording of an actual human voice, so the sound is incredibly life like. You send commands to the OmniPro II using the keys of your Touch-Tone telephone. -
Page 56: Phone Access Denied - Remote Lockout
Phone Access Denied - Remote Lockout The OmniPro II has a remote lockout feature to discourage youngsters (and adults who act that way) from trying to access your system. If four invalid codes are entered, the system will hang up and a one-hour lockout period will begin. During the lockout period, the OmniPro II will not answer a call after any number of rings, which should discourage the caller. -
Page 57: Control
1 - Control Press 1 from the MAIN MENU to get to the CONTROL menu. If voice descriptions have been programmed, after a three-second delay, the system will begin reading from the list of units (OmniPro II will say the unit number then its description). The OmniPro II will read three units, then say, "PRESS POUND TO CONTINUE."... -
Page 58: Status
Press the temperature zone you wish to control, then press #. Press the ' 0 ' key to select all HAI Thermostats. This is a simple way to broadcast the new Heat or Cool setting or change the system mode, fan mode, or hold mode of all HAI thermostats in your system. -
Page 59: Message
This command allows you to record and verify the voice memo message, allows you to record and play custom messages (phrases), and allows you to record and verify your address. If an optional HAI Two-Way Audio Module is being used, this command also allows paging and listening to the premises. -
Page 60: Playing And Recording The Address
To play one of the custom phrases, press the 6 key. " PLAY PHRASE: ENTER PHRASE NUMBER, THEN POUND." Press the phrase number (1-60) you wish to play, then press #. "PHRASE IS: (OMNIPRO II PLAYS PHRASE)." To record one of the custom phrases, press the 7 key. "... -
Page 61: Emergency Dial-Out
Delay to allow time for the central station to call the premises. If the HAI Two-Way Audio Module is being used, after the transmission of the alarm to the central station, the operator can talk and listen to people and sounds at the premises. -
Page 62: What You Hear - If Your Omnipro Ii Calls You
What You Hear - If Your OmniPro II Calls You When you pick up the phone and say something, the OmniPro II will say one of the following, depending on type of alarm: BURGLAR ALARM FIRE ALARM AUXILIARY ALARM TEMPERATURE ALARM WATER ALARM GAS ALARM SILENT ALARM... -
Page 63: Built-In Ethernet Port
These Setup items can only be assigned and changed from an HAI console. These items can not be assigned or changed via PC Access; although the IP address and port number may be viewed via PC Access - See Set Up Miscellaneous. -
Page 64: Dynamic Dns
If the controller is connected to the Internet via a dynamic IP address, to locate and communicate with the controller from remote locations over the Internet using HAI PC Access, you must subscribe to a Dynamic DNS (Domain Name Service). Dynamic DNS is a service that maps your dynamic (changing) IP address to a static (permanent) hostname, allowing you to access your OmniPro II controller over the Internet using your static hostname instead of an IP address. - Page 65 To connect to an OmniPro II controller from the Internet using HAI PC Access, under Configure >> Network enter the public IP address: To connect to an OmniPro II controller on a local network using HAI PC Access, (i.e. 134.42.112.8) under Configure >>...
-
Page 66: Setup
SETUP Configuration and Advanced Control Programming (ACP) The Setup menu is used to configure operating parameters, program your system to do its automated control and security functions using ACP, and give text and voice descriptions to all of your zones, units, buttons, codes, temperatures, and messages. To enter the Setup menu, from the top-level display or from the main menu, press the 8 (SETUP) key on the console keypad. -
Page 67: Access Areas
Access Areas After an authority level has been entered, you will be prompted for access areas for the user. Specify which area(s) (if part of your system) the user has access to by pressing the number for each area. The display will show all areas that have been enabled for that user. After the area(s) is/are selected, press the ' # ' key. CODE 2 AREAS: 0=CLR You can specify the access (on/off) times for the code;... -
Page 68: Advanced Control Programming (Acp)
Unit Numbers: On, Off, On for time, Off for time, Dim, Brighten, Dim for time, Brighten for time, Level, and Scene • Settings for HAI Communicating Thermostats • PESM control: On, Off, On for time, Off for time, and Heat and Cool setback temperatures •... -
Page 69: Add Programs
1 = Add Programs The 1 (ADD) key is used to add new automation programs to the system. When you press the 1 (ADD) key, the Edit Program menu is displayed which allows the various parts of a program to be specified - See Edit Program. You may edit each part of the program as specified under Edit Program. -
Page 70: Delete All Programs
The first program is displayed once the down arrow is pressed. The top line displays the time or button/event that activates the program and any condition that must be true for the program to activate. The bottom line shows the command to execute when the program is activated. -
Page 71: Edit Programs When
Edit Programs When Selecting the 1 (WHEN) key, from the Edit Program menu, allows the time or button/event that activates the program to be changed. The display shows: EDIT WHEN 1=TIMED 2=BUTTON Times Programs Selecting 1 (TIMED) sets the program to be activated at a specific time of day. You are prompted to enter the time and date or days of week. -
Page 72: Button And Event Programs
Button and Event Programs Selecting 2 (BUTTON), from the "Edit When" menu, sets up a program to be activated when a macro button is executed or an event occurs. The user is prompted to specify the button/event that activates the program: BUTTON: ↓... -
Page 73: Security Mode Event Buttons
Corresponding Switch Table UPB 6-Button UPB 8-Button RadioRA ALC 4-Button StarLite Switch OmniPro II Keypad Keypad Master Control Keypad On Button 1 or E Off Button 2 or F 3 or G 4 or H 5 or I 6 or J 7 or K 8 or L Security Mode Event Buttons... -
Page 74: Zone Event Buttons
Goto” (where the result of the Goto command is “0”) message is received. Using HAI PC Access Software, you can create a program that uses “When Link Fade Stop” as the trigger. When this trigger is used, the program will execute when the “Link Fade Stop” message is received. -
Page 75: Alarm Event Buttons
Alarm Event Buttons Pressing the 5 (ALARM) key allows you to specify an event button activated upon the occurrence of an alarm. You are first prompted to select the type of alarm: SELECT ALARM TYPE ↓ ANY TYPE The arrow keys are used to select from a list of alarm types: •... -
Page 76: Message Event Buttons (Pro-Link)
The arrow keys are used to select from a list of event buttons: • WHEN ENERGY LO • WHEN ENERGY MID • WHEN ENERGY HI • WHEN ENERGY CRIT • WHEN PHONE DEAD • WHEN PHONE RING • WHEN PHONE OFFHK •... -
Page 77: Edit Program Command
Edit Program Command Selecting 2 (CMD), from the Edit Program menu, allows the commanded action for the program to be specified. The following menu is displayed: 1=CONTROL 2=SECURITY ↓ 3=BUTTON 4=ALL 5=TEMP 6=ENERGY ↑ 8=MESSAGE After the command is specified, the display returns to the Edit Program menu: Program Control Commands Press the 1 (CONTROL) key to command lights and appliances. -
Page 78: Unit Toggle Command
WHEN FRONT FOYER SW1 PRESSED: FRONT FOYER TOGGLE UPB Blink Command Using HAI PC Access Software, you can create programs to blink any UPB device. If you are using HLC, you can not blink an HLC room (i.e. the 1 or 9 unit in an HLC house code);... -
Page 79: Program Button Commands
Raise or Lower Temperature Command Using HAI PC Access Software, you can create programs to raise or lower temperatures by a specified number of degrees (between 1-45 degrees Fahrenheit or 0.5 – 25.0 degrees Celsius). When using this command, specify either raise or lower the heat or cool temperature setpoint and number of degrees. -
Page 80: Program Message Commands
Display Message without Beeping / Without Beeping or Flashing the LED Using HAI PC Access Software, when creating programs to display a message on a console or touchscreen, you can specify if the message will be displayed “With Beep” (the console will beep 5 times), “No Beep” (the console will not beep, but the LED will flash), or “No Beep or LED”... -
Page 81: Edit Program Condition
Edit Program Condition Selecting the 3 (&COND) key, from the Edit Program menu, allows the condition for the program to be specified. The condition is optional in all program lines. This condition must be true when the program time or event occurs for the program to executed. Note: Two (2) conditions can be specified in each program line;... -
Page 82: Program Time Clock Conditions
The zone will be displayed and you will be prompted for the state of the zone: IF Front Door: 0=SECURE 1=NOT RDY Program Time Clock Conditions Select the 9 (TIME) key to specify that the program should only execute if a specified Time Clock is either On or Off. The display prompts you for the Time Clock number: ENTER TIME CLOCK: Enter the Time Clock number followed by the ' # ' key. -
Page 83: Set Up Dial
Set Up Dial The Set Up Dial menu is used to configure all of the telephone related items for the OmniPro II. To enter the Set Up Dial menu, from the Setup menu, press the 4 (DIAL) key. Use the arrows to scroll through the items. For each item, the top line displays a description of the item and its current setting. -
Page 84: Dial Out Number 1
Dial Out Number 1 Dial Out Number 1 is one of the 8 numbers that are stored in the system. In the event of an alarm, these numbers are dialed in the order that is set up in the Dial Out Order for the particular type of alarm. Dial out numbers 1 - 8 have On and Off times and days, so that no time is wasted calling you at the office at night or on a Sunday if the alarm is activated. -
Page 85: Set Up Arming
Set Up Arming To configure different arming and disarming options, from the Setup menu, press the 5 (ARM) key. Entry Delay The Entry Delay is the time, in seconds, that you have to disarm the alarm system after entering your home. The Entry Delay only applies to the entry/exit zone (e.g. -
Page 86: Entry/Exit Chime
Entry/Exit Chime When Entry/Exit Chime is set to Yes, the console(s) will beep once when a door on an entry/exit zone is opened, even if the alarm system is off. This lets you know when someone enters and leaves. The default setting for Entry/Exit Chime is Yes. Perimeter Chime When Perimeter Chime is set to Yes, the console(s) will beep once when a window or any other perimeter zone is opened, even if the alarm system is off. -
Page 87: Set Up Miscellaneous
Set up Miscellaneous To configure Miscellaneous items in the system, from the Set Up menu, press the 6 (MISC) key. High Security Mode In High Security Mode, the Master or Manager code is always required to do the following functions: •... -
Page 88: House Codes 1-16 Format
House Codes 1-16 Format House Codes 1-16 can be configured to use the Standard (Preset Dim Command), Extended Code (Level Command), Lightolier's Compose Mode, UPB (open transmission format), Lutron’s RadioRA transmission format, HAI Lighting (HLC), and CentraLite transmission format. HC 1 FORMAT:... -
Page 89: Time Clocks
Time Clocks There are three Time Clocks in the system are used to conditionalize programs. They are used solely to define time periods during the week when certain programs should be enabled or disabled to execute. TIME CLOCK 1 ON TIME CLOCK 1 OFF Specify the on and off times for each Time Clock - See Set Up Codes. -
Page 90: Daylight Savings
It is not necessary to alter the time zone to compensate for daylight savings time, the OmniPro II will automatically adjust its calculations for sunrise and sunset, and time when daylight savings time begins and ends. LATITUDE: 0-60 LATITUDE N/S: 1=NORTH 2=SOUTH LONGITUDE: 0-180... -
Page 91: Controller Ip Address
Controller IP Address The controller’s local network IP address is used to identify the OmniPro II controller on the network. To view and assign the controller’s local network IP address, from the Set Up menu, press the 6 (MISC) key. Using the down arrow key ( ↓... -
Page 92: Set Up Names
Set Up Names The system can be set up to display descriptive names such as "FRONT DOOR", "JOHN'S BEDROOM", or "PORCH LIGHT" for zones, units, buttons, codes, temperatures, areas, and messages. These names are displayed instead of the unit, zone, button, code, temperature, area, and message number that is normally displayed. -
Page 93: Set Up Address
Set Up Address The final setup item is accomplished over the telephone. This is the address that the system says when it dials out in an emergency. Your voice will be recorded on computer chips in the OmniPro II controller and saved to be played back in the emergency message when the system dials out for an alarm. -
Page 94: Audio Control
Unit numbers 457-464 are allocated for the Audio Source names. These names should match the names of each Audio Source in your audio distribution system. For example: Audio Distribution System HAI OmniPro II Source 1 AM/FM Tuner Unit 457... -
Page 95: Programming Audio Commands
Master Bath Programming Audio Commands Using HAI PC Access Software, you can create programs to control Audio Zones, Volume, Audio Sources, and simulate Key Presses on the audio system keypad or remote control. The Audio Zone Command allows you to create programs to select Off, On, Mute Off, and Mute On for individual Audio Zones or for All Audio Zones. -
Page 96: Table 1 - Audio Commands
Table 1 - Audio Commands Code HAI Hi-Fi Russound NuVo NuVo Grand Concerto Xantech Speakercraft Power Power Power Power Power Source select 1 Source step Source step Source step Source step Source select 1 Source select 2 Vol up Source select 2... -
Page 97: Underwriter's Laboratories Requirements
UNDERWRITER'S LABORATORIES REQUIREMENTS For a complete list of requirements and restrictions when installing the OmniPro II panel in a UL Listed system, refer to the Underwriter's Laboratories Requirements section of the Installation Manual (20I00-2). When used in UL Listed Installations, the following items apply: The “High Security Mode”... -
Page 98: Federal Communication Commission Notice
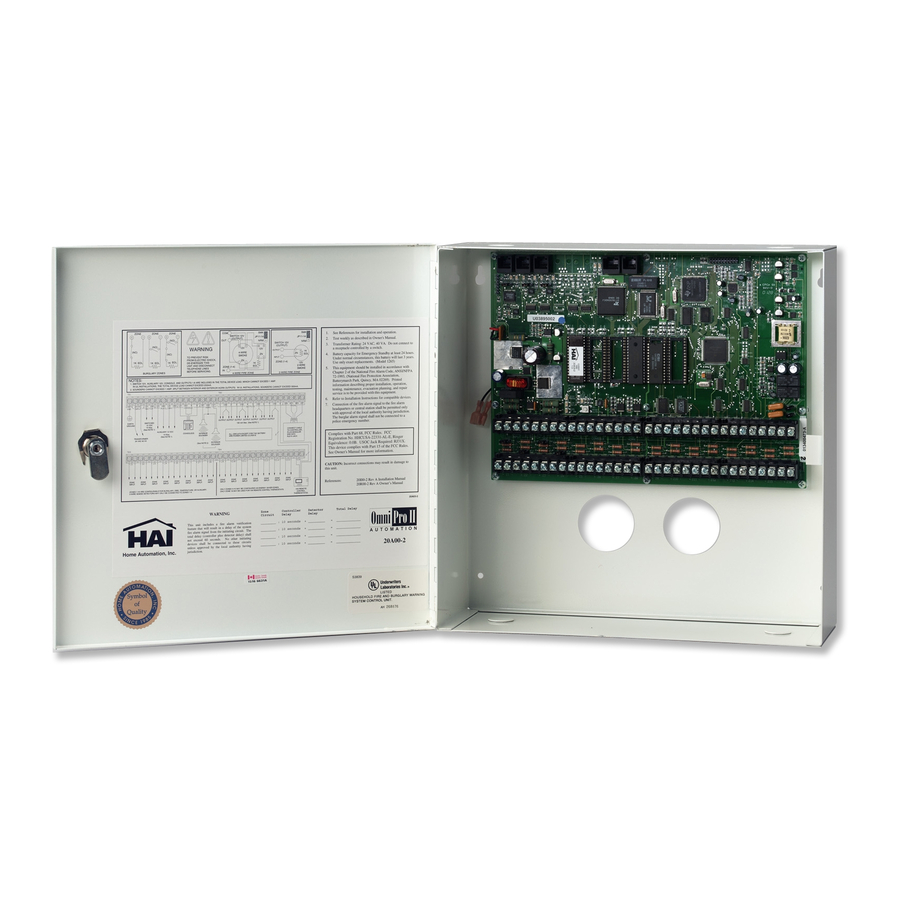
FEDERAL COMMUNICATION COMMISSION NOTICE: This equipment complies with Part 68 of FCC Rules. On the door, inside of the OmniPro II enclosure, is a label that contains, among other information, the FCC registration number and Ringer Equivalence Number (REN) for this equipment. If requested, provide this information to your telephone company. -
Page 99: Canadian Industry Canada Notice
CANADIAN INDUSTRY CANADA NOTICE Notice: The Industry Canada label identifies certified equipment. This certification means that the equipment meets certain telecommunications network protective, operational and safety requirements. The Industry Canada does not guarantee the equipment will operate to the user's satisfaction. Before installing this equipment, users should ensure that it is permissible to be connected to the facilities of the local telecommunications company. -
Page 100: Appendix A - Dial Out Planner
APPENDIX A - DIAL OUT PLANNER Use the following dial-out planner to help you set-up the voice dial-out numbers: OmniPro II Voice Dial-Out Planner DIAL OUT NUMBER 1: __________________________________ AREA: _____________ DIAL OUT 1 ON: TIME: _______________ DAYS: _______________ DIAL OUT 1 OFF: TIME: _______________ DAYS: _______________ DIAL OUT NUMBER 2: __________________________________ AREA: _____________ DIAL OUT 2 ON:... -
Page 101: Instructions To Called Party
INSTRUCTIONS TO CALLED PARTY Dear ___________________________________________________________________ I have programmed my OmniPro II Home Automation system to call you if my alarm is activated. If it is activated, it will call and say: "Emergency... Emergency... The (burglar or fire) alarm has been activated at the following address: ________________________________________________________________________ ________________________________________________________________________ Phone Number ________________________ Please respond immediately."... -
Page 102: Appendix B - Text Description Character Codes
APPENDIX B - TEXT DESCRIPTION CHARACTER CODES CODE CHAR CODE CHAR CODE CHAR CODE CHAR SPACE " < & > ¥ × ¯ à ß Page 94... -
Page 103: Appendix C - Voice Description Codes
APPENDIX C - VOICE DESCRIPTION CODES CODE DESCRIPTION DESCRIPTION DESCRIPTION CODE CODE (ADDRESS MSG) BOAT DANGER (BEEP) BOILER DATE (MEMO MESSAGE) BOTTOM (PAUSE) BOUDOIR DEAD (SHORT PAUSE) BOY'S DECEMBER A. M. BREAK DECK ABOVE BREAKFAST DECREASE AC POWER BRIGHTER DEGREES ACCESS BUILDING DELAYED... - Page 104 CODE DESCRIPTION DESCRIPTION DESCRIPTION CODE CODE FALL HELLO LOWER FAMILY HELP MACHINE HIGH MAID'S FATHER’S HIGHER MAIL FAULT HOBBY MAIN FEBRUARY HOLD MANAGEMENT FENCE HOLIDAY MANAGER FIFTEEN HOME MARCH FIFTY MASTER FILE HOURS FILTER HOUSE FIRE HUMIDITY MECHANICAL FIRST HUNDRED MEDICAL FIVE IMMEDIATELY...
- Page 105 CODE DESCRIPTION DESCRIPTION DESCRIPTION CODE CODE ONLINE RIGHT STORE ONLY RISE STUDIO OPEN ROMANTIC STUDY OPTION ROOF SUITE ROOM SUMMER OTHER SUMP SAFE OUTDOOR SAFETY SUNDAY OUTLET SATELLITE SWITCH OUTSIDE SATURDAY SYSTEM OK OVER SAUNA TABLE OVERFLOW SAVER TALK OVERHEAD SCENE TAMPER P.
-
Page 106: Notes On Custom Phrases
CODE DESCRIPTION CODE DESCRIPTION CODE DESCRIPTION VAULT PHRASE 5 PHRASE 33 (1&2) PHRASE 6 PHRASE 34 (3&4) VIDEO PHRASE 7 PHRASE 35 (5&6) VISITOR PHRASE 8 PHRASE 36 (7&8) VOLUME PHRASE 9 PHRASE 37 (9&10) WAITING PHRASE 10 PHRASE 38 (11&12) WALK PHRASE 11 PHRASE 39 (13&14) - Page 108 NOTE TO INSTALLER Following installation, this manual shall be left for the homeowner's use. HAI • New Orleans, LA • U S A...
Need help?
Do you have a question about the Omni Pro II and is the answer not in the manual?
Questions and answers