Table of Contents
Advertisement
Advertisement
Table of Contents
Troubleshooting

Related Manuals for DeLonghi ESAM 04.320


Summary of Contents for DeLonghi ESAM 04.320
- Page 2 5713214281/ 07.10...
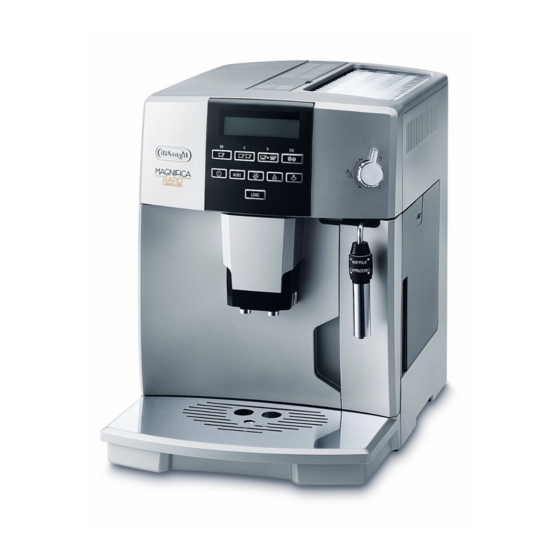
- Page 3 BEAN TO CUP ESPRESSO AND CAPPUCCINO MACHINE ESAM 04.320...
-
Page 4: Electrical Requirements
ElECTRICAl REqUIREMENTS Before using this appliance ensure that the voltage indicated on the product corresponds with the main voltage in your home, if you are in any doubt about your supply contact your local electricity company. The flexible mains lead is supplied connected to a B.S. 1363 fused plug having a fuse of 13 amp capacity. Should this plug not fit the socket outlets in your home, it should be cut off and replaced with a suitable plug, following the procedure outlined below. - Page 5 A4 A5...
- Page 6 15 15...
-
Page 8: Table Of Contents
CONTENTS ClEANING ............14 Cleaning the coffee maker .............14 INTRODUCTION ............7 Cleaning the coffee grounds container ........14 Symbols used in these instructions ..........7 Cleaning the drip tray ............14 letters in brackets ..............7 Cleaning the inside of the machine ........15 Troubleshooting and repairs ............7 Cleaning the water tank ............15 Cleaning the coffee spouts .............15 SAFETY ..............7... -
Page 9: Introduction
INTRODUCTION SAFETY Thank you for choosing the eSaM04.320 automatic coffee and Fundamental safety warnings cappuccino maker. We hope you enjoy using your new appliance. Danger! Take a few minutes to read these instructions. This is an electrical appliance and may cause electric shock. This will avoid all risks and damage to the machine. -
Page 10: Instructions
INSTRUCTIONS DESCRIPTION read these instructions carefully before using the appliance. Description of the appliance • Failure to respect these instructions may result in burns or (page 3 - a ) damage to the appliance. grinding adjustment knob The manufacturer is not liable for damage deriving from Main switch failure to respect these instructions. Beans container Beans container lid Please note:... -
Page 11: Preliminary Checks
PRElIMINARY CHECKS you must first choose the language (the languages scroll through at intervals of about 3 seconds). Checking the appliance 2. When “english” appears, press the OK button (fig. 2) for a after removing the packaging, make sure the product is few seconds until “eNgliSh set”... -
Page 12: Menu Settings
Please note! Important! • To exit the “ Energy saving” mode, first press a button, then To avoid damaging the appliance, always press the press the button relative to the desired drink. button (fig. 5) to turn off. • A few seconds may elapse between “ Energy saving” mode Danger of burns! and delivery of the first drink; “Preparation underway...” is during rinsing, a little hot water flows from the coffee spouts. -
Page 13: Auto-Off (Stand-By)
how many times the machine has been descaled. 8. Press the OK button to confirm. The symbol appears the total number of litres of water delivered. under “auto-start” on the display. 5. Press the ESC button twice to exit the menu. 9. -
Page 14: Customising The Espresso "My Coffee" Quantity
Customising the espresso “my coffee” quantity Tips for a hotter coffee The appliance is set by default to automatically deliver 30 ml of For a hotter coffee, you are recommended to: espresso “My CoFFee”. • before delivering the coffee, perform a rinsing cycle by To modify these settings, proceed as follows: pressing the button to select the “rinsing”... -
Page 15: Making Long Coffee Using Coffee Beans
Making long coffee using coffee beans fills as preparation progresses. once the coffee has been made, the appliance prepares for use Please note! again. When this function is enabled, a long coffee similar to drip coffee is obtained. MAKING FROTHED MIlK (FOR CAPPUCCINO) AND HOT MIlK Important! do not use caramelised or candied coffee beans as they could... -
Page 16: Making Hot Milk
ClEANING 9. add the milk froth to the cup of coffee prepared previously. The cappuccino is ready. Sweeten to taste and, if desired, Important! sprinkle the froth with a little cocoa powder. • Do not use solvents, abrasive detergents or alcohol to Making hot milk clean the appliance. -
Page 17: Cleaning The Inside Of The Machine
The drip tray is fitted with a level indicator (red) showing the Important! level of water it contains (fig. 24). riNSe WiTh WaTer oNly Before the indicator protrudes from the cup tray, the drip tray No WaShiNg uP liQuid - No diSh WaSher must be emptied and cleaned. -
Page 18: Setting Water Hardness
SETTING WATER HARDNESS 1. accendere la macchina. 2. Press the MENU button to enter the settings menu. Press The deSCale message is displayed after a period of time the or button until “descale” is displayed; established according to water hardness. 3. -
Page 19: Disposal
The appliance complies with the following eC directives: • Stand-by Directive no. 1275/2008 • Low Voltage Directive 2006/95/EC and subsequent amendments; • EMC Directive 2004/108/EC and subsequent amendments • Materials and accessories coming into contact with food conform to the provisions of eC regulation 1935/2004. DISPOSAl important information for correct disposal of the product in accordance with eC directive 2002/96/eC. -
Page 20: Displayed Messages
DISPlAYED MESSAGES DISPlAYED MESSAGE POSSIBlE CAUSE REMEDY FILL TANK! Insufficient water in the tank. Fill the tank with water and/or insert it correctly, pushing it as far as it will go until it clicks into place. grouNd Too FiNe adJuST The grinding is too fine and the coffee is delivered too When the steam knob has been turned to the i position slowly or not at all. -
Page 21: Troubleshooting
TROUBlESHOOTING Below is a list of some of the possible malfunctions. if the problem cannot be resolved as described, contact Customer Services. PROBlEM POSSIBlE CAUSE REMEDY The coffee is not hot The cups were not preheated. enable the cup warmer, leave the cups at least 20 minutes to warm up.
Need help?
Do you have a question about the ESAM 04.320 and is the answer not in the manual?
Questions and answers