Table of Contents
Advertisement
Advertisement
Table of Contents
Troubleshooting

Related Manuals for DeLonghi ESAM 04.110


Summary of Contents for DeLonghi ESAM 04.110
- Page 2 5713212551/ 06.09...
- Page 5 A4 A5 B2 B3B4 B5B6 B12 B13 B14...
-
Page 8: Table Of Contents
CONTENTS SETTING WATER HARDNESS....15 Measuring water hardness......15 INTRODUCTION ........7 Set water hardness ......... 16 Symbols used in these instructions ....7 TECHNICAL SPECIFICATION ....16 Letters in brackets ..........7 Troubleshooting and repairs ......7 DISPOSAL ........16 SAFETY ..........7 MEANING OF LIGHTS DURING NORMAL Fundamental safety warnings ...... -
Page 9: Introduction
INTRODUCTION SAFETY Thank you for choosing the ESAM04.110 Bean to Fundamental safety warnings cup coffee maker. Danger! To get the best result of your new coffee machi- This is an electrical appliance and may therefore ne please readthese instructions carefully before cause electric shock. -
Page 10: Designated Use
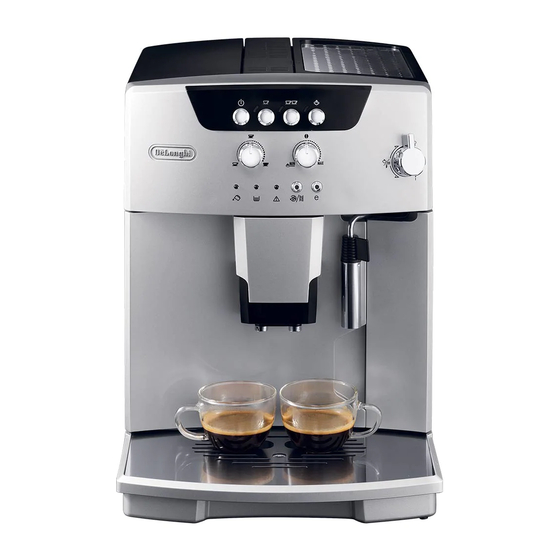
DESIGNATED USE DESCRIPTION This appliance is designed and made to prepare Description of the appliance coffee and heat drinks. (page 3 - All other use is considered improper. A1. Grinding adjustment knob This appliance is not suitable for commercial A2. Main switch use. -
Page 11: Preliminary Checks
B12. light: grounds container full B13. light: general alarm Using the coffee maker for the first time B14. Rinsing or descaling button with light B15. ECO energy saving mode button with light Please note: PRELIMINARY CHECKS pliance and it is therefore completely normal Checking the appliance for there to be traces of coffee in the mill. -
Page 12: Turning The Appliance Off
The appliance is ready for use only after comple- button (see the light/time table). tion of this cycle. 15min 30min Danger of burns! During rinsing, a little hot water comes out of the coffee spouts and is collected in the drip tray underneath. -
Page 13: Selecting The Quantity Of Coffee In The Cup
Selecting the quantity of coffee in the cup nal circuits of the appliance and thus raising Select the required quantity of coffee by turning the coffee temperature. the knob. ter (using the hot water function). Making coffee using coffee beans Important! Do not use caramelised or candied coffee beans as they could stick to the coffee mill and make it... -
Page 14: Making Cappuccino
damage the appliance. 6. Turn the steam knob to the I position. Ste- am is delivered from the cappuccino maker, measure or it could dirty the giving the milk a creamy frothy appearance inside of the machine or block and making it more voluminous; the funnel. -
Page 15: Heating Water
CLEANING 2. Wait for a few minutes for the cappuccino maker to cool down. Grip the handle of the Cleaning the coffee maker cappuccino maker tube firmly in one hand The following parts of the machine must be cle- and with the other rotate the cappuccino aned regularly: maker anticlockwise (fig. -
Page 16: Cleaning The Drip Tray
Cleaning the drip tray Cleaning the pre-ground coffee funnel Check regularly (about once a month ) that the Important! pre-ground coffee funnel (A6) is not blocked. If If the drip tray is not emptied regularly, the water necessary, remove coffee deposits with a brush. could overflow from the edge and seep inside or around the machine. -
Page 17: Descaling
red buttons have snapped out. forms a series of rinses and pauses to remo- 8. Close the infuser door. ve limescale deposits from inside the machi- 9. Replace the water tank. After about 30 minutes, the water tank is empty DESCALING and the light comes on. -
Page 18: Set Water Hardness
Level 3 providing this service. Disposing of a household appliance separately avoids possible negative consequences for the Level 4 environment and health deriving from inappro- priate disposal and enables the constituent mate- Set water hardness rials to be recovered to obtain significant savings 1. -
Page 19: Meaning Of Lights During Normal Operation
MEANING OF LIGHTS DURING NORMAL OPERATION LIGHTS DESCRIPTION MEANING The lights flash The water is not yet at the ideal tempe- rature. Wait for the lights to come on steadily before making coffee The lights are on steadily The appliance is ready to make coffee The light is on steadily The appliance is delivering one cup of coffee... - Page 20 LIGHTS DESCRIPTION MEANING WHAT TO DO The grounds container is Empty the grounds container and The light is on ste- drip tray, clean and replace (fig. full or missing adily 23). Important: when removing the drip tray, the grounds container MUST be emptied, even if it contains few grounds.
-
Page 21: Troubleshooting
TROUBLESHOOTING Below is a list of some of the possible malfunctions. If the problem cannot be resolved as described, contact Customer Services. PROBLEM POSSIBLE CAUSE SOLUTION The coffee is not hot function). 2/3 minutes have elapsed since the last pressing the button. -
Page 22: Electrical Requirements
ELECTRICAL REQUIREMENTS Before using this appliance ensure that the voltage indicated on the product corresponds with the main voltage in your home, if you are in any doubt about your supply contact your local electricity company. The flexible mains lead is supplied connected to a B.S. 1363 fused plug having a fuse of 13 amp capacity.
Need help?
Do you have a question about the ESAM 04.110 and is the answer not in the manual?
Questions and answers