Table of Contents
Advertisement
contents
IntRoDUctIon .................................. 7
Symbols used in these instructions .................. 7
Letters in brackets ............................................. 7
Troubleshooting and repairs .............................. 7
sAFetY ............................................ 7
Fundamental safety warnings ............................ 7
DesIGnAteD Use ................................ 8
InstRUctIons ................................... 8
DescRIPtIon..................................... 8
Description of the appliance ............................... 8
Description of control panel ............................... 8
PReLIMInARY cHecKs ......................... 9
Checking the appliance ...................................... 9
Installing the appliance ...................................... 9
Connecting the appliance ................................... 9
Using the appliance for the first time ................. 9
tURnInG tHe APPLIAnce on ................. 9
tURnInG tHe APPLIAnce oFF ............... 10
settInG AUto-oFF (stAnD-BY) ............. 10
eneRGY sAVInG ................................ 10
MAKInG coFFee ................................ 10
Selecting the coffee taste ................................. 10
Selecting the quantity of coffee in the cup ....... 11
Adjusting the coffee mill .................................. 11
Tips for a hotter coffee: .................................... 11
Making coffee using coffee beans .................... 11
Making coffee using pre-ground coffee ........... 12
MAKInG cAPPUccIno ......................... 12
Cleaning the cappuccino maker after use. ........ 13
HeAtInG WAteR ................................ 13
cLeAnInG ........................................ 13
Cleaning the coffee maker ................................ 13
Cleaning the coffee grounds container ............. 13
Cleaning the drip tray ....................................... 14
Cleaning the inside of the machine .................. 14
Cleaning the water tank .................................... 14
Cleaning the coffee spouts ............................... 14
Cleaning the pre-ground coffee funnel ............. 14
Cleaning the infuser ......................................... 14
DescALInG ...................................... 15
settInG WAteR HARDness .................. 16
Measuring water hardness ............................... 16
Set water hardness .......................................... 16
tecHnIcAL sPecIFIcAtIon ................... 16
DIsPosAL ........................................ 16
oPeRAtIon ..................................... 17
MeAnInG oF tHe ALARM LIGHts ........... 18
tRoUBLesHootInG ............................ 19
6
Advertisement
Table of Contents
Troubleshooting

Related Manuals for DeLonghi ESAM4


Summary of Contents for DeLonghi ESAM4
-
Page 1: Table Of Contents
contents settInG WAteR HARDness ....16 Measuring water hardness ....... 16 IntRoDUctIon ........7 Set water hardness .......... 16 Symbols used in these instructions ....7 tecHnIcAL sPecIFIcAtIon ....16 Letters in brackets ..........7 Troubleshooting and repairs ......7 DIsPosAL ........ -
Page 2: Introduction
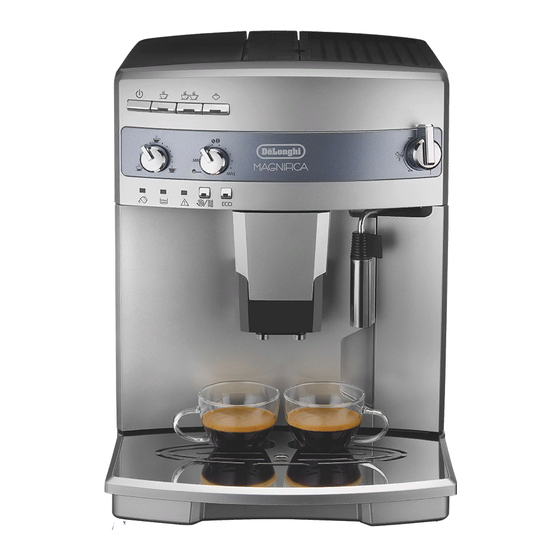
IntRoDUctIon sAFetY Thank you for choosing the ESAM4 automatic Fundamental safety warnings coffee and cappuccino maker. We hope you enjoy using your new appliance. Danger!! Take a few minutes to read these instructions. This is an electrical appliance and may therefore This will avoid all risks and damage to the ma- cause electric shock. -
Page 3: Designated Use
DesIGnAteD Use DescRIPtIon This appliance is designed and made to prepare Description of the appliance coffee and heat drinks. All other use is conside- (page 3 - red improper. A1. Grinding adjustment knob This appliance is not suitable for commercial A2. -
Page 4: Preliminary Checks
PReLIMInARY cHecKs • You should customise water hardness as soon as possible following the instructions checking the appliance in the section “Setting water hardness” on After removing the packaging, make sure the page 16. product is complete and undamaged and that all accessories are present. -
Page 5: Turning The Appliance Off
coffee spouts and is collected in the drip tray un- 15min 30min derneath. Avoid contact with splashes of water. • To turn the appliance on, press the but- ton (fig. 4). The lights flash while the appliance is heating up and perfor- 3. Press the eco button to confirm the selec- ming an automatic rinse cycle. -
Page 6: Selecting The Quantity Of Coffee In The Cup
clockwise, otherwise the coffee may be de- tips for a hotter coffee: For hotter coffee, you should: livered too slowly (a drop at a time), particu- • before delivering the coffee, perform a rinse larly when making two cups of coffee. cycle by pressing the button. Hot water selecting the quantity of coffee in the cup is delivered from the spout, heating the inter- Adjust the coffee quantity selection knob (B9) to... -
Page 7: Making Coffee Using Pre-Ground Coffee
section “Meaning of lghts” on page 17. For a richer denser froth, use skimmed or partially skimmed milk at refrigerator tempe- Making coffee using pre-ground coffee rature (about 5°C). To avoid milk with poor froth or large bub- Important! bles, always clean the cappuccino maker as • Never add pre-ground coffee when the ma- described in the section “Cleaning the cap- chine is off or it could spread through the... -
Page 8: Cleaning The Cappuccino Maker After Use
maker into a container until the lights steadily. stop flashing. 3. Turn the steam knob a half turn anticlockwise as far as it will go. Delivery begins. Danger of burns! 4. Stop by turning the steam knob to the 0 po- Avoid contact with splashes of water. -
Page 9: Cleaning The Drip Tray
and clean. cleaning the water tank 1. Clean the water tank (A12) regularly (about • Empty the grounds container and clean tho- once a month and whenever you replace the roughly to remove all residues left on the water softener filter, if provided) with a damp bottom. -
Page 10: Descaling
4. Wait for the lights to come on steadily. Important! Danger of burns! Hot water containing acid flows from the cap- puccino maker. Avoid contact with splashes of water. 5. Press the button and hold it down for at least 5 seconds to confirm that you have added the solution and begin the descaling Please note! procedure. -
Page 11: Setting Water Hardness
settInG WAteR HARDness The machine is now reprogrammed with the new water hardness setting. light comes on after a period of time established according to water hardness. tecHnIcAL sPecIFIcAtIon The machine is set by default for a hardness va- Voltage: 220-240 V~ 50/60 Hz max. -
Page 12: Meaning Of Lights During Normal Operation
MeAnInG oF LIGHts DURInG noRMAL oPeRAtIon LIGHts DescRIPtIon MeAnInG The lights flash The coffee maker is not ready to make coffee (the water has not yet reached the ideal temperature). Wait for the lights to come on steadily before making coffee The lights are on steadily The coffee maker is at the right tempera- ture and ready to make coffee... -
Page 13: Meaning Of The Alarm Lights
MeAnInG oF tHe ALARM LIGHts LIGHts DescRIPtIon MeAnInG WHAt to Do The light is on Insufficient water in tank Fill the tank with water and/or in- or tank not correctly in sert it correctly, pushing it as far as steadily place it will go until it clicks into place. -
Page 14: Troubleshooting
LIGHts DescRIPtIon MeAnInG WHAt to Do The lights flash The coffee maker has just Press the word PUSH on the infu- been turned on, the infu- ser until it clicks into place. alternately ser is not inserted correct- Make sure the two red buttons ly and the service door is have snapped out. - Page 15 PRoBLeM PossIBLe cAUse soLUtIon Coffee does not come • The spouts are blocked. • Clean the spouts with a toothpick. out of one of the spouts. The coffee does • The holes in the spouts are clogged with • The coffee guide inside the service door dry coffee dust is blocked and cannot swing. not come out of the spouts, but from •...
Need help?
Do you have a question about the ESAM4 and is the answer not in the manual?
Questions and answers