Chapters
Table of Contents

Related Manuals for Kenmore 580.54501 50 Pint


Summary of Contents for Kenmore 580.54501 50 Pint
- Page 1 Owner's Manual Manuel del Propietario ® DEHUMIDIFIER DESHUMIDIFICADOR Model, Modelo 580.54501 50 Pint 580.54701 70 Pint Low Temp Sears, Roebuck and Co., Hoffman Estates, IL 60179 U.S.A. www.sears.com...
-
Page 2: Table Of Contents
TABLE OF CONTENTS ........ 2 OPTIONS FOR DISPOSING OF COLLECTED WATER ......8 WARRANTY ..........MAINTENANCE ..........SAFETY INSTRUCTIONS ......3 Grille and case ......... ELECTRICAL REQUIREMENTS ....4 Air filter ............. INSTALLING YOUR DEHUMIDIFIER ....5 Cleaning inside the unit ......9 Defrost Control Function ...... -
Page 3: Safety Instructions
IMPORTANT SAFETY INSTRUCTIONS To reduce the risk of fire, electric shock or injury when using your dehumidifier, the following safety precautions must be followed: • Do not block the inlet or outlet. • Do not place the power cord near a heater. It may cause fire and electric shock. -
Page 4: Electrical Requirements
OBSERVE ALL LOCAL CODES AND ORDINANCES. DO NOT, UNDER ANY CIRCUMSTANCES, REMOVE THE POWER SUPPLY CORD GROUND PRONG. ELECTRICAL GROUND IS REQUIRED ON THIS APPLIANCE. A 115-volt 60 Hz, AC only, 15A fused and Electrical Shock Hazard properly grounded electrical supply is required. Plug into a grounded 3 prong outlet. -
Page 5: Installing Your Dehumidifier
• Install thedehumidifier ona level f loorstrong enough t o support theunit w itha fullbucket o fwater. • Forbest p erformance, allow atleast 1 2-18 inches ofair space onallsides oftheunitforgood aircirculation. •Keep alloutside d oors, w indows,and other o penings closed when operating t hedehumidifier. -
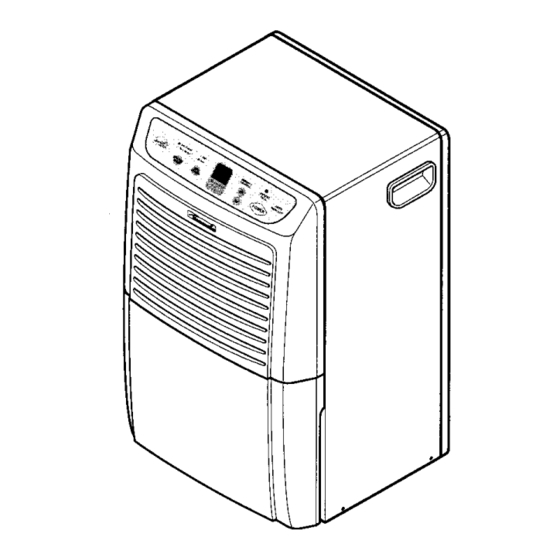
Page 6: Features
FEATURES Control Front Grille Grille Cabinet Air Filter Handle Water bucket Power cord (Optional) Drain Hose Connector SELECTION GUIDE Room Size Moderately Very Extremely (sq-ft) Damp Damp 22'x 22' 35 Pt 35 Pt 35 Pt 35 Pt 30'x 30' 35 Pt 35 Pt 50 Pt 50 Pt... -
Page 7: Controlpanel
CONTROLPANEL 1. POWER Pressing this key once turns the dehumidifier "ON" and pressing againturns the dehumidifier "OFF". 2. HUMIDITY CONTROL keys Press to select the desired humidity setting. • /_. : Used to raise the desired humidity setting. • V : Used to lower the desired humidity setting. •... -
Page 8: Of Collected Water
EMPTYING THE BUCKET USING A GARDEN HOSE MANUALLY 1. When the bucket is full, slide it out by You have the option of attaching a garden hose grasping the handle and emptying it into a to your dehumidifier to drain water later than large sink or tub, and then replace it using the water bucket. -
Page 9: Maintenance
GRILLE AND CASE To clean the case: Use water and a mild detergent. Do not use bleach or an abrasive cleaner. • Disconnect power supply cord from receptacle before performing any To clean the grille: Use a vacuum with an maintenance. -
Page 10: Troubleshooting
The dehumidifier may be operating abnonmally when: Dehumidifier m_e)aeh_mOi_e_ • Make sure the dehumidifier pug s pushed does not start completely into the outletl -,-(3beck tile house-fuseorc_rc-uit L_reaker boxand Ii Bu_k_ is _ in___tai_ed; • Make sure the bucket is in the dght place. ly-ie_-is/;_ •... -
Page 11: Espaiqol
iNDICE DE MATERIAS ........ 11 OPCIONES PARA LA ELIMINACiON DEL AGUA CREADA ..........17 GARANTIA ..........MANTENIMIENTO ........18 INSTRUCCIONES DE SEGURIDAD ....12 La rejilla y el gabinete ......18 REQUERIMIENTOS ELI_CTRICOS .... 13 Filtro de aire .......... 18 INSTALACI6N DEL DESHUMIDIFICADOR ... -
Page 12: Instrucciones De Seguridad
IMPORTANTES INSTRUCCIONES DE SEGURIDAD Pars reducir el riesgo de incendio, descarga el6ctrica o lesion al utilizar su deshumidificador deber_n seguirse en rode memento las siguientes precauciones de seguridad. • No coloque el cable de alimentaci6n cerca de una • No bloquee la entrada ni la salida. estufa. -
Page 13: Requerimientos Eli_Ctricos
RESPETE TODOS LOS CODIGOS Y REGLAMENTOS. BAJO NINGUNA CIRCUNSTANCIA CORTE, QUITE O EVITE EL use DE LA CONEXION A TIERRA DE ESTA CLAVIJA. ESTE APARATO NECESITA SER CONECTADO A TIERRA. Se requiere una alimentaci6n el6ctdca CA, adecuadamente conectada a tierra con un Peligrode chequeel6ctrico fusible de 15 A, de 60 Hz y de 115 V. -
Page 14: Instalaci6N Del Deshumidificador
• Instaleel deshumidificador e n un pisoniveladoIo suficientemente s61ido como parasoportarla unidadcon el recipienteIlenode agua. • Para Iograrun m_ximorendimiento,deje un espaciolibre de 12 a 18 pulgadaen todoel espacioque circundeal aparatoconobjeto de manteneruna buenacirculaci6nde aire • Mantengatodaslas puertas,ventanasy otrasentradasde aire cerradasal operarel deshumidificador El aire hL_medo del exteriorhar_ique el aparatotrabajeen exceso °... -
Page 15: Funcionamiento
CARACTERiSTICAS ADMERTENClA Para reducir el riesgo de incendio, descarga el6ctrica o lesi6n al utilizar su deshumidificador, deber&n seguirse en todo momento las siguientes precauciones de seguridad. Panel de control -- Parrilla Carcasa - Parrilla posterior Filtro de aire alimentaci6n Cubeta de agua Cable de Conector de la Manguera de Drenaje GUiA DE SELECUiON... -
Page 16: Panelde Control
PANELDE CONTROL 1. Tecla POWER Si pulse una vez esta teda, el deshumidificador s e enciende, "ON", y si la vuelve a pulsarel deshurnidificador se apaga, "OFF'. 2. Teclas HUMIDITY CONTROL Pulsepara selecoionarel ajuste de humedaddeseado. • A : soutilizepare aurnentarel ajuste de humedaddeseado. •... -
Page 17: Opciones Para La Eliminacion Del Agua Creada
VACIAR LA CUBETA USO DE UNA MANGUERA DE JARDiN MANUALMENTE Tiene la opciSn de acoplar una manguera de jardin a 1. Cuando la cubeta est_ Ilena, deslicela hacia el su deshumidificador para drenar el agua m_tstarde exterior agarrando el asa y vaciando el liquido en usando la cubeta del agua. -
Page 18: Mantenimiento
LA REJILLA Y EL GABINETE Para limpiar el gabinete: Use agua y un detergente suave. No use blanqueador ni • Desconecte el cable de alimentaci6n del limpiadores abrasivos. enchufe antes de realizar cualquier Para limpiar la rejilla: Use una aspiradora con mantenimiento. -
Page 19: Solucion De Problemas
Eldeshumidificador puede funcionar demodeanormal cuando: " Aseg_rese d e quelaclaviadel deshurnidiflcador esta deshurnidificador completamente i nsertada en el eechufe, _i'$pa_ _ i_mJp_ ,, y cambie el fusibleovuelvaaconecbrelinterrdptor. El deshumidificad-or seapagaautomaticamente cuandeeste ocurre, vacie m a eubeta. ;--G_'_- : "; _e_,r_; _ e _'_;_-ei_-es_ _o_'d-_-&_ _;n_;_ie ba__ar ia humedad perdebajo delajustedelnivelde lasale. -
Page 23: Master Protection Agreements
Ha realizado una comprs inteligente. Su nuevo aparato Kenmore® est_ diseSado y fabricado Your new Kenmore ®product is designed and pare ofrecerle ar_os de buen funcionamiento. manufactured for years of dependable operation. Sin embargo, al igual qua todos los productos, puede... - Page 24 71i{iiiii! Your Home iii!iii! For repair- in your home-of all major brand appliances, i,!ii_i 71!17! _iii! lawn and garden equ ment, or heating and cooling systems, no matter who made it, no matter who sold it! 3_:_ !7i!i{ii7 For the replacement parts, accessories owner's manuals...
Need help?
Do you have a question about the 580.54501 50 Pint and is the answer not in the manual?
Questions and answers