
Related Manuals for CYBEX Pro3


Summary of Contents for CYBEX Pro3
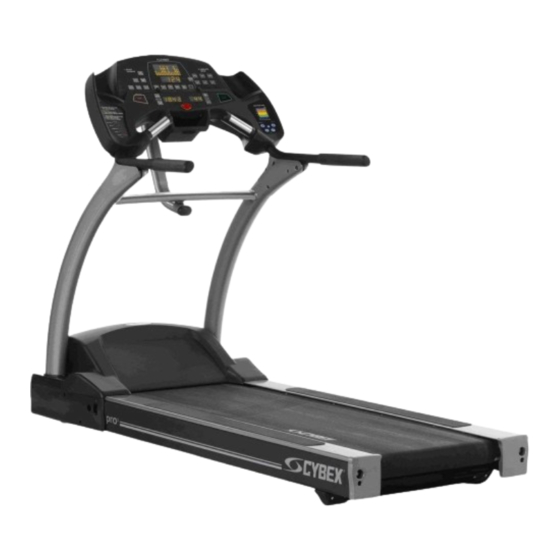
- Page 1 Cybex Pro Treadmill Owner’s Manual Cardiovascular Systems Part Number LT-21311-4 C www.cybexinternational.com...
- Page 3 Owner’s Manual Cardiovascular Systems Part Number LT-21311-4 C Cybex ® and the Cybex logo are registered trademarks of Cybex International, Inc. Safety Sentry™ is a registered trademark of Cybex international, Inc. Polar ® is a registered trademark of Polar. DISCLAIMER: Cybex International, Inc.
-
Page 5: About This Manual
• Contact Cybex Customer Service at 888-462-9239 or 508-533-4300 To contact Cybex with comments about this manual send an email to techpubs@cybexintl.com. FCC Compliance Information ! WARNING: Changes or modifi cations to this unit not expressly approved by the party responsible for compliance could void the user’s authority to operate the... - Page 6 Cybex Pro Treadmill Owner’s Manual This page intentionally left blank. Page ii...
-
Page 7: Table Of Contents
Cybex Pro Treadmill Owner’s Manual Table of Contents Front Pages Meaning of % Grade ... . . 3-10 5K Run ......3-10 About this Manual . - Page 8 Cybex Pro Treadmill Owner’s Manual This page intentionally left blank. Page iv...
-
Page 9: Safety
Before plugging the power cord into an electrical outlet, verify that the voltage requirements for your area match the voltage of the treadmill that you have received. The power requirements for the Cybex Pro treadmill include a grounded, dedicated circuit, rated for one of the following: 115 VAC ±5%, 60 Hz and 20 amps;... -
Page 10: Important Safety Instructions
Cybex Pro Treadmill Owner’s Manual Important Safety Instructions (Save These Instructions) ! DANGER: To reduce the risk of electric shock, always unplug this treadmill from the electrical outlet immediately after using it and before cleaning it. ! WARNING: Serious injury could occur if these precautions are not observed. To reduce the risk of burns, fi... - Page 11 • DO NOT attempt repairs, electrical or mechanical. Seek qualifi ed repair personnel when servicing. If you live in the USA, contact Cybex Customer Service at 888-462-9239. If you live outside the USA, contact Cybex Customer Service at 508-533-4300. •...
-
Page 12: Warning Decals
To replace any worn or damaged decals do one of the following: Fax orders to 508-533-5183 or contact Cybex Customer Service at 888-462-9239. If you live outside of the USA, call 508-533-4300. For location or part number of labels, see the parts list and exploded-view diagram. - Page 13 (I) position. dist Press (except on all Cybex Sport models). DIST appears on the display. First 500 Miles Check Running Belt Tension & Tracking. Every 5000 Miles Check Running Belt Tension &...
- Page 14 Cybex Pro Treadmill Owner’s Manual Safety Page 1-6...
-
Page 15: Caution Decals
Caution Decals Caution decals indicate a potentially hazardous situation, which, if not avoided, may result in minor or moderate injury. There are no caution decals used on the Cybex Pro treadmill. However, there is a caution in the installation instructions for initial installation only. See below. -
Page 16: Emergency Stop Key (E-Stop)
Cybex Pro Treadmill Owner’s Manual Emergency Stop Key (e-stop) The e-stop key functions as the emergency stop. In an emergency situation, remove the e-stop key and the treadmill will come to a stop. Before using the treadmill, clip the e-stop key as described below. -
Page 17: Technical Specifications
Cybex Pro Treadmill Owner’s Manual 2 - Technical Specifi cations Specifications Length: 79” (200 cm) Width: 32” (82 cm) Running Area: 20” x 58” (51 cm x 147 cm) Weight of Product: 385 lbs. (173 kg) Shipping Weight 415 lbs. (187 kg) Speed Range: 0.5 to 12.4 mph (0.8 to 20 kph) in 0.1 mph or 0.1 kph increments... - Page 18 Cybex Pro Treadmill Owner’s Manual This page intentionally left blank. Technical Specifications Page 2-2...
-
Page 19: Operation
Cybex Pro Treadmill Owner’s Manual 3 - Operation Read and understand all instructions and warnings prior to using the treadmill. See all of the safety related information located in chapter 1. Terms and Symbols Used This section lists some of the common terms and symbols used in this chapter. Other terms and symbols are listed in this chapter as appropriate. -
Page 20: Quick Operation Guide
Cybex Pro Treadmill Owner’s Manual Quick Operation Guide NOTE: Maximum user weight is 400 lbs. (181 kg). The following is a quick overview of the operation of the treadmill. For more information read Detailed Operation Guide in this chapter. NOTE: Times specifi ed in this chapter refl ect the treadmills defaults. -
Page 21: Detailed Operation Guide
Cybex Pro Treadmill Owner’s Manual Detailed Operation Guide NOTE: Maximum user weight is 400 lbs. (181 kg). 1. Plug the treadmill power cord into a power outlet from a grounded, dedicated circuit, rated for one of the following: 115 VAC ±5%, 60 Hz and 20 amps; 208/220 VAC, 60 Hz, 15 amps or 230 VAC ±5%, 50 Hz and 15 amps. - Page 22 Cybex Pro Treadmill Owner’s Manual 7. Hold the handrails while you step onto the running belt and begin walking. 8. Observe the three displays. During your workout the time will show in the format of minutes:seconds. If your workout exceeds sixty minutes the time format will change to minutes only. The center window will scan (every three seconds) through Distance, Calories, Mets, MIN MI/KM (Pace) and Heart Rate.
-
Page 23: Stopping The Treadmill
Cybex Pro Treadmill Owner’s Manual Stopping the Treadmill Press Stop once to pause your workout for 20 seconds (default setting) and to enter the Workout Review. The belt will stop and the elevation will return to 0%, but all workout settings and data will remain in memory for the pre-selected time. -
Page 24: Control During Operation
Cybex Pro Treadmill Owner’s Manual Control During Operation Control keys on the display are usable during operation and may be pressed at any time to make adjustments in speed, elevation or data readouts. Changing Speed – Press the Speed + – keys to change the speed in increments of 0.1 mph or 0.10 kph. -
Page 25: Data Readouts
Workout Review for 20 seconds (default setting). Displaying Heart Rate In order for the Cybex Pro to display your heart rate, you must either use a Polar compatible heart rate transmitter belt (not included) or hold the handgrips to use Contact Heart Rate. -
Page 26: Heart Rate Led
Cybex Pro Treadmill Owner’s Manual NOTE: Cybex does not recommend continuous holding onto the contact heart rate grips during exercise. Contaminants, such as hand lotions, oils or body powder, may come off on the contact heart rate grips. These can reduce sensitivity and interfere with the heart rate signal. Therefore, ensure you have clean hands when using the contact heart rate. -
Page 27: Use Of Programs
! WARNING: Obtain a medical exam before beginning any exercise program. Begin comfortably with a lower level and progress with higher levels as you become acclimated. With the Cybex Pro , you may choose from fi ve different programs. Each program provides ten levels of diffi... -
Page 28: The Workout Profile
Cybex Pro Treadmill Owner’s Manual To increase or decrease the incline while in Manual Mode use the Λ V arrows. Time counts up, you can end your session at any time. NOTE: A Manual workout session using Quick Start will display time counting up to the confi gured MAX TIME. - Page 29 Cybex Pro Treadmill Owner’s Manual NOTE: This program includes both a two-minute warm up and cool down in addition to the actual 5K portion of the program. 5K Run Profiles Show Level 10 12.4 20.0 — — — — — —...
-
Page 30: Holes
Cybex Pro Treadmill Owner’s Manual 9 Holes Program Overview In this program, the user chooses their speed as they go. The level of the program uses variations in the elevation. As the level goes up so does the level of intensity. Like the golf course, there are uphill and downhill sections, which not only contribute to the intensity of the exercise but also provide the additional adaptation to covering varied terrain. - Page 31 Cybex Pro Treadmill Owner’s Manual 9 Holes Profiles Show Level 10 12.4 20.0 — — — — — — — — 12.0 — — — — — 19.0 — — — — — — — — — — — — —...
-
Page 32: Heart Rate
Cybex Pro Treadmill Owner’s Manual Heart Rate Program Overview The Heart Rate Control program is interactive. By selecting a predetermined heart rate, the treadmill will adapt the elevation and speed to keep the users heart rate at that level. This program is exceptionally useful for those individuals just starting out as well as the athlete. - Page 33 Cybex Pro Treadmill Owner’s Manual Heart Rate Based on Age, Selective HR and Response to Exercise 12.4 20.0 — — — — — — — — 12.0 — — — — — — — 19.0 — — — — —...
-
Page 34: Cardio
Cybex Pro Treadmill Owner’s Manual Cardio Program Overview This program was designed for the exercise participant who wants to improve the overall effi ciency of their cardio-respiratory system. Unlike some of the other treadmill programs that incorporate low and moderate intensity segments, the Cardio program contains overall higher intensity levels with more moderate recovery segments. -
Page 35: Profiles Show Level
Cybex Pro Treadmill Owner’s Manual Cardio Profiles Show Level 10 at 20 Minutes 12.4 20.0 — — — — — — — — 12.0 — — — — — — — 19.0 — — — — — — — — —... -
Page 36: Weight Loss
Cybex Pro Treadmill Owner’s Manual Weight Loss Program Overview This program was designed to help individuals of all fi tness levels achieve their weight loss goals through a protocol that incorporates both low and moderate intensity activity. Because walking has become a popular mode of exercise for those looking to lose weight, all levels of this program are performed at walking speeds. -
Page 37: Figure 9
Cybex Pro Treadmill Owner’s Manual Weight Loss Profiles Show Level 10 at 20 Minutes 12.4 20.0 — — — — — — — — 12.0 — — — — — — — 19.0 — — — — — — —... - Page 38 Cybex Pro Treadmill Owner’s Manual This page intentionally left blank. Operation Page 3-20...
-
Page 39: Preventive Maintenance
NOTE: Worn or damaged components shall be replaced immediately or the treadmill removed from service until the repair is made. NOTE: Cybex is not responsible for performing regular inspection and maintenance actions for your treadmill. Instruct all personnel in equipment inspection and maintenance actions and also in accident reporting/recording. -
Page 40: Cleaning Your Treadmill
Cybex Pro Treadmill Owner’s Manual Cleaning Your Treadmill When cleaning your treadmill spray a mild cleaning agent, such as a water and dishsoap solution, on a clean cloth fi rst and then wipe the treadmill with the damp cloth. NOTE: Do not spray cleaning solution directly on the treadmill. Direct spraying could cause damage to the electronics and may void the warranty. -
Page 41: Running Belt Maintenance
Cybex Pro Treadmill Owner’s Manual Running Belt Maintenance Belt and Deck – Clean the belt and the deck surfaces to minimize the effect of friction between the wood deck and the running belt. Clean the underside of the running belt and the top of the running deck surface by wiping them with a clean dry towel. - Page 42 Cybex Pro Treadmill Owner’s Manual 2. Center the belt. NOTE: While centering the belt choose one bolt to adjust. Do not adjust both bolts. With the treadmill running at 5 mph (8 kph) observe the running belt. If the belt tracks off center to the right or left the deck will become exposed.
- Page 43 NOTE: When replacing the deck, replace the belt at the same time. 7. Clean under the belt. To minimize the effect of friction between the deck and the running belt, Cybex recommends cleaning the underside of the running belt and the top of the running deck surface by wiping them with a clean, dry towel.
-
Page 44: Other Preventive Maintenance
Cybex Pro Treadmill Owner’s Manual 8. Secure the top steps. Place each top step in position. See Figure 4. Using a Phillips head screwdriver, tighten the three screws that hold each top step in place. See Figure 4. 9. Secure the end caps. -
Page 45: Service Schedule
Cybex Pro Treadmill Owner’s Manual Service Schedule All maintenance activities shall be performed by qualifi ed personnel. Failure to do so could result in serious injury. NOTE: This is the minimum recommended service. 1. Determine mileage. While in Dormant Mode enter Test Mode by holding down any key while turning the treadmill to the on (I) position. - Page 46 Cybex Pro Treadmill Owner’s Manual This page intentionally left blank Preventive Maintenance Page 4-8...
-
Page 47: Setup And Assembly
Cybex Pro Treadmill Owner’s Manual 5 - Setup and Assembly Warnings/Cautions All warnings and cautions listed in this chapter are as follows: ! WARNING: Use extreme caution when assembling the treadmill. Failure to do so could result in injury. ! CAUTION: A minimum of two people are required to lift, move and assemble this treadmill. -
Page 48: Electrical Power Requirements
Lift up and remove the cardboard sleeve that surrounds the treadmill. Check to be sure that the following items are present. Check off ( ) each item as you fi nd it. See Figure 1. If any of the parts are missing contact Cybex Customer Service. Setup Assembly... - Page 49 Cybex Pro Treadmill Owner’s Manual Item Qty Part Number Description Varies Base with uprights and console attached AX-16724 Motor cover, center, with decals PL-16465 Motor cover, right (in box) PL-16464 Motor cover, left (in box) AX-16956 Hardware pack (in box)
- Page 50 Cybex Pro Treadmill Owner’s Manual Check off ( ) each item in the hardware pack as you fi nd it. See Figure 2. Item Qty Part Number Description HS-16929 Screw, hex head whiz-lock 3-8-16 x 5-8 HS-16950 Screw, button head 5-16-18 x 7-8 HS-16939 Screw, Phillips head sems 10-32 x .75...
- Page 51 Cybex Pro Treadmill Owner’s Manual ! CAUTION: A minimum of two people are required to lift, move and assemble this treadmill. Always use proper lifting methods when moving heavy items. 4. Lift and move the treadmill. At least two people should lift and move the treadmill to a level location where you intend to leave it.
- Page 52 Cybex Pro Treadmill Owner’s Manual 6. Verify the model, voltage and color. Verify that you have the correct model by looking at the console and reading the model name. Verify that you have the correct voltage by looking at the lower board and reading the voltage sticker.
- Page 53 Cybex Pro Treadmill Owner’s Manual Figure 7 Using the Allen wrench provided, tighten the two pivot screws on the handrail. See Figure 8. Pivot Screws Figure 8 9. Remove the left side panel. Pull the left side panel away from the base. See Figure 9.
- Page 54 Cybex Pro Treadmill Owner’s Manual Front routing: a. Unwind the power cord and route it under the upright. b. Slide the grommet into the front exit hole with the curved end first. See Figure 10. c. Wire tie the cord down. See Figure 10.
- Page 55 Cybex Pro Treadmill Owner’s Manual 11. Attach the motor cover (three pieces). Using a Phillips head screwdriver, partially tighten each motor cover side (left and right) with four 10-32 x .75 Phillips head screws. See Figure 12. Place the motor cover center into position. See Figure 12.
- Page 56 Cybex Pro Treadmill Owner’s Manual Emergency Stop Button Emergency Stop Key Figure 13 Setup Assembly Page 5-10...
-
Page 57: Testing The Treadmill Operation
2. Locate the on/off (I/O) power switch on the left side of the treadmill. Toggle it to the on position (I). 3. The control panel will light up and be in the Dormant Mode. NOTE: Cybex recommends that the treadmill be unplugged or the on/off (I/O) power switch turned off (O) when it is not in use. -
Page 58: Setting Operation Options
Cybex Pro Treadmill Owner’s Manual 11. Run the treadmill through its full % grade range. Press the Incline Λ key until the treadmill reaches its highest grade (15%). Next press the Incline V key until the treadmill is down to -2% grade. Ensure the power cord is not being pinched under the front of the treadmill. -
Page 59: Customer Service
Your serial number and voltage can be found on the front of your treadmill. See Figure 1. For your convenience record your serial number and voltage below so that you will have it ready if you call Cybex Customer Service. -
Page 60: Return Material Authorization (Rma)
Contact your authorized Cybex dealer on all warranty-related matters. Your local Cybex dealer will request an RMA from Cybex, if applicable. Under no circumstances will defective parts or equipment be accepted by Cybex without proper RMA and an Automated Return Service (ARS) label. -
Page 61: Damaged Parts
Cybex Pro Treadmill Owner’s Manual Damaged Parts Materials damaged in shipment should not be returned for credit. Shipping damages are the responsibility of the carrier (UPS, Federal Express, trucking companies, etc.) Apparent Damage – Upon receipt of your shipment, check all boxes carefully. Any damage seen with a visual check must be noted on the freight bill and signed by the carrier's agent. -
Page 62: Ordering Parts
USA) or 508-533-4300 (for customers outside the USA). CAUTION Use only Cybex replacement parts when servicing. Failure to do so could result in personal injury. Cybex will void warranty if non-Cybex replacement parts are used. Customer Service Page 6-4... -
Page 63: Parts List
Nut, Lock, 3/8 - 24, GRD C, STL, ZN PL-17659 Console, Back, Plastic DE-17144-X Decal, International only* DE-17712 Decal, Logo, Cybex Intl, 9 x 7” HS-17936 Bolt, 3/8 - 24 X 2.0”, HXHD CAP, PL-17658 Front Console, Plastic G8, YEL ZN... - Page 64 LT-21311-X Owner’s and Service, Manual Cybex DE-17714 Decal, Cybex, 13.8 X 2.2” Pro3* DE-16784 Decal, Side Stripe LT-21312 Warranty Sheet, Cybex Pro3, Pink DE-21275 Cybex Pro3 Decal for Side SK-17827 Kit, Assembly, Contact Heart Rate Extrusions Grip, Pair HN-60064 Nut, Jam 3-8”-16 blk zn...
- Page 65 AV Option 110 125 133 131 Cybex Pro 3 Treadmill Owner’s Manual Page 6-7...
-
Page 66: Schematic
ROW 3 SWITCH AW-17707 COL 1 SWITCH E-STOP MAGNET COL 2 SWITCH CABLE, CHR TO DISPLAY PCA, SALUTRON SERIAL OUTPUT SW-21228-X EC-17763 E-STOP KEY MEMBRANE, 550T CONSOLE BTM Cybex Pro 3 Schematic Cybex Pro 3 Treadmill Owner’s Manual Page 6-8...
Need help?
Do you have a question about the Pro3 and is the answer not in the manual?
Questions and answers