
Related Manuals for CYBEX 525T


Summary of Contents for CYBEX 525T
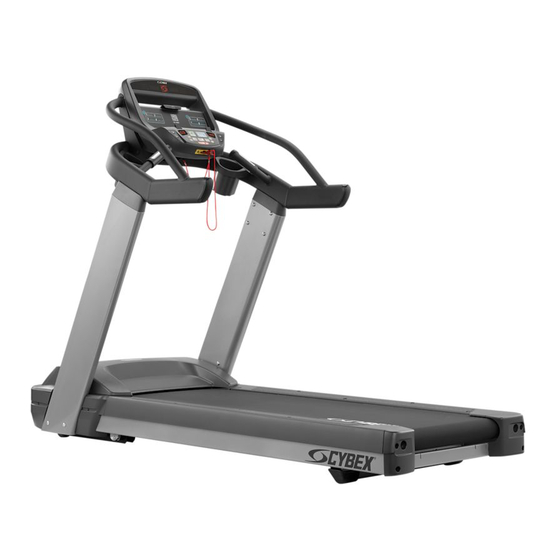
- Page 1 Cybex Treadmill Product Number 525T Owner’s Manual Cardiovascular Systems Part Number LT-24018-4 D www.cybexintl.com...
-
Page 2: Table Of Contents
....53 Cybex ® and the Cybex logo are registered trademarks of Cybex International, Inc. Safety Sentry™ is a registered trademark of Cybex International, Inc. -
Page 3: Fcc Compliance Information
Cybex Owner’s Manual FCC Compliance Information Changes or modifications to this unit not expressly approved by the party responsible for compliance could void the user’s authority to operate the equipment. This equipment has been tested and found to comply with the limits for a Class A digital device, pursuant to part 15 of the FCC Rules. -
Page 4: Safety
Cybex Owner’s Manual Safety Read all instructions and warnings before using. Important Voltage Information Before plugging the power cord into an electrical outlet, verify that the voltage requirements for the site match the voltage of the treadmill that has been received. The power requirements for the unit... -
Page 5: Important Safety Instructions
Cybex Owner’s Manual Important Safety Instructions (Save These Instructions) WARNING: Shock and electrocution hazard. Unplug unit and let sit 10 minutes before cleaning or performing maintenance. • Electrical charge can remain in unit after unplugging. • Keep water and liquids away from electrical parts. - Page 6 DO NOT attempt repairs, electrical or mechanical. Seek qualified repair personnel when servicing. • If you live in the USA, contact Cybex Customer Service at 888-462-9239. If you live outside the USA, contact Cybex Customer Service at 508-533-4300. Use Cybex factory parts when replacing parts on the treadmill.
-
Page 7: Warning Decals
To replace any worn or damaged decals do one of the following: Visit www.cybexintl.com to shop for parts online, fax orders to 508-533-5183 or contact Cybex Customer Service at 888-462-9239. If you are located outside of the USA, call 508-533-4300. For location or part number of labels, see the REVISIONS THE INFORMATION CONTAINED IN THIS DRAWING IS THE SOLE PROPERTY OF CYBEX. - Page 8 Cybex Owner’s Manual REVISIONS THE INFORMATION CONTAINED IN THIS DRAWING IS THE SOLE PROPERTY OF CYBEX. DESCRIPTION DATE APPROVAL ANY REPRODUCTION IN PART OR WHOLE WITHOUT See sheet 1. THE WRITTEN PERMISSION OF CYBEX IS PROHIBITED. REVISIONS THE INFORMATION CONTAINED IN THIS DRAWING IS THE SOLE PROPERTY OF CYBEX.
-
Page 9: Label Placement
Cybex Owner’s Manual Label Placement DE-23767 Decal, Warning, Upper Display, E3 View Monitor DE-23767-E Decal, Warning, Upper Display, E3 View Monitor, Canada DE-23764-4 Decal, Center DE-23764-E Decal, Center, Canada DE-23636-4 Decal, Warning, Main DE-23637-4 Decal, Warning DE-22910 Decal, Motor Cover, 115 VAC... -
Page 10: Emergency Stop Key (E-Stop)
Cybex Owner’s Manual Emergency Stop Key (e-stop) The e-stop key functions as an emergency stop. In an emergency situation, the e-stop key disengages from the console and the treadmill will come to a stop. Before using the treadmill, clip the e-stop key as described below. - Page 11 Cybex Owner’s Manual When not in use store the e-stop clip on the storage tab located on the left or right side of the handrail. Handrail Storage tab E-Stop clip...
-
Page 12: Assembly
Cybex Owner’s Manual Assembly Specifications - 525T Assembled 82” (208.3 cm) Length Assembled 34” (86.4 cm) Width Height: 62.5”(159 cm) Weight of 400 lbs. (181 kg) Product Shipping 440 lbs. (200 kg) Weight Incline Range 0 to 15% grade. Speed Range 0.5 to 12.4 mph (0.8 to 20.0 kph) in 0.1 mph or 0.1 kph increments. -
Page 13: Choosing And Preparing A Site
Cybex Owner’s Manual Choosing and Preparing a Site Before assembling the unit, verify the chosen site meets the following criteria: Area is well lit and well ventilated. • Surface is structurally sound and properly leveled. • Free area for access to unit and emergency dismount. Minimum clearance is 19.7 inches (0.5 me- •... -
Page 14: Electrical Power Requirements
Cybex Owner’s Manual Electrical Power Requirements The power requirements for this treadmill are a grounded, dedicated circuit rated for one of the following: 100 VAC, 50/60 Hz, 20A 220 VAC, 60 Hz, 15A • • 115 VAC, 50/60 Hz, 20A 230 VAC, 50 Hz, 13A, UK •... - Page 15 Cybex Owner’s Manual Unpack and verify contents of boxes. See content listing and diagram below for carton contents. See Customer Service for contact information if any parts are missing. Item Quantity Part Number Description Varies Base assembly Varies Console assembly...
- Page 16 Cybex Owner’s Manual Item Quantity Part Number Description HS-21672 Screw, #8-32 x 1/2” HS-22651 Bolt, 3/8-16 .75”, BHCS, ZN HS-16929 Bolt, Whiz Lock, 3/8-16 x .625”, HXHD AX-23657 Standoff, M-F, 3/8-16” Thread, Short AX-23656 Standoff, M-F, 3/8-16” Thread, Long HX-00440 Allen wrench, 7/32”...
- Page 17 Cybex Owner’s Manual WARNING: Heavy equipment: At least two people must lift, move or assemble unit. • Use safe lifting methods. • Lift and move the unit Take note of doorway widths in facility before assembly. The base is 32.5” (83 cm) wide. With uprights installed the width is 35.6”...
- Page 18 Cybex Owner’s Manual Install the uprights 1. Install the short and long standoffs to the right side of the base using a 3/4” open end wrench. Item Description Standoff, short Standoff, Long Base Front of unit 2. Thread two bolts into the base by hand. Do not fully thread bolts into the base.
- Page 19 Cybex Owner’s Manual Install the console assembly to the uprights If unit includes optional A/V or CSAFE cables, follow same display cable procedure. 1. Thread one bolt, into the top back hole for each side of the console assembly by hand. Do not fully thread bolts into the console assembly.
- Page 20 Cybex Owner’s Manual 4. Thread six bolts into the remaining holes of the right upright and left upright. Item Description Console Upright (Right shown) Bolt 5. Tighten all of the bolts using a 7/32” Allen wrench and 9/16” open end wrench.
- Page 21 Cybex Owner’s Manual Install optional A/V or CSAFE cables 1. Insert the CSAFE coupler into the mounting plate by hooking the lower tab into the mounting plate and snapping in the upper tab. Item Description Upper tab Mounting plate CSAFE coupler...
- Page 22 Cybex Owner’s Manual Install shield Tighten the seven screws securing the shield to the base using a Philips screwdriver. Item Description Base Screws (7) Shield Install motor cover 1. Place motor cover on carpeting or other soft surface. Do not scratch top of hood cover.
- Page 23 Cybex Owner’s Manual 3. Place the motor cover into position vertically by aligning the two tabs and four plastic connectors. Two plastic connectors are mounted in the front cover and two in the motor cover. Item Description Motor cover Tabs (2) Plastic connectors If motor cover top does not fit properly, loosen the side screws on the front cover as needed.
- Page 24 Cybex Owner’s Manual Install coax cable (E3 View Monitor option) Install 6’ coax cable to the coax cable connector in base of unit. Item Description 6’ Coax Cable Coax Cable Connector Install emergency stop key Confirm that the emergency stop key is in place in the bottom of the console. The treadmill will not run without the key in place.
-
Page 25: Setup
Cybex Owner’s Manual Setup Use the following instructions to setup the units settings. WARNING: Falling hazard. When starting unit. Stand on two top steps. • Do not stand on belt. • 1. Without anyone on the unit, plug the power cord into a power outlet from a grounded, dedicated circuit as described under Electrical Requirements in this chapter. - Page 26 GLOSS AREAS Cybex Owner’s Manual Setup options 1. Press and the hold the SCAN/HOLD and UP keys for 3 seconds. 2. Navigate through the setup menu with the UP or DOWN keys. EMBOSS WINDOW DEAD FRONT (PT-3396) 3. Press the ENTER key once to enter setup values.
- Page 27 GLOSS AREAS Cybex Owner’s Manual To reset setup options to default values 1. Press the Display option key at the first setup option screen (Time). The console will display “[rSEt] [? ]“. To exit without resetting, press the STOP or ENTER key.
-
Page 28: A/V Configuration And Fm Radio Presets
Cybex Owner’s Manual A/V Configuration and FM Radio Presets Setting up the Cybex Wireless Audio Receiver Module requires three steps: Determine the type of transmitter used (MYE 900MHz, Broadcast Vision 863MHz, etc. or TV FM). • Assign a TV channel number to each transmitter on the console. - Page 29 Setup key When storing FM presets, this button will clear all stored FM radio REVISIONS THE INFORM A TION CON T AINED IN THIS DR A WING IS THE SOLE PROPE R T Y OF CYBEX. presets DESCRIPTION AN Y REPRODUCTION IN P A R T OR WHOLE WITHOUT See sheet 1 THE WRITTEN PERMISSION OF CYBEX IS PROHIBITED.
- Page 30 “A 863” Enercise Audeon REVISIONS THE INFORM A TION CON T AINED IN THIS DR A WING IS THE SOLE PROPE R T Y OF CYBEX. DESCRIPTION AN Y REPRODUCTION IN P A R T OR WHOLE WITHOUT See sheet 1 “B 900”...
- Page 31 REVISIONS THE INFORM A TION CON T AINED IN THIS DR A WING IS THE SOLE PROPE R T Y OF CYBEX. DESCRIPTION AN Y REPRODUCTION IN P A R T OR WHOLE WITHOUT 5.
- Page 32 Cybex Owner’s Manual 4. Press Speed Up or Down keys to add “[Add]” a channel. Press Enter to save channel, “std” (stored) will be displayed. 5. Repeat steps 3 and 4 to save up to 32 FM radio stations. 6. Press Stop to exit setup when all FM radio stations are stored.
-
Page 33: E3 View Monitor Controls
Cybex Owner’s Manual E3 View Monitor Controls The remote control is used to perform all setup operations for the E3 View Monitor. POWER Turn the E3 View monitor on or off POWER MUTE POWER MUTE POWER MUTE SETUP TV/AV TV/FM... -
Page 34: E3 View Monitor Setup
Cybex Owner’s Manual E3 View Monitor Setup POWER MUTE Access Setup Screen SETUP TV/AV TV/FM CH LIST Press the SETUP button to display the SETUP MODE screen on the E3 View Monitor. Follow SLEEP LAST procedure to setup the E3 View Monitor. - Page 35 Cybex Owner’s Manual Picture settings Brightness Adjust range from 1 to 100. Default is 65. Contrast Adjust range from 1 to 100. Default is 70. Color Adjust range from 1 to 100. Default is 75. Tint Adjust range from 1 to 100. Range is R50 to G50. Default is 0.
- Page 36 Cybex Owner’s Manual Channel settings Signal (ATSC only) Select Air, Cable STD, Cable IRC, or Cable HRC. Auto Program See Below Manual Program See Below (DVB-T only) Add/Delete Channels See Below Parental Control Block channels based on TV ratings. Default Channel Select channel to display on power up.
- Page 37 SETUP SETUP TV/AV TV/AV TV/FM TV/FM CH LIST CH LIST Cybex Owner’s Manual SLEEP SLEEP LAST LAST POWER MUTE SETUP TV/AV TV/FM CH LIST 6. Press to set the Channel Sequence in which the channels are displayed after SLEEP LAST searching.
- Page 38 SLEEP LAST Cybex Owner’s Manual POWER MUTE POWER MUTE Auto Program (DVB-T Monitor) SETUP TV/AV TV/FM CH LIST SETUP TV/AV TV/FM CH LIST SLEEP LAST SLEEP LAST 1. Tap to select Auto Program. POWER MUTE 2. Tap SETUP TV/AV TV/FM to enter the menu.
- Page 39 Cybex Owner’s Manual POWER MUTE POWER MUTE This may take 20 or more minutes. If screen shuts off, POWER button to turn monitor on. SETUP TV/AV TV/FM CH LIST SETUP TV/AV TV/FM CH LIST SLEEP LAST 9. Press the SETUP...
- Page 40 SETUP SETUP TV/AV TV/AV TV/FM TV/FM CH LIST CH LIST Cybex Owner’s Manual SLEEP SLEEP LAST LAST 4. Tap to select ATV or DTV. ATV Manual Program DTV Manual Program ■ Storage ■ UHF CH. ► ■ System ■ Save ■...
- Page 41 SETUP SETUP TV/AV TV/AV TV/FM TV/FM CH LIST CH LIST Cybex Owner’s Manual SLEEP SLEEP LAST LAST POWER MUTE POWER MUTE POWER 5. Press to select Added or Deleted. SETUP TV/AV TV/FM CH LIST SLEEP SETUP LAST TV/AV TV/FM CH LIST...
- Page 42 Cybex Owner’s Manual Feature settings Power on Captions Mode Select Off or Last. Last will set caption mode to last used setting. (ATSC only) Power on Subtitles Mode Select Off or Last. Last will set subtitle mode to last used setting.
-
Page 43: Testing The Treadmill Operation
Do not stand on belt. • Cybex recommends that the treadmill be unplugged or the on/off (I/O) power switch turned off (O) when it is not in use. 1. Without anyone on the treadmill, plug the power cord into a power outlet from a grounded, dedicated circuit as described under Electrical Requirements in this chapter. -
Page 44: Operation
Cybex Owner’s Manual Operation Read and understand all instructions and warnings prior to using the treadmill. See all of the safety related information located in the Safety chapter. Terms Used This section lists some of the common terms and symbols used in this chapter. Other terms and symbols are listed in this chapter as appropriate. -
Page 45: User Control Symbols Used
Cybex Owner’s Manual User Control Symbols Used Control Control Name Description INCLINE UP Adjust Incline up. INCLINE DOWN Adjust Incline down. SPEED UP Adjust Speed up. SPEED DOWN Adjust Speed down. VOLUME UP Adjust Volume up. VOLUME DOWN Adjust Volume down. -
Page 46: Console Display
Cybex Owner’s Manual Console Display LED Display Left enunciator Displays Time, BPM, or Weight. Left data readout Displays value of Time, BPM, or Weight. Bar graph Displays workout profiles and setup options. Right enunciator Displays Calories, Distance, or Pace. Right data readout Displays value of Calories, Distance, or Pace. -
Page 47: User Controls
Cybex Owner’s Manual User Controls Incline keys Speed keys E-Stop key Incline display Volume keys Setup key Quick Start key Display option key Enter key Workouts key Headphone jack Up/Down keys Speed display STOP key Displays — Incline and speed are shown in the LED displays. -
Page 48: Detailed Operation Guide
Cybex Owner’s Manual 5. Hold the handrails while you step onto the running belt and begin walking. 6. Press the Incline ▲▼ keys to change the incline at any time. The left display will show incline. 7. Press the Speed + – keys to change the belt speed at any time. The right display will show the current speed. - Page 49 Cybex Owner’s Manual Setup options: Time Enter workout time. Level Enter workout level. Weight Enter user weight. 3. Use the UP and DOWN keys to increase or decrease each of the setup options. Press the ENTER key to advance to the next option.
-
Page 50: Stopping The Treadmill
Cybex Owner’s Manual Stopping the Treadmill Press STOP once to end the workout session and start the Workout Review. The treadmill will perform a controlled belt stop and bring the incline to 0%. The accumulated data or the results of the Fitness Test will be displayed for the duration configured in Setup for Review Time. -
Page 51: Workout Selection
Cybex Owner’s Manual Workout Selection Workout Choices: Workout Levels Settings Weight Loss Select time, level and weight. Rolling Hills Select time, level and weight. Hills Select time, level and weight. Pikes Peak Select time, level and weight. Hill Interval 1:1 Select time, level and weight. -
Page 52: Data Readouts
Cybex Owner’s Manual Data Readouts As you exercise, the treadmill keeps track of the following data: BPM (Beats Per Minute) — Your current heart rate. Heart rate will appear when a signal is introduced. Use the hand grips for Contact Heart rate or wear a Polar ® compatible heart rate chest strap. -
Page 53: Meaning Of % Grade
15% grade is equal to 8.53 Degrees (ArcTan(.15)=8.53º). The opposite is true to determine % Grade REVISIONS THE INFORM A TION CON T AINED IN THIS DR A WING IS THE SOLE PROPE R T Y OF CYBEX. from Degree of incline (Tan (8.53º)=.15). -
Page 54: Maintenance
Maintenance All preventive maintenance activities must be performed on a regular basis. Performing routine preventive maintenance actions can aid in providing safe, trouble-free operation of all Cybex equipment. Cybex is not responsible for performing regular inspection and maintenance actions for your machines. -
Page 55: Preventive Maintenance Activities
Cybex is not responsible for performing regular inspection and maintenance actions for your unit. Instruct all personnel in equipment inspection and maintenance actions and also in accident reporting/ recording. - Page 56 Cybex Owner’s Manual 1. Loosen but do not remove the two front cover screws securing the motor cover using a Phillips screwdriver. Description Motor cover Front cover Screws (2) 2. Remove motor cover by lifting vertically. 3. Loosen but do not remove the seven screws securing the sheild to the base using a Phillips screwdriver.
- Page 57 Cybex Owner’s Manual 6. Vacuum the fan and heat sink area of the motor controller. Motor controller Fan and heatsink 7. Use a dry cloth for the areas that you can not reach with the vacuum cleaner. If the machine has not been used for some time or is excessively dirty, use a dry cloth to wipe all exposed areas.
-
Page 58: Running Belt Maintenance
Cybex Owner’s Manual 3. Place the motor cover into position vertically by aligning the two tabs and four plastic connectors. Two plastic connectors are mounted in the front cover and two in the motor cover. Description Motor cover Tabs (2) Plastic connectors If motor cover top does not fit properly, loosen the side screws on the front cover as needed. - Page 59 The lateral position of the running belt is correctly centered when the Cybex logo is centered between the inside edges of the two belt tracking slots. If the Cybex logo is not centered between the belt tracking slots, center the running belt with the following procedure.
- Page 60 Cybex Owner’s Manual 7. Check the belt tension after the running belt has been centered. Make sure the running belt tension is tight enough so that the running belt does not slip or hesitate when stepped on. Walk on the treadmill at 3.5 - 4 mph (5.6 - 6.4 kph) and every 4th to 5th step throw your weight into your step to feel if the running belt is slipping.
-
Page 61: Other Preventive Maintenance
Cybex Owner’s Manual Tools Required Phillips screwdriver Disconnect the external power source 1. Turn the main power switch under the front end of the unit to the off (O) position. 2. Unplug the treadmill from the power outlet. Check the running belt condition 1. -
Page 62: E3 View Monitor
Cybex Owner’s Manual Static Electricity — Depending upon where you live, you may experience dry air, causing a common experience of static electricity. This may be especially true in the winter time. You may notice a static build-up just by walking across a carpet and then touching a metal object. The same can hold true while working out on your treadmill. -
Page 63: Recommended Service Schedule
Cybex Owner’s Manual Recommended Service Schedule THE INFORM A TION CON T AINED IN THIS DR A WING IS THE SOLE PROPE R T Y OF CYBEX. AN Y REPRODUCTION IN P A R T OR WHOLE WITHOUT See sheet 1 THE WRITTEN PERMISSION OF CYBEX IS PROHIBITED. - Page 64 Cybex Owner’s Manual Every 15,000 miles (24,140 km) Replace running belt and flip deck. • Check elevation assembly and replace worn parts. • Lubricate elevation pivot points. • Every 30,000 miles (48,280 km) Replace running belt and deck. •...
-
Page 65: Customer Service
To speak with a customer service representative, call 888-462-9239 (for customers living within the USA) or 508-533-4300 (for customers outside the USA). The following information located on the serial number decal will assist our Cybex representatives in serving you. Unit Serial Number, Product Name and Model Number •... -
Page 66: Return Material Authorization (Rma)
Provide the model and serial number of your Cybex equipment. At Cybex’s discretion, the technician may request that you return the problem part(s) to Cybex for evaluation and repair or replacement. The technician will assign you a RMA number and will send you an ARS label. -
Page 67: Appendix - Workout Overviews
Cybex Owner’s Manual Appendix - Workout Overviews 1 Weight Loss The Weight Loss workout uses a series of relatively minor changes in its five-minute core to add an incremental demand. The five-minute core utilizes a baseline incline for two minutes and then increases the incline for added demand and then provides a slightly lower Incline for two-minutes for recovery. -
Page 68: Rolling Hills
Cybex Owner’s Manual 2 Rolling Hills The Rolling Hills workout uses an eight-minute core intended to mimic variety in terrain that might be found on a hilly outdoor run. The eight-minute core is composed of four segments. The baseline segment is two –minutes in length and is followed by two two-minute segments of increase Incline before returning to the intermediate incline for two-minutes. -
Page 69: Hills
Cybex Owner’s Manual 3 Hills The Hills workout uses a six-minute core utilizing one minute segments with mild Incline changes and two relative peak segments followed by relative rest segments. Time 1:00 1:00 1:00 1:00 1:00 1:00 Warm Up Core Segments... -
Page 70: Pikes Peak
Cybex Owner’s Manual 4 Pikes Peak Pikes Peak uses a nine-minute core where the incline increases every minute for the first five minutes. After the fifth minute of the core workout, the incline is reduced each minute. This workout uses continuous and gradual changes to give the user time to acclimate to demand and recover without large perceived changes in the effort required. -
Page 71: Hill Interval 1:1
Cybex Owner’s Manual 5 Hill Interval 1:1 This workout is designed for to increase capability by alternating two minute work segments with two minutes of relative rest. The intensity of rest periods is greater here than in Hill Interval 1:2 as is the duration of the work interval making this workout more demanding than Hill Interval 1:2. -
Page 72: Hill Interval 1:2
Cybex Owner’s Manual 6 Hill Interval 1:2 This workout is designed for to through a one-minute work interval at a high incline followed by a two minute rest interval at a substantially lower incline. Given the lower incline and longer rest intervals this workout is less intense than Hill Interval 1:1. -
Page 73: Hill Interval 1:3
Cybex Owner’s Manual 7 Hill Interval 1:3 Hill Interval 1:3 utilizes a one-minute work interval followed by a three-minute rest interval. The rest intervals are of a higher incline that those found in the other Hill Interval workouts, and therefore require a longer recovery period. -
Page 74: Cardio
Cybex Owner’s Manual 8 Cardio The Cardio workout is designed to maintain a high total demand using two four-minute segments of alternating incline. This allows prolonged intervals that take advantage of long-term energy systems and total aerobic capability when associated with speeds that require a high sustained cardiovascular demand. -
Page 75: Heartrate Control (E3 View Monitor Option)
Cybex Owner’s Manual 9 - Heartrate Control (E3 View Monitor Option) The Heartrate Control (HRC) program will attempt to bring the user to their target heartrate in 3-5 minutes, then keep them there for the duration of the body of the program. A Cool Down is built in to the end of the program. - Page 76 Cybex Owner’s Manual Cool Down By default, Cool Down occurs at session time minus two minutes or if the user presses the Cool Down button. Cool Down goes to 75% of existing step, then drops by 1 step every 15 seconds for the remainder of Cool Down.
- Page 77 Cybex Owner’s Manual Stage 1 Stage 2 Stage 3 Stage 4 Step Watts Step Watts Step Watts Step Watts...
- Page 78 Cybex Owner’s Manual...
Need help?
Do you have a question about the 525T and is the answer not in the manual?
Questions and answers
In stetting up a 525T treadmill, is there a manufacture recommended distance between the treadmill and other pieces of equipment to ensure safe dismount.
The recommended distance between the CYBEX 525T treadmill and other equipment for safe dismount is 79 inches (2.0 meters) at the back.
This answer is automatically generated