
Related Manuals for Air Live POE-280HD


Summary of Contents for Air Live POE-280HD
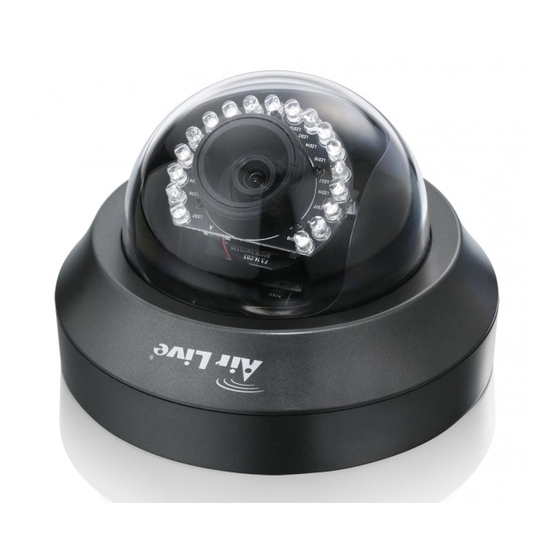
- Page 1 Table of Contents POE-280HD H.264 1.3 MegaPixel IR Night Vision Dome Camera User’s Manual AirLive POE-280HD User’s Manual...
- Page 2 This product contains some codes from GPL. In compliance with GPL agreement, AirLive will publish the GPL codes on our website. Please go to and go to the www.airlive.com "Support->GPL" menu to download source code. All Trademarks are properties of their respective holders. AirLive POE-280HD User’s Manual...
-
Page 3: Fcc Statement
FCC Radiation Exposure Statement This equipment complies with FCC radiation exposure limits set forth for an uncontrolled environment. This equipment should be installed and operated with minimum distance 20cm between the radiator & your body. AirLive POE-280HD User’s Manual... -
Page 4: Table Of Contents
5. Configuration of Main Menu ..............17 5.1 Live View....................18 5.2 Setting....................19 5.3 Client Setting ..................20 5.4 Image Setup ..................21 6. Setting-Basic ..................22 6.1 System....................22 6.2 Camera ....................27 6.3 Network....................39 6.4 Security....................51 7. Setting-Advanced ..................55 7.1 FTP Client ..................55 7.2 SMTP....................60 AirLive POE-280HD User’s Manual... - Page 5 7.5 HTTP Event ..................75 7.6 Alarm output..................78 7.7 Schedule....................79 7.8 Alarm Input..................81 7.9 Alarm Buffer ..................82 7.10 Motion Detection ................82 7.11 System Log ..................84 8. Appendix ....................85 A. Frame-rate and Bitrate Table............85 B. Storage Requirement Table ..............90 AirLive POE-280HD User’s Manual...
-
Page 6: Overview
Airlive POE cameras in locations with power limitation. The built-in IR LED and ICR make POE-280HD provide a clear and smooth video image even in the night time or in a low illumination environment. For applications such as hallways or stairwell, the POE-280HD is an ideal IP camera for these locations. -
Page 7: Product Specification
(32 ~ 122 conditions Humidity: 20% ~ 85% non-condensing Supported Bonjour, TCP/IP, DHCP, PPPoE, ARP, ICMP, FTP, protocols SMTP, DNS, NTP, UPnP, RTSP, RTP, HTTP, TCP, UDP, 3GPP/ISMA RTSP Dimension HxWxD:145x145x100 mm Approvals CE, FCC, RoHS AirLive POE-280HD User’s Manual... -
Page 8: System Requirement
Windows 2000, Windows 2003, Windows XP, Windows Vista, System Windows 7, and Mac OS X Leopard Web Browser Internet Explore 6 or later Note: Please keep updating the latest Windows software and service package. (Ex: Net Framework, Windows Media Player, Enhance ActiveX Security) AirLive POE-280HD User’s Manual... -
Page 9: Package Contents And Installation
Installation User can find the following items in the package as below: 1. POE-280HD is the main element of the product. 2. Bundle CD include Setup Wizard II, Quick Start Guide, User Manual and other tools 3. Power Adapter dedicates 12V DC electric power output to Network Camera. - Page 10 Steady green for Network link. Orange Flash orange while Network activity. Reset Reboot Press the Reset Button to reboot the camera. Reset to Hold the Reset Button for 10 seconds to restore the Factory Default camera to default AirLive POE-280HD User’s Manual...
-
Page 11: Hardware Installation
2. Package Contents and Installation 2.2 Hardware Installation Follow these steps to install the POE-280HD on your Ethernet: A. Wall mounting and Ceiling mounting 1. Attach the alignment sticker to the wall/ceiling and drill two pilot holes into it. 2. Hammer the supplied plastic anchors into the holes. - Page 12 2. Package Contents and Installation 2. Without Power over Ethernet (PoE) connection Connect the power adaptor to the IP Camera. Using a standard RJ-45 network cable, connect the IP Camera to a normal Hub / Switch / Router. AirLive POE-280HD User’s Manual...
- Page 13 4. Slightly adjust dome bubble to final position if needed and double check the camera is properly focused. 5. The installation is complete now. AirLive POE-280HD User’s Manual...
-
Page 14: Connect To Ip Camera
2. Package Contents and Installation 2.3 Connect to IP Camera A. Insert the bundle CD into your PC/Laptop B. Auto Run Screen then shows up, click “Install Driver & Utility IP Search Tool” to install the configuration tool software AirLive POE-280HD User’s Manual... - Page 15 If the Camera’s IP address is in the same IP segment as your LAN, select the founded IP Camera and double click on the item, then the default browser will show up and connect to the IP camera’s Web automatically. AirLive POE-280HD User’s Manual...
-
Page 16: Using Ip Camera Via Web Browser
You can change them in the Account Menu. (Please check “Setting → Basic → Security → Account”) C. The monitor image will be displayed in your browser. In the far left side of main configuration are Setting, Client Setting, and Image Setup. AirLive POE-280HD User’s Manual... -
Page 17: Mac Web Browser
3. Using IP Camera via Web Browser 3.2 Mac Web Browser A. Click the Safari icon, and enter the IP address of the IP camera in the Location / Address field of your browser. AirLive POE-280HD User’s Manual... - Page 18 B. Enter the default account “admin” and default password “airlive”. Note: The default user name “admin” and the password “airlive” are set at the factory for the administrator. You can change them in the Account Menu (Please check “Setting → Basic → Security → Account”) AirLive POE-280HD User’s Manual...
- Page 19 3. Using IP Camera via Web Browser C. The monitor image will be displayed in your browser. In the far left side of main configuration are Setting, Client Setting, and Image Setup. AirLive POE-280HD User’s Manual...
-
Page 20: Operating Ip Camera Via Mobile Phone
Browser. <IP> is the Public IP address of your IP camera. 2.5G Mobile Phone Browser Viewing For 2.5G mobile phone viewing, type “http://<IP>/mobile.wml ” into your 2.5G Web Browser. <IP> is the Public IP address of your IP camera. AirLive POE-280HD User’s Manual... -
Page 21: Using Ip Camera Via Iphone
D. The Web User Interface and Default value is admin / airlive. live image will show up in the Then click Login In middle of screen. Note: The image is continuous snapshots, not video. Thus, live image can’t be recorded here. AirLive POE-280HD User’s Manual... -
Page 22: Configuration Of Main Menu
In the left side of main configuration are Setting, Client setting, and Image setting. In the right side, you can control Live View in your main Browser. The functions include Snapshot, Open digital zoom, and Video Play. Snapshot Full screen Open digital zoom Video Play AirLive POE-280HD User’s Manual... -
Page 23: Live View
B.Pull the to adjust the digital zoom range, and it will be showed on the above window. C.Use the left click of your mouse to move to anywhere in the window area. AirLive POE-280HD User’s Manual... -
Page 24: Setting
Basic and Advanced Settings menu. Basic Click Basic, there are sub-menus including System, Camera, Network, and Security. Advanced Click Advanced, there are sub-menus including FTP Client, SMTP, Network storage, HTTP event, Schedule, Alarm buffer, Motion Detection, and System Log. AirLive POE-280HD User’s Manual... -
Page 25: Client Setting
Select the transferring protocol among TCP, UDP, and HTTP. Video Buffer Turn the Video Buffer function On / Off. The Video Buffer function makes the streaming more smoothly in unsteady network environment, but might cause a little delay in live viewing AirLive POE-280HD User’s Manual... -
Page 26: Image Setup
The value range is 0~99. It applies image processing techniques to adjust the sharpness of live view. However, higher the value is, more the noise is. Default After the adjustment of all setting, you can still click Default to make the setting back to the original setting. AirLive POE-280HD User’s Manual... -
Page 27: Setting-Basic
6. Setting-Basic Setting-Basic Click the Basic to display the sub-menus including System, Camera, Network, and Security. 6.1 System Click System to display the sub-menus including Information, Date / Time, Initialize, and Language. AirLive POE-280HD User’s Manual... - Page 28 6. Setting-Basic Information The Information screen provides the product factory information which includes Product Name, and Firmware Version. Date / Time The Date/ Time screen displays all options of time setting. AirLive POE-280HD User’s Manual...
- Page 29 IP Camera with those of the time server, known as the NTP server. Time Zone: Select the Time Zone format of Greenwich Mean Time among different cities. The time display will be the same as the current date / time option. AirLive POE-280HD User’s Manual...
- Page 30 “OK” to execute. The network indicator on this IP Camera will start to blink. This IP Camera will reboot automatically after completing adjustments to the default setting. Don't turn off this IP Camera until the device reboots. AirLive POE-280HD User’s Manual...
- Page 31 WEB User Interface could be changed. A confirmation dialogue will appear. Click “OK”, then the update will be applied immediately. The default language is “English.” Note: You might find the Language Pack in the bundle CD. AirLive POE-280HD User’s Manual...
-
Page 32: Camera
The default value is 554. If the IP Cameras connected with router and installed outside are over 2 sets and all of them need support RTSP, please fill some value in the blank space in the range from 1024 to 65535. AirLive POE-280HD User’s Manual... - Page 33 The Bright value higher, the led auto-off more easily in the bright environment will be. The Dark value higher, the led auto-on more easily in the dark environment will be. Both values range from 0 to 100. AirLive POE-280HD User’s Manual...
- Page 34 QuickTime Player to have live viewing. Off: If the viewer authentication is Off, you can have live viewing on computer by QuickTime Player after entering “rtsp://ip:port/video.h264” on the URL column directly. AirLive POE-280HD User’s Manual...
- Page 35 Excellent. Fixed Bitrate: Set the bitrate of H.264 image transmission for a line. Select one among 64Kbps, 128Kbps, 256Kbps, 384Kbps, 512Kbps, 768Kbps, 1Mbps, 1.5 Mbps, 2 Mbps, 3 Mbps, 4 Mbps, 5 Mbps, and 6 Mbps. AirLive POE-280HD User’s Manual...
- Page 36 QuickTime Player to have live viewing. Off: If the viewer authentication is Off, you can have live viewing on computer by QuickTime Player after entering “rtsp://ip:port/video.mp4” on the URL column directly. AirLive POE-280HD User’s Manual...
- Page 37 Set the bitrate of MPEG-4 image transmission for a line. You can select one value among 64Kbps, 128Kbps, 256Kbps, 384Kbps, 512Kbps, 768Kbps, 1Mbps, 1.5 Mbps, 2 Mbps, 3 Mbps, 4 Mbps, 5 Mbps, and 6 Mbps. AirLive POE-280HD User’s Manual...
- Page 38 Off: If the viewer authentication is Off, you can have live viewing on computer by QuickTime Player after entering “rtsp://ip:port/video.mjpg” on the URL column directly. Multicasting streaming (if it’s on): Multicast Address: Specify the multicast server address. AirLive POE-280HD User’s Manual...
- Page 39 H.264/MPEG-4/MJPEG setting page has to been selected 320x240 or 640x480 at the same time. Quality: Auto: The quality and bit rate will be adjusted automatically according to the frame rate. Fixed Quality: Select the value of quality among Medium, Good, Delicate and Excellent. AirLive POE-280HD User’s Manual...
- Page 40 Set the bitrate of 3GPP image transmission for a line. You can select one among 64Kbps, 48Kbps, 32Kbps, and 16Kbps. IP Interval: It’s the ratio of i-frame & p-frame. You can select one among 5, 10, 15 and 30 fps. The ratio is smaller, and the streaming is smoother. AirLive POE-280HD User’s Manual...
- Page 41 White Balance: Choose the white balance among Auto, Florescent, Sunny and Cloudy. Lighting: The default setting of lighting environment is Auto. However, you may also choose 50 or 60 Hz upon the lighting environment of your country. AirLive POE-280HD User’s Manual...
- Page 42 Manual: Choose Manual and you can select options, including Shutter Speed and Gain. Shutter Speed: The default value is 1/30 sec. and you can select the value among 1/4, 1/6, 1/12, 1/30, 1/60, and 1/120 sec. AirLive POE-280HD User’s Manual...
- Page 43 Please refer to the diagram below for learning how to use the Playback function. Mirror/ Flip Snapshot Full Screen Increase Speed Volume Play/Pause Open Stop Decrease Mute on / Files Open Digital Zoom Speed Mute off AirLive POE-280HD User’s Manual...
-
Page 44: Network
Display and configure the network setting about the IP camera, such as MAC address, IP setting. Obtain an IP address automatically (DHCP): If a DHCP server is installed on the network, to select this while the IP address is assigned by the DHCP server. AirLive POE-280HD User’s Manual... - Page 45 Select this when you set the fixed address as the IP address of DNS server. Primary DNS server: Enter the IP address of the primary DNS server. Secondary DNS server: Enter the IP address of the secondary DNS server, if necessary. AirLive POE-280HD User’s Manual...
- Page 46 The IP address obtained at the PPPoE connecting with network. User ID: Enter the user ID for authentication necessary for PPPoE connections. Type it up to 64 characters. Password: Enter the password for authentication necessary for PPPoE connections. Type it up to 32 characters. AirLive POE-280HD User’s Manual...
- Page 47 ADSL, VDSL or SDSL) The IP Camera needs to be rebooted after it finishes changing the network completely. The IP Camera with Intelligent IP Installer can’t be founded after turning on the PPPoE and reboot. AirLive POE-280HD User’s Manual...
- Page 48 Re-type the password to confirm. Host Name: Enter the host name that is registered to the DDNS server. Note: How to apply DDNS username and Host name? You can apply DDNS username and Host name by the following steps: AirLive POE-280HD User’s Manual...
- Page 49 6. Setting-Basic A. Login http://www.dyndns.org, click the Creat Account B. Input all information and follow step by step with DynDNS AirLive POE-280HD User’s Manual...
- Page 50 6. Setting-Basic C. Login with new account and click Account → My Hosts → Add Host Services D. Type domain in the Hostname field and select sub-domain AirLive POE-280HD User’s Manual...
- Page 51 6. Setting-Basic E. After typing the information, check your DDNS service. F. Type your DDNS User ID, Password and Host name in Setting → Network → DDNS. After completing setting, reboot IP Camera. AirLive POE-280HD User’s Manual...
- Page 52 Bonjour, also known as zero-configuration networking, enables automatic discovery of computers, devices, and services on IP networks. Bonjour uses industry standard IP protocols to allow devices to automatically discover each other without the need to enter IP addresses or configure DNS servers. AirLive POE-280HD User’s Manual...
- Page 53 6.3.6 IP Notification When network notify type is set to “ON”, you can send an e-mail notification of the configuration of the network setting. Notify Type: You can select the notify type among DHCP, Static IP, and PPPoE. AirLive POE-280HD User’s Manual...
- Page 54 Select the authentication required when you send an email. Off: Select if no authentication is necessary when an email is sent. On: When authentication is necessary an e-mail is sent, there are SMPT, POP before SMPT or both three options. AirLive POE-280HD User’s Manual...
- Page 55 Type the subject/title of the e-Mail up to 64 characters. With respect to mail which is sent according to the IP notification. Message: Type the text of the E-mail up to 384 characters. Default value provides network information including IP, Port, MAC, Model, Firmware Version and Web Version. AirLive POE-280HD User’s Manual...
-
Page 56: Security
IP address can access the device including all configuration. It is necessary to assign a password if the device is intended to be accessed by others. User Name: Set a user name between 4-16 characters. AirLive POE-280HD User’s Manual... - Page 57 //URL/ with a different default TCP port (443) and an additional encryption / authentication layer between the HTTP and TCP. You can use the IP camera through HTTPS easily by using https:// instead of http://. AirLive POE-280HD User’s Manual...
- Page 58 Note: When enable HTTPS with RTSP on mode, the IP Camera only protect the setting such as username and password and do not protect video. When enable HTTPS with RTSP off mode, the IP Camera will protect all setting including video. AirLive POE-280HD User’s Manual...
- Page 59 Deny Range List: You can define not more than five sets of deny range in the list. Note: The super user account, “admin”, will not be blocked even the user access the device with a denied IP. AirLive POE-280HD User’s Manual...
-
Page 60: Setting-Advanced
7. Setting-Advanced Setting-Advanced Click the Advanced to display the sub menus including FTP client, SMTP, Network storage, Memory Card, HTTP event, Alarm output, Schedule, Alarm buffer, Motion detection, and System Log. 7.1 FTP Client AirLive POE-280HD User’s Manual... - Page 61 Type the FTP server name to upload still images up to 64 characters, or the IP address of the FTP server. User Name: Type the user name for the FTP server. Password: Type the password for the FTP server. AirLive POE-280HD User’s Manual...
-
Page 62: Alarm Sending
Set to forward a snapshot or video clip file to the specified FTP server linked with the alarm detection by the external sensor input or by the built-in motion detection function. Select On to send the file to FTP server linked with the alarm detection. AirLive POE-280HD User’s Manual... - Page 63 Note: You can set alarm buffer at alarm buffer screen. (Please go “Setting → Advanced → Alarm Buffer → Setting”) Effective Period: Set the period when the periodical sending is effective. Always: The periodical sending is always effective. AirLive POE-280HD User’s Manual...
-
Page 64: Periodical Sending
(2 digits), month (2 digits), date (2 digits), hour (2 digits), minute (2 digits) and second (2 digits), and consecutive number (2 digits), thus 14-digit number is added to the file name. AirLive POE-280HD User’s Manual... -
Page 65: Smtp
Mail (SMTP) function, you can send a mail with attached file which has been shot linked with the external sensor input or with the built-in motion detection function. The file can also be sent periodically. E-Mail (SMTP) setting menu is composed of three tabs, General, Alarm Sending and Periodical Sending. AirLive POE-280HD User’s Manual... - Page 66 25. Security setting: Tick SSL box if the mail server you use has security restriction. Note: If you use g-mail as your mail server, you should set 25 as your port number and tick SSL box. AirLive POE-280HD User’s Manual...
- Page 67 You can choose snapshot or video clip for alarm sending. Select “Snapshot,” one snapshot will be transmitted to the administrator’s e-mail address while motion detection triggered. Select “Video Clip,” one 5-seconds video clip will be transmitted. AirLive POE-280HD User’s Manual...
- Page 68 Set to send the mail with connection to the alarm detection by the external sensor input or by the built-in motion detection function. Select On to send the image file to SMTP server linked with the alarm detection. AirLive POE-280HD User’s Manual...
- Page 69 Advanced → FTP Client → General”) , you can using Alarm buffer function as a sensor. Note: You can set alarm buffer at alarm buffer screen. (Please go “Setting → Advanced → Alarm Buffer → Setting”) AirLive POE-280HD User’s Manual...
- Page 70 (2 digits), month (2 digits), date (2 digits), hour (2 digits), minute (2 digits) and second (2 digits), and consecutive number (2 digits), thus 14-digit number is added to the file name. AirLive POE-280HD User’s Manual...
-
Page 71: Network Storage
Please check “Setting → Basic → Advanced → Schedule → Setting.” Note: You can set schedule function at schedule screen. (Please go “Setting → Advanced → Schedule → Setting”) 7.3 Network Storage AirLive POE-280HD User’s Manual... - Page 72 Set to transmit the snapshot or video clip file with connection to the alarm detection by the external sensor input or by the built-in motion detection function. Select On to send the file to network storage location linked with the alarm detection. AirLive POE-280HD User’s Manual...
- Page 73 Motion Detection: Click it on for using Motion Detection function as a sensor. You can set motion detection function at the motion detection function screen. Note: You can set motion detection at motion detection screen. (Please go “Setting → Advanced → Motion Detection → Setting”) AirLive POE-280HD User’s Manual...
-
Page 74: Periodical Recording
Type the file name you want to assign to the file transmitted to the network storage location. You can use up to 10 alphanumeric, - (hyphen) and _ (underscore) for naming. Suffix: Select a suffix to add to the file name AirLive POE-280HD User’s Manual... - Page 75 Schedule: You can specify the period when the periodical recording is effective in the Schedule setting in the other section. Note: You can set schedule function at schedule screen. (Please go “Setting → Advanced → Schedule → Setting”) AirLive POE-280HD User’s Manual...
-
Page 76: Memory Card
Set to transmit the snapshot or video clip file with connection to the alarm detection by the external sensor input or by the built-in motion detection function. Select On to send the file to SD card with the alarm detection. AirLive POE-280HD User’s Manual... - Page 77 Motion Detection: Click it on for using Motion Detection function as a sensor. You can set motion detection function at the motion detection function screen. Note: You can set motion detection at motion detection screen. (Please go “Setting → Advanced → Motion Detection → Setting”) AirLive POE-280HD User’s Manual...
- Page 78 On. Image file name: Type the file name you want to assign to the file transmitted to the network storage location. You can use up to 10 alphanumeric, - (hyphen) and _ (underscore) for naming. AirLive POE-280HD User’s Manual...
- Page 79 Advanced → Schedule → Setting”) 7.4.4 Backup The Backup function is a redundant storage. If the user enables this function, once the network storage is disconnect, the SD card will take over the role as the storage device. AirLive POE-280HD User’s Manual...
-
Page 80: Http Event
HTTP server. HTTP client setting menu is composed of two tabs, General and Alarm sending. AirLive POE-280HD User’s Manual... - Page 81 Note: The setting of URL should be the same as CGI. 7.5.2 Alarm Sending Set to send the command with connection to the alarm detection by the external sensor input or by the built-in motion detection function. Select “ON“ to send the image. AirLive POE-280HD User’s Manual...
- Page 82 Click it on to receive a snapshot or a video clip while network link down. If Attached File Type (go “Setting → Advanced → FTP client → General”) was clicked as video clip, you can using Alarm buffer function as a sensor. AirLive POE-280HD User’s Manual...
-
Page 83: Alarm Output
7. Setting-Advanced Note: You can set alarm buffer at alarm buffer screen. (Please go “Setting → Advanced → Alarm Buffer → Setting”) Parameter: the parameter of CGI (defined in URL of HTTP → General) is from your target device. For example, move=down. Message: message will show up in the form of Message = PTZ down. -
Page 84: Schedule
Schedule to set Effective period and Schedule in FTP client, e-Mail (SMTP), HTTP event, Record, and Alarm out setting menu setting menu. AirLive POE-280HD User’s Manual... - Page 85 When this is checked, the Start Time and End Time set to Mon (Monday) are applied to all days. In this case, the Start Time and End Time of the other days than Mon (Monday) cannot be input. AirLive POE-280HD User’s Manual...
-
Page 86: Alarm Input
Click it on for using external sensor which is connected to sensor input1 of the camera I / O port. Trigger Condition: Select High signal output and Low signal output as your alarm. Camera Move: Pull down the window to select the camera preset position. AirLive POE-280HD User’s Manual... -
Page 87: Alarm Buffer
There are three Motion Detection functions as sensors to set for different detecting zones. Each one has Threshold and Sensitivity inputs which you can adjust to specific zone sequentially. Motion Detection function can support to FTP Client, SMTP, Network Storage, and HTTP Event. AirLive POE-280HD User’s Manual... - Page 88 Click it on for using Motion Detection 2 function as a sensor. You can adjust and move the detecting zone by using mouse. Motion Detection 3: Click it on for using Motion Detection 3 function as a sensor. You can adjust and move the detecting zone by using mouse. AirLive POE-280HD User’s Manual...
-
Page 89: System Log
7.11 System Log The System Log function allows users to review any changes and events happened. The system starts logging automatically after started. Enable Remote Log: Enables user to send the log data to a specified log server. AirLive POE-280HD User’s Manual... -
Page 90: Appendix
640*480 320*240 Excellent 1900 1400 Detailed 1200 Good Standard Medium A.1.3 H.264 / kbps, fps Frame-Rate Current Image-Size Bitrate Setting Current Bitrate Setting Frame-Rate 1280*1024 6144 6300 1280*1024 6144 6300 1280*1024 2048 2200 1280*1024 2048 2200 AirLive POE-280HD User’s Manual... - Page 91 3000 2300 Detailed 2200 1600 Good 1400 1100 Standard Medium A.1.6 MPEG4 / kbps, fps Frame-Rate Current Image-Size Quality Setting Current Bitrate Setting Frame-Rate 1280*1024 6144 5200 1280*1024 6144 6300 1280*1024 2048 2200 1280*1024 2048 2200 AirLive POE-280HD User’s Manual...
- Page 92 4700 2000 Standard 4700 3500 1500 Medium 2800 2200 1000 A.1.9 MJPEG / kbps, fps Frame-Rate Current Image-Size Quality Setting Current Bitrate Setting Frame-Rate 1280*1024 Excellent 17500 1280*1024 Excellent 16000 1280*1024 Good 10000 1280*1024 Good 6500 AirLive POE-280HD User’s Manual...
- Page 93 320*240 Excellent Detailed Good Standard Medium A.2.2 H.264@15 fps / kbps Quality 640*480 320*240 Excellent Detailed Good Standard Medium A.2.3 H.264 / kbps, fps Frame-Rate Current Image-Size Bitrate Setting Current Bitrate Setting Frame-Rate 640*480 6144 6300 AirLive POE-280HD User’s Manual...
- Page 94 Current Image-Size Bitrate Setting Current Bitrate Setting Frame-Rate 640*480 6144 6300 640*480 6144 6300 640*480 2048 2200 640*480 2048 2200 640*480 640*480 320*240 6144 5100 320*240 6144 2800 320*240 2048 2200 320*240 2048 2200 320*240 320*240 AirLive POE-280HD User’s Manual...
-
Page 95: Storage Requirement Table
2000 320*240 Good 1200 320*240 Medium 1000 320*240 Medium B. Storage Requirement Table Help to set Recording Storage System. Please refer to the following table to find out the capability for recording into your hard disk. AirLive POE-280HD User’s Manual... - Page 96 1280*720 45.7 1280*720 45.7 640*480 6144 522.9 640*480 6144 522.9 640*480 2048 182.6 640*480 2048 182.6 640*480 45.7 640*480 45.7 320*240 6144 423.3 320*240 6144 298.8 320*240 2048 182.6 320*240 2048 182.6 320*240 45.7 320*240 45.7 AirLive POE-280HD User’s Manual...
- Page 97 1280*720 45.7 1280*720 45.7 640*480 6144 522.9 640*480 6144 522.9 640*480 2048 182.6 640*480 2048 182.6 640*480 45.7 640*480 45.7 320*240 6144 182.6 320*240 6144 149.4 320*240 2048 182.6 320*240 2048 149.4 320*240 45.7 320*240 45.7 AirLive POE-280HD User’s Manual...
- Page 98 2048 2200 182.6 320*240 2048 2200 182.6 320*240 45.7 320*240 45.7 B.2.4. MPEG4 Storage Requirement GB / channel / day @ 30fps Quality 640*480 320*240 Excellent 116.2 20.8 Detailed 13.3 Good 49.8 Standard 33.2 Medium 24.9 AirLive POE-280HD User’s Manual...
- Page 99 640*480 6144 6300 522.9 640*480 2048 2200 182.6 640*480 2048 2200 182.6 640*480 45.7 640*480 45.7 320*240 6144 5100 423.3 320*240 6144 2800 232.4 320*240 2048 2200 182.6 320*240 2048 2200 182.6 320*240 45.7 320*240 45.7 AirLive POE-280HD User’s Manual...
Need help?
Do you have a question about the POE-280HD and is the answer not in the manual?
Questions and answers