Air Live BC-5010 User Manual
5-mega pixel box type poe ip camera
Hide thumbs
Also See for BC-5010:
- Quick setup manual (5 pages) ,
- User manual (67 pages) ,
- How to adjust (9 pages)
Table of Contents
Advertisement
Quick Links
Advertisement
Table of Contents

Related Manuals for Air Live BC-5010


Summary of Contents for Air Live BC-5010
- Page 1 BC-5010 5-Mega Pixel Box Type PoE IP Camera User’s Manual...
- Page 2 OvisLink Corp. has made the best effort to ensure the accuracy of the information in this user’s guide. However, we are not liable for the inaccuracies or errors in this guide. Please use with caution. All information is subject to change without notice All Trademarks are properties of their respective holders. AirLive BC-5010 User’s Manual...
-
Page 3: Fcc Statement
FCC Radiation Exposure Statement This equipment complies with FCC radiation exposure limits set forth for an uncontrolled environment. This equipment should be installed and operated with minimum distance 20cm between the radiator & your body. AirLive BC-5010 User’s Manual... -
Page 4: Table Of Contents
4. Operating IP Camera via Mobile Phone ..........20 4.1 Using IP Camera via iPhone..............20 5. Configuration of Main Menu..............23 5.1 Live View....................24 5.2 Configuration ..................26 6. Configuration-Network ................28 6.1 General ....................29 6.2 UPnP/Bonjour/QoS ................31 6.3 IP Filter....................32 6.4 IP Notification..................33 6.5 iSCSI....................34 AirLive BC-5010 User’s Manual... - Page 5 9.3 Motion Detection ................48 10. RS-485.....................49 10.1RS-485 Settings................49 10.2 RS-485 PTZ ..................50 11. System ....................51 11.1Device Settings .................52 11.2 Account ....................52 11.3 Management Ports................54 11.4 Firmware ..................54 11.5 Maintenance..................55 12. Status ......................57 12.1 Basic ....................57 12.2 Audio/Video..................57 12.3 Network....................58 AirLive BC-5010 User’s Manual...
- Page 6 A. Alarm I/O Connector ................61 B. Frequently Ask Questions..............62 C. Ping IP Address...................67 D. Bandwidth Estimation................68 E. Configure Port Forwarding Manually ...........68 F. Power Line Frequency .................72 G. 3GPP....................73 H. Enable UPnP of Windows XP .............74 AirLive BC-5010 User’s Manual...
-
Page 7: Overview
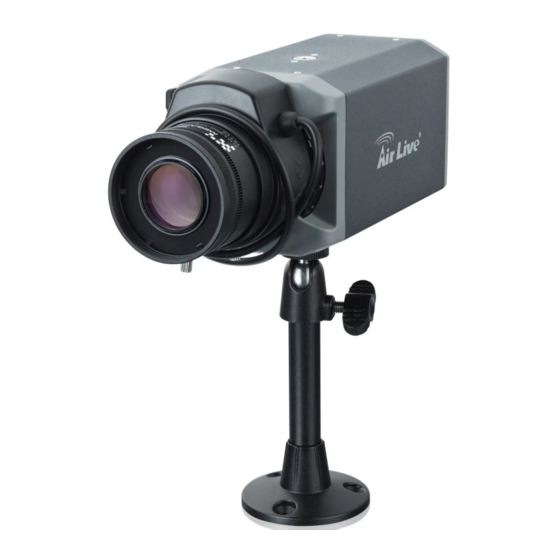
1.1 Introduction AirLive BC-5010 is a standalone system that can be connected directly to an Ethernet or Fast Ethernet network. Equipped with a powerful 5 Mega pixel color CMOS sensor, the camera allows you to capture a wider field of view which is up to 2592 x 1920 resolution. -
Page 8: Features
DDNS and PPPoE Multi-channel control software for surveillance application On-line firmware upgrade Digital I/O connectors and RS-485 supported 802.3af PoE support (wired model only) SD/SDHC Slot and USB slot for local storage Compatible with ONVIF standard AirLive BC-5010 User’s Manual... -
Page 9: Product Specification
30 fps @ 176 x 144 Multi-profile streaming Streaming over UDP, TCP, or HTTP M-JPEG streaming over HTTP (for non IE browser) Streaming 3GPP mobile view Configurable frame rate and bandwidth Support both CBR and VBR AirLive BC-5010 User’s Manual... - Page 10 System RAM 128Mbyte DDR2 SDRAM Power Supply DC12V Power Consumption 4 Watts Max. RJ-45 10BaseT/100BaseTX 12V DC power jack Connector Microphone/Speaker jack DIDO Reset button Operation: Temp: -5℃ ~ 55℃ Environment Humidity: 20% ~ 85% non-condensing AirLive BC-5010 User’s Manual...
- Page 11 Save to SD card/USB Continuous recording Windows® XP, Vista, 7 IE 7.0 or later, Firefox 2.0 or later, Safari, Google Viewing Browser Chrome System Cell Phone With 3GPP player Video Player VLC, Quick Time, Real Player, Core Player AirLive BC-5010 User’s Manual...
-
Page 12: System Requirement
Microsoft Internet Explorer 7.0 or above; Apple Safari 2 or above; Mozilla Firefox 2.00 or above; Google Chrome Note: If you connect multiple cameras to monitor various places simultaneously, you are recommended to use a computer with higher performance. AirLive BC-5010 User’s Manual... -
Page 13: Package Contents And Installation
2.1 Package Content A user can find the following items in the package as below: 1. AirLive BC-5010 is the main part of the product with Camera Mount Kit. Note: The lens is optional. For further information about the lens, please check with your installer. -
Page 14: Connections
Front / Top / Side Panel 1. DC-iris Connector: It allows you to attach the DC-Iris lens (optional). 2. C and CS Lens Focus Ring: You can adjust C and CS lens focus ring to fit your lens type. Back Panel AirLive BC-5010 User’s Manual... - Page 15 Action high voltage: 9~40 VDC Dropout voltage: 0 VDC GPIO In #2 3. DC-in Jack: The input power is 12VDC. Note that supply the power to the Network Camera with the power adapter included in package. 4. Audio I/O Connectors AirLive BC-5010 User’s Manual...
-
Page 16: Connections Mounting The Camera
(or bottom) panel. After attaching the camera to the Wall Mount Kit, the camera can be mounted on the wall or ceiling securely through the three screw holes on the base of the Wall Mount Kit. AirLive BC-5010 User’s Manual... - Page 17 (LAN). When you connect the AC power adapter, the camera is powered on automatically. You can verify the power status from the Power LED on the Ethernet port. Once connected, the Link LED starts flashing green light and the camera is on standby and ready for use now. AirLive BC-5010 User’s Manual...
- Page 18 1. Remove the protective cap. 2. Fit the C or CS lens onto the CS-mount ring and screw it in clockwise. 3. Plug the cable to the DC-Iris connector on the side panel of the camera. AirLive BC-5010 User’s Manual...
- Page 19 You can adjust C and CS lens focus ring to fit your lens type. 4. Applications of the Camera The camera can be applied in multiple applications, including: Monitor local and remote places and objects via Internet or Intranet. AirLive BC-5010 User’s Manual...
-
Page 20: Connect Airlive X.usb For Wireless Function (Optional)
Home Applications of the Internet Camera 2.4 Connect AirLive X.USB for wireless function (Optional) You can add wireless function to your BC-5010 by connecting the optional AirLive X.USB, 11a/b/g/n wireless USB dongle. Simply plug AirLive X.USB in the USB slot of the back panel to enable the wireless function. -
Page 21: Connect To Ip Camera
2. Package Contents and Installation 2.5 Connect to IP Camera 1. Insert the bundle CD into your PC/Laptop. 2. Auto Run Screen then shows up; click “Install Software “IPWizard II” to install the configuration tool software. AirLive BC-5010 User’s Manual... - Page 22 2. Package Contents and Installation 3. After completing installation, run the configuration tool software. AirLive BC-5010 User’s Manual...
- Page 23 5. If the Camera’s IP address is in the same IP segment as your LAN, select the founded IP Camera and double click on the item. Then, the default browser will show up and connect to the IP camera’s Web automatically. AirLive BC-5010 User’s Manual...
-
Page 24: Using Ip Camera Via Web Browser
Otherwise, the system will load the ActiveX silently. 4. After the ActiveX control was installed and ran, the first image will be displayed. 5. The monitor image will be displayed in your browser. In the left side of main configuration AirLive BC-5010 User’s Manual... - Page 25 3. Using IP Camera via Web Browser is “Configuration”. For more details, you can check the following chapters. AirLive BC-5010 User’s Manual...
-
Page 26: Operating Ip Camera Via Mobile Phone
You can access to your IP camera via your iPhone. Please follow the setting process below. Then you can see the live view via iPhone. 2. Execute AirLive CamPro Mobile 1. Download AirLive CamPro Mobile from APP store 3. Click Setup button. 4. Setup page appears AirLive BC-5010 User’s Manual... - Page 27 4. Operating IP Camera via Mobile Phone 5. Click Add button. Click LAN button and select the camera. AirLive BC-5010 User’s Manual...
- Page 28 10. The video appears on the 9. Click Live View button main screen. Notes: App for Android will be available in 11/2013. Note: The image is continuous snapshots, not video. Thus, live image can’t be recorded here. AirLive BC-5010 User’s Manual...
-
Page 29: Configuration Of Main Menu
In the left side, you can control Live View in your main Browser. The functions include Function Buttons, Streaming Protocol, Video Profile, Monitor Image Section, Language and Digital Output. Function Buttons Streaming Protocol Configuration Menu Monitor Image Section Video Profile Language Digital Output AirLive BC-5010 User’s Manual... -
Page 30: Live View
When you click the button, the Pan window and Zoom IN/OUT bar will appear on the left-top of Live View Window. You can enlarge the video image digitally by sliding the Zoom IN/OUT bar, and select the area of the image to display by moving the Pan window. AirLive BC-5010 User’s Manual... - Page 31 5. Configuration of Main Menu 2. Monitor Image Section The image from BC-5010 is shown here. 3. Streaming Select to transmit and record the video using H.264 (MPEG4), or MJPEG compression. 4. Video Output User can select proper streaming protocol according to networking environment.
-
Page 32: Configuration
5. Configuration of Main Menu 5.2 Configuration This function is only for the Administrator. In the left side of main configuration, you can see Configuration including below. AirLive BC-5010 User’s Manual... - Page 33 Chapter 11. Status The Status menu provides the current status of the camera, including the basic information, audio/video settings, networking configuration, and system logs. For more detail information, you can refer to Chapter 12. AirLive BC-5010 User’s Manual...
-
Page 34: Configuration-Network
6. Configuration-Network Configuration-Network Click the Network to display the sub-menus including General, UPnP/Bonjour/ QoS, IP Filter, IP Notification, iSCSI. AirLive BC-5010 User’s Manual... -
Page 35: General
When the camera starts up, it will be assigned an IP address from the DHCP server automatically. - Static IPv4/IPv6: Select this option to assign the IP address for the camera directly. You can use IPFinder to obtain the related setting values. AirLive BC-5010 User’s Manual... - Page 36 - Multicast TTL: Set the value from 1 to 255. TTL (time to live) is used to specify the time to live in the IP header so that the system is able to decide whether or not the packet has been in the network too long and should be discarded. AirLive BC-5010 User’s Manual...
-
Page 37: Upnp/Bonjour/Qos
To set up the DDNS, select the Provider from the pull-down menu and then enter the required information in the Host Name, User Name, and Password text boxes. NOTE You have to sign up for DDNS service with the service provider before configuring this feature. 6.2 UPnP/Bonjour/QoS AirLive BC-5010 User’s Manual... -
Page 38: Ip Filter
IP address located within the range will not be allowed to access the camera. To remove the assigned range of IP addresses for IP Filter, select the setting in the Accept/Deny IP List and then click Delete. AirLive BC-5010 User’s Manual... -
Page 39: Ip Notification
If enable this function, then the “TCP Server“, “TCP Port”, and “Message” fields need to be filled. TCP Server: Type the server name or the IP address of the TCP server. - TCP Port: Set port number of TCP server. AirLive BC-5010 User’s Manual... -
Page 40: Iscsi
- HTTP Login Password: Type the password for the HTTP server. 6.5 iSCSI Enable the iSCSI and key-in server IP address and Port number. The disk of the server will be storage in IP cam setting. AirLive BC-5010 User’s Manual... -
Page 41: Wireless
6. Configuration-Network 6.6 Wireless When you insert AirLive X.USB to BC-5010 USB port, the wireless page will appear. After enabling the wireless function, please choose your wireless SSID and key in security key, then click Apply button to save the settings. When you complete the setting, please unplug the internet cable and search BC-5010 again by AirLIve IP Wizard II. -
Page 42: Video Settings
7. Video Settings Video Settings Click the Video to display the sub-menus including Video Profile, Exposure, Image, WDR, Overlay settings of the camera. AirLive BC-5010 User’s Manual... -
Page 43: Video Profile
7.2 Exposure 1. Exposure Setting: There are two options (Auto and Manual) to select. When you select Manual mode, you can adjust Exposure Value, Exposure Time and Gain settings of the day and night mode. AirLive BC-5010 User’s Manual... - Page 44 - IR-Cut: IR-Cut filter is used for the camera to produce true color images, which avoids the color deviation for the captured images effectively. Select Auto, Always ON, Always OFF, or Schedule (and then set the period by entering From/To time) for the function. AirLive BC-5010 User’s Manual...
-
Page 45: Image
- Power Line Frequency: Select the proper frequency according to the camera’s location to reduce the flicker: NTSC/60Hz or PAL/50Hz. - Video O utput: You can enable or disable video output of BNC connector. AirLive BC-5010 User’s Manual... -
Page 46: Wdr
7. Video Settings 7.4 WDR . WDR Setting You can ad just WDR level to fix your backlight environment. 2. BLC Setting You can adjust BLC level to fix your backlight environment. AirLive BC-5010 User’s Manual... -
Page 47: Overlay
Enable Image Overlay: Select Default Logo or User Define Image to display the image overlay on the live view image. You can set the displayed image in transparent mode by selecting the Transparent option and select the background color as white or black. AirLive BC-5010 User’s Manual... - Page 48 Update to apply the setting. The width and height of the input overlay graphic should be multiple of 4 at a maximum size of 160x128, and in JPG or BMP (24-bit RGB) format. AirLive BC-5010 User’s Manual...
-
Page 49: Audio
2. Speaker: Select the option to enable the camera’s audio out function, so that the connected speaker can play the sound and voice through the camera. 3. Recording File: You can upload audio file for event action. AirLive BC-5010 User’s Manual... -
Page 50: Event
H264 Video to send the alert message with one video clip recorded by the camera. You can set the attachment that is captured in Pre Event or Post Event time when the event has been triggered. AirLive BC-5010 User’s Manual... - Page 51 4. TCP Server: Select Enable to enable the TCP server for the camera. - TCP Server Address: Enter the IP address of the TCP server. - TCP Port: Set port number of TCP server AirLive BC-5010 User’s Manual...
-
Page 52: Event Schedule
GO Preset: The camera will move to the preset position when triggered. Please note that the function is available only when a RS-485 device, such as an external camera stand with rotation function, is connected to the camera. AirLive BC-5010 User’s Manual... - Page 53 Audio File Playback: The camera will play voice file when triggered. hen done, click Add. The e vent profile will be added to the Event list. To change/remove the event profile, select the desired profile from the Event list and then click Modify/Delete. AirLive BC-5010 User’s Manual...
-
Page 54: Motion Detection
. Set the Percentage and Sensitivity (1~99) for detecting motion to record video. 4. When done, click Apply to save the settings and activate the motion detection function. AirLive BC-5010 User’s Manual... -
Page 55: Rs-485
Click the RS-485 to display the sub-menus including RS-485 Settings, RS-485 PTZ. 10.1RS-485 Settings The RS-485 option provides the control settings for external device through the I/O port. Select Enable RS-485 and complete the required settings to activate the RS-485 function of the camera. AirLive BC-5010 User’s Manual... -
Page 56: Rs-485 Ptz
Please note that the setting values in the Command Name string boxes should be from the connected external device (please refer to the manual of the connected device). 10.2 RS-485 PTZ You can enable RS-485 PTZ function when you have Pan/Tilt Head. AirLive BC-5010 User’s Manual... -
Page 57: System
11. System System Click the System to display the sub-menus including Device Settings, Account, Management Ports, Firmware, Maintenance. AirLive BC-5010 User’s Manual... -
Page 58: Device Settings
1. Admin To prevent unauthorized access to the camera’s Web Configuration, you are strongly recommend to change the default administrator password. Type the administrator password twice and then click Modify to set and confirm the password. AirLive BC-5010 User’s Manual... - Page 59 Web Configuration; the “Guest’ can only view the live view image from the Main screen of the Web Configuration while accessing the camera. Only the “Admin” is allowed to configure the camera through the Web Configuration. AirLive BC-5010 User’s Manual...
-
Page 60: Management Ports
1. Update Firmware: You can upgrade the firmware for your camera once you obtained a latest version of firmware. - Current Firmware Version: This item displays the current firmware version. - Update: Click Browse to locate the backup file on your PC and then click Update. AirLive BC-5010 User’s Manual... -
Page 61: Maintenance
Be aware that you should not turn off the power during updating the firmware and wait for finish message. Furthermore, the firmware upgrade procedure always is risk and do not try to upgrade new firmware if it’s not necessary. AirLive BC-5010 User’s Manual... - Page 62 11. System AirLive BC-5010 User’s Manual...
-
Page 63: Status
Basic information includes Camera Name, Firmware version, MAC, Camera Date & Time. 12.2 Audio/Video 1. Video -H.264: Video Resolution/Video Quality/Frame Rate -MJPEG: Video Resolution/Video Quality/Frame Rate -Mobile View: 3GPP (Enable/Disable) 2. Audio: Microphone In, Microphone Gain and Speaker Out AirLive BC-5010 User’s Manual... -
Page 64: Network
IP addresses. Enter the Primary DNS and Secondary DNS that are provided by ISP. A media access control address (MAC address) is a unique identifier assigned to network interfaces for communications on the physical network segment. AirLive BC-5010 User’s Manual... -
Page 65: System Log
You can check the usage log of IP camera here. In this page, you can click: 1. First page / Final page: Jump to first / final page of log. 2. Previous / Next: Jump to previous or next page of log. 3. Remove: Clear log. You’ll be prompted for confirmation. AirLive BC-5010 User’s Manual... - Page 66 12. Status AirLive BC-5010 User’s Manual...
-
Page 67: Appendix
GPIO In #1 Action high voltage: 9~40 VDC Dropout voltage: 0 VDC GPIO In #2 User can refer to the schematic below to make a proper connection between I/O connector and external sensor and output device. AirLive BC-5010 User’s Manual... -
Page 68: Frequently Ask Questions
The device can be used The device is not weatherproof. It needs to be equipped with a outdoors or not. weatherproof case for outdoors using. However, equipped with a weatherproof case might disable the audio function of the device. AirLive BC-5010 User’s Manual... - Page 69 UPnP NAT Traversal Can not work with NAT • Maybe NAT router does not support UPnP function. Please check router user’s manual of router and turn on UPnP function. AirLive BC-5010 User’s Manual...
- Page 70 • When you use DDNS, you need to set Default Gateway and DNS server address. • If it’s not working after above procedure, reset Network Camera to default setting and installed it again. • If the problem is not solved, the Network Camera might be faulty. AirLive BC-5010 User’s Manual...
- Page 71 • Ethernet switching hub can smooth the frame rate. Blank screen or very • Your connection to the device does not have enough bandwidth to AirLive BC-5010 User’s Manual...
- Page 72 White-light LED on. Miscellaneous Can not play the Have installed Microsoft®’s DirectX 9.0 or later and use the Windows recorded ASF file Media Player 11.0 or later to play the AVI filed recorded by the Device. AirLive BC-5010 User’s Manual...
-
Page 73: Ping Ip Address
The replies, as illustrated below, will provide an explanation to the problem. If you want to detect any other devices conflicts with the IP address of Network Camera, also can utilize the PING command but you must disconnect the Network Camera from the network first. AirLive BC-5010 User’s Manual... -
Page 74: Bandwidth Estimation
Therefore, user could use this feature to configure port forwarding of NAT router first. However, if user needs to configure port forwarding manually, please follow the steps as below: Manually installing the device with a router on your network is an easy 3–step procedure as following: AirLive BC-5010 User’s Manual... - Page 75 Reset IP address at next boot button at the top of the screen after modifying the IP address. Failure to do so will reset the IP address when you restart your computer. AirLive BC-5010 User’s Manual...
- Page 76 Virtual Server is accessed by clicking on the Advanced tab of the router screen. Follow these steps to configure your router’s Virtual Server settings • Click Enabled. • Enter a unique name for each entry. AirLive BC-5010 User’s Manual...
- Page 77 Enter valid ports in the Virtual Server section of your router. Please make sure to check the box on this line to enable settings. Then the device can be access from WAN by the router’s WAN IP Address. By now, you have finished your entire PC configuration for this device. AirLive BC-5010 User’s Manual...
-
Page 78: Power Line Frequency
50 Hz *Eastern Japan 50 Hz (Tokyo, Kawasaki, Sapporo, Yokohoma, and Sendai); Western Japan 100V 50/60 Hz* Japan 60 Hz (Osaka, Kyoto, Nagoya, Hiroshima) Malaysia 240V 50 Hz Netherlands 230V 50 Hz Portugal 230V 50 Hz AirLive BC-5010 User’s Manual... -
Page 79: 3Gpp
2. Use the following URL to access: rtsp://host/stream1 Where host is the host name or IP address of the camera. Compatible 3G mobile phone: Please contact your dealer to get the approved list of compatible 3G phone. AirLive BC-5010 User’s Manual... -
Page 80: Enable Upnp Of Windows Xp
H. Enable UPnP of Windows XP Use the following steps to enable UPnP settings only if your operating system of PC is running Windows XP. Go to Start > Settings, and then click Control Panel Click Add or Remove Programs AirLive BC-5010 User’s Manual... - Page 81 13. Appendix Click Add/Remove Windows Components The following screen will appear: Select Networking Services, and then click Details AirLive BC-5010 User’s Manual...
- Page 82 13. Appendix Select Universal Plug and Play, and then click OK Click Next AirLive BC-5010 User’s Manual...
Need help?
Do you have a question about the BC-5010 and is the answer not in the manual?
Questions and answers