
Related Manuals for Honda XR250R


Summary of Contents for Honda XR250R
- Page 1 HONDA XR250R OWNER’S MANUAL WWW.MOTOMANUALCD.COM.AR © HONDA MOTOR CO., LTD. 1983. Ripped by JAW 2004 www.crustyquinns.com...
- Page 2 IMPORTANT NOTICE OPERATOR ONLY. NO PASSENGER. This motorcycle is designed and constructed as an operator only model. The seating configuration does not safely permit the carrying of a passenger. Do not exceed the vehicle capacity load. ON/OFF-ROAD USE This motorcycle is designed and manufactured for both "ON ROAD" and "OFF ROAD" use. For "ON ROAD"...
- Page 3 All information in this publication is based on the latest production information available at the time of approval for printing. HONDA MOTOR CO., LTD. reserves the right to make changes at any time without notice and without incurring any obligation. No part of this publication may be reproduced without written permission.
- Page 4 BEFORE YOU RIDE THE MOTORCYCLE. When service is required, remember that your Honda dealer knows your motorcycle best. If you have the required mechanical "know-how" and tools, your dealer can supply you with an official Honda Shop Manual to help you perform many maintenance and repair tasks.
-
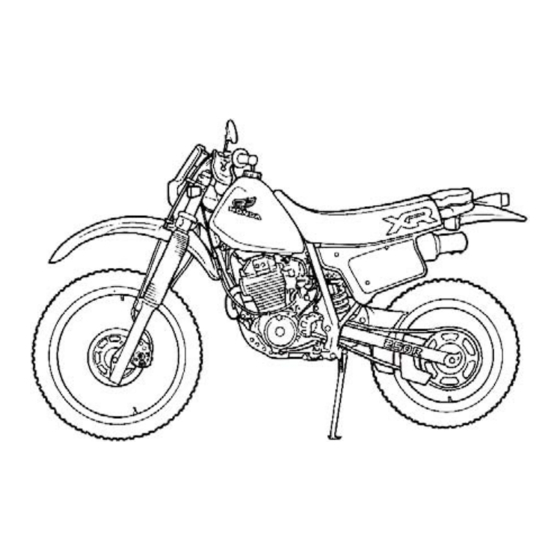
Page 5: Table Of Contents
OPERATION PAGE 1 MOTORCYCLE SAFETY 32 ESSENTIAL INDIVIDUAL Safe riding Rules COMPONENTS Protective Apparel 32 Engine stop Button Modifications 32 Switches Loading and Accessories 34 FEATURES (Not required for operation) 34 Tool Bag 5 DESCRIPTION Parts location 35 OPERATION Parts Function 35 Pre-Ride-Inspection 10 MAJOR COMPONENTS (Information 36 Starting the Engine... - Page 6 MAINTENANCE PAGE 44 MAINTENANCE 64 FRAME/WHEEL/BRAKES 45 Competition inspection 64 Front Wheel Removal 46 Maintenance Schedule 66 Rear Wheel Removal 48 Serial Numbers 68 Front Suspension 49 Colour Label 69 Rear Suspension 70 Brake Wear Indicators 50 FILTERS/LUBRICATION 71 Wheel Rims and Spokes 50 Air Cleaner 72 Side Stand 51 Fuel Filter and Fuel Line...
-
Page 7: Motorcycle Safety
WWW.MOTOMANUALCD.COM.AR MOTORCYCLE SAFETY Motorcycle riding requires special efforts on your part to ensure your safety. Know these requirements before you ride. SAFE RIDING RULES 7. Never ride beyond your ability and experience or faster than conditions 1. Always make a pre-ride inspection (page warrant. -
Page 8: Protective Apparel
PROTECTIVE APPAREL MODIFICATIONS 1. Most motorcycle accident fatalities are due to head injuries: ALWAYS wear a * Modification of the motorcycle, or helmet. You should also wear a face removal of original equipment, may shield or goggles as well as boots, gloves, render the vehicle unsafe or illegal. -
Page 9: Loading And Accessories
As weight is located father from non-Honda accessories. Always follow the the motorcycle's centre of gravity, handling guidelines under Loading, and these: is proportionally affected. - Page 10 1. Carefully inspect the accessory to make sure it does not reduce ground clearance, or limit suspension travel, steering travel or control operation. 2. Do not add electrical equipment that will exceed the motorcycle's electrical system capacity. An electrical failure could cause a dangerous loss of lights or engine power at night, far from help.
-
Page 11: Parts Location
DESCRIPTION PARTS LOCATION (1) Speedometer (2) Engine stop button (3) Throttle grip (4) Front brake lever (5) Fuel tank cap (6) Horn button (7) Starter decompressor lever (8) Clutch lever (9) Turn signal switch (10) Headlight dimmer switch (11) Headlight switch (12) Trip meter... - Page 12 (1) Fuel valve (2) Choke lever (3) Gearshift pedal (4) Foot peg (5) Side stand...
- Page 13 WWW.MOTOMANUALCD.COM.AR (1) Tool bag (2) Kickstarter (3) Foot peg (4) Rear brake pedal...
-
Page 14: Parts Function
PARTS FUNCTION Instruments and Indicators The indicators are in the speedometer, above the headlight. Their functions are described in the table on the following page. (1) Speedometer (2) Tripmeter (3) Trip ON-OFF indicator (4) Tripmeter reset knob... - Page 15 Ref. No. Description Function Speedometer Shows riding speed. Tripmeter Shows mileage per trip or section of route. Trip ON-OFF indicator Verifies tripmeter reset knob position. Tripmeter reset knob Pull knob to OFF and turn to zero (0). Push knob to ON to begin counting.
-
Page 16: Major Components
MAJOR COMPONENTS Air Pressure Adjustment Low air pressure settings provide a soft ride (Information you need to operate this and are for light loads and smooth riding motorcycle) conditions. FRONT SUSPENSION High air pressure settings provide a firm ride The front suspension system uses air assisted front and are for heavy loads and rough riding forks. - Page 17 2. Remove the air valve caps (1) and check the Oil Volume Adjustment: air pressure with a pressure gauge. Low oil levels provide a soft ride and are for Standard air pressure: 0 psi (0 kPa,0 light loads and smooth riding conditions. kg/cm2) Height oil levels provide a firm ride and are for heavy loads and rough riding conditions.
- Page 18 Inspect the O-ring on the cap bolts and Standard oil level: 150 mm (5.9 in) replace if they are damaged. To lower the oil level (decrease volume), use a syringe. Add oil with a graduated beaker for accurate measurements. The fork cap bolts are under extreme spring The recommended oil level range is 150 pressure.
-
Page 19: Rear Suspension
NOTE: REAR SUSPENSION Be sure the damping adjuster is not between The rear shock rebound damping and spring positions but is located in a detent. preload can be adjusted for rider weight and Compression damping: riding conditions. The compression damping adjuster has 16 Rebound damping: positions or more. - Page 20 1. Turn the adjuster knob counter clockwise Spring preload: until it will no longer go. 1. Remove the left and right side covers. 2. Check that the yellow dots (4) on the 2. Remove the seat, exhaust muffler and air knob and reservoir are aligned.
- Page 21 (6) and turn the adjusting nut (7) to take the old unit to your authorised increase the spring length. Do not increase Honda dealer for proper disposal. to more than 202.0 mm (8.0 in). NOTE: Each turn of the adjuster equals 1.5 mm (0.06 in) of spring length and 15.6 kg...
- Page 22 Condition and adjustment: 1. Always begin with Step I, then test ride the motorcycle. If the condition still exists, proceed to Stop II and again test ride the motorcycle. If necessary, proceed to Step III. Step Condition Bottoming Shorten the spring Turn the compression length (to increase the adjuster to a stiffer...
-
Page 23: Front Brake
(page 18), there is probably air in the brake system and it must be bled. See your authorised Honda dealer. Brake Fluid Level: Brake fluid may cause irritation. Avoid contact with skin or eyes. - Page 24 CAUTION: Brake pads: Use only DOT 4 brake fluid from a sealed Brake pad (2) wear will depend upon the severity of usage, type of riding, and container. condition of the roads. The pads will wear Handle brake fluid with care because it can faster on dirty and wet roads.
-
Page 25: Rear Brake
3. Measure the distance the rear brake REAR BRAKE pedal (3) moves before the brake starts to Adjustment: take hold. 1. Place the motorcycle on its side stand. Free play should be 20-30 mm (3/4 - 1- 2. The stopper bolt (1) is provided to allow 1/4 in). - Page 26 Make sure the cut-out on the adjusting nut is seated on the brake arm pin. If proper adjustment cannot be obtained by this method, see your authorised Honda dealer. 4. Apply the brake several times and check for free wheel rotation when released.
- Page 27 Pull back the rubber dust cover (2). Loosen CLUTCH the lock nut (3) and turn the adjuster (4). Clutch adjustment may be required if the Tighten the lock nut (3) and check the motorcycle stalls when shifting into gear or adjustment.
- Page 28 If proper adjustment cannot be obtained or the clutch does not work correctly, the cable or clutch friction discs may be worn. Refer to the official Honda shop (5) Adjusting nut (A) Increase free play manual or see your authorised Honda...
- Page 29 FUEL Know how to operate the fuel valve Fuel Valve while riding the motorcycle. You may The three way fuel valve (1) is on the left side avoid a sudden stop in traffic. near the carburettor. Be careful not to touch any hot engine parts while operating the fuel valve.
- Page 30 Fuel Tank be used. If "knocking" or "pinging" occurs, try Fuel tank capacity is 9.0L (2.4 US gal) including a different brand of gasoline or a higher 1.5L (0.4 US gal) in the reserve supply. octane grade. To open the fuel tank cap (1), pull out the After refuelling, be sure to tighten the fuel breather tube (2) from the steering stem nut.
-
Page 31: Engine Oil
CAUTION: ENGINE OIL Running the engine with insufficient oil Engine Oil Level Check can cause serious engine damage. Check engine oil level each day before operating the motorcycle. The oil filler cap (1) is at the front of the right crankcase cover and contains a dipstick for measuring the oil level. - Page 32 Engine Oil Recommendation Recommended Oil Viscosity SAE low-40/SAE 20W-50 USE HONDA 4-STROKE OIL OR Other viscosities shown in the chart below AN EQUIVALENT may be used when the average temperature in Use only high detergent, premium quality your riding area is within the indicated range.
-
Page 33: Drive Chain
3. Rotate the wheel and check drive chain DRIVE CHAIN slack as the wheel turns. Drive chain slack The service life of the drive chain is should remain constant as the wheel dependent upon proper lubrication and rotates. If the chain is slack in one section adjustment. - Page 34 4. Check the chain slider (3) and guide 5. Measure a section of the drive chain to slider (2) for wear. determine whether the chain is worn Replace the chain guide chain if the beyond its service limit. Remove the drive depth of the groove exceeds these limits chain and measure the distance between a FRONT:...
- Page 35 6. Inspect the sprocket teeth for wear or Adjustment: damage. If the drive chain requires adjustment, the procedure is as follows: 1. Loosen the rear axle nut (1). 2. Turn both right and left adjusters (2) equally to increase or decrease chain slack. 3.
- Page 36 NOTE: Lubrication and cleaning: Lubricate every 300 miles (500 km) or sooner if If drive chain slack is excessive when the chain appears dry. rear axle is moved to the furthest limit of The O-rings in this chain can be damaged by adjustment, the drive chain is worn and steam cleaning, high pressure washers, and must be replaced.
- Page 37 Check the tyres for cuts, imbedded nails, or TYRES other sharp objects. See your authorised Proper air pressure will provide maximum Honda Dealer for replacement of damaged stability, riding comfort and tyre life. Check tyres or punctured inner tubes. tyre pressures frequently and adjust if necessary.
-
Page 38: Essential Individual Components
ESSENTIAL INDIVIDUAL COMPONENTS ENGINE STOP BUTTON SWITCHES The engine stop button (1) is next to the right The four controls next to the left handlebar handlebar grip. grip are: Push the button until the engine stops Headlight Switch (1) completely. The headlight switch has two positions: "H", and "OFF"... - Page 39 Headlight Dimmer Switch (2) Stoplight Switch Select Hi for high beam, Lo for low beam. Check the operation of the stoplight switch (1) at the right side behind the engine from time to Turn Signal Switch (3) time. Move to L to signal a left turn, R to signal a Adjustment is done by turning the adjusting right turn.
-
Page 40: Features (Not Required For Operation)
FEATURES (Not required for operation) TOOL BAG A multi-purpose wrench (1) is in the tool bag (2) at the rear of the seat. Some repairs, minor adjustments and parts replacement can be performed with this tool. This owner's manual and other documents should be stored in the tool bag. - Page 41 4. Tyres-check condition and pressure (page Correct any discrepancy before you ride. 31). Contact your authorised Honda dealer for 5. Spokes and rim locks-check and tighten if assistance if you cannot correct the problem. necessary (page 71). 6. Drive chain-check condition and slack (pages...
-
Page 42: Starting The Engine
Normal Air Temperature STARTING THE ENGINE 10° - 35°C (50°-95°F) 1. Pull the choke lever up all the way to Never run the engine in a closed area. The "Fully Open" (A). exhaust contains poisonous carbon 2. Keep the throttle closed. monoxide gas. - Page 43 CAUTION: Low Air Temperature 1O°C (50°F) or below Do not allow the kickstarter to snap back against the pedal stop, as engine case damage 1. Follow steps 1-3 under "Normal Air could result. Temperature." 1. About a half minute after the engine 2.
-
Page 44: Manual Starter Decompressor
MANUAL STARTER DECOMPRESSOR Although an engine decompression system is 3. If the rear tyre skids instead of turning interlocked with the kickstarter, the manual over the engine, pull the decompressor starter decompressor can also be used if you lever. Releasing compression allows the experience starting difficulties. -
Page 45: Flooded Engine
FLOODED ENGINE BREAK-IN If the engine fails to start after repeated During the first 200 miles (350 km), avoid full attempts, it may be flooded with excess fuel. throttle use and never lug the engine. Do not To clear a flooded engine, stop the engine by operate at any one speed for prolonged pressing the engine stop button and push the periods. - Page 46 5. This sequence is repeated to progressively RIDING shift to 3rd, 4th, 5th and 6th (top) gears. 6. Raise the pedal to shift to a higher gear and depress the pedal to down shift. Each Review Motorcycle Safety (pages 1-4) stroke of the pedal engages the next gear in before you ride.
-
Page 47: High Altitude Riding
See your authorised Honda * Do not tow the motorcycle or coast for long dealer for this high altitude modification. distances while the engine is off. The... - Page 48 When riding in wet or rainy conditions, or BRAKING loose surfaces, ability 1. For normal braking, gradually apply both manoeuvre and stop will be reduced. All of front and rear brakes while downshifting your actions should be smooth under these to suit your road speed.
- Page 49 PARKING ANTI-THEFT TIPS 1. After stopping the motorcycle, shift the 1. Be sure the registration information for transmission into neutral and turn the your motorcycle is accurate and current. fuel valve OFF. Press the engine stop 2. Park your motorcycle in a locked garage button until the engine stops completely.
- Page 50 Consult your authorised Honda dealer for recommendations applicable to your individual needs and use. If your motorcycle is involved in a collision, have your Honda dealer inspect the major components including frame, suspension and steering parts for misalignment or damage.
- Page 51 COMPETITION INSPECTION-Check all items before each race ITEMS INSPECT FOR ACTION PAGE All Pre-ride Inspection items Page 35 Engine oil Contaminants Change Pages 52-53 Fuel line Deterioration, damage or leakage Replace Page 51 Valve clearance Correct clearance Adjust Pages 61-62 Carburettor-idle speed Correct idle speed Adjust...
-
Page 52: Maintenance Schedule
ENGINE OIL FILTER SCREEN STARTER DECOMPRESSOR CARBURETTOR IDLE SPEED SHOULD BE SERVICED BY AN AUTHORISED HONDA DEALER. UNLESS THE OWNER HAS PROPER TOOLS AND IS MECHANICALLY QUALIFIED. REFER TO THE OFFICIAL HONDA SHOP MANUAL. IN THE INTEREST OF SAFETY, WE RECOMMEND THESE ITEMS BF SERVICED ONLY BY... - Page 53 BREAK- REGULAR SERVICE MAINTENANCE SCHEDULE INTERVAL REFER I: Inspect and Clean, Adjust, Lubricate or replace MAINT if necessary. PAGE 200 mi 1,000 mi C: Clean. R: Replace. 350 km 1,600 km A: Adjust. L:Lubricate. DRIVE CHAIN SEE NOTE 1 I, L I, L every 300mi (500km) DRIVE CHAIN GUIDE SLIDER DRIVE CHAIN SLIDER...
-
Page 54: Serial Numbers
The frame number (1) is stamped on the right SERIAL NUMBERS side of the steering head. The engine number The frame and engine serial numbers are (2) is stamped on top the crankcase. required when registering your motorcycle. They may also be required by your dealer ENGINE NO. -
Page 55: Colour Label
COLOUR LABEL The colour label (1) is attached to the frame behind the left side cover. It is helpful when ordering replacement parts. Record the model and colour here for your reference. MODEL_________________________________ COLOUR________________________________ (1) Colour label... -
Page 56: Air Cleaner
4. Wash the element in clean non-flammable AIR CLEANER or high flash point solvent and dry it The air cleaner should be serviced at regular thoroughly. intervals (page 45). When riding in dusty areas, more frequent service Never use gasoline or low flash point necessary. - Page 57 FUEL FILTER AND FUEL LINE 3. Make sure the O-ring (4) on the fuel filter pipe is in good condition. Reinstall the fuel The fuel filter is incorporated in the fuel filter and fuel valve in the reverse order of valve.
-
Page 58: Engine Oil Change
6. Fill the crankcase with approximately 1.1L ENGINE OIL CHANGE (1.2 US qt) of the recommended grade oil. Engine oil quality is the chief factor affecting 7. Reinstall the oil filler cap. engine service life. Change the engine oil 8. Start the engine and let it idle for a few when specified by the maintenance schedule. -
Page 59: Engine Oil Filter
4. Insert a new oil filter element. Check that ENGINE OIL FILTER all parts are installed as shown. NOTE: 5. Install the oil filter cover. 2. Change the filter after draining the engine Oil Filter Bolt Torque: 8-12 N m (0.8-1.2 kg-m, 5-9 ft-lb) 1. -
Page 60: Spark Plug
1. Clean any dirt from around the spark plug SPARK PLUG base. Recommended plugs: 2. Disconnect the spark plug cap and remove Standard: the spark plug with the multipurpose DPR9Z (NGK) or X27GPR-U (ND) wrench (1) provided in the tool bag. For most riding conditions this spark plug 3. - Page 61 4. Make sure that the spark plug gap (2) is 0.6-0.7 mm (0.024-0.028 in) using a wire- type feeler gauge. If adjustment is necessary, bend the side electrode (3) carefully. Make sure the plug washer is in good condition. 5. With the plug washer attached, thread the spark plug in by hand to prevent cross- threading.
- Page 62 NOTE: IDLE SPEED: 1,300 +/- 100 rpm Do not attempt to compensate for faults in other systems by carburettor adjustment. Idle Mixture: See your authorised Honda dealer for 1. Turn the air screw clockwise until the regularly scheduled carburettor engine misses or decreases in speed, then adjustments.
-
Page 63: Throttle Operation
Lubricate throttle cables with THROTTLE OPERATION commercially available cable lubricant to Cable Inspection: prevent premature wear and corrosion. Check for smooth rotation of the throttle grip from the fully open to the fully closed position. Check at full left and full right steering For safe operation and positive engine positions. - Page 64 after replacing the throttle cables or removing the carburettor, are made with the lower adjuster (2). Minor free play adjustments are made with the upper adjuster (4). To adjust free play, loosen the lock nut (1) or (3), and turn the adjuster (2) or (4). Tighten the lock nut after adjustment.
-
Page 65: Starter Decompressor
4. Measure the tree play at the tip of the STARTER DECOMPRESSOR decompression lifter lever. To adjust, loosen Excessive decompressor lever free plan will the lock nut (5) and turn the adjusting nut (6). cause hard starting, and insufficient free play Free play: 1-3 mm (1/32-1/8 in) may cause erratic idling and valve burning. - Page 66 7. Measure the free play at the top of the manual decompressor lever (7). Free play: 5-8 mm (3/16 - 5/16 in) adjust: Loosen manual decompressor lock nut (2) and turn the adjusting nut (1). Other Checks: Check the decompression cable for kinks or signs of wear that could cause sticking or failure.
-
Page 67: Valve Clearance
1. Turn the fuel valve OFF and remove the VALVE CLEARANCE seat and fuel tank. Excessive valve clearance will cause noise. 2. Remove the crankshaft hole cap (1) and Little or no clearance will prevent the valve timing mark hole cap (2). from closing and cause valve damage and 3. - Page 68 top of the compression stroke by jiggling the rocker arms with your fingers, If they are free, the piston is at the top of-the compression stroke. If they are tight, rotate the crankshaft 360° and realign the marks. 5. Check the clearance by inserting the feeler gauge (5) between the adjusting screw (6) and valve stem.
- Page 69 5. Pass the chain over the sprockets and join DRIVE CHAIN the ends of the chain with the master link. Removal and Cleaning: For ease of assembly, hold the chain ends When the drive chain becomes dirty, it should against the rear sprocket teeth while be removed and cleaned prior to lubrication.
-
Page 70: Front Wheel Removal
If this Remove the calliper assembly from the occurs, servicing of the brake system will fork leg by removing the mount bolts (1). be necessary. See your authorised Honda CAUTION: dealer. Support the calliper assembly so that it does not hung from the brake hose. - Page 71 Installation Notes: Install the axle holder with the "UP" mark Reverse the removal procedure. (9) upward and tighten the upper holder nuts to the specified torque first, then Insert the axle through the wheel hub and left fork leg. tighten the lower holder nuts to the same torque.
-
Page 72: Rear Wheel Removal
it is detached from the chain adjuster REAR WHEEL REMOVAL stopper pin (6). 1. Raise the rear wheel off the ground by 5. Turn both adjusters so the rear wheel can placing a support under the engine. be moved all the way forward for 2. - Page 73 Installation Note: Position the brake arm pin holder (10) To install the rear wheel, reverse the correctly. removal procedure. Adjust the rear brake (page 19) and drive Make sure that the tang (7) on the chain (pages 27-30). swingarm is located in the slot (8) in the Apply the brake several times and check brake panel (9).
-
Page 74: Front Suspension
Honda dealer is legs. Damaged, binding, or leaking front forks qualified to determine whether or not should be repaired before the motorcycle is replacement parts or repairs are needed. - Page 75 Check the rear suspension periodically by components appear damaged or worn, careful visual examination. Note consult your Honda dealer for further following items. inspection. 1. Swingarm bearings should be checked by Lubrication: pushing hard against the side of the rear There are grease fittings at the swingarm pivot wheel.
-
Page 76: Brake Wear Indicators
BRAKE WEAR INDICATORS The rear brake is equipped with brake wear indicators. When the brake is applied, an arrow (1) attached to the brake arm (2) moves toward a reference mark (3) on the brake panel (4). If the arrow aligns with the reference mark on full application of the brake, the brake shoes must be replaced. -
Page 77: Wheel Rims And Spokes
Excessively 3. Check wheel rim turnout. If runout is loose spokes may result in high speed noticeable, see your Honda dealer for instability and possible loss of control. inspection. (1) Wheel rim... -
Page 78: Side Stand
SIDE STAND Check the side stand spring for damage and loss of tension, and the side stand assembly for freedom of movement. If the side stand (1) is squeaky or stiff, clean the pivot area and lubricate the pivot bolt with engine oil. - Page 79 1. To install the headlight, reverse the HEADLIGHT TAILLIGHT removal procedure. TURNSIGNAL NOTE: Headlight Bulb: When installing the bulb, align the tab on 1. Remove the three headlight mounting the bulb with the groove on the headlight bands (1) and remove the front number case.
- Page 80 Taillight Bulb Replacement: 1. Remove the two screws (7) and remove the taillight lens (8). 2. Replace the bulb (9) with a new one. 3. Reinstall the lens. (7) Screws (8) Taillight lens (9) Taillight bulb...
- Page 81 Turn Signal Bulb Turn Signal Removal 1. Remove the turn signal light lens (1) by When you ride your XR250R with the turn pulling it forward. signals removed, observe the following to 2. Press the bulb (2) inward and twist to the prevent entry of mud and water into the left and the bulb can be removed.
- Page 82 CLEANING 2. Dry the motorcycle, start the engine, and let it run for several minutes. Clean your motorcycle regularly to protect the surface finishes and inspect for damage, wear, and oil or hydraulic fluid seepage. Braking performance may be impaired CAUTION: immediately after...
-
Page 83: Storage Guide
STORAGE GUIDE 4. Remove the spark plug and pour a tablespoon (15-20 cc) of clean engine oil STORAGE into the cylinder. Crank the engine several times to distribute the oil, then reinstall Extended storage, such as for winter, requires that you take certain steps to reduce the the spark plug. -
Page 84: Removal From Storage
6. Inflate the tyres to their recommended REMOVAL FROM STORAGE pressures. Place the motorcycle on blocks 1. Uncover and clean the motorcycle. Change to raise both tyres off the ground. the engine oil if more than 4 months have 7. Cover the motorcycle (don't use plastic or passed since the start of storage. - Page 85 SPECIFICATIONS DIMENSIONS Overall length 2,035 mm (80.1 in) Overall width 880 mm (34.6 in) Overall height 1,180 mm (46.5 in) Wheel base 1,365 mm (53.7 in) WEIGHT Dry weight 105 kg (231 lb) CAPACITIES Engine oil 1.3L (1.4 US qt) After disassembly 1.1L (1.2 US qt) After draining Fuel tank 9.0L (2.4 US gal)
- Page 86 ENGINE Bore and stroke 75 x 56.5 mm(2.9x2.2in) Compression ratio 10.2 : 1 Displacement 249 cc (15.2 cu. in) Spark plug Standard DPR 9Z(NGK) or X27GPR-U(ND) For cold climate DPR 8Z(NGK) or X24GPR-U(ND) Spark plug gap 0.6-0.7 mm (0.024-0.028 in) Valve clearance Intake: 0.05 mm (0.002 in) Exhaust: 0.08 mm (0.003 in)
-
Page 87: Power Transmission
CHASSIS AND SUSPENSION Caster 64° Trail 105 mm (4.1 in) Tyre size, front 3.00-21 (6 PR) Tyre size, rear 4.60-17 (6 PR) POWER TRANSMISSION Primary reduction 3,100 Final reduction 3,846 Gear ratio, 1st 2,769 1,941 1,450 1,174 0.960 0.815 ELECTRICAL Alternator 0.0595 kw/5,000 rpm LIGHTS... - Page 88 HONDA MOTOR CO., LTD. 32KK1801 5008312E 00X32-KK1-8011 PRINTED IN JAPAN...
Need help?
Do you have a question about the XR250R and is the answer not in the manual?
Questions and answers