Table of Contents
Advertisement
Quick Links
U8/16-Modular KVM Switch
with modules:
Cat.5 Extender and IP Access
Modules
User Manual
LINDY No. 39532, 39533
www.lindy.com
For Commercial Use Only
Tested to comply
with FCC Standards
© LINDY ELECTRONICS LIMITED & LINDY-ELEKTRONIK GMBH - SECOND EDITION (NOV 2009)
The modular LINDY KVM Switch series U8/16
The U8/16 KVM switch series provides either 8 or 16 KVM server ports
supporting both PS/2 and USB keyboard and mouse connections.
This KVM switch series incorporates a modular concept design which
allows for dual console access. The local console port allows direct
access whilst a second console option permits remote access either via
remote IP or via a remote Cat.5 extender Unit. This option allows
system administrators to access and administrate their servers and
KVM switches from a remote office workstation. The required optional
IP or Cat.5 access modules can be purchased separately and are
simply installed into the back of a U8/16-Modular KVM Switch.
This manual also covers the KVM Switch U8/16-C, another version of
this modular KVM switch series that is used only in conjunction with the
modular LINDY KVM LCD Terminals U8/16-C. U8/16-C models can
English
only be installed in the back of an appropriate 19" LCD drawer and do
not have a display or front panel controls fitted. Any references to front
panel display and switch buttons in this manual does not apply to the
modular version U8/16-C.
About this manual
This manual is divided into five sections.
The first section is an introduction to the U8/16, U8/16-C, U8/16-C5
1.
and U8/16-IP
The second section deals with installing and connecting the switch
2.
The third section describes the basic operation of the KVM switch
3.
from the locally connected console
The fourth section describes operation via the remote Cat.5 Extender
4.
The fifth section describes operation and access via remote IP
5.
1
Advertisement
Table of Contents

Related Manuals for Lindy 39532


Summary of Contents for Lindy 39532
- Page 1 The fourth section describes operation via the remote Cat.5 Extender The fifth section describes operation and access via remote IP www.lindy.com For Commercial Use Only Tested to comply with FCC Standards © LINDY ELECTRONICS LIMITED & LINDY-ELEKTRONIK GMBH - SECOND EDITION (NOV 2009)
-
Page 2: Table Of Contents
Contents Section 1..................3 1.1 About the U8/16 concept ..............3 1.2 U8/16-Modular IP Access module: U8/16-IP ........4 Section 1 1.3 U8/16-Modular with Cat.5 Access module: U8/16-C5 ......4 1.4 KVM compatibility and backward compatibility with P-series KVMs .. 5 1.5 Product Features ................ -
Page 3: Section 1
KVM Switch U8/U16 series. You may configure it to be set to “Scroll Lock” or several other hotkeys via the OSD configuration (see further below). The U8/16 is also compatible with older LINDY P-Series KVM switches as well as other brand IP Network U8/16-IP KVM switches. -
Page 4: Product Features
8/16 port KVM switch in a 1U, 19” rackmount size design Power Adapter Built-in daisy chain port allows daisy chaining of up to 8 LINDY KVM switches U or P series 19” Rackmount Kit to be connected to support up to 128 computers KVM Daisy Chain Cable Utility &... -
Page 5: Section 2
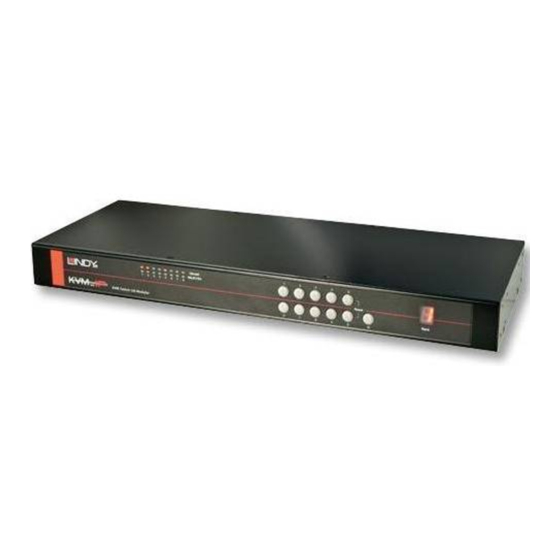
Section 2 Hardware Installation 2.1. Product Information & Connection Guide Port LED Display When the port LED labelled “On Line” is illuminated a computer attached to this port is powered on. When the green LED labelled “Select” is illuminated, the KVM console is connected to this port. -
Page 6: Rackmount Installation
Hardware Installation 2.2. Rackmount Installation Should you wish to cascade the U-series KVM Switch with any other or the older LINDY P-series KVM Switch then this must be done via Port cascading using the standard KVM Before you start installation please verify that all system cables for the computer / server ports. -
Page 7: Kvm Switch Operation
– i.e. keep the default password “00000000”. Otherwise, if you forget the password, you will need to send the switch back to LINDY for maintenance to clear the password. The U8/16 OSD security feature offers up to 8 users + 1 SUPERVISOR. -
Page 8: Keyboard Hotkey Selection
If you have not pressed any key in hotkey mode within 2 instead of “SCROLL LOCK” compared to previous LINDY U-series KVM switches!) seconds, the keyboard will return back to Operating System control status. -
Page 9: On Screen Display Menu (Osd) Port Selection
Section 3 KVM Switch Operation Section 3 KVM Switch Operation 3.3. On Screen Display Menu (OSD) Port Selection KVM Switch / Bank Selection: The U8/16 supports daisy chaining of up to 8 KVM Switches (Banks). Therefore, when using The On Screen Display menu provides a lot of information about the U8/16 and the attached direct hotkey port selection you must include the key sequence for the KVM Switch/Bank: computers, and offers advanced administration features and full KVM Switch control to the user. -
Page 10: Section 4
Section 3 KVM Switch Operation The OSD Menu displays further OSD configuration menus when selecting F1 from the main OSD menu. From the F1 Menu further submenus can be selected to configure the switch settings. In the submenus you can either use the cursor up/down keys or the mouse for navigation or simply press the number of the further option menu. -
Page 11: Cat.5 Kvm Extender Features
Section 4 CAT. 5 Extender Access & Operation Section 4 CAT. 5 Extender Access & Operation 4.1. Cat.5 KVM Extender Features 4.3. Cat.5 KVM Extender Operation The modular KVM switch U8/16 may be used with or without a remote console access module. The Cat.5 Extender Receiver unit incorporates its own OSD menu which allows switching This module can be either a Cat.5 Extender or an IP Access solution. -
Page 12: Section 5
Section 5 IP Access Configuration & Operation 5.0.1. KVM over IP Access Features The IP access module provides remote KVM over IP access to the KVM switch U8/16. It converts all keyboard video and mouse signals and sends them as TCP/IP signals over your LAN/WAN connection. -
Page 13: U8/16-Ip Setup Tool
Section 5 IP Access Configuration & Operation Section 5 IP Access Configuration & Operation 5.1. Configuration 5.2 U8/16-IP Setup Tool The U8/16-IP’s communication interfaces MAC Address Detection Parameter Value are all based on TCP/IP. The switch comes IP auto configuration DHCP pre-configured with... -
Page 14: Keyboard, Mouse And Video Configuration
Section 5 IP Access Configuration & Operation Section 5 IP Access Configuration & Operation Authentication 5.3. Keyboard, Mouse and Video Configuration To adjust the authentication settings, enter your login as a super user and change your Between the U8/16-IP and the host, there are two interfaces available for transmitting keyboard password. - Page 15 Section 5 IP Access Configuration & Operation Section 5 IP Access Configuration & Operation Host System Mouse Settings Recommended Mouse Settings The host's operating system obtains various settings from the mouse driver. For the different operating systems we can give the following advice... MS Windows 2000/2003 (Professional and Server), XP Note: The following limitations do not apply when using USB mice and In general, we recommend the use of a USB mouse.
-
Page 16: Usage
Section 5 IP Access Configuration & Operation Section 5 IP Access Configuration & Operation 5.4. Usage 5.5. Logging In Prerequisites Login to the U8/16-IP Launch your web browser. Direct it to the address of your U8/16-IP which you configured during The U8/16-IP features an embedded operating system offering a variety of standardized the installation process. -
Page 17: Navigation
Section 5 IP Access Configuration & Operation Section 5 IP Access Configuration & Operation The Remote Console is the redirected screen, keyboard and mouse of the remote host system 5.6. Navigation that the U8/16-IP switch controls. Selecting this button opens the Remote Console Main Window. - Page 18 Section 5 IP Access Configuration & Operation Section 5 IP Access Configuration & Operation Note: Your local keyboard changes its keyboard layout according to the remote host system. If Options you use a German administration system and your host system uses a US English keyboard Opens the Options menu.
- Page 19 Section 5 IP Access Configuration & Operation Section 5 IP Access Configuration & Operation Video Settings through the remote console: Undo Changes Restore last settings Soft Keyboard Opens up the sub-menu for the Soft-Keyboard: Show Pops up the Soft-Keyboard. The Soft-Keyboard is necessary in case your host system runs a completely different language and country mapping than your administration machine.
-
Page 20: Menu Options
To refresh the picture, click on the Refresh button. Remote Power Future firmware updates will allow the P16-IP to control external RS-232 controlled power control distribution units. Please contact LINDY for further information regarding compatibility, connection and configuration of both LINDY and third party power control distribution units. - Page 21 Section 5 IP Access Configuration & Operation Section 5 IP Access Configuration & Operation The following list shows the command mode syntax and usage. Telnet Console Help Displays the list of possible commands Clears the screen Quit Exits the current session and disconnects from the client Version Displays the release information Terminal...
-
Page 22: Virtual Media
Section 5 IP Access Configuration & Operation Section 5 IP Access Configuration & Operation Windows 5.7.2 . Virtual Media Windows users should use the tool, RawWrite for Windows, which is included on the supplied CD. One of the computers connected to the U8/16-IP can also be set up for remote mass storage via a USB connection. - Page 23 Section 5 IP Access Configuration & Operation Section 5 IP Access Configuration & Operation Windows Create a CD-ROM/ISO Image To create the image file, use your favorite CD imaging tool. Copy the whole contents of the disc into one single image file on your hard disk. For example, with ‘Nero’...
- Page 24 Section 5 IP Access Configuration & Operation Section 5 IP Access Configuration & Operation 7. You will see the dialog below detailing the active image: Drive Redirection 8. Click Reactivate. Access the console window and you will see that another CD drive has The Drive Redirection feature allows the host system to access the CD-Rom drives, hard drives, been installed on the host computer.
- Page 25 Section 5 IP Access Configuration & Operation Section 5 IP Access Configuration & Operation 2. Click on the Search for new devices icon - The U8/16-IP will be detected as an 1. Choose the drive you wish to redirect from the Unconfigured device and its MAC address will be displayed in the left panel.
-
Page 26: User Management
Section 5 IP Access Configuration & Operation Section 5 IP Access Configuration & Operation 5.7.3. User Management Users And Groups The U8/16-IP comes with 2 pre-configured user accounts that have fixed permissions. The Change Password super account has all possible rights to configure the device and to use all functions. The user account has only the permission to open and use the Remote Console. -
Page 27: Kvm Settings
Section 5 IP Access Configuration & Operation Section 5 IP Access Configuration & Operation Manually 5.7.4. KVM Settings Allows adjustment of both compression rate and colour depth individually. Depending on the selected compression rate the data stream between the U8/16-IP and the Remote Console will User Console be compressed in order to save bandwidth. - Page 28 Section 5 IP Access Configuration & Operation Section 5 IP Access Configuration & Operation Keyboard/Mouse Sun Microsystems Java Browser Plug-in Instructs the web browser of your administration system to use Sun’s JVM. The JVM in the browser is used to run the code for the Remote Console window which is actually a Java Applet.
-
Page 29: Device Settings
Section 5 IP Access Configuration & Operation Section 5 IP Access Configuration & Operation USB Mouse Type really changing (depending on the quality of the video input signal). All in all the default setting Enables USB mouse type. Choose between MS Windows 2000 or newer for MS Windows should be suitable for most situations. - Page 30 Section 5 IP Access Configuration & Operation Section 5 IP Access Configuration & Operation Dynamic DNS IP auto configuration With this option you can control if the U8/16-IP should obtain its network settings from a DHCP A freely available Dynamic DNS service (dyndns.org) can be used in the following scenario (see or BOOTP server.
- Page 31 Section 5 IP Access Configuration & Operation Section 5 IP Access Configuration & Operation Security Enable Dynamic DNS Enables the Dynamic DNS service. This requires a configured DNS server IP address. Dynamic DNS server This is the server name where the U8/16-IP registers itself in regular intervals. At the time of Force HTTPS writing, this is a fixed setting since only dyndns.org is currently supported.
- Page 32 Section 5 IP Access Configuration & Operation Section 5 IP Access Configuration & Operation Certificate After completing these three steps, the U8/16-IP has its own certificate that is used to identify it to its clients. Note: If you destroy the CSR on the U8/16-IP there is no way to get it back! In case you deleted it by mistake, you have to repeat the three steps as described previously.
- Page 33 Section 5 IP Access Configuration & Operation Section 5 IP Access Configuration & Operation Serial Port Confirm Challenge Password Confirmation of the Challenge Password Email The email address of a contact person that is responsible for the U8/16-IP and its security. Key length This is the length of the generated key in bits.
- Page 34 Section 5 IP Access Configuration & Operation Section 5 IP Access Configuration & Operation Date And Time Modem Init String The initialization string used by the U8/16-IP to initialize the modem. The default value will work with all modern standard modems directly connected to a telephone line. In case you have a special modem or the modem is connected to a local telephone switch that requires a special dial sequence in order to establish a connection to the public telephone network, you can change this setting by entering a new string.
- Page 35 Section 5 IP Access Configuration & Operation Section 5 IP Access Configuration & Operation SMTP Logging enabled Event Log With this option, the U8/16-IP is able to send Emails to an address given by the Email address text field in the Event Log Settings. These mails contain the same description strings as the internal log file and the mail subject is filled with the event group of the occurred log event.
-
Page 36: Maintenance
Allows you to download the U8/16-IP data file with specific support information. This is an XML file with certain customized support information like the serial number etc. You can send this information if you contact LINDY technical support. It may help us solve any problems. Connected Users The example below displays the U8/16-IP activity. - Page 37 A new firmware update is a binary file which can be sent to you by email or which you can Unit Reset download from our website www.lindy.com. This section allows you to reset specific parts of the device. This involves the keyboard and Updating the firmware is a four stage process: mouse, the video engine and the U8/16-IP itself.
-
Page 38: Troubleshooting
- Some advanced mice like radio frequency mice, 5 button mice and scroll wheel mice use standby mode. very uncommon proprietary signals. Although LINDY has carefully checked for the highest compatibility, we cannot guarantee that the U8/16-IP will work with all known mice, 10. -
Page 39: Key Codes
Technical Information Technical Information Key Codes The layout for this keyboard is also shown. However, most modifier keys and other 0 - 9 alphanumeric keys used for hotkey purposes in application programs are in an identical This table shows the key codes used to A - Z position, no matter what language mapping you are using. -
Page 40: Technical Information
1152 x 870 Reine B2B Geräte wie diesen KVM Switches nimmt LINDY kostenlos zurück und führt sie einem geordneten Recycling zu. Sie dürfen nicht über die Sammelstellen entsorgt werden. Bitte nehmen Sie zur Entsorgung Kontakt mit LINDY auf, die Adressen finden Sie auf der LINDY 1152 x 900 Website www.lindy.com...
Need help?
Do you have a question about the 39532 and is the answer not in the manual?
Questions and answers